
This would also look good under the front cover so it is hidden when not needed, this is of it would fit.Mold this into that cubby between the power ports, angled up at you:

If it interferes with the traction control button, just tuck it inside the dash. Unless you use it?
Move the rocker switch you have in the cubby to the otherwise useless pocket next to the headlight knob.

You are using an out of date browser. It may not display this or other websites correctly.
You should upgrade or use an alternative browser.
You should upgrade or use an alternative browser.
Rocket Man's 2008 Bagged CC Silverado Build AKA "THE MACHINE"
- Thread starter Rocket Man
- Start date
Disclaimer: Links on this page pointing to Amazon, eBay and other sites may include affiliate code. If you click them and make a purchase, we may earn a small commission.
OP
OP


digital gauge? maybe something like this?
https://www.ebay.com/itm/2-Inch-52m...584681?hash=item2624687ca9:g:KgIAAOSw1r1dVQfS
I debated on commenting but it always caught my eye when looking at your day and not in a good way, more like out of place. I have built enough vehicles to appreciate a little honest feedback from another set of eyes. You have probably thought of this already but why not a gauge on pillar? It would be better vision for for you to see and look visually cleaner.
Mold this into that cubby between the power ports, angled up at you:

If it interferes with the traction control button, just tuck it inside the dash. Unless you use it?
Move the rocker switch you have in the cubby to the otherwise useless pocket next to the headlight knob.
I have considered digital gauges but decided against them for this application due to the fact the pressure goes up and down by 5-10 psi or so when going over bumps and seeing the numbers constantly changing would drive me nuts. For tank pressure that would be ok but... then that gauge wouldn't match the look of the dual needle front/rear gauge. I was almost dead set on the pillar pod and I just decided on that route, I had to quit messing around and decide. so here it is; all from Glowshift. I just ordered it all. The dual gauges are digital input and the single is mechanical. I like the dual for the front/rear pressure. I'll run a 1/4" line from the tank for the single.
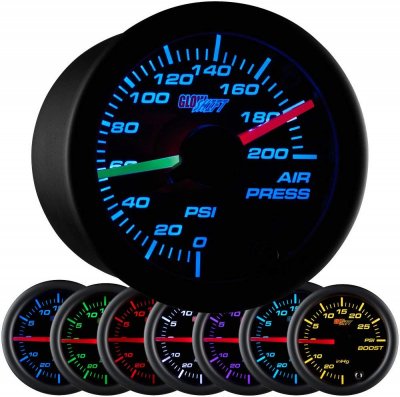
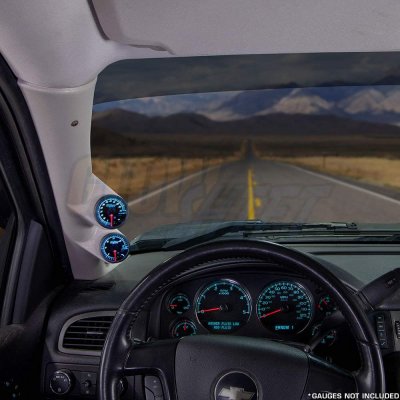
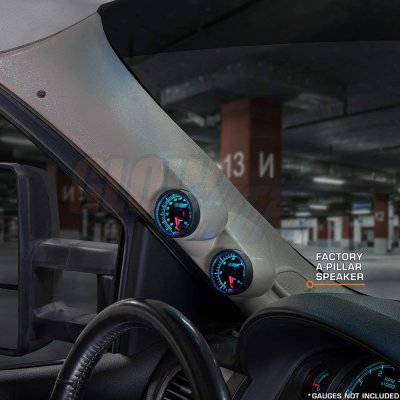
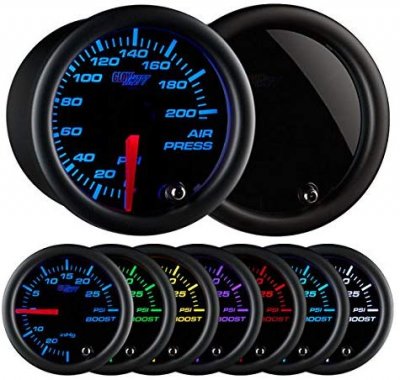

iamdub
Full Access Member
I have considered digital gauges but decided against them for this application due to the fact the pressure goes up and down by 5-10 psi or so when going over bumps and seeing the numbers constantly changing would drive me nuts. For tank pressure that would be ok but... then that gauge wouldn't match the look of the dual needle front/rear gauge. I was almost dead set on the pillar pod and I just decided on that route, I had to quit messing around and decide. so here it is; all from Glowshift. I just ordered it all. The dual gauges are digital input and the single is mechanical. I like the dual for the front/rear pressure. I'll run a 1/4" line from the tank for the single.
View attachment 241240 View attachment 241241 View attachment 241242 View attachment 241243
Hey, those match the factory gauges! Oh, wait...

OP
OP
They’re needed anytime I’m driving. I already have enough stuff to remember before driving or airing out, kind of a “pre-flight checklist” lol. Thanks though. I want my air info to be one of those things that’s up front and center so I don’t forget shit when I’m driving. I have sat at a left turn light and forgot to air the front up from 60 I use when cruising or sitting still to 120 for turning sharp until just before the front tires hit the fenders. Kinda important, I don’t want to replace front fenders again. Thanks for the ideas though.This would also look good under the front cover so it is hidden when not needed, this is of it would fit.
OP
OP
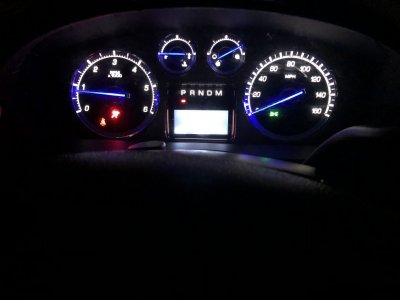
Actually the Esky gauge faces ARE black and the needles are blue. So they match pretty good. I can set the color of the Glowshift to any color I want so if they look better green like those in the pic .. haha yeah rightHey, those match the factory gauges! Oh, wait...
Last edited:
OP
OP
And I see the confusion I set forth regarding digital gauges since I originally said I was considering doing a digital setup. I didn’t mean digital readout but digital signal instead of airlines going to mechanical gauges. I want to eliminate the 2 airlines going to the dual gauge for 2 reasons- leaks and the fact that it’s a ***** to run air lines to the a-pillar. If a matching single gauge was available in digital like the dual I would do that. I figure I can run a single line to the pillar. 3 lines would not have been fun.
OP
OP
Your pillar idea was what I was thinking, just needed to quit procrastinating and make up my mind. Anyway, this is what I’m doing for now. It can all be changed if I don’t like it but I hope it looks good.Just wanted to throw it out there.
OP
OP
Probably gonna need a triple gauge pod anyway with what I’ve been thinking about...
......boost?
......boost?
Last edited:
I have an idea floating around in my head for my caddy interior that some won't like, I am not even sure if I like it, but sometimes you just gotta try something and see how it turns out.Your pillar idea was what I was thinking, just needed to quit procrastinating and make up my mind. Anyway, this is what I’m doing for now. It can all be changed if I don’t like it but I hope it looks good.
OP
OP
I changed my mind on the tank pressure gauge- I’m going with the digital readout one with the digital sender. It won’t bounce up and down like the other because the pressure will stay steady and that way I can eliminate all the air lines running to them and just run wires.
OP
OP
RIP Mad Mike "Rocket Man" Hughes..guess we’ll never find out if Earth is flat or not after all.

https://fox40.com/news/man-dies-after-home-built-rocket-crashes-in-california-desert/
https://fox40.com/news/man-dies-after-home-built-rocket-crashes-in-california-desert/
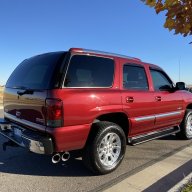
Giggity...!Probably gonna need a triple gauge pod anyway with what I’ve been thinking about...
......boost?
And look what you did..? You contributed to Mark’s Machine build. [emoji106][emoji16]Just wanted to throw it out there.
OP
OP
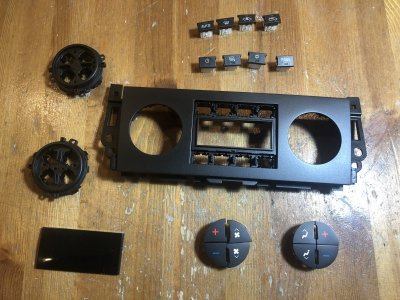
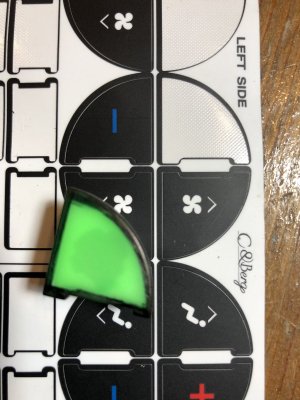
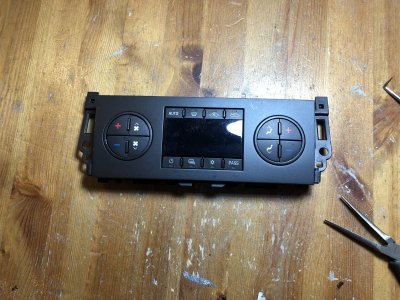
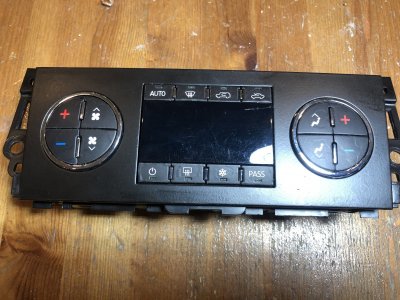
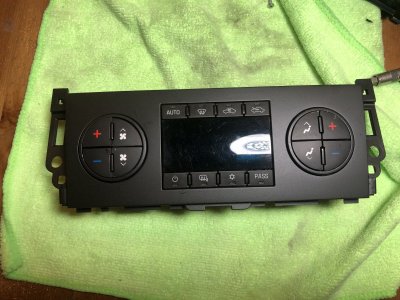
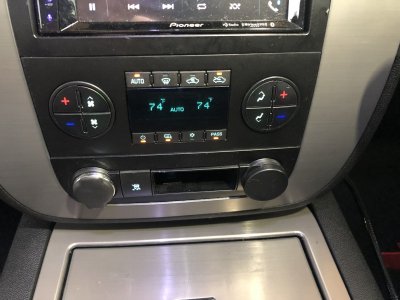
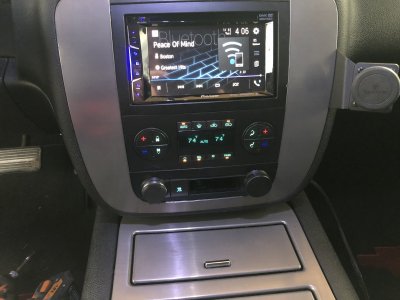
Had another day off so I eliminated a tiny bit of chrome by murdering the spare HVAC control escutcheon. I also wanted to redo the buttons because when I originally put stickers on them I didn’t remove all the paint under them which showed when the backlights were lit. I might not have roughed up the chrome enough so I’ll probably disassemble the other one and do that and use those parts on this one.
OP
OP
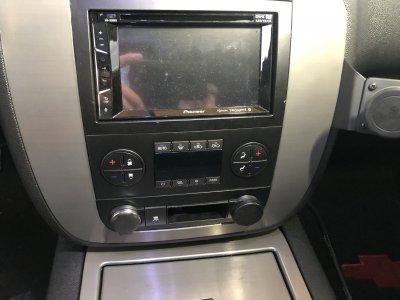
More pics. Looks better. I need to do this to the cup holder buttons but can’t figure out how to take it apart.

Tonyrodz
Resident Resident
More better-er.Had another day off so I eliminated a tiny bit of chrome by murdering the spare HVAC control escutcheon. I also wanted to redo the buttons because when I originally put stickers on them I didn’t remove all the paint under them which showed when the backlights were lit. I might not have roughed up the chrome enough so I’ll probably disassemble the other one and do that and use those parts on this one.
View attachment 241305 View attachment 241306 View attachment 241307 View attachment 241308 View attachment 241309
More pics. Looks better. I need to do this to the cup holder buttons but can’t figure out how to take it apart.
View attachment 241310 View attachment 241311 View attachment 241312
Maybe use a q-tip on the button?
Sent from my iPhone using Tapatalk
iamdub
Full Access Member
De-chroming Level: Expert
Hey that looks familiar!Had another day off so I eliminated a tiny bit of chrome by murdering the spare HVAC control escutcheon. I also wanted to redo the buttons because when I originally put stickers on them I didn’t remove all the paint under them which showed when the backlights were lit. I might not have roughed up the chrome enough so I’ll probably disassemble the other one and do that and use those parts on this one.
View attachment 241305 View attachment 241306 View attachment 241307 View attachment 241308 View attachment 241309
Sent from my iPhone using Tapatalk Pro
Similar threads

- Replies
- 35
- Views
- 883


