JonnyTahoe
Full Access Member
I just tightened them until they felt tight enough. They hold a tin baffle tray they don't need to be real tight.
Disclaimer: Links on this page pointing to Amazon, eBay and other sites may include affiliate code. If you click them and make a purchase, we may earn a small commission.
Yes Trans has to come off fun times with that job will have to wait until we get some warmer weather like months before that's going to happen.On this motor I believe you have to drop the transmission and a plate comes off above the pan for the rear main seal. From what I recall my old LT1 was a bit different (easier) but that was 15 years ago lol I this stuff is like once in a decade work for me.
No need to use any Loctite. Just snug the bolts up tight.Does it require any locktite? I may put a little blue on it but curious if that would just melt off in oil.
I never put any bolts in the pan holes before lifting the pan up to the motor. Looking back on it that would of made the installation go much faster.You don't need anything in those rivet holes anymore to keep the gasket from moving around. The new gasket (as shown above) grips the bolts a tiny bit and holds them in place while lifting up the pan.
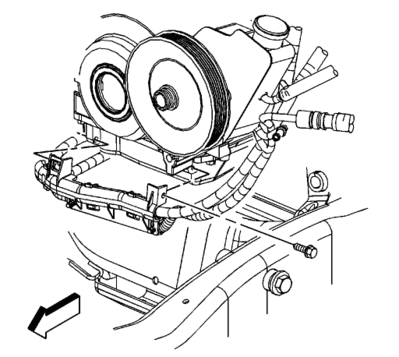
You might be able to find them at your local auto store.Darn i forgot to take a picture. I am curious the dumb gray wire loom clips. They are all broke where thr harness attaches to the tranny cooler lines and oil pan. Curious where can you buy those things?
Sent from my SM-G925V using Tapatalk
There is a black wire guide which screws onto the front of the oil pan. I'm trying to find a parts diagram with that in it or picture or something to determine if it's installed correctly. I believe it has the power cable to turn over the starter, and then the oil sensor lines etc. Does anybody know what that's called and or have a picture of it installed correctly... I just have one bolt for it.

If your Oil Tube/Pump O-ring ever goes bad your going to wish you replaced it while you had the Pan off. We are cleaning the oil pan and related parts because we all have OCD.I found a few thing prob should have been done better than others i saw do in videos...
I did use the gm part for rtv, 10-2010. Perdon who did mine before used regular rtv and this is where ot leaked.
I put in ONLY the small screw, i think there are 12 of them. Torqued them to thr 18ft lbs and let setup for 24 hours. Then i put in remaining screws after rtv had setup
I cleaned thr mating surface with scotch bright and rasor (very careful with rasor). Then went over with 100% alcohol so as to leave no residue.
I applied rtv straight to engine bock.. on BOTH front and rear covers. You will see the seam on block this is where rtv goes.
When complete i couldnt spin oil pump so i filled filter with oil then put filter on. I then pullled fuze to injectors and fuel pump relay. Turned engine with starter by taping start position about 3 or 4 times. Scarey as hell at startup it still took about 5 seconds to build oil pressure.
Let engine idle till heat soak then searched for more leaks. None found. So far so good.
Hope these extra notes help
Bonus, while down there with pan off i actually had room to work. I see guys taking off oil baffles, repalacing pickup tube oring, cleaning oil pan inside, etc. My opinion is if it aint broke dont fix it. However at this time your wiring harnesses at bottom are easily accessable. I insoected mine and rebuilt the looms as they were decentegrating. I had only a short time before seeing bare wire and shorts. I would encourage focusing on this instead of removing harmess oil varnish. Some ppl also say is easier to do engine mounts at this point too, mine were fine. Look and inspect things made accessable by removal of oil pan. My 2 cents.
Sent from my SM-G925V using Tapatalk
