skpyle
Full Access Member
- Joined
- May 15, 2021
- Posts
- 403
- Reaction score
- 1,039
Hello All!
I had been planning on refreshing the cooling system and doing the Big 3 electrical upgrade after Thanksgiving. Two weekends ago, while cleaning the throttle body, I found the front two VLOM bolts were finger loose. Sooo...add intake R&R to the To Do List.
Yesterday, I started in on all this. Here is my intent:
Cooling System Refresh:
-new water pump and thermostat
-all new hoses in the engine bay
-new plastic heater hose Tees
-new coolant reservoir
-new coolant temp sensor in the left cylinder head
-flush all with the garden hose, followed by pouring a few gallons of distilled water through the front and rear heater cores and the radiator
-refill with 50/50 mix of Dexcool and distilled water
(all above parts and fluids are GM)
Big 3 Electrical Upgrade:
-new GM 220A alternator
-1/0 cable for alternator, main feed to fuse/relay box, and engine ground
-new battery (-) cable RVC sensor
-onboard bluetooth battery monitor
-onboard NOCO battery maintainer
Intake:
-new gaskets and throttle body seal
-fuel injectors cleaned and reinstalled with new O-rings
-new clean side PCV line and canister purge line from the solenoid to the connector behind the left cylinder head
-remove all the deteriorated plastic loom covering on the various wires/harnesses and cover them in braided loom
VLOM:
-replace the outer gasket
-perform the 'VLOM Modification' as per Crazed Performance Repair
-properly torque all the VLOM mounting bolts
NOTE: All of this is preventative/preemptive maintenance. My Escalade has 153,2** miles on her clock. She runs like a top. I drive her every day, and try to put my foot in the water pump at least once a day. I want to keep it this way.
I started off by removing:
air intake duct, airbox
throttle body
serpentine belt, tensioner, idler pulley
alternator
battery cable from battery (+) terminal to alternator hot post
catch can assembly and hoses
PCV clean side line from right valve cover to intake duct
Evap line from solenoid to intake
-disconnected wires and such as needed for above, keeping track of the various little clips and retainers
Noted the serpentine belt, tensioner, and idler pulley were all in good condition. No cracking, no noisy bearings. Which is good, as they are a little over 2 years and a little under 30,000 miles old.
I was kind of surprised that I got nothing out of the catch can when I drained it prior to removal. It had been 3000 miles since I drained it last.
Removing an LS truck intake is supposed to be easy, but I took a cautious approach anyway. I searched this forum, and watched a few youtube videos. Picked up some good tips. I used bungee cords to hold the harness up out of the way. As well, I blew out the intake area, engine valley, and everything else with compressed air.
In one of the videos, guy said the back intake bolts can get hung up and caught while trying to pull the intake out. So he removed them. Simple. WRONG!
I played h*ll getting my gorilla fingers on all 10 bolts. Combination of my fingers, prydrivers, pliers, and of course colorful language finally got all 10 out.
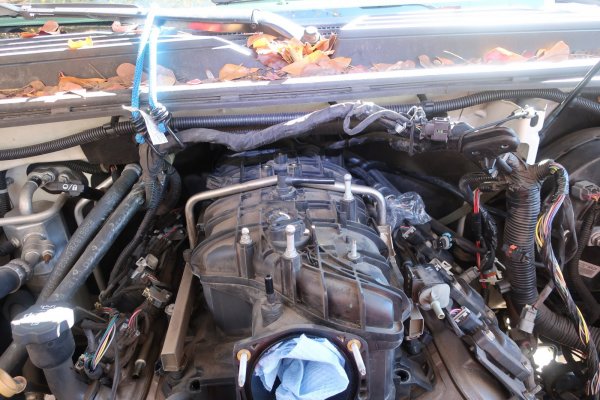
Intake manifold ready to pull.
I had to use a prybar to gently break the seal between the intake and the cylinder heads. Then I was able to relatively easily pull the intake up and forward, and out.
The cylinder head surfaces and top of the VLOM didn't look terrible.
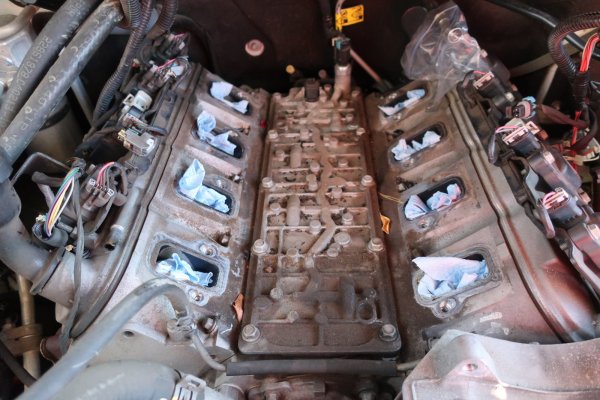
Top of the engine, pre-cleaning.
NOTE: It was a windy day today. As I got my first look at the top of an LS engine, an errant leaf floated in and went right down #8 intake port.
I immediately stuffed rags in the other 7 intake ports. Of course I could not get my fat head into look down port #8, so all I had to go by was photos from my phone. I tried sticking a Dust Buster nozzle down the port. No. Cursed at it. Finally had a long, skinny hook pick that was able to catch the leaf and pull it out. And then stuff a rag in the port.
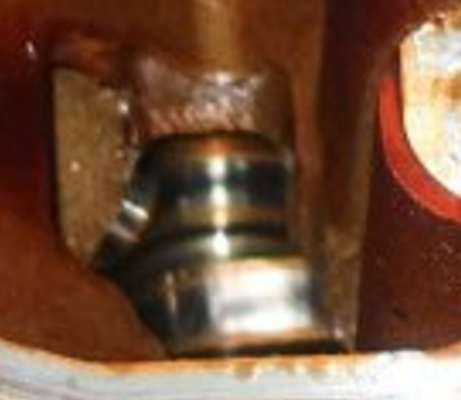
I cleaned the intake mounting surfaces on the cylinder heads with brake cleaner soaked rags and very light usage of a carbide scraper to remove any debris. They will get cleaned again just before I reinstall the intake. I wiped out the mouths of the intake ports, mainly just to say I did. I had no real intent on deep cleaning the ports. They looked good, though. Some build up at the mouths, but clean further in and down at the valve pocket. All 8 intake valves looked good as well, no crud on them.
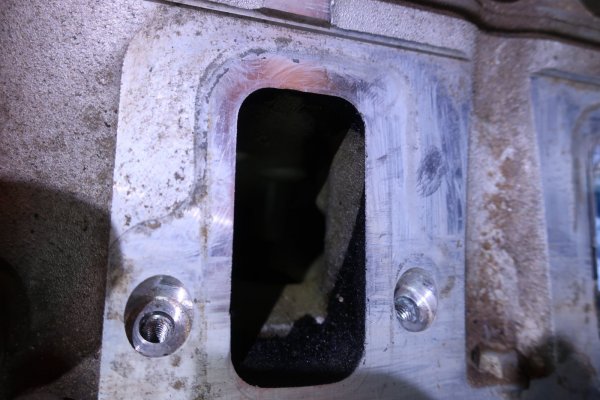
Best photo I could get of an intake port.
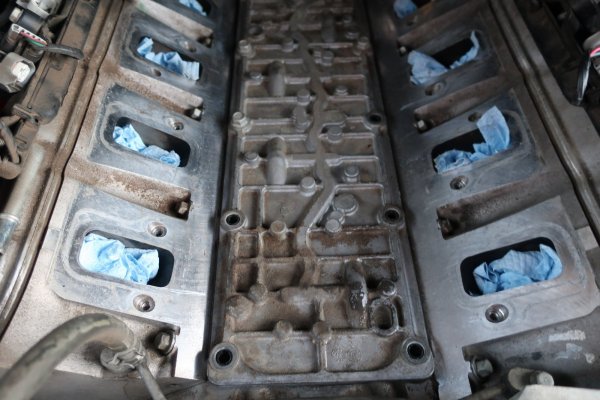
Intake mounting surfaces on cylinder heads cleaned. Sides of VLOM mounting surface cleaned.
Of the 11 bolts that secure the VLOM, the front 5 were finger loose. The remaining 6 were tight. Before removing the VLOM, I sprayed the top of it, and the mounting surfaces at the sides with brake cleaner. And then wiped the mounting surfaces at the sides with brake cleaner soaked rags. I didn't want anything falling into the engine valley.
Bolts out, gentle prydriver action to break the seal, and up and out came the VLOM.
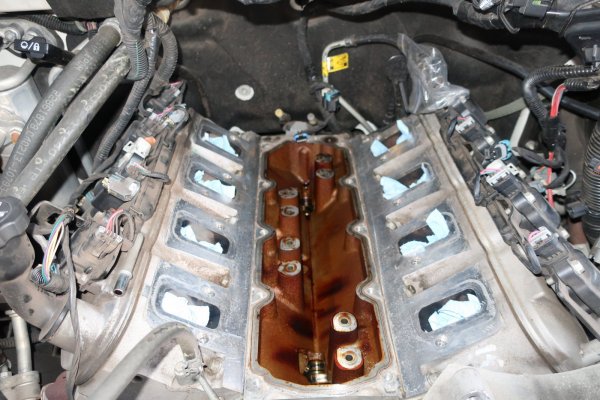
I was a little disappointed to notice the amount of oil varnish on the underside of the VLOM. As well, there was a little varnished oil in the engine valley. Nothing awful, though. The cam lobes that I could see looked good.

Underside of the VLOM is cruddier than I like.
Much like the cylinder head surfaces, I cleaned the VLOM mounting surface with gentle carbide scraper action and brake cleaner soaked rags.
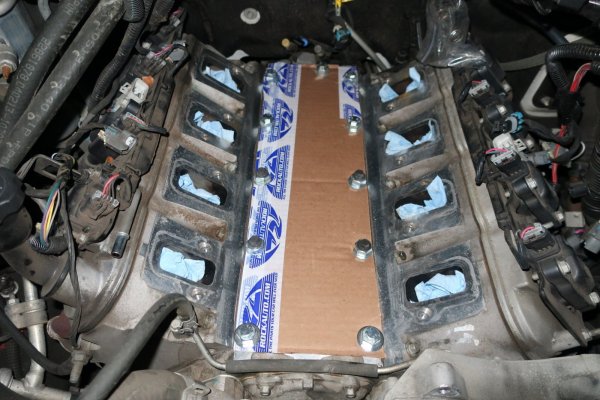
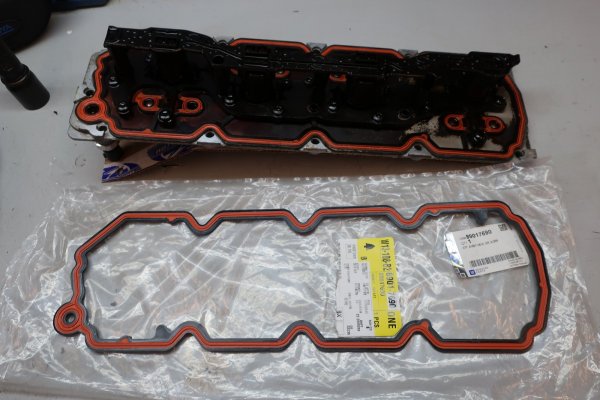
Before I removed the VLOM, I cut a piece of cardboard 6" x 20". Using the new outer gasket as a template, I punched 11 mounting holes out. This was to be a cover for the engine valley while the VLOM was out. After removing the VLOM, I set the cover in place. And realized pretty much NONE of the mounting holes lined up. Back to the drawing board. I cut another piece of cardboard. And used the VLOM itself as a template. Much better. I secured the cover in place with 11 bolts and large washers.
NOTE: all the various hardware, little parts, big parts, etc...that were removed from this engine have been bagged and tagged. And will be cleaned before reinstallation.
With the intake manifold on my work bench, I removed the fuel rail and fuel injectors. And realized how much gasoline this fuel rail holds. Not all of it spilled on my workbench. Just most of it.
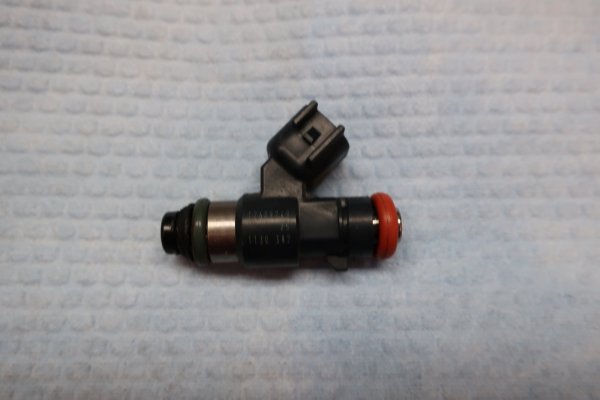
All 8 injectors were removed, looked at, bagged, tagged, and put in a box. In went a new set of GM fuel injector O-rings. A friend of mine runs a shop in Spartanburg. These injectors are going to him to be cleaned.
All the injectors looked good, some dirt on the outside, some crud below the lower O-ring. Absolutely nothing on the nozzles.
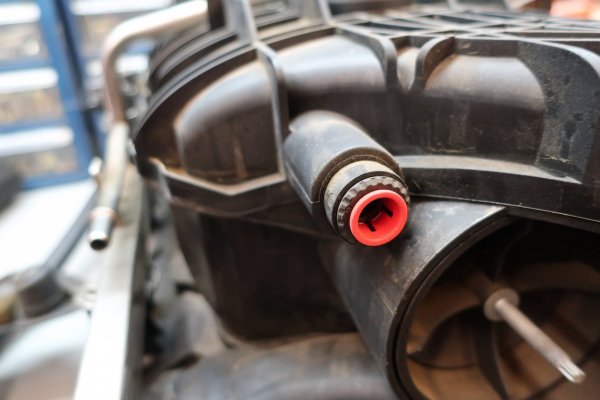
Also, I removed the sound deadening cover from the back of the intake manifold. It will not be going back on. I find it a little humorous that GM uses a 'push-lock' style air fitting at the back of the intake manifold to secure the power brake vacuum hose. I work with those fittings at my day(night) job.
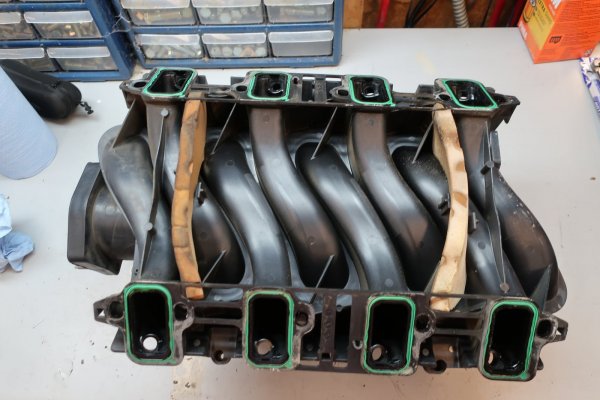
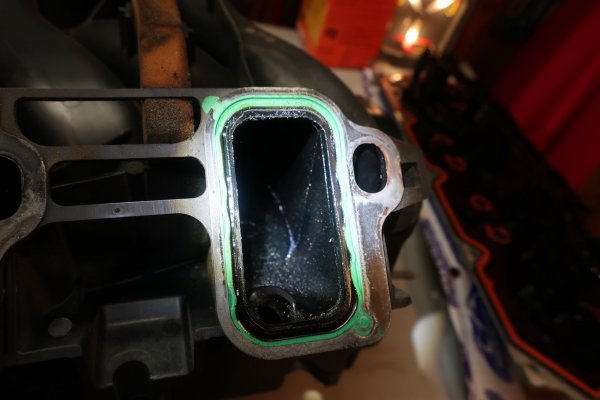
I rolled the intake over to remove the gaskets. And noted a dirty oily film on the inside of all 8 intake runners. Luckily, I bought a bottle brush for just this cleaning purpose. Also, I found the two foam 'dams' at the front and rear of the underside of the intake. Those also will not be going back on.
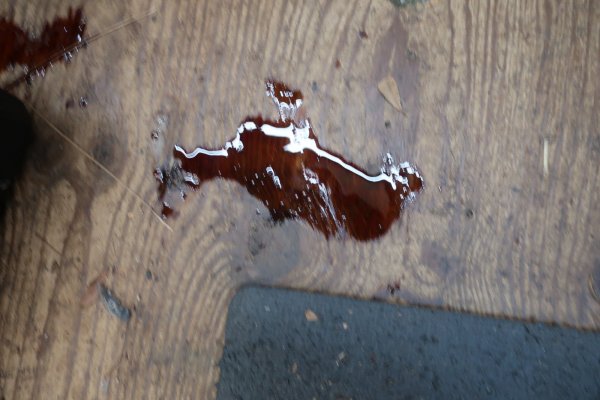
Once I was done with the intake, I rolled it back over and set it on the floor. Out of my way until I could start cleaning it. Walked around my shop a bit, and noticed a puddle of oil on the floor. Oh no...looked at the intake manifold. Oil pooled up under one of the runners. Looked down at my feet. Oil on my shoes...
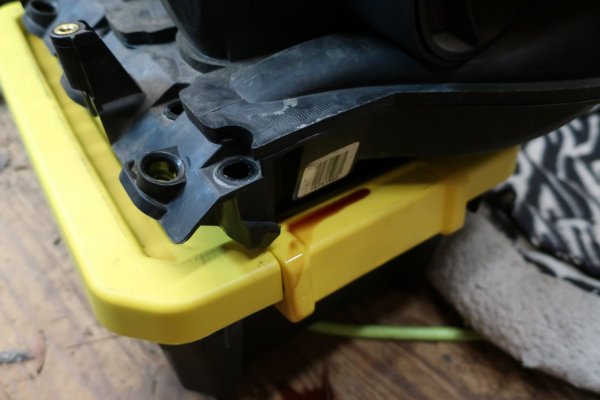
I forgot oil pools in LS truck intakes. I put the intake in an oil drain pan, and cocked it a bit so the runners would drain.
This manifold is getting cleaned in my parts washer.
I am done for a few days. I go back to work tomorrow, and it is supposed to rain this weekend. I may get some work done running the larger battery cables. Maybe not.
Likely I will start draining the cooling system.
I REALLY wish GM had included a radiator drain.
More to come!
I had been planning on refreshing the cooling system and doing the Big 3 electrical upgrade after Thanksgiving. Two weekends ago, while cleaning the throttle body, I found the front two VLOM bolts were finger loose. Sooo...add intake R&R to the To Do List.
Yesterday, I started in on all this. Here is my intent:
Cooling System Refresh:
-new water pump and thermostat
-all new hoses in the engine bay
-new plastic heater hose Tees
-new coolant reservoir
-new coolant temp sensor in the left cylinder head
-flush all with the garden hose, followed by pouring a few gallons of distilled water through the front and rear heater cores and the radiator
-refill with 50/50 mix of Dexcool and distilled water
(all above parts and fluids are GM)
Big 3 Electrical Upgrade:
-new GM 220A alternator
-1/0 cable for alternator, main feed to fuse/relay box, and engine ground
-new battery (-) cable RVC sensor
-onboard bluetooth battery monitor
-onboard NOCO battery maintainer
Intake:
-new gaskets and throttle body seal
-fuel injectors cleaned and reinstalled with new O-rings
-new clean side PCV line and canister purge line from the solenoid to the connector behind the left cylinder head
-remove all the deteriorated plastic loom covering on the various wires/harnesses and cover them in braided loom
VLOM:
-replace the outer gasket
-perform the 'VLOM Modification' as per Crazed Performance Repair
-properly torque all the VLOM mounting bolts
NOTE: All of this is preventative/preemptive maintenance. My Escalade has 153,2** miles on her clock. She runs like a top. I drive her every day, and try to put my foot in the water pump at least once a day. I want to keep it this way.
I started off by removing:
air intake duct, airbox
throttle body
serpentine belt, tensioner, idler pulley
alternator
battery cable from battery (+) terminal to alternator hot post
catch can assembly and hoses
PCV clean side line from right valve cover to intake duct
Evap line from solenoid to intake
-disconnected wires and such as needed for above, keeping track of the various little clips and retainers
Noted the serpentine belt, tensioner, and idler pulley were all in good condition. No cracking, no noisy bearings. Which is good, as they are a little over 2 years and a little under 30,000 miles old.
I was kind of surprised that I got nothing out of the catch can when I drained it prior to removal. It had been 3000 miles since I drained it last.
Removing an LS truck intake is supposed to be easy, but I took a cautious approach anyway. I searched this forum, and watched a few youtube videos. Picked up some good tips. I used bungee cords to hold the harness up out of the way. As well, I blew out the intake area, engine valley, and everything else with compressed air.
In one of the videos, guy said the back intake bolts can get hung up and caught while trying to pull the intake out. So he removed them. Simple. WRONG!
I played h*ll getting my gorilla fingers on all 10 bolts. Combination of my fingers, prydrivers, pliers, and of course colorful language finally got all 10 out.

Intake manifold ready to pull.
I had to use a prybar to gently break the seal between the intake and the cylinder heads. Then I was able to relatively easily pull the intake up and forward, and out.
The cylinder head surfaces and top of the VLOM didn't look terrible.

Top of the engine, pre-cleaning.
NOTE: It was a windy day today. As I got my first look at the top of an LS engine, an errant leaf floated in and went right down #8 intake port.

I immediately stuffed rags in the other 7 intake ports. Of course I could not get my fat head into look down port #8, so all I had to go by was photos from my phone. I tried sticking a Dust Buster nozzle down the port. No. Cursed at it. Finally had a long, skinny hook pick that was able to catch the leaf and pull it out. And then stuff a rag in the port.
I cleaned the intake mounting surfaces on the cylinder heads with brake cleaner soaked rags and very light usage of a carbide scraper to remove any debris. They will get cleaned again just before I reinstall the intake. I wiped out the mouths of the intake ports, mainly just to say I did. I had no real intent on deep cleaning the ports. They looked good, though. Some build up at the mouths, but clean further in and down at the valve pocket. All 8 intake valves looked good as well, no crud on them.

Best photo I could get of an intake port.

Intake mounting surfaces on cylinder heads cleaned. Sides of VLOM mounting surface cleaned.
Of the 11 bolts that secure the VLOM, the front 5 were finger loose. The remaining 6 were tight. Before removing the VLOM, I sprayed the top of it, and the mounting surfaces at the sides with brake cleaner. And then wiped the mounting surfaces at the sides with brake cleaner soaked rags. I didn't want anything falling into the engine valley.
Bolts out, gentle prydriver action to break the seal, and up and out came the VLOM.
I was a little disappointed to notice the amount of oil varnish on the underside of the VLOM. As well, there was a little varnished oil in the engine valley. Nothing awful, though. The cam lobes that I could see looked good.

Underside of the VLOM is cruddier than I like.
Much like the cylinder head surfaces, I cleaned the VLOM mounting surface with gentle carbide scraper action and brake cleaner soaked rags.
Before I removed the VLOM, I cut a piece of cardboard 6" x 20". Using the new outer gasket as a template, I punched 11 mounting holes out. This was to be a cover for the engine valley while the VLOM was out. After removing the VLOM, I set the cover in place. And realized pretty much NONE of the mounting holes lined up. Back to the drawing board. I cut another piece of cardboard. And used the VLOM itself as a template. Much better. I secured the cover in place with 11 bolts and large washers.
NOTE: all the various hardware, little parts, big parts, etc...that were removed from this engine have been bagged and tagged. And will be cleaned before reinstallation.
With the intake manifold on my work bench, I removed the fuel rail and fuel injectors. And realized how much gasoline this fuel rail holds. Not all of it spilled on my workbench. Just most of it.
All 8 injectors were removed, looked at, bagged, tagged, and put in a box. In went a new set of GM fuel injector O-rings. A friend of mine runs a shop in Spartanburg. These injectors are going to him to be cleaned.
All the injectors looked good, some dirt on the outside, some crud below the lower O-ring. Absolutely nothing on the nozzles.
Also, I removed the sound deadening cover from the back of the intake manifold. It will not be going back on. I find it a little humorous that GM uses a 'push-lock' style air fitting at the back of the intake manifold to secure the power brake vacuum hose. I work with those fittings at my day(night) job.
I rolled the intake over to remove the gaskets. And noted a dirty oily film on the inside of all 8 intake runners. Luckily, I bought a bottle brush for just this cleaning purpose. Also, I found the two foam 'dams' at the front and rear of the underside of the intake. Those also will not be going back on.
Once I was done with the intake, I rolled it back over and set it on the floor. Out of my way until I could start cleaning it. Walked around my shop a bit, and noticed a puddle of oil on the floor. Oh no...looked at the intake manifold. Oil pooled up under one of the runners. Looked down at my feet. Oil on my shoes...
I forgot oil pools in LS truck intakes. I put the intake in an oil drain pan, and cocked it a bit so the runners would drain.
This manifold is getting cleaned in my parts washer.

I am done for a few days. I go back to work tomorrow, and it is supposed to rain this weekend. I may get some work done running the larger battery cables. Maybe not.
Likely I will start draining the cooling system.
I REALLY wish GM had included a radiator drain.
More to come!
Last edited:

