Rocket Man's 2008 Bagged CC Silverado Build AKA "THE MACHINE"

Disclaimer: Links on this page pointing to Amazon, eBay and other sites may include affiliate code. If you click them and make a purchase, we may earn a small commission.

iamdub

Full Access Member
Joined
Apr 23, 2016
Posts
20,821
Reaction score
45,014
Location
Li'l Weezyana
I'd get the Kooks, even if just to flip. If their collectors are above the frame, then you'd only need to be concerned about the Y-pipe. You could sell the Kooks Y and have one custom made, probably for less than what you could sell that Y for. Then you'd still have the headers for an even bigger steal.
 

NathanJax

Vacation Nathan
Staff member
Administrator Moderator Supporting Member
Joined
May 9, 2009
Posts
49,141
Reaction score
943,577,203
Location
Jax, Fl
you get those 90's from Grainger yet?
 
OP
OP
Rocket Man

Rocket Man

Mark
Supporting Member
Joined
Dec 25, 2014
Posts
26,679
Reaction score
52,954
Location
Oregon
you get those 90's from Grainger yet?
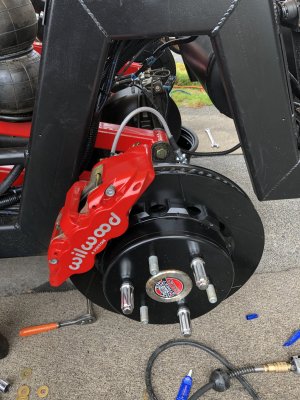
Yes, now I’m waiting on the Swagelok fittings for the rest of the system. The only PTC fittings will be those 90’s at the manifold. I hate leaks and that left front one was the last straw. Man I wish I could change the ones at the manifold to Swageloks. Working on the Wilwoods now but our weather turned to sucky for the next week and I’m finding it hard to get excited about going outside even though I’m under cover. I just got back from having some new rear center brake lines made and decided to paint the bracket .
 
OP
OP
Rocket Man

Rocket Man

Mark
Supporting Member
Joined
Dec 25, 2014
Posts
26,679
Reaction score
52,954
Location
Oregon
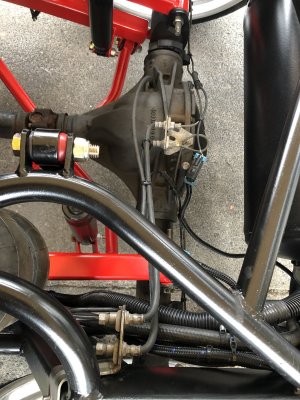
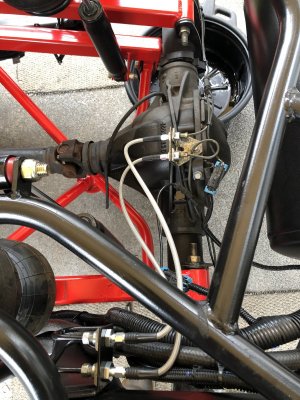
I worked on the rear brakes about 4 hours today but had a bit of a challenge so I only got one side done. I had a feeling I might have trouble due to the nature of the conversion and the Moser axles. At first try the caliper on the DS wouldn’t even go over the rotor, it was too far to the inside. There’s shims to space it to the outside but I needed to go the other way so I had to cut the mounting ears off the inside of the aluminum mounting plate and even that wasn’t enough so I pulled the bolts that held it on and added washers behind it where it mounts to the axle flange. That did it, it went too far to the outside then and I was able to use the shims to center the caliper on the rotor by moving it back inside a bit. I also painted the center hose bracket and installed the new lines I had made earlier today. The rubber ones were stretched tight when the bags were fully aired up (which only happens when I’m jacking the truck up) and now they’re ok. I had them made 3” longer but could have gone a couple more but they’re much better. The suspension is almost never this aired up but I just wanted to be safe when it is. The red matches pretty good with the parts I painted.

BC4BEDD0-F3FA-4189-9D6B-2A9CE8B2BA4F.jpeg 9CA2ECAC-0C8D-4B21-AC41-A834F629D36E.jpeg EC72F62B-B39B-449E-B10C-59217F1B3315.jpeg DA0C33A6-014E-4BCE-BA07-36ECE10E869A.jpeg
 
OP
OP
Rocket Man

Rocket Man

Mark
Supporting Member
Joined
Dec 25, 2014
Posts
26,679
Reaction score
52,954
Location
Oregon
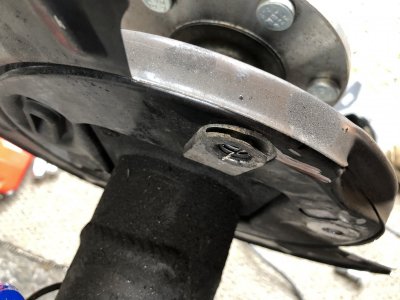
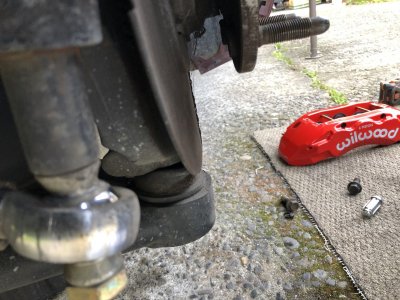
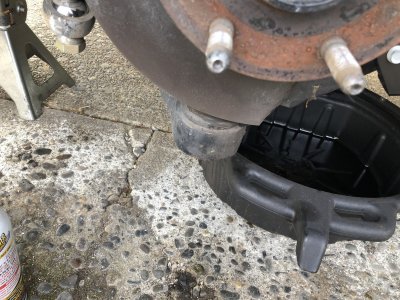
Got the rear brakes done but the fronts have been nothing but trouble. First, it took me an hour just to remove the driver brake line due to the fact it’s in an impossible to get to spot. The upper control arm is in the way. Then the new Wilwood adapter won’t thread to the truck hard line. I’ll have to buy new adapters from a local place. Well, I figured I’d bolt up a caliper and rotor and check clearance. It’s a stock knuckle I think but the ball joint area hits the back side of the rotor so it won’t seat on the axle all the way. I determined I need 1/4-5/16” so the plan is to use 1/4” wheel spacers between the rotor and axle flange and then grind a little on the control arm. I’ll have to use spacers on the caliper bracket too. It’s not the preferred method but I don’t know of any other. I can’t even switch to Wilwoods 14.25” rotors, same problem. The stock 13” barely clears. I don’t want my tires any closer to the fenders but I think 1/4” will be ok.

EC680BFA-2210-4469-A8B6-5EF0DB8F0013.jpeg C39A6FBC-BAB5-41A2-8946-003F495C781B.jpeg
 
OP
OP
Rocket Man

Rocket Man

Mark
Supporting Member
Joined
Dec 25, 2014
Posts
26,679
Reaction score
52,954
Location
Oregon
That definitely can’t be correct...


Sent from my iPhone using Tapatalk
It’s correct. The front has about 14” of travel with zero camber change from aired all the way up to fully aired out. The control arms and steering is all custom made for bagged trucks. You have to remember what this suspension is asked to do.
 

Sam Harris

Elite Member
Supporting Member
Joined
Sep 26, 2018
Posts
7,445
Reaction score
14,977
Location
Texas
Got the rear brakes done but the fronts have been nothing but trouble. First, it took me an hour just to remove the driver brake line due to the fact it’s in an impossible to get to spot. The upper control arm is in the way. Then the new Wilwood adapter won’t thread to the truck hard line. I’ll have to buy new adapters from a local place. Well, I figured I’d bolt up a caliper and rotor and check clearance. It’s a stock knuckle I think but the ball joint area hits the back side of the rotor so it won’t seat on the axle all the way. I determined I need 1/4-5/16” so the plan is to use 1/4” wheel spacers between the rotor and axle flange and then grind a little on the control arm. I’ll have to use spacers on the caliper bracket too. It’s not the preferred method but I don’t know of any other. I can’t even switch to Wilwoods 14.25” rotors, same problem. The stock 13” barely clears. I don’t want my tires any closer to the fenders but I think 1/4” will be ok.

View attachment 243550 View attachment 243551

Suck
 
OP
OP
Rocket Man

Rocket Man

Mark
Supporting Member
Joined
Dec 25, 2014
Posts
26,679
Reaction score
52,954
Location
Oregon
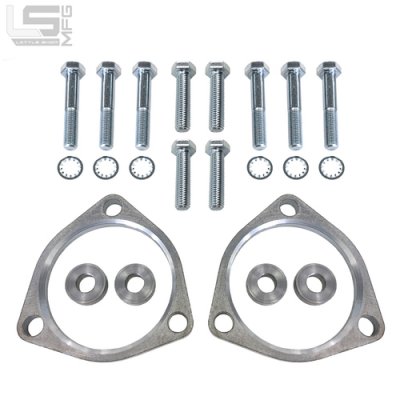
So apparently it’s a thing with this setup- the ball joints are flipped. There’s a company called Little Shop that makes a spindle spacer kit for this. Problem is it’s 1/2” which means the wheels are pushed out 1/2”. I’m going to see if I can add the 1/4” spacers and massage the ball joint cup a little bit. If that doesn’t work I’ll buy the kit and have some material machined off the inside of the wheel hubs. I know from previous experience with the engineer at intro that it’s ok to remove 1/4” from the wheel hub. It’s just time and money, right?

B1294A96-9777-4071-A212-52745A06C2FA.jpeg
 

Forum statistics

Threads
138,095
Posts
1,998,884
Members
103,020
Latest member
Andylbc
Back
Top