Rocket Man's 2008 Bagged CC Silverado Build AKA "THE MACHINE"

Disclaimer: Links on this page pointing to Amazon, eBay and other sites may include affiliate code. If you click them and make a purchase, we may earn a small commission.

OP
OP
Rocket Man

Rocket Man

Mark
Supporting Member
Joined
Dec 25, 2014
Posts
26,679
Reaction score
52,954
Location
Oregon
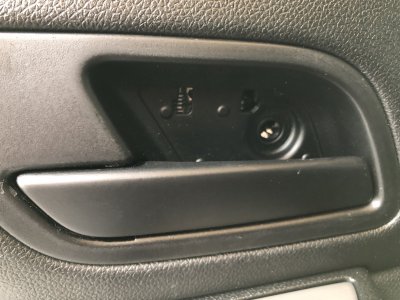
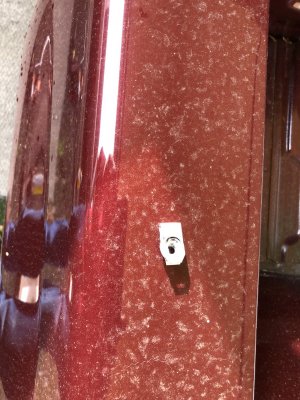
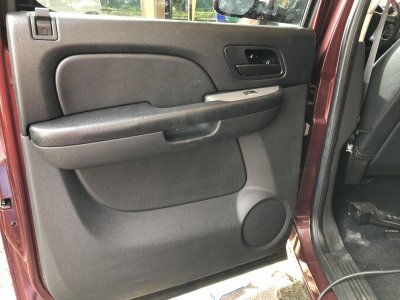
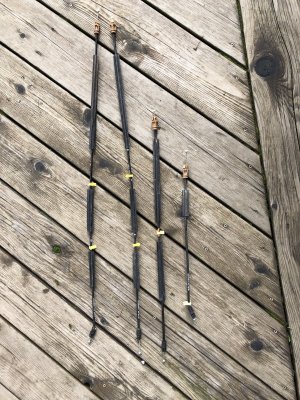
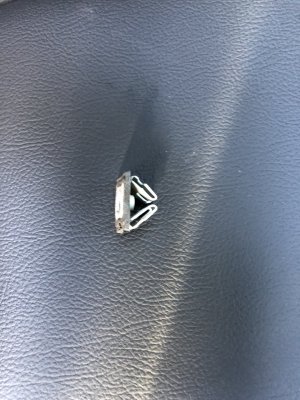
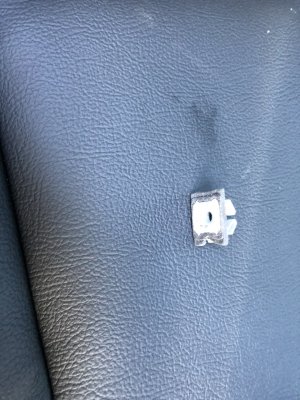
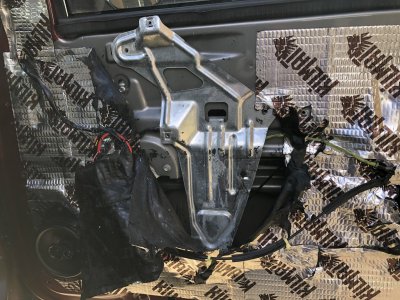
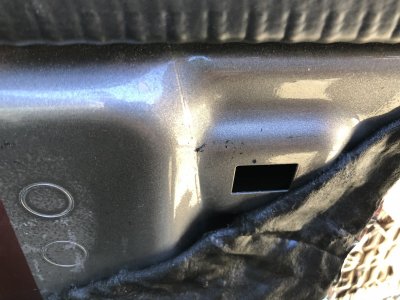
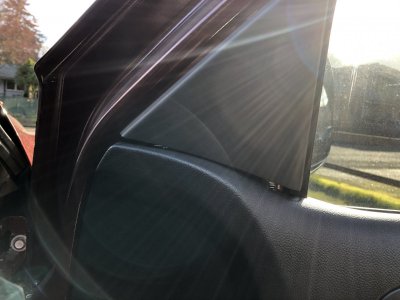
I was going to install both rear door panels today but ran into a couple snags. First was the latch cable. The one from the wrecking yard labeled left rear was too short so I used the one from the right rear which was a few inches longer for some reason, so I need another for the right rear. The one on the right in the pic is the one for the LT panel, the one next to it is the one they pulled from the left rear and is too short, the others are fronts. The other snag is the bolt that’s by the new latch handle- there’s nothing on my door for it to screw into. There’s just a rectangular hole which I thought was for a nut clip but I found one and it doesn’t work. I will research, because this bolt is needed so when you pull that handle you don’t pull it off the panel.

67A28624-1932-41BE-9851-42A0B2F12D1F.jpeg 2C4617A8-DA06-4AEF-BA36-DE33B503859A.jpeg 133EF220-E95A-4690-8F3C-AD4DAE427753.jpeg 068DF930-10C2-4A75-9BCE-A6CEDBD8E138.jpeg
 

Doubeleive

Wes
Supporting Member
Joined
Nov 7, 2017
Posts
30,750
Reaction score
48,438
Location
Stockton, Ca.
I was going to install both rear door panels today but ran into a couple snags. First was the latch cable. The one from the wrecking yard labeled left rear was too short so I used the one from the right rear which was a few inches longer for some reason, so I need another for the right rear. The one on the right in the pic is the one for the LT panel, the one next to it is the one they pulled from the left rear and is too short, the others are fronts. The other snag is the bolt that’s by the new latch handle- there’s nothing on my door for it to screw into. There’s just a rectangular hole which I thought was for a nut clip but I found one and it doesn’t work. I will research, because this bolt is needed so when you pull that handle you don’t pull it off the panel.

View attachment 240693 View attachment 240694 View attachment 240695 View attachment 240696
It might take one of those plastic clips like the ones that hold a license plate on?
 

kbuskill

***CAUTION*** I do my own stunts!
Joined
Mar 11, 2017
Posts
5,861
Reaction score
9,931
Location
NE. FL.
I was going to install both rear door panels today but ran into a couple snags. First was the latch cable. The one from the wrecking yard labeled left rear was too short so I used the one from the right rear which was a few inches longer for some reason, so I need another for the right rear. The one on the right in the pic is the one for the LT panel, the one next to it is the one they pulled from the left rear and is too short, the others are fronts. The other snag is the bolt that’s by the new latch handle- there’s nothing on my door for it to screw into. There’s just a rectangular hole which I thought was for a nut clip but I found one and it doesn’t work. I will research, because this bolt is needed so when you pull that handle you don’t pull it off the panel.

View attachment 240693 View attachment 240694 View attachment 240695 View attachment 240696

Is it possible the rear cables came off of a Tahoe instead of a Suburban/crew cab pickup?

Not 100% sure there is a difference but I know the doors are obviously different.
 
OP
OP
Rocket Man

Rocket Man

Mark
Supporting Member
Joined
Dec 25, 2014
Posts
26,679
Reaction score
52,954
Location
Oregon
Is it possible the rear cables came off of a Tahoe instead of a Suburban/crew cab pickup?

Not 100% sure there is a difference but I know the doors are obviously different.
They did come off a Tahoe but the right was 3” longer than the left which makes no sense unless it was replaced at some point. I found out the 27” ones ( which I need and was labeled right rear ) are for Suburbans and the 24” ( which they took off the left rear) are for Tahoe’s. I didn’t think I needed the Suburban ones but guess I was wrong.
 

kbuskill

***CAUTION*** I do my own stunts!
Joined
Mar 11, 2017
Posts
5,861
Reaction score
9,931
Location
NE. FL.
They did come off a Tahoe but the right was 3” longer than the left which makes no sense unless it was replaced at some point. I found out the 27” ones ( which I need and was labeled right rear ) are for Suburbans and the 24” ( which they took off the left rear) are for Tahoe’s. I didn’t think I needed the Suburban ones but guess I was wrong.

Yeah, I didn't know for sure that they were different but it makes sense because the Tahoe's rear doors are cut out for the wheel well so I guess the lock mechanism sits higher.
 

Sam Harris

Elite Member
Supporting Member
Joined
Sep 26, 2018
Posts
7,445
Reaction score
14,977
Location
Texas
I was going to install both rear door panels today but ran into a couple snags. First was the latch cable. The one from the wrecking yard labeled left rear was too short so I used the one from the right rear which was a few inches longer for some reason, so I need another for the right rear. The one on the right in the pic is the one for the LT panel, the one next to it is the one they pulled from the left rear and is too short, the others are fronts. The other snag is the bolt that’s by the new latch handle- there’s nothing on my door for it to screw into. There’s just a rectangular hole which I thought was for a nut clip but I found one and it doesn’t work. I will research, because this bolt is needed so when you pull that handle you don’t pull it off the panel.

View attachment 240693 View attachment 240694 View attachment 240695 View attachment 240696
Coming along man it’s looking great! Amazing how many little details you’re finding different, and correcting/ making better. Keep up the good work!
 
OP
OP
Rocket Man

Rocket Man

Mark
Supporting Member
Joined
Dec 25, 2014
Posts
26,679
Reaction score
52,954
Location
Oregon
The BCM programming issue was just what @ks03 said- the red dot next to “locking” was an option. I needed to double-click in the dot which brought up options in the lower screen. I had to check on one of them, one was to allow the auto lock option to be controlled through the DIC and the other to have auto lock on all the time. Tech support walked me through it. However nothing changed, my exact same problems are still there with the new BCM. Glad it only cost me $40. My next plan is to pull the front seats and console and roll back the carpet to look for signs of wiring damage.
 
OP
OP
Rocket Man

Rocket Man

Mark
Supporting Member
Joined
Dec 25, 2014
Posts
26,679
Reaction score
52,954
Location
Oregon
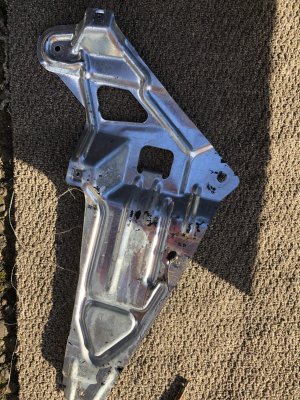
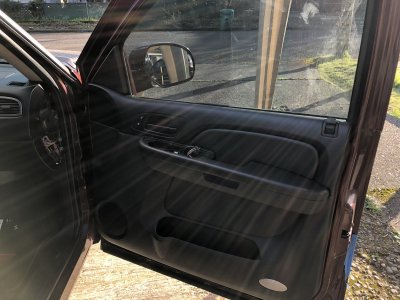
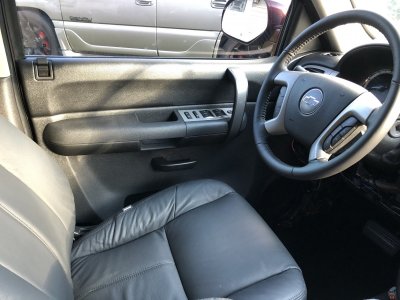
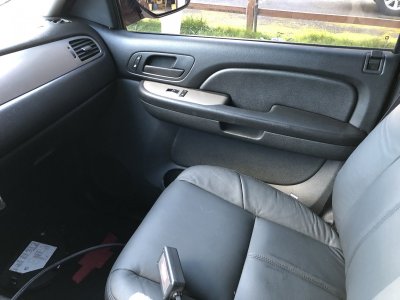
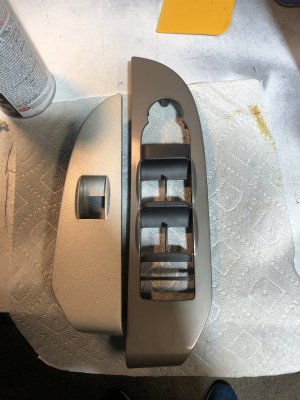
I got 2 more door panels installed today. I need to pull the left rear to install the nut insert I got at the wrecking yard today. I also swapped for a longer latch cable. No charge. For the fronts, I just needed to remove the metal plate that the LT panel bolts to and the holes I needed were right there. I popped the brushed front switch bezel in just for a pic. Did a comparison shot of the left front door too. I am going to attempt to match the brushed look with paint instead of wrap. There’s 3 Fusion metallic colors, I tried metallic aluminum but it’s off so I’m going to get the metallic nickel and try it and maybe try the scotchbrite idea that @iamdub suggested if the color is close.

1F12455C-0C53-4455-B773-2BA3CA8AB96F.jpeg 506F06F3-8767-4C57-B084-E8D6236070A5.jpeg 8314F19F-7B08-49B9-A36D-82ED0E7867CF.jpeg 6F03C167-5F7B-4AFD-B94E-1223790EF45B.jpeg
 
OP
OP
Rocket Man

Rocket Man

Mark
Supporting Member
Joined
Dec 25, 2014
Posts
26,679
Reaction score
52,954
Location
Oregon
I also need to buy the sail panels dammit, they’re a different shape where they meet the door panel, and I can’t find any used ones. New are about $45 each. I’m gonna keep looking for used ones.
Edit: I found new OEM ones for $31 each so I ordered them. The only used one I saw on eBay was listed for $40. The wrecking yards around here said they didn’t have any.

80F4A945-7F9A-4E83-8C45-EA8CCA8978C0.jpeg FF0F3E41-DB72-4B89-B80D-F48B11FD7DA7.jpeg A45E03FA-D197-4481-A2C0-13AF61290424.jpeg B242A6B9-ADE9-4F3B-A835-DAD8D2586B84.jpeg FA1D7C3E-F67F-4683-B37B-4156324205CB.jpeg
 
Last edited:

Tonyrodz

Resident Resident
Joined
Feb 16, 2012
Posts
33,341
Reaction score
51,829
Location
Central Jersey
I also need to buy the sail panels dammit, they’re a different shape where they meet the door panel, and I can’t find any used ones. New are about $45 each. I’m gonna keep looking for used ones.
Edit: I found new OEM ones for $31 each so I ordered them. The only used one I saw on eBay was listed for $40. The wrecking yards around here said they didn’t have any.

View attachment 240799 View attachment 240800 View attachment 240801 View attachment 240802 View attachment 240803
Always the little details that get 'cha.
 

Doubeleive

Wes
Supporting Member
Joined
Nov 7, 2017
Posts
30,750
Reaction score
48,438
Location
Stockton, Ca.
The BCM programming issue was just what @ks03 said- the red dot next to “locking” was an option. I needed to double-click in the dot which brought up options in the lower screen. I had to check on one of them, one was to allow the auto lock option to be controlled through the DIC and the other to have auto lock on all the time. Tech support walked me through it. However nothing changed, my exact same problems are still there with the new BCM. Glad it only cost me $40. My next plan is to pull the front seats and console and roll back the carpet to look for signs of wiring damage.
maybe it's the drivers door lock module?
 
OP
OP
Rocket Man

Rocket Man

Mark
Supporting Member
Joined
Dec 25, 2014
Posts
26,679
Reaction score
52,954
Location
Oregon
maybe it's the drivers door lock module?
Hmmm maybe, never thought of that. I did replace it awhile back and never programmed it. It worked on all the windows right out of the box but it isn’t ACDelco. If I remember, when I tried to program it yesterday while in the midst of the bcm it had an error that said something like fatal error or something.
 
OP
OP
Rocket Man

Rocket Man

Mark
Supporting Member
Joined
Dec 25, 2014
Posts
26,679
Reaction score
52,954
Location
Oregon
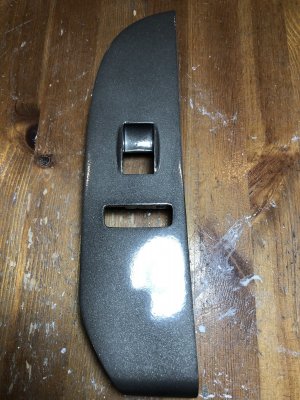
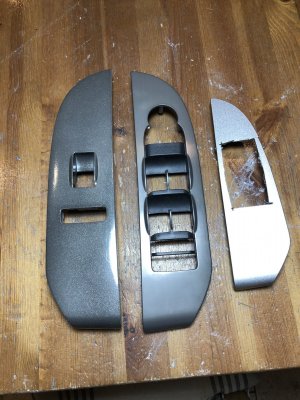
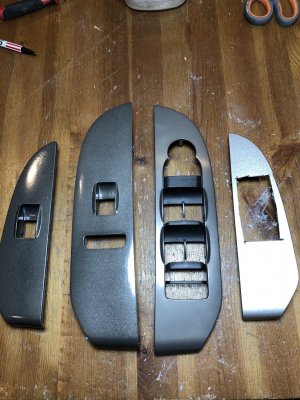
I have tried several of the Fusion metallics (I found out there are 6-7) and after buying 4 of the closest ones I have decided the Metallic Dark Metal is closest. The first pic is the Pewter Metallic next to the OEM brushed. Then there’s a pic with Metallic Silver on the right ( the bezel with the hole cut out) , Metallic Dark Metal on the left and OEM in the middle. I’m going to attempt to do a brushed effect on the small rear bezel I painted Metallic Dark to see how it looks but my clearcoat won’t be here for a few days. I did finally get my bodywork to look good, I painted that bezel (right front) Metallic Dark and it came out good. I have decided to paint all 4 so they match even though it’s real hard for me to paint over the rear brushed ones. I need them to match though. I’m thinking I’ll paint the oval reflectors in the bottoms of the front door panels the same instead of the wrap. Just trying to get everything to match as close as possible and not have 3 or 4 different finishes.

B9E15C8C-F9F6-43AC-9083-5B759F6EE232.jpeg E4F8706C-87E6-4FCE-AAF5-173A3774688B.jpeg E6AB24A0-B365-4161-898A-39E50D6BA33E.jpeg D7F8A742-CD90-4BF0-9ED8-0887337EE12C.jpeg
 
OP
OP
Rocket Man

Rocket Man

Mark
Supporting Member
Joined
Dec 25, 2014
Posts
26,679
Reaction score
52,954
Location
Oregon
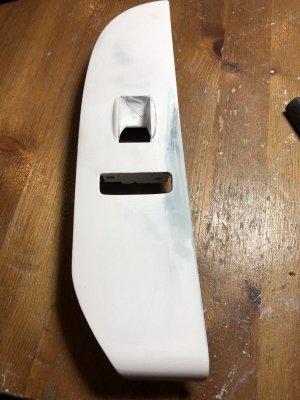
Bodywork, using Ever Gold Finishing Putty 3 times and wet sanding with 400 grit finally did it. It’s still not perfect but close enough that nobody will know.

05DCB293-4384-4D7D-8978-1A7D7371B417.jpeg
 

iamdub

Full Access Member
Joined
Apr 23, 2016
Posts
20,821
Reaction score
45,014
Location
Li'l Weezyana
I got 2 more door panels installed today. I need to pull the left rear to install the nut insert I got at the wrecking yard today. I also swapped for a longer latch cable. No charge. For the fronts, I just needed to remove the metal plate that the LT panel bolts to and the holes I needed were right there. I popped the brushed front switch bezel in just for a pic. Did a comparison shot of the left front door too. I am going to attempt to match the brushed look with paint instead of wrap. There’s 3 Fusion metallic colors, I tried metallic aluminum but it’s off so I’m going to get the metallic nickel and try it and maybe try the scotchbrite idea that @iamdub suggested if the color is close.

View attachment 240792 View attachment 240793 View attachment 240795 View attachment 240796
You’re either brave, bored or a glutton for punishment! I don’t know if you’ve watched any how-to vids, but making straight lines in one direction is the key. I would hot glue the piece to my table saw and use the fence as a straightedge to guide the scrub pad in a straight line. I used my table saw since the hot glue easily peeled off the iron surface. Practice on scrap first!
 
OP
OP
Rocket Man

Rocket Man

Mark
Supporting Member
Joined
Dec 25, 2014
Posts
26,679
Reaction score
52,954
Location
Oregon
You’re either brave, bored or a glutton for punishment! I don’t know if you’ve watched any how-to vids, but making straight lines in one direction is the key. I would hot glue the piece to my table saw and use the fence as a straightedge to guide the scrub pad in a straight line. I used my table saw since the hot glue easily peeled off the iron surface. Practice on scrap first!
I’ll try on the one rear one I painted. If i fail it’s no big deal. The problem with these is the humps around the switches.
 
OP
OP
Rocket Man

Rocket Man

Mark
Supporting Member
Joined
Dec 25, 2014
Posts
26,679
Reaction score
52,954
Location
Oregon
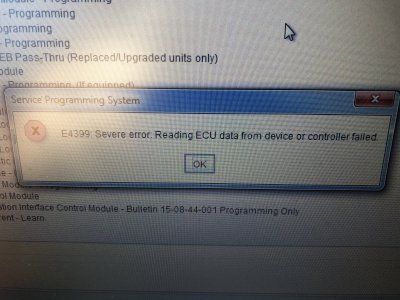
I went to install the switch bezel that I spent so much time on, and when I pushed on it, it cracked along one of the cuts. I didn’t weld it good enough. F*ck. :mad: So I rewelded it, added some plastic pieces and rewelded it some more and bent and pushed and twisted it to make sure it was good. Then added finishing putty and sanded it perfect again. Then when I sprayed it, something got in the paint so I had to remove the paint. I haven’t looked at it since. :mad: I moved on to the driver door module programming. As I thought, there’s a problem according to the Tech2. “Severe error reading ECU data from device”. I suspect it’s because it’s not an a ACDelco part so I ordered one. It’s only $36 for the real thing so I ordered it.

DDFE8004-34D5-40C2-81E9-DAF8F5F580D9.jpeg
 
OP
OP
Rocket Man

Rocket Man

Mark
Supporting Member
Joined
Dec 25, 2014
Posts
26,679
Reaction score
52,954
Location
Oregon
Ok so on to other things, and while I had everything hooked up I decided to see if there were any updates to the software in the modules because, you know, I hadn’t punished myself enough. Hey look- there’s an update to the HVAC module, let’s try that right? I was just trying to get my moneys worth out of my programming subscription, not that there was anything wrong with the thing. What’s that old saying-if it ain’t broke? Just before I hit the “program module” there was a message that if the module becomes inoperative or doesn’t respond or something like that, don’t replace it, just cycle battery power to it. Ominous? I hit the program icon. The display on the HVAC went blank. The programming stayed at 0%. For an hour. I left it alone and kept checking. Then called TIS support, who told me there wasn’t anything they could do. Their suggestion was unplug the Tech2, cycle the ignition. Still blank. Then he said disconnect the battery for 10 minutes and try again. Nothing. I tried reprogramming it again but there was a problem, it would communicate but not start programming. Called support again, nice woman did a remote onto my computer and then asked if I had a factory radio. No. Aha, it’s on the same bus line so when the program went to ask the connected modules if they were there and to stay quiet, the Pioneer didn’t cooperate so the programming failed. I pulled the radio fuse and we got it to program but when it hit 100% it said the java program had stopped working and she said since it’s not windows 10 they don’t support any troubleshooting of my computer system. Done. I tried a couple other times but it’s dead. Tried leaving the battery disconnected for a half hour. Still dead. :mad::mad::mad: I ordered a HVAC unit from LKQ for $45. If it’s ugly I’ll swap my escutcheon onto it. The part that’s listed for my truck, new, is discontinued. :mad::mad::mad:.
 
OP
OP
Rocket Man

Rocket Man

Mark
Supporting Member
Joined
Dec 25, 2014
Posts
26,679
Reaction score
52,954
Location
Oregon
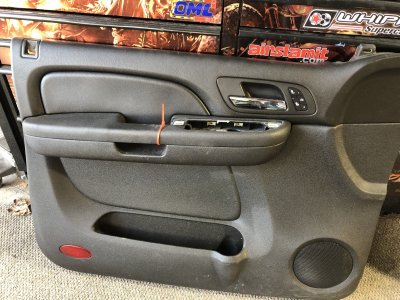
While I was struggling with the HVAC module the nice UPS guy dropped off the driver front door panel. If you’re keeping track, this is #3. I was afraid to open it, with the way today was going. I could. Not. Resist. AHA! It looked great, even the handle. At least until I removed it. It has the same broken plastic pieces broken where the metal plate screws on. :mad: But the good news is, I have the one perfect handle from the wrecking yard panel, but it used to be tan. It’s been painted though, sitting in the spare bedroom. I think it looks fine. So i can make this panel work after all. :)

944364A5-8B8C-4F61-9D69-8F5B490104E8.jpeg
 

iamdub

Full Access Member
Joined
Apr 23, 2016
Posts
20,821
Reaction score
45,014
Location
Li'l Weezyana
Ok so on to other things, and while I had everything hooked up I decided to see if there were any updates to the software in the modules because, you know, I hadn’t punished myself enough. Hey look- there’s an update to the HVAC module, let’s try that right? I was just trying to get my moneys worth out of my programming subscription, not that there was anything wrong with the thing. What’s that old saying-if it ain’t broke? Just before I hit the “program module” there was a message that if the module becomes inoperative or doesn’t respond or something like that, don’t replace it, just cycle battery power to it. Ominous? I hit the program icon. The display on the HVAC went blank. The programming stayed at 0%. For an hour. I left it alone and kept checking. Then called TIS support, who told me there wasn’t anything they could do. Their suggestion was unplug the Tech2, cycle the ignition. Still blank. Then he said disconnect the battery for 10 minutes and try again. Nothing. I tried reprogramming it again but there was a problem, it would communicate but not start programming. Called support again, nice woman did a remote onto my computer and then asked if I had a factory radio. No. Aha, it’s on the same bus line so when the program went to ask the connected modules if they were there and to stay quiet, the Pioneer didn’t cooperate so the programming failed. I pulled the radio fuse and we got it to program but when it hit 100% it said the java program had stopped working and she said since it’s not windows 10 they don’t support any troubleshooting of my computer system. Done. I tried a couple other times but it’s dead. Tried leaving the battery disconnected for a half hour. Still dead. :mad::mad::mad: I ordered a HVAC unit from LKQ for $45. If it’s ugly I’ll swap my escutcheon onto it. The part that’s listed for my truck, new, is discontinued. :mad::mad::mad:.

Le sigh.

Just reading of your troubles stresses me out. lol

At the same time, it also makes me glad that I can be lazy and have an "eh, it's too much trouble and it's fine as-is" attitude about some things.
 

Forum statistics

Threads
138,096
Posts
1,998,979
Members
103,022
Latest member
scottd

Latest posts

Back
Top