Rocket Man's 2008 Bagged CC Silverado Build AKA "THE MACHINE"

Disclaimer: Links on this page pointing to Amazon, eBay and other sites may include affiliate code. If you click them and make a purchase, we may earn a small commission.

Tonyrodz

Resident Resident
Joined
Feb 16, 2012
Posts
33,186
Reaction score
51,406
Location
Central Jersey
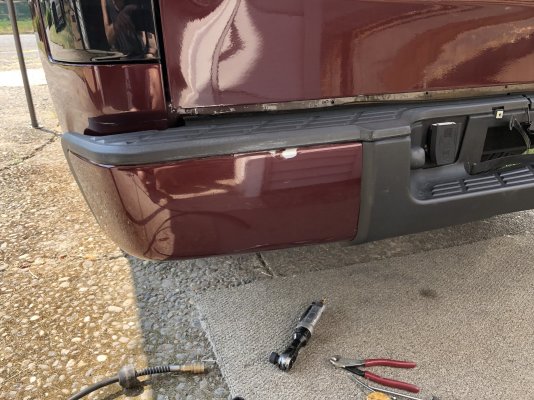
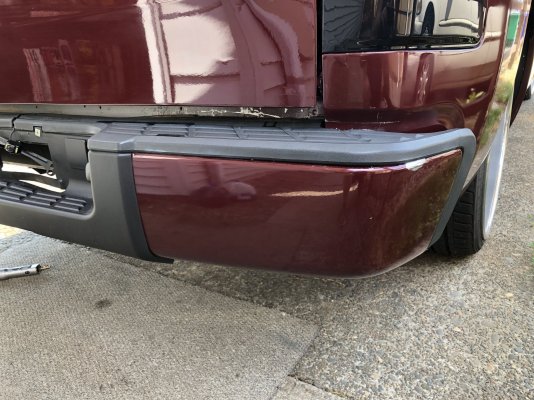
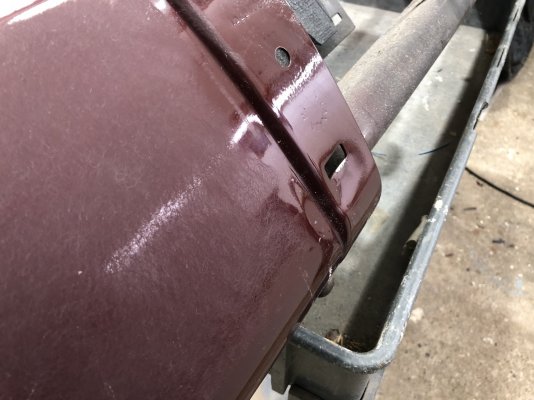
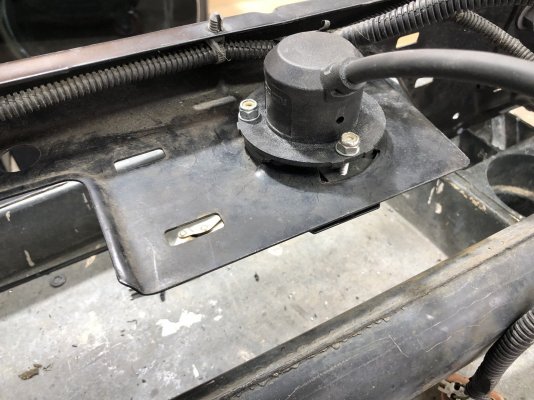
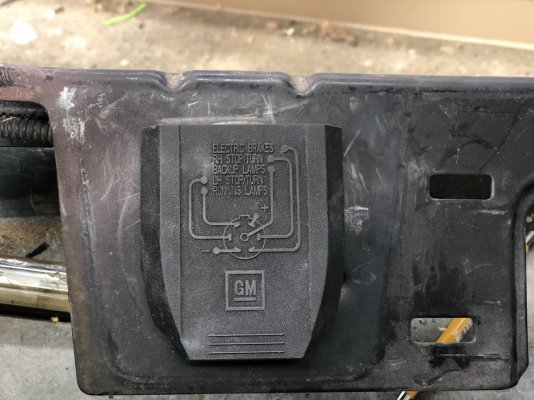
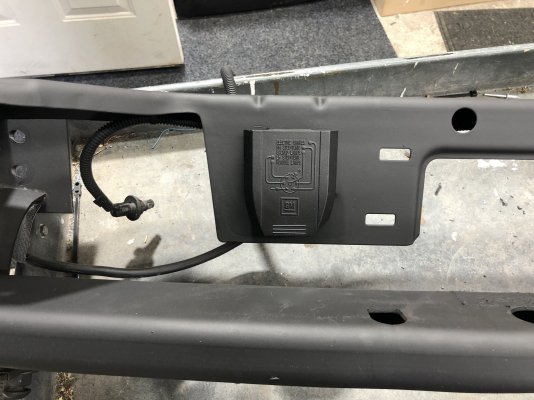
Well shit. I was thinking about the fact I’m planning on opening one of the headlights back up due to the dust. So of course I’m thinking is there anything else I’d like to do while this is happening and of course there is. I regret not spending the money on etching the lenses so they all match. The bulb color is easily changed to match. The projector etching isn’t and since I’m gonna open one up, I’ll open them both up and replace the Acmes with new Acmes with 6000k bulbs that are etched to match the Morimotos. It cost me the same as just plain Morimoto projectors. $40 for the Acmes, $110 for etching, and I ordered another pair of 6000k bulbs so I know they will all match. Gonna get these bitches right one way or another. Another $180 into these expensive things. Oh well. I just got the rest of my stimmy after the IRS processed my 2020 tax return and my income level dropped below the threshold. Yay!
Glutton for punishment lol!
 
OP
OP
Rocket Man

Rocket Man

Mark
Supporting Member
Joined
Dec 25, 2014
Posts
26,679
Reaction score
52,949
Location
Oregon
BEF7DB1C-E0B9-4AA5-A251-FE5B9327F19D.jpeg
This mornings picture.
 
OP
OP
Rocket Man

Rocket Man

Mark
Supporting Member
Joined
Dec 25, 2014
Posts
26,679
Reaction score
52,949
Location
Oregon
The paint on the rear bumper has started flaking off. I see shiny chrome underneath so it looks like they didn’t even sand it before spraying. I ordered paint from automotivetouchup and I’ll do this myself. Headlights are pushed further back since right now I’m in the middle of a backyard makeover. The bumper will need to be done before the headlights, it looks horrible. ****** assholes. :mad:

4F967880-B94A-4180-9442-E05BDD32584F.jpeg 2B48A938-7874-4B1E-8F02-2E693A86EECA.jpeg
 

Sam Harris

Elite Member
Supporting Member
Joined
Sep 26, 2018
Posts
7,445
Reaction score
14,977
Location
Texas
The paint on the rear bumper has started flaking off. I see shiny chrome underneath so it looks like they didn’t even sand it before spraying. I ordered paint from automotivetouchup and I’ll do this myself. Headlights are pushed further back since right now I’m in the middle of a backyard makeover. The bumper will need to be done before the headlights, it looks horrible. ****** assholes. :mad:

View attachment 279960 View attachment 279961
Well... do NOT like.. man, those clowns seem to have taken every damn shortcut possible. I swear, in the next 6 months, you will have rebuilt / refreshed the entire truck, minus some strategic chassis welds. [emoji35][emoji2959]
 

Tonyrodz

Resident Resident
Joined
Feb 16, 2012
Posts
33,186
Reaction score
51,406
Location
Central Jersey
The paint on the rear bumper has started flaking off. I see shiny chrome underneath so it looks like they didn’t even sand it before spraying. I ordered paint from automotivetouchup and I’ll do this myself. Headlights are pushed further back since right now I’m in the middle of a backyard makeover. The bumper will need to be done before the headlights, it looks horrible. ****** assholes. :mad:

View attachment 279960 View attachment 279961
I wonder if sandblasting that chrome would help for the paint to adhere---if possible.
 

NathanJax

Vacation Nathan
Staff member
Administrator Moderator Supporting Member
Joined
May 9, 2009
Posts
49,141
Reaction score
943,577,203
Location
Jax, Fl
The paint on the rear bumper has started flaking off. I see shiny chrome underneath so it looks like they didn’t even sand it before spraying. I ordered paint from automotivetouchup and I’ll do this myself. Headlights are pushed further back since right now I’m in the middle of a backyard makeover. The bumper will need to be done before the headlights, it looks horrible. ****** assholes. :mad:

View attachment 279960 View attachment 279961

That sucks... Didn't know yours was chrome. When i did mine, I got the painted bumper
 

kbuskill

***CAUTION*** I do my own stunts!
Joined
Mar 11, 2017
Posts
5,823
Reaction score
9,834
Location
NE. FL.
Eh, I’m just gonna sand it. I’ll start with 60 grit. I don’t have a sandblaster. It’s not a big area and it’s relatively flat so that will work.

I have successfully sandblasted chrome and used a good "self etching" primer before painting but sanding will accomplish the same thing.

The self etching primer helps to bite into the chrome and adheres better.

Sucks that you have to do this but at least you will know that it is right when done.
 
OP
OP
Rocket Man

Rocket Man

Mark
Supporting Member
Joined
Dec 25, 2014
Posts
26,679
Reaction score
52,949
Location
Oregon
That sucks... Didn't know yours was chrome. When i did mine, I got the painted bumper
Well... I didn’t know mine was chrome either until lately. :crazy::gathering:

Edit: this is the bumper that was on the truck when I bought it but I was thinking about installing a 2015 one. I actually have one of those I got for free but my mounts are made for the 07-14 one and won’t work on the 15. My frame isn’t stock so it’s not an easy swap like yours was. I’d have to fab mounts and decided to just run the one I have for now at least.
 
Last edited:

07Burb

GM fan for life
Staff member
Moderator Supporting Member Administrator
Joined
Jan 3, 2011
Posts
50,937
Reaction score
19,340
To be fair, painting over chrome is not the easiest thing to accomplish. Doing what @NathanJax did and painting a painted bumper is more ideal
 
OP
OP
Rocket Man

Rocket Man

Mark
Supporting Member
Joined
Dec 25, 2014
Posts
26,679
Reaction score
52,949
Location
Oregon
To be fair, painting over chrome is not the easiest thing to accomplish. Doing what @NathanJax did and painting a painted bumper is more ideal
Agreed 100%. I waa under the assumption I needed to buy the entire bumper minus the black plastic parts because that’s what I found when I searched and they’re $400 aftermarket. Today I pulled it and went to my auto paint supply store to get aircraft stripper but they don’t like Mondays. Tues-Sat only. Which was great because I came home and was looking at the thing and noticed the ends are riveted on. So I looked up the parts schematic and I saw I can buy just the paintable ends. And then believe it if not I can get them on Amazon for about 50 bux each. And I had just dropped off parts from my Denali that I was returning and by the time I got home that was already available in my Amazon account. Love their return policy- as soon as the boxes are scanned in at the shipping place they put the money in my account. So it was almost a wash. Score! Too bad it’s not Prime 2- day shipping but that’s fine. Oh, also I noticed one side had a small dent anyway. It doesn’t look like they even roughed up the chrome before painting.
 

Attachments

  • 3D963962-AC7B-49D5-BF37-B998AFE8B1EC.jpeg
    3D963962-AC7B-49D5-BF37-B998AFE8B1EC.jpeg
    463.5 KB · Views: 25
  • ACA039BB-9565-484C-92C6-FC6DDF2030A0.jpeg
    ACA039BB-9565-484C-92C6-FC6DDF2030A0.jpeg
    395.6 KB · Views: 22
  • 136F042B-2E75-4835-B54E-0B5EBD1ACB28.jpeg
    136F042B-2E75-4835-B54E-0B5EBD1ACB28.jpeg
    215.7 KB · Views: 27
  • 342DEC79-5D86-4707-85F3-A5E0F6C4E896.jpeg
    342DEC79-5D86-4707-85F3-A5E0F6C4E896.jpeg
    396.1 KB · Views: 21
  • 72E3B88A-C126-4FD1-860A-EEEF4D95CDEB.jpeg
    72E3B88A-C126-4FD1-860A-EEEF4D95CDEB.jpeg
    251.4 KB · Views: 23
OP
OP
Rocket Man

Rocket Man

Mark
Supporting Member
Joined
Dec 25, 2014
Posts
26,679
Reaction score
52,949
Location
Oregon
I decided to look at installing the 120v receptacle in the rear bumper. My goal is to be able to plug in the battery maintainer at the back of the truck. I installed an outlet in that corner of my garage when I remodeled it so I’ll just need a short extension cord. No more opening the hood and having a wire hanging down and a cord run along the fence. I ordered a mountable tender which OptiMate doesn’t make so I bought a Noco. I’ll extend the power cable and run it with my other harnesses along the frame.
At first I was going to remove the trailer wire receptacle and replace it with the one I bought from Noco. Which would have been ok but I decided since I wasn’t going to use the factory one anyway, I could see if I could cut it up and use it as a cover for the new one. So now it will look like the factory trailer connector but when you open it up there’s a 120v receptacle instead. The tender will be all wired in so all I’ll have to do this winter is open that cover and plug in the cord. I still have to take it apart and paint everything but the prototype is done.
 

Attachments

  • image.jpg
    image.jpg
    245.5 KB · Views: 22
  • 0234548C-A2FC-43DC-A7BE-B795E8CBB439.jpeg
    0234548C-A2FC-43DC-A7BE-B795E8CBB439.jpeg
    323.5 KB · Views: 27
  • 7725E89B-0791-46B9-8E7E-3ACCC1E25E96.jpeg
    7725E89B-0791-46B9-8E7E-3ACCC1E25E96.jpeg
    333.4 KB · Views: 27
  • AC2262FF-06B4-4F2D-B0DD-1E66509B3338.jpeg
    AC2262FF-06B4-4F2D-B0DD-1E66509B3338.jpeg
    277 KB · Views: 24
  • 1CF51EB3-9CE7-4E41-959D-0B334788035F.jpeg
    1CF51EB3-9CE7-4E41-959D-0B334788035F.jpeg
    253 KB · Views: 32

Fless

Staff member
Moderator
Joined
Apr 2, 2017
Posts
16,340
Reaction score
33,789
Location
People's Republic of Colorado
Now you got me thinking. If the charger was not mounted in the truck you could just charge it through a modified 7-blade adapter, using the 12v Aux (connected at the fusebox, of course) and ground conductors in the trailer connector.
 
OP
OP
Rocket Man

Rocket Man

Mark
Supporting Member
Joined
Dec 25, 2014
Posts
26,679
Reaction score
52,949
Location
Oregon
Now you got me thinking. If the charger was not mounted in the truck you could just charge it through a modified 7-blade adapter, using the 12v Aux (connected at the fusebox, of course) and ground conductors in the trailer connector.
But then the charger would be out in the weather, snow and all. Or I guess I could extend the 12v output wires from the charger and keep it in the garage. I like this way better though with an extension cord from the garage to the back of the truck. The charger is pretty small, it should be easy to mount even though my under hood space is limited.
 

Fless

Staff member
Moderator
Joined
Apr 2, 2017
Posts
16,340
Reaction score
33,789
Location
People's Republic of Colorado
But then the charger would be out in the weather, snow and all. Or I guess I could extend the 12v output wires from the charger and keep it in the garage. I like this way better though with an extension cord from the garage to the back of the truck. The charger is pretty small, it should be easy to mount even though my under hood space is limited.

Agree completely, what you have is perfect for your setup.
 
OP
OP
Rocket Man

Rocket Man

Mark
Supporting Member
Joined
Dec 25, 2014
Posts
26,679
Reaction score
52,949
Location
Oregon
I got the bumper ends today. I need to sand the orange peel out of them and then paint, clear and assemble. I painted the main bumper parts in flat black.
 

Attachments

  • 246BFCE0-B85A-4F52-9C72-9DD9F0FC7C96.jpeg
    246BFCE0-B85A-4F52-9C72-9DD9F0FC7C96.jpeg
    187.9 KB · Views: 25
  • 0A1605CD-4116-481A-9245-CA0C3D15900D.jpeg
    0A1605CD-4116-481A-9245-CA0C3D15900D.jpeg
    209.1 KB · Views: 23
  • C9F4BCAE-F885-4770-A47F-F875B0C2AF62.jpeg
    C9F4BCAE-F885-4770-A47F-F875B0C2AF62.jpeg
    305.3 KB · Views: 31
  • BCF25147-CFF9-4517-825D-DE1C1CE5311F.jpeg
    BCF25147-CFF9-4517-825D-DE1C1CE5311F.jpeg
    270.4 KB · Views: 28
  • 7C7B5E08-2D8C-41B2-A09C-D50C35ACE086.jpeg
    7C7B5E08-2D8C-41B2-A09C-D50C35ACE086.jpeg
    285.3 KB · Views: 29

Forum statistics

Threads
137,765
Posts
1,991,562
Members
102,754
Latest member
canadiandux
Back
Top