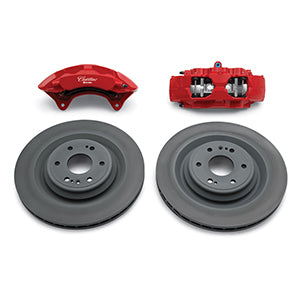
2021 PPV Front Brakes on 2013 Escalade ESV, and rear brake overhaul

Disclaimer: Links on this page pointing to Amazon, eBay and other sites may include affiliate code. If you click them and make a purchase, we may earn a small commission.

OP
OP
skpyle

skpyle

Senior Member
Supporting Member
Joined
May 15, 2021
Posts
546
Reaction score
1,348
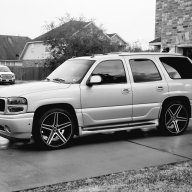
Hey Seth, Hope you've been able to clear up the spacing issue. I'm curious to know how your project is coming along as i'm getting ready to start my upgrade this weekend. Hopefully I don't have the spacing issues as i'm running aftermarket 24 inch rims.
I lived with the spacing issue by installing 15mm hubcentric spacers and longer lug studs. I have been daily driving my Escalade since then with no issues.
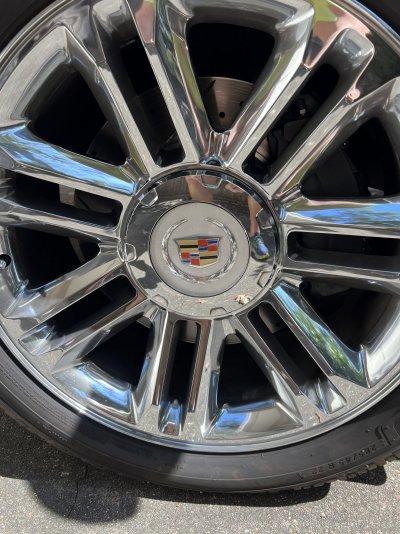
It was not necessarily the diameter of the rim, but the offset of the rim. The back of my wheel spokes hit the outside of the calipers.

Good Luck!

NOTE: this is with the Brembos spec'd out for the 2022 Tahoe PPV. If you use the Brembos listed a couple of posts above, you probably won't have fitment issues.
 

n8in8or

TYF Newbie
Joined
Jul 31, 2024
Posts
2
Reaction score
6
Hi Seth, excellent thread on this brake conversion. I found this because I am currently installing the PPV brakes on my 13 Escalade ESV Platinum. I was led to believe on the Facebook forum that these would as a direct bolt-on.....including the wheels, which of course is not true. It was very helpful reading what you had found for the F350 lugs - it saved me time searching for those myself. My spacers should arrive today and I will be able to bed the pads after bleeding the brakes.

To pay it forward, I thought I'd share the washers I used to space my calipers away from the knuckle, in the hopes it helps someone else in the future. I already had these in stock from another project. I stacked 2 each of these and it got me within about .020" of being perfectly centered, like you. The beauty of these is they are the correct OD so you don't have to grind away any of the knuckle and they are also the right ID so you don't have to drill them out. Here's the link to McMaster-Carr for them: https://www.mcmaster.com/98017A215/

Thanks again for posting such a helpful thread!
 
OP
OP
skpyle

skpyle

Senior Member
Supporting Member
Joined
May 15, 2021
Posts
546
Reaction score
1,348
Hi Seth, excellent thread on this brake conversion. I found this because I am currently installing the PPV brakes on my 13 Escalade ESV Platinum. I was led to believe on the Facebook forum that these would as a direct bolt-on.....including the wheels, which of course is not true. It was very helpful reading what you had found for the F350 lugs - it saved me time searching for those myself. My spacers should arrive today and I will be able to bed the pads after bleeding the brakes.

To pay it forward, I thought I'd share the washers I used to space my calipers away from the knuckle, in the hopes it helps someone else in the future. I already had these in stock from another project. I stacked 2 each of these and it got me within about .020" of being perfectly centered, like you. The beauty of these is they are the correct OD so you don't have to grind away any of the knuckle and they are also the right ID so you don't have to drill them out. Here's the link to McMaster-Carr for them: https://www.mcmaster.com/98017A215/

Thanks again for posting such a helpful thread!
Outstanding!
Thanks for the link.
 

ivin74

05 NBS Nali
Joined
Aug 3, 2014
Posts
2,420
Reaction score
2,557
Location
Htown, Texas
Hey, stumbled onto your thread as I’m looking for a rear big brake kit now for my brothers 18. I wanted to share I just installed his front “GM performance setup” I got via piecing together front rockauto sneakily.


This is the $2500 kit I got for <$1400 via rockauto from piecing it together. Everything was bolt on and no modifications needed (clearing his stock 22’). Took less then hour an half to install and it stops HARD now!

2 calipers #1722891 (DR flip bleeder/plugs)
2 Rotors #60447079
Power stop pads #z361910
Need 2 - m10x1.0 banjos (I had some from old caliper off my vette I did a wilwood setup on) should be Dorman 14100
What is the diameter of those rotors??
 

n8in8or

TYF Newbie
Joined
Jul 31, 2024
Posts
2
Reaction score
6
I got it on the road last night, and everything is smooth and quiet. I've only driven it enough to do the bedding procedure, but nothing else, so I can't comment on performance yet.

BUT, before I got it on the road, I decided to test fit my winter wheels/tires to see if they fit. They are some aftermarket 20s and they are nowhere close to fitting even with the 15mm spacers. They actually crash at the rim because they taper down the closer they get to the face of the wheel. So now I get to search for some new wheels. I'm hoping to find a set of 20s that will fit so I don't have to also get new tires. This brake upgrade gets more and more expensive...... If you don't mind, I'll report back with what I find for wheels to add to the knowledge in this thread.
 
OP
OP
skpyle

skpyle

Senior Member
Supporting Member
Joined
May 15, 2021
Posts
546
Reaction score
1,348
IMG_5757.png


IMG_5758.png


Uh-oh…


I received this E-mail last week. Lovely. Especially since my Escalade is my daily driver.

I immediately ordered new GM Genuine brake hose assemblies.
Today, I was able to install them.


IMG_5761.jpeg


GM Genuine 84331227 left and 84331228 right front brake hose assemblies. These are correct for my 2013 Escalade ESV.


IMG_5764.jpeg


New hose assemblies include new banjo bolts and copper crush washers. SWEET!
If you remember, I slightly shortened the new banjo bolts to better fit the PowerStop hoses. (However…note the thread pitch on the new banjo bolts.)


IMG_5765.jpeg


New hoses also include line end brackets and clips.
 
OP
OP
skpyle

skpyle

Senior Member
Supporting Member
Joined
May 15, 2021
Posts
546
Reaction score
1,348
I was able to remove the PowerStop hoses and install the new GM Genuine hoses without much trouble. I had to swap over the ball studs for the front suspension ride height sensors.

Did have a problem attaching the new hoses to the calipers. The banjo bolts only threaded in one turn, then bound up. Turns out the new banjo bolts included with the new hoses are coarse thread. Which is a little concerning, as the stock calipers and the Brembo calipers use fine thread banjo bolts.
For lack of any other option, I reused the slightly shortened fine thread banjo bolts I installed with the PowerStop hoses. They torqued down to 31 lbs/ft no problem.


IMG_5767.jpeg


Removed PowerStop hoses. Will submit the photos for reimbursement.


Since I had ordered the full kit of 6 new PowerStop hoses, I also ordered new GM Genuine brake hoses for the rear.

I am going to rebuild the rear brakes at the annual servicing later in October.


IMG_5766.jpeg


New GM Genuine brake hoses for calipers and to the axle.
 

Davidj281

TYF Newbie
Joined
Dec 31, 2020
Posts
20
Reaction score
28
Seth, wanted to offer my appreciation for this thread on how to do this awesome upgrade. Your work is impeccable. It is quite a step up from stock and well worth the upgrade. Thought I would also discuss what I did/used for this job. Calipers/rotors/stud/lug nuts from Rock Auto.

1. R1 Concepts Drilled/slotted Rotors: 631-47091L, 631-47091R
2. Pads: BENDIX PBD2407 Police
3. Studs: Dorman 610-530.1, I didn't push the old ones out like you did, I just whacked them with a 3lb hammer. They came out pretty easy. Installing did require an some heavy nuts as washers and an impact gun.
4. Banjo Bolt: I ordered qty of 2 of M10x1.0mm x 24 mm Metric SS Single Banjo Bot w/washers, used this instead of cutting GM banjo bolt like you did. I have SS Brake lines too.
5. McMaster Carr Washers (18-8 SS Mil Spec Washer, 5/8" Screw Size, NAS 1149-C1063R 98017A215: Used 4 of these washers, 2 on each bolt of caliper to line them up over rotors. Thanks n8in8or via thread #42!
6. Used the same wheel spacers; mine rubs a bit on a hard turn in because of my mud flaps but i can live with that.
7. This upgrade makes you realize that you have very capable brakes!

Thanks Again. Now i'll try to figure out the Aluminum front end parts that Pete did as these rotors are quite heavy. Calipers feel lighter that the stock ones though.
 

Attachments

  • IMG_2484.JPG
    IMG_2484.JPG
    371.8 KB · Views: 49
  • IMG_2494.JPG
    IMG_2494.JPG
    415.6 KB · Views: 46
Last edited:

petethepug

Michael
Joined
May 4, 2016
Posts
3,790
Reaction score
4,359
Location
SoCal
Man, you guys are holding out on me. Didn’t know the Brembo 6 piston 410mm / 16.25” discs were now being manufactured in Drilled, slotted & zinc plated. Now, finally we can get some decent life out of these rotors without all the brake material build up / warping that caused all that pulse in the pedal.

Welcome Gen III 07-14 front brakes and suspension to the Gen V 21+ world, finally, bolt on OEM stopping power with Brembo as a factory option.


IMG_2348.jpeg
 
Last edited:

mikez71

Full Access Member
Joined
Mar 9, 2023
Posts
3,336
Reaction score
4,137
I wonder if newer model knuckles will bolt up, eliminating the need for grinding and centering washers. ?
 

petethepug

Michael
Joined
May 4, 2016
Posts
3,790
Reaction score
4,359
Location
SoCal
Kinda missed the question put up there. Modification of the Alum knucks for BBK, find out soon. Modify or not, they do fit.

15-20 / Alum / Newer model knucks are used in 09-14 z71 package and a few other oddball configurations like Hybrid and XFE package.

Yes, alum knucks can replace steel as long as the steel upper control arm / UCA is replaced with the matching alum UCA that has a different taper that matches the Alum knuck.

The alum knucks and alum UCA were used on & off during 09-14 and GM put them into play full time on 15-20 full size SUV.

The same goes for the alum lower control arm / LCA however, the Alum LCA fits EVERY 07-14 & 15-20 truck whether it has Alum or Steel knucks.

As stated before, if doing a BBK swap and you’re in the hubs, you can easily swap to Alum UCA, LCA, knuckles as well as the 6 pot Alum Brembo BBK and shave close to 100lb off each front corner of your truck.

I have all the parts to do it but I fubar my back at work and have to wait for the Indi to install this Winter. It’s frustrating literally looking at it but not able to do anything with it yet.
 
Last edited:

mikez71

Full Access Member
Joined
Mar 9, 2023
Posts
3,336
Reaction score
4,137
How about '21+ knucks and arms..?

In another thread someone got the wrong lower arm, supposedly a 15-20 tahoe lower arm..


petethepug

Michael
Joined
May 4, 2016
Posts
3,790
Reaction score
4,359
Location
SoCal
Good question about fitting the 21-Present knuckles, arms and ball joints to our 07-14 trucks. Good pic you referenced on the 21+ aluminum control arm not fitting a 15-20 aluminum knuckle.

To make it more Kra-Kray you have to remember this is in regard to fitting only 15-20 aluminum suspension parts on 07-14 full size SUV

Well I guess I screwed up and got the wrong lowers. Ball joint are too big to fit into my drop spindles. I guess I can either sell or try and send these back or order some drop spindles that will work.
IMG_2545.jpeg

above pic is a 21+ aluminum control arm that won’t fit in a 15-20 aluminum knuckle that was installed from factory on some 07-14 full size SUV.
 
Last edited:

NipRing

TYF Newbie
Joined
Apr 16, 2025
Posts
4
Reaction score
4
Hey, stumbled onto your thread as I’m looking for a rear big brake kit now for my brothers 18. I wanted to share I just installed his front “GM performance setup” I got via piecing together front rockauto sneakily.


This is the $2500 kit I got for <$1400 via rockauto from piecing it together. Everything was bolt on and no modifications needed (clearing his stock 22’). Took less then hour an half to install and it stops HARD now!

2 calipers #1722891 (DR flip bleeder/plugs)
2 Rotors #60447079
Power stop pads #z361910
Need 2 - m10x1.0 banjos (I had some from old caliper off my vette I did a wilwood setup on) should be Dorman 14100
So this is the "kit" you pieced together for a '13 Escalade like OP or something else? Because if this is a straight bolt up for my '13, I need to be buying this right now, lol
 

BacDoc

Full Access Member
Joined
Apr 11, 2024
Posts
731
Reaction score
915
Location
Vero Beach Florida
Wow! Nice write up on this project!

I read through all the pages and your attention to detail is amazing. Also impressive that you did all this work in high heels ! As Jerry Seinfield would say “ Not that there is anything wrong with that”
Definitely extra style points
 

shpitz461

TYF Newbie
Joined
Jul 2, 2025
Posts
3
Reaction score
2
Amazing stuff, thanks!

Going to attempt this on my 2012 Escalade with 22's.

Has anyone done the rears as well? Can you provide part #'s?

Thanks!
 

shpitz461

TYF Newbie
Joined
Jul 2, 2025
Posts
3
Reaction score
2
After 9 hours with my son, we're up and running.

Lucky for me, the OEM wheels cleared the calipers no problem.

I forgot to purchase the bolt washers for the caliper, I've had some washers lying around and needed to use two washer on each screw to center the rotor.

Flushing and bleeding the brake fluid was a *****, the rear bleeders weren't open I guess in 13 years, and that took several hours to complete.

The brakes are amazing!

My wheels are
Q7L:
- Wheels, 22" x 9" (55.9 cm x 22.9 cm)
- WHEEL 22 X 9.0, J, ALUMINUM, DESIGN 2
IMG_20250719_094407.jpg


The wheel is stamped ET31, they clear the caliper very nicely.

I had to shave just a few mm on the ear so that the top cliper bolt would fit perfectly, there was enough space for the washers I used to fit without grinding them down.

I used a dremel with a burr carbide tip, went slow, it was very easy to trim the ear nicely:


IMG_20250719_102907.jpg


Here's the stock bolt (left) vs recommended bolt (right):


IMG_20250719_110012.jpg


Rotor centered in the caliper:

IMG_20250719_122359.jpg


Old caliper vs new:

IMG_20250719_125015.jpg


Here I've penciled how much I needed to remove:


IMG_20250719_141928.jpg


All in all didn't require too much skill, but was very labor intensive, and we had a mini thunderstorm in the middle, gotta love Georgia.

It is my understanding that the Tahoe PPV had the single piston rears that are very similar to what I currently have on mine, so I'm not going to touch it.

I also purchased the two enormous dust covers to replaced the OEM, but that would've been an ordeal to replace, requiring the removal of the wheel bearing. This will be for another day.

Thanks all for the amazing guide and tips!
 

Forum statistics

Threads
138,037
Posts
1,997,590
Members
102,974
Latest member
kikeap
Back
Top