What did you do to your NNBS GMT900 Tahoe/Yukon Today?

Disclaimer: Links on this page pointing to Amazon, eBay and other sites may include affiliate code. If you click them and make a purchase, we may earn a small commission.

iamdub

Full Access Member
Joined
Apr 23, 2016
Posts
20,750
Reaction score
44,585
Location
Li'l Weezyana
Washed it then removed the roof rack then washed the roof again.

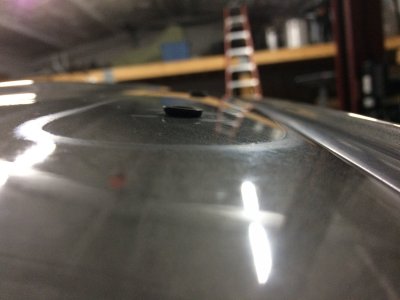
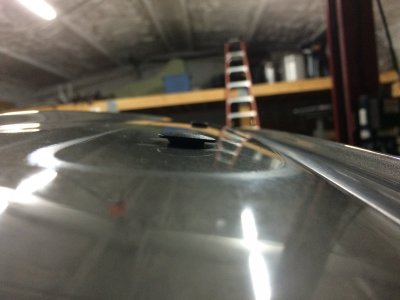
I didn't know the threaded inserts stuck up as high as they do. The caps I painted aren't gonna be nearly as low-profile and clean as I was expecting. By my tolerances, this is HUGE:
IMG_5095.JPG


I cut the stem off a plain, non-painted cap to test. I planned to apply a thin layer of urethane to seal them and fill what I thought would be a really thin gap between the cap and roof. This gap is about the thickness of a nickel, so the sealant would really show:
IMG_5096.JPG


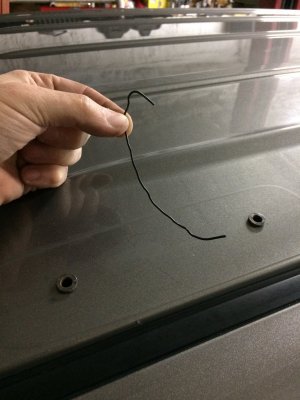
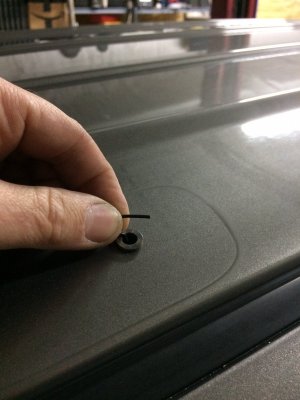
And these are definitely NOT blind holes!:
IMG_5098.JPG

IMG_5099.JPG

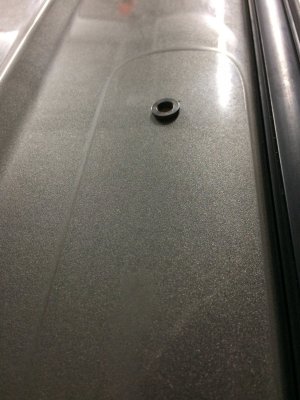
Anyone have any suggestions for removing the footprints? I only have polishing compound and it's not abrasive enough. Should I get rubbing compound or is there something better suited?

IMG_5097.JPG


I'm REALLY tempted to just put the rack back on until I can regroup with a better game plan. For now, I put the screws back in with some black Permatex under the head and ran them all the way in.
 

Geoffsfas10

Full Access Member
Joined
Nov 27, 2019
Posts
761
Reaction score
1,655
Location
St. Louis
Put in an OEM USB port in the front center stack, now I have clean phone charging options. I have an idea for a wireless charger, but not sure if I want to cut up my console insert just yet
 

qcon

Full Access Member
Joined
Jul 21, 2017
Posts
109
Reaction score
252
Location
Huntsville, AL
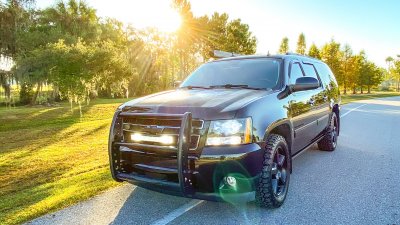
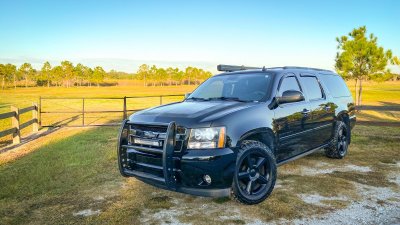
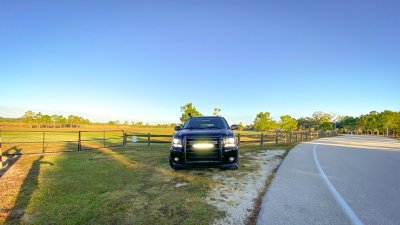
Added a Black Friday light bar to the push bar. Also found a used Diablosport s1000 module for $50. I read that’s it’s basically a rebranded Range AFM. The module really woke up the Suburban and acceleration and ride feels much more responsive and smooth. I am noticing a decreased fuel economy, but it could just be me having more fun stepping on the gas pedal...
012BAFF9-0864-48D9-ACF5-AF1C75AC1B13.jpeg 90424125-E487-4D4D-A773-57135412FFC6.jpeg B811AF58-0491-4CC7-BC45-11DB92669B73.jpeg
 

89Suburban

Bull in the china shop
Supporting Member
Joined
Jan 10, 2013
Posts
13,046
Reaction score
35,846
Location
SE PA
Washed it then removed the roof rack then washed the roof again.

I didn't know the threaded inserts stuck up as high as they do. The caps I painted aren't gonna be nearly as low-profile and clean as I was expecting. By my tolerances, this is HUGE:

View attachment 236598

A tube of silicone is so much cheaper and better looking.


I cut the stem off a plain, non-painted cap to test. I planned to apply a thin layer of urethane to seal them and fill what I thought would be a really thin gap between the cap and roof. This gap is about the thickness of a nickel, so the sealant would really show:

View attachment 236599


And these are definitely NOT blind holes!:
View attachment 236600

View attachment 236601

Anyone have any suggestions for removing the footprints? I only have polishing compound and it's not abrasive enough. Should I get rubbing compound or is there something better suited?
View attachment 236602


I'm REALLY tempted to just put the rack back on until I can regroup with a better game plan. For now, I put the screws back in with some black Permatex under the head and ran them all the way in.

Added a Black Friday light bar to the push bar. Also found a used Diablosport s1000 module for $50. I read that’s it’s basically a rebranded Range AFM. The module really woke up the Suburban and acceleration and ride feels much more responsive and smooth. I am noticing a decreased fuel economy, but it could just be me having more fun stepping on the gas pedal...
View attachment 236612 View attachment 236610 View attachment 236611

bad ass looking rig!!
 

wjburken

Supporting Member
Joined
Dec 26, 2017
Posts
9,790
Reaction score
26,653
Location
Eastern Iowa
Washed it then removed the roof rack then washed the roof again.

I didn't know the threaded inserts stuck up as high as they do. The caps I painted aren't gonna be nearly as low-profile and clean as I was expecting. By my tolerances, this is HUGE:

View attachment 236598


I cut the stem off a plain, non-painted cap to test. I planned to apply a thin layer of urethane to seal them and fill what I thought would be a really thin gap between the cap and roof. This gap is about the thickness of a nickel, so the sealant would really show:

View attachment 236599


And these are definitely NOT blind holes!:

View attachment 236600

View attachment 236601

Anyone have any suggestions for removing the footprints? I only have polishing compound and it's not abrasive enough. Should I get rubbing compound or is there something better suited?

View attachment 236602


I'm REALLY tempted to just put the rack back on until I can regroup with a better game plan. For now, I put the screws back in with some black Permatex under the head and ran them all the way in.
Wow!

Can you put one of your extra tree rivets in a drill and spin it while holding it up against a file to turn it down to the same diameter of the insert? Would that look any better?

That the inserts aren’t blind is a surprising discovery to say the least.
 

Geoffsfas10

Full Access Member
Joined
Nov 27, 2019
Posts
761
Reaction score
1,655
Location
St. Louis
Added a Black Friday light bar to the push bar. Also found a used Diablosport s1000 module for $50. I read that’s it’s basically a rebranded Range AFM. The module really woke up the Suburban and acceleration and ride feels much more responsive and smooth. I am noticing a decreased fuel economy, but it could just be me having more fun stepping on the gas pedal...
View attachment 236612 View attachment 236610 View attachment 236611


rod vault????
 

Rocket Man

Mark
Supporting Member
Joined
Dec 25, 2014
Posts
25,965
Reaction score
50,650
Location
Oregon
Washed it then removed the roof rack then washed the roof again.

I didn't know the threaded inserts stuck up as high as they do. The caps I painted aren't gonna be nearly as low-profile and clean as I was expecting. By my tolerances, this is HUGE:

View attachment 236598


I cut the stem off a plain, non-painted cap to test. I planned to apply a thin layer of urethane to seal them and fill what I thought would be a really thin gap between the cap and roof. This gap is about the thickness of a nickel, so the sealant would really show:

View attachment 236599


And these are definitely NOT blind holes!:

View attachment 236600

View attachment 236601

Anyone have any suggestions for removing the footprints? I only have polishing compound and it's not abrasive enough. Should I get rubbing compound or is there something better suited?

View attachment 236602


I'm REALLY tempted to just put the rack back on until I can regroup with a better game plan. For now, I put the screws back in with some black Permatex under the head and ran them all the way in.
That sucks. I don’t understand why GM went to that system of fastening the racks on the NNBS. It’s the first I’ve heard of it actually. I would be tempted to get an Esky rack and PTM and just leave the cross rails off. That would look cleaner to me than those huge rivnuts sticking up plus that would provide better protection against leaking since there’s gaskets involved.
 

Forum statistics

Threads
129,106
Posts
1,810,365
Members
92,181
Latest member
16yukon

Latest posts

Top