What did you do to your NNBS GMT900 Tahoe/Yukon Today?

Disclaimer: Links on this page pointing to Amazon, eBay and other sites may include affiliate code. If you click them and make a purchase, we may earn a small commission.

R3cord303

Posse In Effect
Joined
Feb 28, 2019
Posts
1,166
Reaction score
1,421
Location
Oregon Valley
Don't think about it- be about it. That dirty urinal water color of your current bulbs is doing an injustice. Get whatever will match your DRLs.
pft. Will see. This month I fixed DRLs and am gonna take care of the cabin air filter. Next month I’m buying HPTuners to disable AFM. Two months from now I’m gonna do LED headlights and fog lights (maybe reverse lights too). Plan is Morimoto 2stroke gen 2 for headlights and a guy on facebook has Morimoto 2stroke Gen 1s which are supposed to fit the fog lights housings. He’s had them for sale for like 4 months so hopefully I’ll be able to get them for like $50
 

randeez

Full Access Member
Joined
Sep 29, 2017
Posts
6,190
Reaction score
18,926
Location
south florida
the fuel st/lt trim learning will be disabled under open loop/enrichment(or enleanment? dunno it thats a word but think deacceleration) conditions.

basically when the desired o2 reading isnt stoich its disabled, the calculation will still happen but wont contribute to the long term.
 

Doubeleive

Wes
Supporting Member
Joined
Nov 7, 2017
Posts
23,706
Reaction score
34,649
Location
Stockton, Ca.
All looks pretty good. The long terms are at 5. That's near the top end of what you'd like to see. Watch those for the next little bit and see if they keep creeping up.

The short terms are striving for stoich. The long terms are "more important" because they adjust based on what the short terms have been doing. If it sees the short terms adding fuel consistently, the long term bumps up so the short term gets closer to 0.

Lame analogy:

The short term guy is shooting free throws. His normal shot (0 trim) keeps falling short, so he shoots a little harder (5 trim) and starts making them (stoich). The long term guy says "we want your trim at 0“, so he moves the free throw line closer to the hoop (long term trim 5). Now the short term guy goes back to his normal shot (0 trim) and still makes it.

This is a constant game between the two. If the shooter starts launching them off the backboard, the long term moves the line back again. On and on. If the long term ever gets to +-25 it's gonna throw the rich or lean code for that bank.


What's the volatility thing you're talking about? I don't see that...
James said the "fuel volatility low" is normal it's in the list I pictured, thanks for the info
 

HiHoeSilver

Away!
Joined
Feb 28, 2017
Posts
10,919
Reaction score
14,571
Location
Chicago
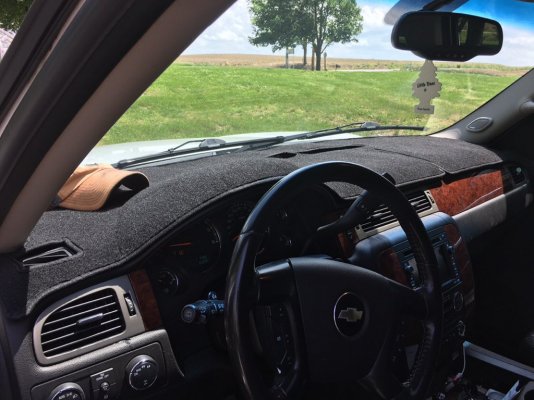
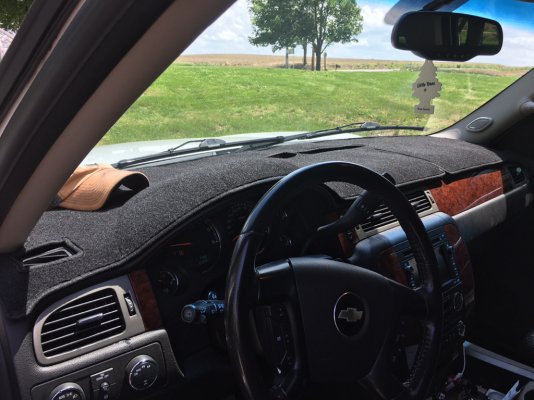
Got this a few weeks back, but forgot to snap a pic. I got tired of looking at the cracked dash so I carpeted it. I had a big crack at the passenger airbag and a lot of little ones behind the gauge cluster.

2d189743a6b77aaeb37c8c34fb968921.jpg

I think it looks much better, the wife isn’t as convinced.


https://www.ebay.com/itm/2007-2013-...R-MAT-black-/161779640910?txnId=1846349757006

Hmmm. Have to agree with wife on this one. Looks ok up until the center console. From there to the right looks too long, like your welcome mat is hanging off the front of the porch.
 

R3cord303

Posse In Effect
Joined
Feb 28, 2019
Posts
1,166
Reaction score
1,421
Location
Oregon Valley
Okay fellas. I'm back, post cabin air filter retrofit install. After 218,000 miles, there was a metric crap ton of pine needles and dust in the HVAC box thing in front of the evaporator. To make matters harder, its been raining here, and I had the defrost on this morning while i was driving around. So I don't know how I didn't expect this but the evaporator was all wet which as far as I can tell is normal- given that the refrigerant as it evaporates in the evaporator expands and cools the coil sub-ambient, which is why it gets moisture on it- which is why the AC box needs a drain (thankfully mine is functional). I shoved paper towels up in it and then removed them and then worked at it with a toothbrush to remove as much crap as possible, shoved the cabin air filter in the slot, and then put the door on. Tighened the screw to make the little foam gasket compress a bit, and then put the kick panel cover back on. Fingers crossed for no leaks because I can't stand water leaks. I'm going to pull the cover down in a few days because its got foam insulation on it and see if its damp. If it is, I'm going to pull the filter door off, and drown it in RTV, then put it back on there. Given that you only really need to change cabin air filters once every year or two, I'd be okay with having to scrape some off if it means I don't have moldy carpet. Prob also going to pull the AC drain tube off in the engine bay and run a pipe cleaner thru it a little bit just to see what happens. Will report back.
 

derfman00

Member
Joined
May 14, 2019
Posts
85
Reaction score
80
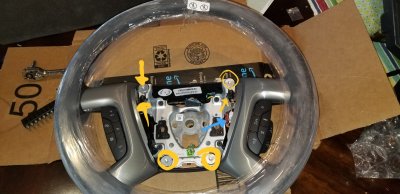
Step one

Remove hex bolts. T-30 silver .T-15 black

Also remove the red clip (blue arrow)

Remove bracket.

20190525_185247.jpg
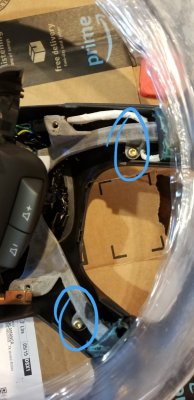
[Placeholder for forgotten step]

Remove those
20190525_185435.jpg


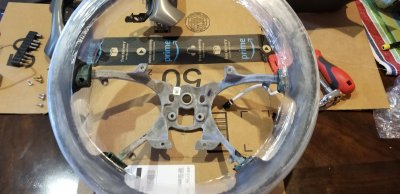
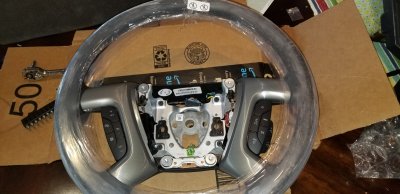
Stripped down steering wheel.
20190525_184314.jpg

Now to run to AutoZone to borrow a steering wheel puller to remove my wife's steering wheel.

I'll take more pics of the reassembly. I suck at archiving how to articles - here is a YouTube video that touches base on some steps. :rofl:

By the way. I'm switching this ebony wheel into a brown interior vehicle. I'm swapping the brown and black rear covers of the steering wheels to get as much brown as I can. I think the black wheel will look ok - if not, I'll recover the wheel in brown.

20190525_182902.jpg
 
Last edited:

PG01

Supporting Member
Joined
Nov 6, 2016
Posts
14,758
Reaction score
17,877
Location
Up here to the right
Okay fellas. I'm back, post cabin air filter retrofit install. After 218,000 miles, there was a metric crap ton of pine needles and dust in the HVAC box thing in front of the evaporator. To make matters harder, its been raining here, and I had the defrost on this morning while i was driving around. So I don't know how I didn't expect this but the evaporator was all wet which as far as I can tell is normal- given that the refrigerant as it evaporates in the evaporator expands and cools the coil sub-ambient, which is why it gets moisture on it- which is why the AC box needs a drain (thankfully mine is functional). I shoved paper towels up in it and then removed them and then worked at it with a toothbrush to remove as much crap as possible, shoved the cabin air filter in the slot, and then put the door on. Tighened the screw to make the little foam gasket compress a bit, and then put the kick panel cover back on. Fingers crossed for no leaks because I can't stand water leaks. I'm going to pull the cover down in a few days because its got foam insulation on it and see if its damp. If it is, I'm going to pull the filter door off, and drown it in RTV, then put it back on there. Given that you only really need to change cabin air filters once every year or two, I'd be okay with having to scrape some off if it means I don't have moldy carpet. Prob also going to pull the AC drain tube off in the engine bay and run a pipe cleaner thru it a little bit just to see what happens. Will report back.
Not gonna leak thru new door and going up from underneath passenger side behind front wheel will be easier to see/clean drain.

https://www.tahoeyukonforum.com/threads/a-c-drain-location.93315/
 

Forum statistics

Threads
129,203
Posts
1,812,059
Members
92,303
Latest member
44Dan
Top