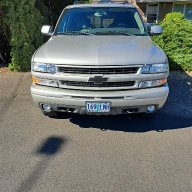
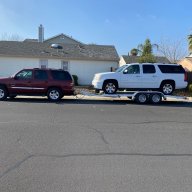
Transmission Out, What Maintenance While I’m in There

Disclaimer: Links on this page pointing to Amazon, eBay and other sites may include affiliate code. If you click them and make a purchase, we may earn a small commission.

OP
OP
CTX-SLPR

CTX-SLPR

Member
Joined
Nov 26, 2023
Posts
99
Reaction score
108
Location
College Station, TX
A heat gun. Almost a necessity to unplug the harness from the transmission. It also helps to remove your intake, to tilt the back of the transmission down. Also to reach the upper bellhousing bolts. While you're in there you should consider a new oil pressure sending unit and intake manifold gasket
See List, they're on there minus the oil pressure sensor. I've had the transmission harness out twice while chasing what I had hoped was just valve body issues, no heat gun needed then.
Oh yeah. Since the starters coming out, and if it looks really old.... It's a great time for a new AC Delco. Oil cooler line set. If you want to preserve your O2 sensors, I recommend taking them out before using any sort of impact on the exhaust. And well they're out.... It's a good excuse to splurge on a new set of O2 sensors, LOL
O2s are new
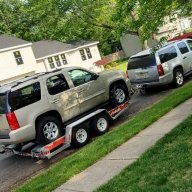
I have no oil cooler on the passenger model RWD spec. When the radiator needs changed I'll get the lines and add one but for now it's just a new gasket for the leaking block off plate.
 
OP
OP
CTX-SLPR

CTX-SLPR

Member
Joined
Nov 26, 2023
Posts
99
Reaction score
108
Location
College Station, TX
Any feedback on the Melling MOGP100HV barbell?
MOGP-100HP-1-TOP.jpg


Worth the extra $17 over the GM or standard Melling?
 

rdezs

Full Access Member
Joined
Nov 6, 2023
Posts
1,385
Reaction score
2,578
I've been using ICT on the past couple builds. No issues. Not really a high-tech part. Well most of us cringe at OEM using plastic for it, I can't say that I've ever seen one that failed. (It's the lifter trays that I've never got over. I've never had a genuine GM one fail, but still..... Putting plastic in 200° oil for years and years?)
 
OP
OP
CTX-SLPR

CTX-SLPR

Member
Joined
Nov 26, 2023
Posts
99
Reaction score
108
Location
College Station, TX
All was going well till I can't get the new rear main seal in past flush with the OUTSIDE of the plate. I have already ruined one seal trying to get it to drive farther in. Every thing I've watched just taps it in with a plastic lid or pipe coupler and I couldn't get the first Fel-Pro to seat using my press? I heated the plate up in the sun and lightly oiled the seal and inside of the bore. It goes in just fine till the top of the seal is flush with the transmission side of the plate but I know for a fact the original seal was down at the bottom of the counterbore. Any ideas for what I'm missing?
 

OR VietVet

GMT800 2005 Tahoe Z71
Navy Supporting Member
Joined
Oct 8, 2014
Posts
23,939
Reaction score
44,672
Location
Willamette Valley
Right where the seal ring rolls down, at that 90 degree spot, it can be thicker there. Get another seal and be very careful and use a fine file and shave it a bit. Then get the CORRECT seal driver puck and go STRAIGHT in.

I say be easy with the file because that portion is what helps hold the seal in place, Add some fine grease around the edge when you install.
 

rdezs

Full Access Member
Joined
Nov 6, 2023
Posts
1,385
Reaction score
2,578
If the seal was bottomed out in the bore in the rear cover when you took it off, that indicates someone has already replaced the seal and possibly the cover sometime ago. The factory installs the seals flush with the outside edge of the bore.

It's customary when replacing the seal to go ahead and bottom it out so the seal rides in a different spot on the crankshaft in case you have a wear groove. If your crankshaft looks good, nothing wrong with being flush with the outside of the bore.

Considering it's been replaced before, you may or may not have an oem rear cover. They're not expensive, and not knowing exactly what brand rear cover you have, I might lean towards replacing it with a genuine GM AC Delco.
 
OP
OP
CTX-SLPR

CTX-SLPR

Member
Joined
Nov 26, 2023
Posts
99
Reaction score
108
Location
College Station, TX
I figured it out and managed to not ruin the second seal in the process. The Fel-Pro seal has a slightly taller metal lip on it so when you seat it down it leaves a bigger gap under the seal so it looks like you don't have it seated. In short I did it right the first time but didn't realize it so mangled the seal trying to push it in farther. The second seal I realized what was going on before I did more than start to move it back out gently and saw the rim move along with the rubber.

Transmission is now back in though I called it for the night once I had the trans cross member and it's bolts back in. I'm exhausted after benchpressing the trans off of the trans jack so my son could start the bellhousing bolts. Is nice to have a high school aged son for stuff like this.
 
OP
OP
CTX-SLPR

CTX-SLPR

Member
Joined
Nov 26, 2023
Posts
99
Reaction score
108
Location
College Station, TX
I now have a functional Yukon XL again! Some take aways and then some notes on the final chapter.
1. The Fel-Pro rear main seal installs at a different depth of the seal compared to the GM so it won't look the same when installed. Push it till it stops and then check if there's a step where the rubberized metal rim of the seal hasn't bottomed out in the bore. The gap behind the seal is supposed to be there in the Fel-Pro design
2. The large ears on the Al driveshaft make it a real pain to get the joints out. If the cap stops moving, don't hit it harder; turn it over and go the other direction if it's not bottoming out on the main body or get out a punch that fits between the ear and the pin. My 20mm deep Kobalt impact socket was the perfect size to make sure things were straight
3. Get the top transmission bellhousing bolt from the top, super easy to reach if you've pulled the intake off
4. Don't underestimate how tall the transmission is. I did this on the ground with the vehicle up on ramps on top of a single layer of 2x6s to get it up and I was able to get the bellhousing out through the front wheel kickup but had to tilt it down to get it under the running boards.
5. A 40k cooler is almost certainly going to block the clean airflow to the outside temp sensor, relocate it the first time vs. learning that and having to pull the bumper off again.

When I first drove it there was a ton of oil dripping off of the back side of the engine and out the bellhousing. I was afraid I was going to have to pull the exhaust and redo the rear main seal. However after sitting overnight I had to move it in the driveway and I threw a piece of cardboard under it and only found 2 half dollar sized spots the next day. Decided to take it on a long test drive and then repeat, 1 slightly larger than quarter drip mark the next day. I think I had to heat cycle the rear main to get it to seat because no new drips!
The 40k cooler almost seems too effective, highest temp I saw yesterday in 100º weather with sticky humidity was 148º sitting at a long light after the freeway. Normal driving is about 140º. Might end up masking part of it off unless I'm towing to get the temps up to the 160-175º range.
 

rdezs

Full Access Member
Joined
Nov 6, 2023
Posts
1,385
Reaction score
2,578
The felpro rear main seals go on completely dry, not even the slightest film of oil. Wipe down the crankshaft with brake cleaner prior to installing. Supposedly if there's oil on the crankshaft or on the seal lip, it's a guaranteed leak.... Something about the new Teflon seals, installing dry goes against everything for the past 100 years.
 

West 1

Full Access Member
Joined
Jan 20, 2023
Posts
703
Reaction score
1,513
The Teflon seals have been used in Heavy Duty Diesel engines for 30 years. They are proven and are the very best rear main seal.

As stated they have to go in clean and dry. The crank must be clean and dry also. Teflon will impregnate into the crankshaft surface and you end up with teflon rubbing on teflon. That is your seal. The groves on the teflon seal will pump excess oil back into the oil pan.

If you have a leaking teflon seal it is most commonly the plate gasket leaking and not the seal. They can last almost a million miles with no wear and no leaks. Very good design.

Congratulations on getting your tranny back in.

I wanted to thank a previous posted for mentioning removing the intake manifold to get better access to the transmission bolts. I have not done that but I have spent many hours getting the tranny bolts back in and always searched for a better way. I may do that next time.
 

solli5pack

Full Access Member
Joined
Jun 17, 2023
Posts
504
Reaction score
775
Just for future readers of this fourm. If using a transmission jack use the safety strap to hold it down. Transmissions slip off real easy....Here's a picture of me not using the strap!
1000008017.jpg
 

alvocado

Allen
Joined
Feb 18, 2025
Posts
251
Reaction score
370
Location
Cincinnati, OH
Just for future readers of this fourm. If using a transmission jack use the safety strap to hold it down. Transmissions slip off real easy....Here's a picture of me not using the strap!
View attachment 464986

I will second this recommendation. After getting a little too bold and not using a strap over July 4th weekend, I dumped my trans off the jack while trying to wrestle it back onto the dowel pins. It fell into my chest then dropped onto my elbow, dumping at least 5 quarts of fluid out of the fill hole onto my garage floor. 70lbs of cat litter later, I used some ratchet straps across the frame rails to get it back onto the jack.
 

rdezs

Full Access Member
Joined
Nov 6, 2023
Posts
1,385
Reaction score
2,578
I use that same transmission jack that was pictured. I put a half inch piece of plywood between the transmission pan and the jack itself, about 2 in wider all around compared to the size of the transmission pan. With the plywood screwed down to the top of the transmission jack, I've never had the transmission slip. I usually don't use the straps and haven't had a problem. But I can see if you have the transmission sitting directly on the jack, metal to metal, that could be very slippery indeed.
 

alvocado

Allen
Joined
Feb 18, 2025
Posts
251
Reaction score
370
Location
Cincinnati, OH
I use that same transmission jack that was pictured. I put a half inch piece of plywood between the transmission pan and the jack itself, about 2 in wider all around compared to the size of the transmission pan. With the plywood screwed down to the top of the transmission jack, I've never had the transmission slip. I usually don't use the straps and haven't had a problem. But I can see if you have the transmission sitting directly on the jack, metal to metal, that could be very slippery indeed.
Metal-to-metal contact is definitely the issue. The trans starts to slide on the jack plate.
 
OP
OP
CTX-SLPR

CTX-SLPR

Member
Joined
Nov 26, 2023
Posts
99
Reaction score
108
Location
College Station, TX
It's worse if the pan is dented. The outgoing pan was in great shape and didn't slide much (though I did have it strapped down). The ingoing transmission had a usable but not perfect pan and we were constantly chasing it around the jack surface to keep it lined up. If it hadn't been strapped on it would have gone over the side multiple times.
 

solli5pack

Full Access Member
Joined
Jun 17, 2023
Posts
504
Reaction score
775
I contemplated trying to build some type of cradle to attach to the top of the jack but was to busy trying to get the truck done. I ended up using the strap and even with that the trans was trying to slip out but after an hour of so of wrestling got it back in. Definitely a 6 pack + job! Especially when doing it in the summer!
 

Forum statistics

Threads
138,098
Posts
1,999,057
Members
103,024
Latest member
jpurdie
Back
Top