
Rocket Man's 2008 Bagged CC Silverado Build AKA "THE MACHINE"

Disclaimer: Links on this page pointing to Amazon, eBay and other sites may include affiliate code. If you click them and make a purchase, we may earn a small commission.

OP
OP
Rocket Man

Rocket Man

Mark
Supporting Member
Joined
Dec 25, 2014
Posts
26,679
Reaction score
52,954
Location
Oregon
F8D659E1-B6AC-4C93-8854-BA5C79FB76F1.jpeg
1C055368-5B62-4146-A63C-186821603877.jpeg
I’m usually pretty good with computers and such but this bcm programming is killing me. I hooked up the Tech2 to the OBD, connected the 12v adapter to an extension cord, connected my laptop to the Tech2 and plugged it into the extension cord, got cables going everywhere. Set it all up so i didn’t need to move it, brought my iPad out so I could read the instructions from @Doubeleive from earlier in my thread. Fired up the laptop and went to the TDS website and added the VIN to my subscription, and followed all of Wes’s instructions, got through all the menus to where it asked what module I wanted to program. I chose “program bcm” and it didn’t do what Wes said it would- it didn’t tell me to read the bcm calibration from the Tech2. I could click on all the different parts of the programming which showed me all the updates available but the button that said “next” was greyed out. All I could do was cancel or go back. I disconnected everything and tried to start the truck ( I had swapped in a bcm I bought off Amazon that was listed as “used-like new” so I wasn’t sure wth) and tried to start the truck. Nothing. I swapped the original one back in, truck fired right up but has the same symptoms, so I hooked everything back up and tried to update it by programming it but got to the same point on the menu and it was greyed out. Shit. And I didn’t even try programming the door module to see if it will do that because I was just so frustrated. Help Wes!
 

ks03

Fool Excess Member
Joined
May 3, 2019
Posts
307
Reaction score
299
I’ve been out of the dealership for years, but just spitballing here, take it with a grain of salt...
I was thinking to read a calibration, you select a different option when you power up the tech 2. like only 2 or so screens in, before building the vehicle. If it’s just selecting options, note what they are in the old module if you’re having problems, but usually just setup by rpo or looking at what is actually present in the vehicle.
Sometimes it seems like one new module had to be setup in other modules. Might have to “setup” a new bcm in the pcm, sdm, or tdm/theft deterent. The setup is basically just telling the other module a new bcm is ok, hardly anything to setup, just has to be done in a different module
 
OP
OP
Rocket Man

Rocket Man

Mark
Supporting Member
Joined
Dec 25, 2014
Posts
26,679
Reaction score
52,954
Location
Oregon
I’ve been out of the dealership for years, but just spitballing here, take it with a grain of salt...
I was thinking to read a calibration, you select a different option when you power up the tech 2. like only 2 or so screens in, before building the vehicle. If it’s just selecting options, note what they are in the old module if you’re having problems, but usually just setup by rpo or looking at what is actually present in the vehicle.
Sometimes it seems like one new module had to be setup in other modules. Might have to “setup” a new bcm in the pcm, sdm, or tdm/theft deterent. The setup is basically just telling the other module a new bcm is ok, hardly anything to setup, just has to be done in a different module
I thought I was using it as a pass-through so I did everything through the tds web program on the laptop. That’s where I log in and select the options to go into the program modules section. Nowhere does it tell me to do anything with the Tech2 except hook it to the laptop and vehicle, turn it on and get it to the start screen.
 
OP
OP
Rocket Man

Rocket Man

Mark
Supporting Member
Joined
Dec 25, 2014
Posts
26,679
Reaction score
52,954
Location
Oregon
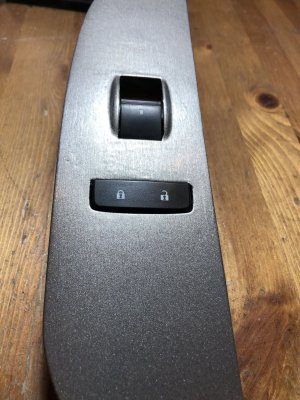
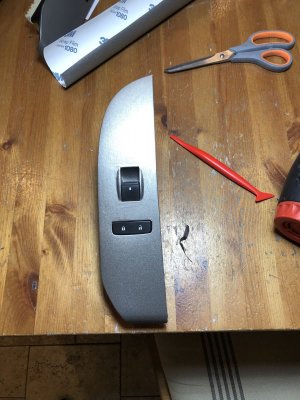
Well even after an hour of tech support from @Doubeleive (thanks for trying Wes) I can’t program the bcm. As for the door switch module, there’s no use even trying. I tried to connect the door harness I bought from a wrecking yard and it only has the main gray connector that goes next to the fuse box and one small connector and mine has the gray connector and 2 more large connectors. They’re completely different so I think the whole interior cab or dash harness would have to be swapped, plus I was reading you need either a different bcm and use an LTZ or Tahoe VIN to flash it to or at least flash the existing bcm to that VIN. I’m going to swap my front switches into the LTZ housings, do a bit of body work to them, and wrap them. I guess they won’t be brushed metal but I’ll make them look good. Sigh.
 

ks03

Fool Excess Member
Joined
May 3, 2019
Posts
307
Reaction score
299
On your screen shots it’s red by “locking” if you click on it, does it give you options, and give you a green check mark after selecting one?
 
OP
OP
Rocket Man

Rocket Man

Mark
Supporting Member
Joined
Dec 25, 2014
Posts
26,679
Reaction score
52,954
Location
Oregon
On your screen shots it’s red by “locking” if you click on it, does it give you options, and give you a green check mark after selecting one?
No. I can’t change the green check marks, or the red dot. If I highlight them it gives me information on updates if they’re available but the “next” button is greyed out and nothing I do will change that. I’m gonna call their tech support and have them walk me through it.
 

ks03

Fool Excess Member
Joined
May 3, 2019
Posts
307
Reaction score
299
After locking is highlighted in the top box, in the lower box it would have info on the updates. Locking is red because a selection needs to be made somewhere in the lower box, with enough options and versions, you may need to scroll to the right and or down to get to selectable boxes
 
OP
OP
Rocket Man

Rocket Man

Mark
Supporting Member
Joined
Dec 25, 2014
Posts
26,679
Reaction score
52,954
Location
Oregon
After locking is highlighted in the top box, in the lower box it would have info on the updates. Locking is red because a selection needs to be made somewhere in the lower box, with enough options and versions, you may need to scroll to the right and or down to get to selectable boxes
There’s nothing. I scrolled everywhere, there’s no options. I cant do anything in the lower box. There are no selectable boxes. Something is wrong, I’ll talk to tech support. Thanks for trying to help.
 
OP
OP
Rocket Man

Rocket Man

Mark
Supporting Member
Joined
Dec 25, 2014
Posts
26,679
Reaction score
52,954
Location
Oregon
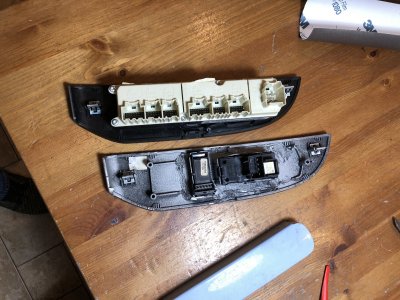
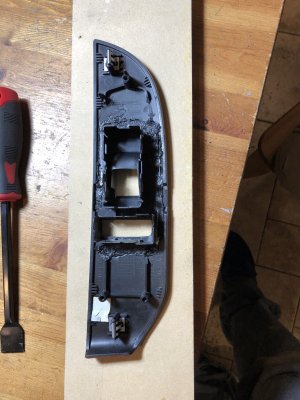
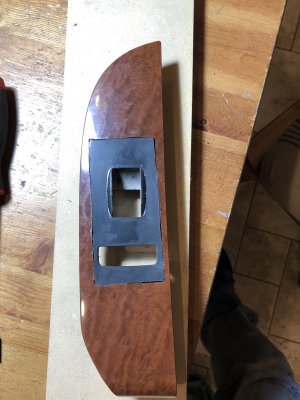
I started on the passenger front switch Frankenstein mod. Got it welded together. The switches are in fact lined up perfect to the right edge like they were originally, the piece I cut out of my old switch bezel had to be made out of square so it would fit. Gotta bondo, sand and wrap it. It’s gonna be fine, lol.

00C097FA-D1D3-4D3C-8AA8-7B2F57A8C965.jpeg 5533658B-D971-41F9-90E4-068C96B58935.jpeg
 

iamdub

Full Access Member
Joined
Apr 23, 2016
Posts
20,821
Reaction score
45,014
Location
Li'l Weezyana
I started on the passenger front switch Frankenstein mod. Got it welded together. The switches are in fact lined up perfect to the right edge like they were originally, the piece I cut out of my old switch bezel had to be made out of square so it would fit. Gotta bondo, sand and wrap it. It’s gonna be fine, lol.

View attachment 240605 View attachment 240606

I approve of and like this cheat. :thumbsup:
 

iamdub

Full Access Member
Joined
Apr 23, 2016
Posts
20,821
Reaction score
45,014
Location
Li'l Weezyana
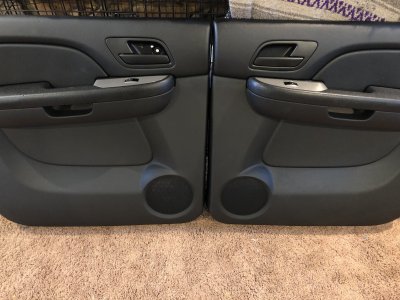
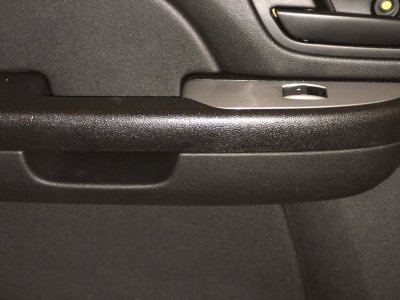
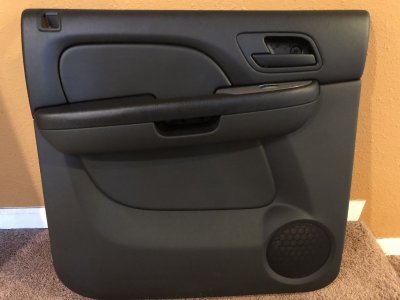
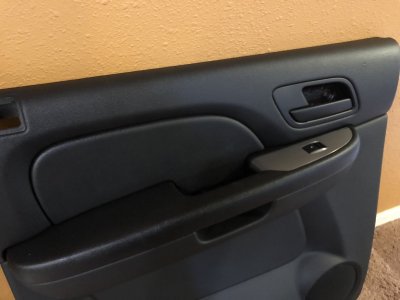
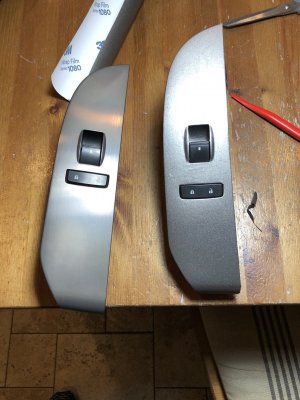
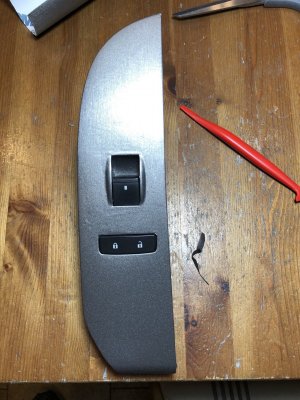
Well there’s no way to wrap the handles or their housings so that’s not an option. I like them in flat to match. I finished the passenger rear panel today. It’s a lot of work on each panel to get all the parts painted without f-ing it up. I had to re-sand the handles and housings twice each before they came out good, and I have to be super careful painting the panels to not get too much paint on the texture so they don’t LOOK painted. The other rear panel has a small 3/16” diameter nick in the upper part and I’m repairing it with a kit- hopefully the texture matches good. In the pic with both panels you can see the matte handle on the left one, flat on the right.

View attachment 240557 View attachment 240558 View attachment 240559 View attachment 240560
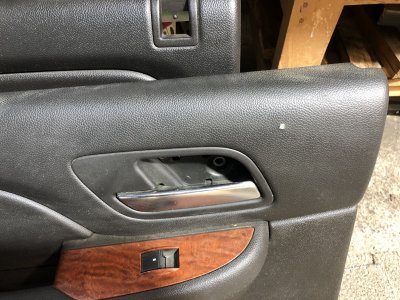
I didn't mean to wrap the handles cuz I know that ain't happening. When I said "if they could match the brushed trim", I was thinking silver paint with Scotch-Brite pad drug across it to make a brushed finish, then cleared. You have waaaay too much going on to even consider adding such a tedious venture! Regardless, I think having less flair fits the overall cleaner scene you have here. Making the handles match rather than accenting them is the better choice, IMO.
 
OP
OP
Rocket Man

Rocket Man

Mark
Supporting Member
Joined
Dec 25, 2014
Posts
26,679
Reaction score
52,954
Location
Oregon
3 out of 4 door panels are now done. The driver front (third one I’ve bought) will be here Tuesday and I’m really hoping it’s usable. The driver rear came with a hole in the upper part that I missed in the photos, not sure how but I went back to the ad pics and it was there. It’s not as noticeable after I repaired it.

59BDE26F-09BF-4A08-B34C-3101497AA434.jpeg C350B2A9-C6F8-48C0-8752-04400BB062A5.jpeg FDBCE41A-05B2-4E36-B95F-63DBA90519D9.jpeg 3B98EA27-0329-4B7F-8EC4-10FA365EC672.jpeg D3E56CFD-1772-499A-A262-754F47D1766A.jpeg
 

Tonyrodz

Resident Resident
Joined
Feb 16, 2012
Posts
33,342
Reaction score
51,831
Location
Central Jersey
3 out of 4 door panels are now done. The driver front (third one I’ve bought) will be here Tuesday and I’m really hoping it’s usable. The driver rear came with a hole in the upper part that I missed in the photos, not sure how but I went back to the ad pics and it was there. It’s not as noticeable after I repaired it.

View attachment 240628 View attachment 240629 View attachment 240630 View attachment 240631 View attachment 240632
That's the type of stuff I fix Mark. Just curious--how'd you fix it? Or did you just spray over it?
 
OP
OP
Rocket Man

Rocket Man

Mark
Supporting Member
Joined
Dec 25, 2014
Posts
26,679
Reaction score
52,954
Location
Oregon
Ok so I suck at bodywork. Actually I just need to practice patience and I can do it. I just didn’t have much today. Every time I re-sanded it the worse if got. I need to get some primer tomorrow and sand it down, add filler and repaint, sand it then primer and sand again. I just wrapped it to see how much shows and like I thought it would, pretty much all does. I will re do it tomorrow but at least I know it’s possible. I’m also considering using a clear over the wrap to see if it matches the OEM brushed better. It’s weird how many connections the LTZ switches have compared to mine.

BEBA1AE1-75A8-4F01-8F04-BCA5057570A4.jpeg 0F8CC511-3905-49AA-A769-978FEB6D0F96.jpeg 081CED3A-100D-4559-AF2B-086FB5A0C30B.jpeg 14EDE734-C7F5-475F-A1A4-FCD084F0C67A.jpeg
 

HiHoeSilver

Away!
Joined
Feb 28, 2017
Posts
10,918
Reaction score
14,578
Location
Chicago
Ok so I suck at bodywork. Actually I just need to practice patience and I can do it. I just didn’t have much today. Every time I re-sanded it the worse if got. I need to get some primer tomorrow and sand it down, add filler and repaint, sand it then primer and sand again. I just wrapped it to see how much shows and like I thought it would, pretty much all does. I will re do it tomorrow but at least I know it’s possible. I’m also considering using a clear over the wrap to see if it matches the OEM brushed better. It’s weird how many connections the LTZ switches have compared to mine.

View attachment 240666 View attachment 240667 View attachment 240668 View attachment 240669

Looks great! Your OCD is accelerating.
 

Forum statistics

Threads
138,100
Posts
1,999,086
Members
103,027
Latest member
MonteJ
Back
Top