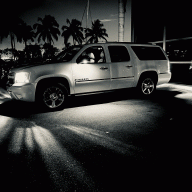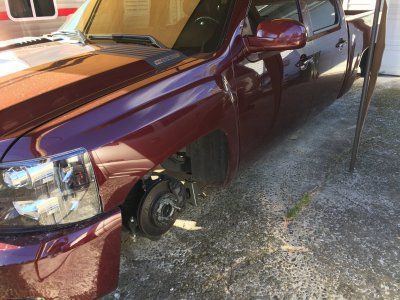
Rocket Man's 2008 Bagged CC Silverado Build AKA "THE MACHINE"

Disclaimer: Links on this page pointing to Amazon, eBay and other sites may include affiliate code. If you click them and make a purchase, we may earn a small commission.

OP
OP
Rocket Man

Rocket Man

Mark
Supporting Member
Joined
Dec 25, 2014
Posts
26,679
Reaction score
52,954
Location
Oregon
The Machine has been doing a good job as my daily since I broke The Beast 2 weekends ago. But the other day it seemed to stumble a bit as I was driving. It didn’t do it again until tonight on the way home from work. I just got off the freeway and was on a road with a 40 mph limit and as I tried to accelerate it felt like it wasn’t getting gas and I had to pump the pedal a bit to maintain speed and rpm’s. Then the CEL light came on and it died as I got into a left turn lane. As the light was about to turn green I started it up and had to keep pumping the gas pedal to keep it running. It was only a couple blocks to home and I made it. I shut it off, then got my tech 2 and read the codes and took pics ( which turned out so blurry I can’t read them) and then erased them, hoping clearing them would let it run again. It started right up and I drove around the block a couple times. Then I let it run for awhile and went in and tried looking up the codes which I discovered I couldn’t see in the ****** pics. I remember one was a lean code and one was for the fuel pressure control module. I decided to have a look under to see if any connections were bad or wet, and looked at the fuel lines. I found a crimp in a fuel line where they had routed a flex line wrong so I fixed that, routing it so the line was straighter. Then there was an almost complete crimp of a vapor line so I fixed that too. No pics of the fuel line but I hit one of the vapor line. I’m hoping it’s not the fuel pump since it’s almost new but I did run it out of gas during the summer. I’m keeping my fingers crossed. As well as considering a purchase of a NBS Tahoe to hold me over until I fix The Beast. Just a lot going bad for me lately including some money issues so IDK. Just hanging in there.
2E635660-FCCC-4170-84E2-8412E2246F1B.jpeg 866600AB-8C36-40E7-A24C-AA9A1648CAF0.jpeg
 

kbuskill

***CAUTION*** I do my own stunts!
Joined
Mar 11, 2017
Posts
5,861
Reaction score
9,930
Location
NE. FL.
The Machine has been doing a good job as my daily since I broke The Beast 2 weekends ago. But the other day it seemed to stumble a bit as I was driving. It didn’t do it again until tonight on the way home from work. I just got off the freeway and was on a road with a 40 mph limit and as I tried to accelerate it felt like it wasn’t getting gas and I had to pump the pedal a bit to maintain speed and rpm’s. Then the CEL light came on and it died as I got into a left turn lane. As the light was about to turn green I started it up and had to keep pumping the gas pedal to keep it running. It was only a couple blocks to home and I made it. I shut it off, then got my tech 2 and read the codes and took pics ( which turned out so blurry I can’t read them) and then erased them, hoping clearing them would let it run again. It started right up and I drove around the block a couple times. Then I let it run for awhile and went in and tried looking up the codes which I discovered I couldn’t see in the ****** pics. I remember one was a lean code and one was for the fuel pressure control module. I decided to have a look under to see if any connections were bad or wet, and looked at the fuel lines. I found a crimp in a fuel line where they had routed a flex line wrong so I fixed that, routing it so the line was straighter. Then there was an almost complete crimp of a vapor line so I fixed that too. No pics of the fuel line but I hit one of the vapor line. I’m hoping it’s not the fuel pump since it’s almost new but I did run it out of gas during the summer. I’m keeping my fingers crossed. As well as considering a purchase of a NBS Tahoe to hold me over until I fix The Beast. Just a lot going bad for me lately including some money issues so IDK. Just hanging in there.
View attachment 212695 View attachment 212696

It's hard to "like" this post seeing as you are having issues on several fronts... BUT

I admire your resilience and perseverance.

Good luck with ALL.
 

bottomline2000

Full Access Member
Joined
Oct 21, 2009
Posts
1,722
Reaction score
991
Location
Dallas, TX
The Machine has been doing a good job as my daily since I broke The Beast 2 weekends ago. But the other day it seemed to stumble a bit as I was driving. It didn’t do it again until tonight on the way home from work. I just got off the freeway and was on a road with a 40 mph limit and as I tried to accelerate it felt like it wasn’t getting gas and I had to pump the pedal a bit to maintain speed and rpm’s. Then the CEL light came on and it died as I got into a left turn lane. As the light was about to turn green I started it up and had to keep pumping the gas pedal to keep it running. It was only a couple blocks to home and I made it. I shut it off, then got my tech 2 and read the codes and took pics ( which turned out so blurry I can’t read them) and then erased them, hoping clearing them would let it run again. It started right up and I drove around the block a couple times. Then I let it run for awhile and went in and tried looking up the codes which I discovered I couldn’t see in the ****** pics. I remember one was a lean code and one was for the fuel pressure control module. I decided to have a look under to see if any connections were bad or wet, and looked at the fuel lines. I found a crimp in a fuel line where they had routed a flex line wrong so I fixed that, routing it so the line was straighter. Then there was an almost complete crimp of a vapor line so I fixed that too. No pics of the fuel line but I hit one of the vapor line. I’m hoping it’s not the fuel pump since it’s almost new but I did run it out of gas during the summer. I’m keeping my fingers crossed. As well as considering a purchase of a NBS Tahoe to hold me over until I fix The Beast. Just a lot going bad for me lately including some money issues so IDK. Just hanging in there.
View attachment 212695 View attachment 212696
It's a shame you not closer. I have an extra engine hoist taking up space in my garage that would make that pump change ez. You not the only one being put thru the ringer. Tis the season I guess. Hang in there, if anything powering thru a trans swap after a motorcycle accident has proven you bend, but don't break.

Sent from my SAMSUNG-SM-T377A using Tapatalk
 
OP
OP
Rocket Man

Rocket Man

Mark
Supporting Member
Joined
Dec 25, 2014
Posts
26,679
Reaction score
52,954
Location
Oregon
It started cutting out again on the way home from work tonight so I hooked up my Tech 2 in the parking lot of my bank and it had a code in the fuel pump control module for insufficient fuel pump flow. I figure it’s the pump. I have no idea of the make of the one the PO had installed just before I bought the truck, plus I ran it out of fuel once. I was surprised it even ran at all after that, and I’m thinking it did some damage. I stopped by Oreilly’s on my way home and they offered to trade me a no-name pump for a measly $375. Too bad it’s the holiday weekend because I checked Amazon and an ACDelco was about $280 but delivery with Prime would take 6 days. I got home and checked AutoZone and they had a Delphi for $303 with a $25 rebate so I got that. The only good thing is the truck has a fuel cell and the pump can be replaced by pulling the rear panel behind the tailgate. I hope this fixes it, Ill know tomorrow.
 
OP
OP
Rocket Man

Rocket Man

Mark
Supporting Member
Joined
Dec 25, 2014
Posts
26,679
Reaction score
52,954
Location
Oregon
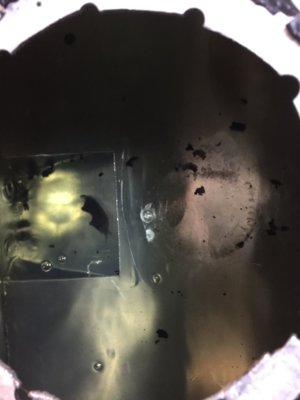
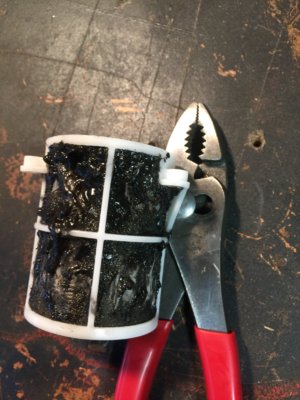
It’s been a challenge. I had to drop the tank because it’s all full of crap. It looks like the RTV I used as well as other stuff got all in the tank and filter. I cleaned it up, bought what I thought was the right pump, and it was too tall. So I took it back and checked the other one they had for my truck but got the standard bed and it was taller. Then I called the PO and he said he shortened the stock pump to fit the tank. So now I had to take an Uber to Autozone and I’m on my way back. Gonna try the original rubber gasket or supplied o-ring. And maybe different RTV but just a little where needed.

0D9AB952-9220-49EB-A57C-E56989545715.jpeg 5F881AB1-AA5C-4495-AA8C-A89B95678320.jpeg
 

07Burb

GM fan for life
Staff member
Moderator Supporting Member Administrator
Joined
Jan 3, 2011
Posts
50,967
Reaction score
19,478
Wow that filter was gummed up
 

Tonyrodz

Resident Resident
Joined
Feb 16, 2012
Posts
33,337
Reaction score
51,822
Location
Central Jersey
It’s been a challenge. I had to drop the tank because it’s all full of crap. It looks like the RTV I used as well as other stuff got all in the tank and filter. I cleaned it up, bought what I thought was the right pump, and it was too tall. So I took it back and checked the other one they had for my truck but got the standard bed and it was taller. Then I called the PO and he said he shortened the stock pump to fit the tank. So now I had to take an Uber to Autozone and I’m on my way back. Gonna try the original rubber gasket or supplied o-ring. And maybe different RTV but just a little where needed.

View attachment 212772 View attachment 212773
I wonder how all that rtv got in the filter. Was it gas compatible? Did it drip down off the opening while it was still wet? And kind of got squeezed off when you pushed the pump down to bolt it down?
 
OP
OP
Rocket Man

Rocket Man

Mark
Supporting Member
Joined
Dec 25, 2014
Posts
26,679
Reaction score
52,954
Location
Oregon
Yeah it was amazing any gas was getting through that filter at all, what a mess. I found out the RTV I used was not gas compatible. I never even thought about it when I R&R'd the pump last time, I just figured all silicone was. Plus I did it wrong- I used it as a gasket since the rubber hand-made gasket was full of holes and cut in 2 places and was unusable. So I had shot a lot of the RTV around the opening. setting the pump down in it, and then running the screws through the RTV and the metal ring they had made to hold the pump in. (There's no tabs to use a factory lock ring.) I believe some of the RTV dripped down on the inside, something I also didn't think about. Plus it was probably hanging down around the inside of the opening so every time I filled up the cell with gas, it came in contact.
 
OP
OP
Rocket Man

Rocket Man

Mark
Supporting Member
Joined
Dec 25, 2014
Posts
26,679
Reaction score
52,954
Location
Oregon
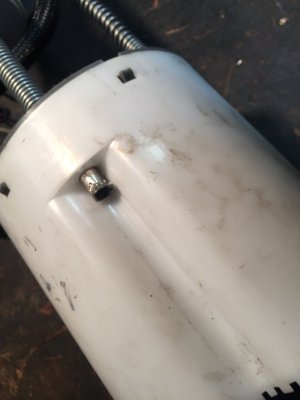
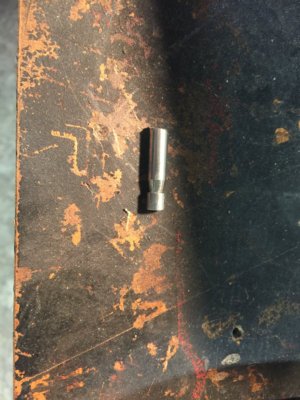
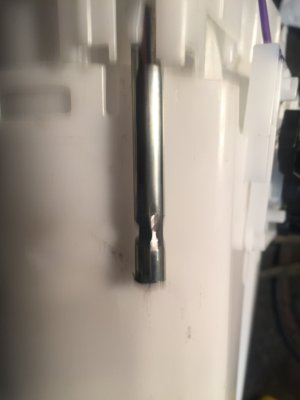
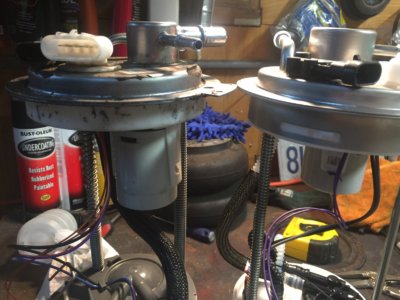
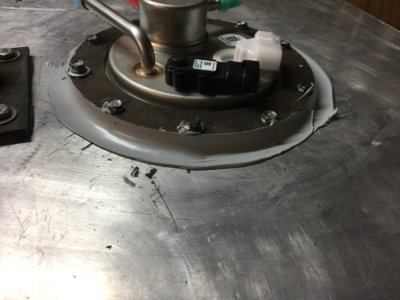
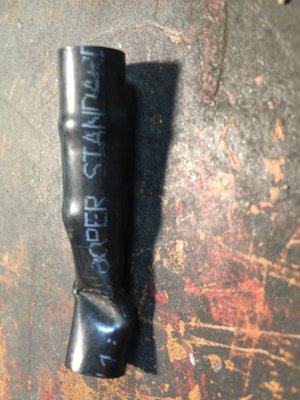
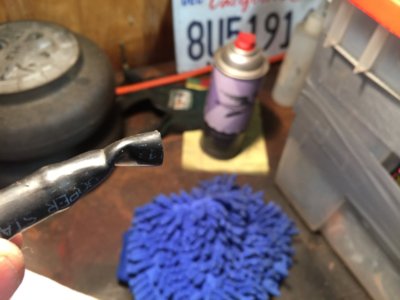
Also, I was doing the work that last time in a cramped area since I didn't pull the tank. I was just trying to seal the leaks so I didn't get any more evap codes but it ended up costing me in the long run. Anyway, this time I used the huge o-ring that came with the new pump. First, I needed to cut down the legs on the new pump so it would fit the tank but as soon as I got home and looked at the Delphi pump, I saw it was built different from the AC Delco that the PO cut down. Instead of hollow legs that were accessible from the outside of the filter basket, it had solid legs that were inside it. I figured it was a $300 gamble but said f it, I can do this. The solid legs had grooves machined near the bottom, I guess to keep it from coming apart somehow even though I couldn't see how that worked. I did my best with my angle grinder and it kind of worked even though it came apart once. It doesn't matter once the pump is in, since it pushes up against the top half of the assembly when I put it in the tank. ( I had to unsnap the filter housing and force it to the side while cutting the legs since it can't be completely removed due to the wiring and hoses that were heat shrinked on) I have to push down on the pump all the way and I took 1 1/8" off those legs. It still barely pushes down enough and the spring holds pressure upwards. Anyway, success with the cutting down. Then I used that o-ring which was about 1/4" thick and that sealed the pump to the tank which just left the extra holes that were left over from someone moving the ring a bit and then putting the screws into new locations (that wasn't me.) as well as the screws themselves. So with that o-ring towards the center, I used some Dow 791 which is resistant to solvents as a seal where the screws go through and then backfilled the area between the o-ring and the outside of the mounting ring. I'll let it set up overnight before pressure testing and installing the tank tomorrow. There shouldn't be any silicone touching fuel anymore, or at the most it will be a tiny amount where the screws go through.

IMG_9103.JPG IMG_9100.JPG IMG_9101.JPG IMG_9102.JPG IMG_9104.JPG
 

Tonyrodz

Resident Resident
Joined
Feb 16, 2012
Posts
33,337
Reaction score
51,822
Location
Central Jersey
Also, I was doing the work that last time in a cramped area since I didn't pull the tank. I was just trying to seal the leaks so I didn't get any more evap codes but it ended up costing me in the long run. Anyway, this time I used the huge o-ring that came with the new pump. First, I needed to cut down the legs on the new pump so it would fit the tank but as soon as I got home and looked at the Delphi pump, I saw it was built different from the AC Delco that the PO cut down. Instead of hollow legs that were accessible from the outside of the filter basket, it had solid legs that were inside it. I figured it was a $300 gamble but said f it, I can do this. The solid legs had grooves machined near the bottom, I guess to keep it from coming apart somehow even though I couldn't see how that worked. I did my best with my angle grinder and it kind of worked even though it came apart once. It doesn't matter once the pump is in, since it pushes up against the top half of the assembly when I put it in the tank. ( I had to unsnap the filter housing and force it to the side while cutting the legs since it can't be completely removed due to the wiring and hoses that were heat shrinked on) I have to push down on the pump all the way and I took 1 1/8" off those legs. It still barely pushes down enough and the spring holds pressure upwards. Anyway, success with the cutting down. Then I used that o-ring which was about 1/4" thick and that sealed the pump to the tank which just left the extra holes that were left over from someone moving the ring a bit and then putting the screws into new locations (that wasn't me.) as well as the screws themselves. So with that o-ring towards the center, I used some Dow 791 which is resistant to solvents as a seal where the screws go through and then backfilled the area between the o-ring and the outside of the mounting ring. I'll let it set up overnight before pressure testing and installing the tank tomorrow. There shouldn't be any silicone touching fuel anymore, or at the most it will be a tiny amount where the screws go through.

View attachment 212776 View attachment 212777 View attachment 212778 View attachment 212779 View attachment 212780
Good job. I hope you got it licked this time around.
 

HiHoeSilver

Away!
Joined
Feb 28, 2017
Posts
10,918
Reaction score
14,578
Location
Chicago
Also, I was doing the work that last time in a cramped area since I didn't pull the tank. I was just trying to seal the leaks so I didn't get any more evap codes but it ended up costing me in the long run. Anyway, this time I used the huge o-ring that came with the new pump. First, I needed to cut down the legs on the new pump so it would fit the tank but as soon as I got home and looked at the Delphi pump, I saw it was built different from the AC Delco that the PO cut down. Instead of hollow legs that were accessible from the outside of the filter basket, it had solid legs that were inside it. I figured it was a $300 gamble but said f it, I can do this. The solid legs had grooves machined near the bottom, I guess to keep it from coming apart somehow even though I couldn't see how that worked. I did my best with my angle grinder and it kind of worked even though it came apart once. It doesn't matter once the pump is in, since it pushes up against the top half of the assembly when I put it in the tank. ( I had to unsnap the filter housing and force it to the side while cutting the legs since it can't be completely removed due to the wiring and hoses that were heat shrinked on) I have to push down on the pump all the way and I took 1 1/8" off those legs. It still barely pushes down enough and the spring holds pressure upwards. Anyway, success with the cutting down. Then I used that o-ring which was about 1/4" thick and that sealed the pump to the tank which just left the extra holes that were left over from someone moving the ring a bit and then putting the screws into new locations (that wasn't me.) as well as the screws themselves. So with that o-ring towards the center, I used some Dow 791 which is resistant to solvents as a seal where the screws go through and then backfilled the area between the o-ring and the outside of the mounting ring. I'll let it set up overnight before pressure testing and installing the tank tomorrow. There shouldn't be any silicone touching fuel anymore, or at the most it will be a tiny amount where the screws go through.

View attachment 212776 View attachment 212777 View attachment 212778 View attachment 212779 View attachment 212780

That's a lot of work. Excellent problem solving, as usual. Looks good.
 

Fosscore

Full Access Member
Joined
Apr 16, 2014
Posts
10,885
Reaction score
19,845
Since the battery on this is kinda hard to get to and it will be sitting for extended periods this winter, I decided the last thing I want to happen is for it to be sitting aired out and have it not start. As we all know, just starting up the engine and letting it idle for awhile doesn’t really charge the battery very good. I bought an Optimate 6 battery maintainer for it, which is the same brand that I’ve been using for my Harley’s for years. I’ve never had a dead or bad battery and Optimate is rated highly. This one has all kinds of modes it selects automatically from testing to saving to maintaining to charging etc. It will be nice to know the battery is being maintained and ready to go. View attachment 210373

Sorry to hear of the truck troubles, but if one guy can solve these niggly issues, it certainly is you and your fortitude. Nice work! Those wheels look beautiful.

Wanted to see if you had any further pros/cons on that Optimate 6 unit? Thinking about getting one for my trucks. Thx and keep up that great work.
 
OP
OP
Rocket Man

Rocket Man

Mark
Supporting Member
Joined
Dec 25, 2014
Posts
26,679
Reaction score
52,954
Location
Oregon
I installed the fuel cell this morning, added 6 gallons of gas and it fired right up. The Tech 2 says fuel rail pressure is steady at 58 psi. What a relief. And @Fosscore , the optimate is a great little unit for keeping a battery optimized. It’s maintaining The Beast’s battery now that I’m driving The Machine.
 

Fosscore

Full Access Member
Joined
Apr 16, 2014
Posts
10,885
Reaction score
19,845
I installed the fuel cell this morning, added 6 gallons of gas and it fired right up. The Tech 2 says fuel rail pressure is steady at 58 psi. What a relief. And @Fosscore , the optimate is a great little unit for keeping a battery optimized. It’s maintaining The Beast’s battery now that I’m driving The Machine.

Thx man. Going to put that on my list to get for the longer periods when the truck sits idle. :thumbsup:
 

Tonyrodz

Resident Resident
Joined
Feb 16, 2012
Posts
33,337
Reaction score
51,822
Location
Central Jersey
Spring is finally here so I took the wheels in to have tires swapped over. Hopefully they’ll be done tomorrow.

View attachment 219258
Make sure you look those babies over when you get them back. Def don't want or need any nicks or scratches on them because they don't know how to mount them correctly.
 

Forum statistics

Threads
138,094
Posts
1,998,785
Members
103,016
Latest member
BadDaddy2003
Back
Top