Do you need shims for proper alignment?
You are using an out of date browser. It may not display this or other websites correctly.
You should upgrade or use an alternative browser.
You should upgrade or use an alternative browser.
What did you do to your OBS GMT400 Tahoe/Yukon Today?
- Thread starter 96ProCompTahoe
- Start date
Disclaimer: Links on this page pointing to Amazon, eBay and other sites may include affiliate code. If you click them and make a purchase, we may earn a small commission.
the 18th letter
Full Access Member
I have no idea. No shims were installed with the previous starter. If the next one doesn’t work I’ll have it towed to a decent shop that can figure it out. I don’t even know how to inspect the teeth on the flywheel.Do you need shims for proper alignment?
Didn't read all of your posts but I have replaced a few starters on these trucks. I use a reman #6449 starter, it's the small starter. Be sure you have the correct bolts for the correct starter. life was good back in the day when starter bolts were either long or short for a Chevy. When the smaller starters came out they take a special bolt that's just a little shorter. This starter is used on small and big block Chevy trucks, I use the same starter on my drag car.
The bolts inspection, recommended by @Eman85 sounds like an idea. When I was in shops, to see the starter gear line up on the flex plate, we painted the starter drive teeth.I have no idea. No shims were installed with the previous starter. If the next one doesn’t work I’ll have it towed to a decent shop that can figure it out. I don’t even know how to inspect the teeth on the flywheel.
the 18th letter
Full Access Member
Didn't read all of your posts but I have replaced a few starters on these trucks. I use a reman #6449 starter, it's the small starter. Be sure you have the correct bolts for the correct starter. life was good back in the day when starter bolts were either long or short for a Chevy. When the smaller starters came out they take a special bolt that's just a little shorter. This starter is used on small and big block Chevy trucks, I use the same starter on my drag car.
 That’s what came out of it, 6449. Going to get the OEM part and return this WAI brand they sold me
  Will make sure the bolts match as well before reinstalling.
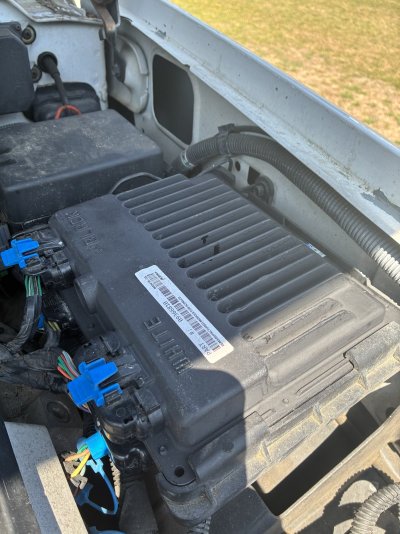
Man, you can see the "salt on roads" damage to that starter.View attachment 480274That’s what came out of it, 6449. Going to get the OEM part and return this WAI brand they sold me
the 18th letter
Full Access Member
My poor baby probably hasn’t had an undercarriage wash (proper with a cleaner. I will run the sprinkler under it at end of winter) since the year I put the starter in. New starter in and she’s firing right up as she had been. During the detailed inspection I noticed one of the connecting wires was showing metal. I switched that out and swapped the WAI for a re manufactured AC Delco and I’m good to go again for now.
Last edited:
- Joined
- Dec 31, 2025
- Posts
- 629
- Reaction score
- 600
Question. Does ur vehicle have the turn the key once and it will turn over? Or do u have to hold the key over? I haven't read all the post either. Just spit balling.View attachment 480274That’s what came out of it, 6449. Going to get the OEM part and return this WAI brand they sold me
the 18th letter
Full Access Member
Turn and hold the key in forward position for it to turn over.Question. Does ur vehicle have the turn the key once and it will turn over? Or do u have to hold the key over? I haven't read all the post either. Just spit balling.
the 18th letter
Full Access Member
After a few trips with the new starter I’m inclined to think it may have been the frayed wire all the time. I used to get a slight shock at times when opening the driver door. When I say slight, it was more static like than an actual electrical shock. LSS I’m not getting static shocked anymore. New starter didn’t work at all once I really disturbed that wire before checking it and replacing. As mentioned 10 years is a good run for a starter so even if it was the wire, it’s not a totally wasted parts canon shot. At least that’s what I’m telling myself lol
th3 shifty
Full Access Member
Got my tune from Blackbear. They corrected the speedometer (4.56 gears 35” tires) raised the speed limiter to 100mph, tuned for 91 fuel, adjusted shift points in trans. It made a huge difference is drivability. Woke up the truck in all the right places, and now I actually know my correct speed lol.
So huge shout out to BlackBear Performance. If you haven’t used them yet, you should. This was done on my 96 tahoe with 6” lift, 4.56 gears, 35” tires, rebuilt tranny with shift kit, headers, 3” exhaust
So huge shout out to BlackBear Performance. If you haven’t used them yet, you should. This was done on my 96 tahoe with 6” lift, 4.56 gears, 35” tires, rebuilt tranny with shift kit, headers, 3” exhaust
- Joined
- Dec 31, 2025
- Posts
- 629
- Reaction score
- 600
Nice!!
IRQVET
2 Door Owners Club
I unloaded the parts cannon . . . (I don't have pics of everything)
Over the past 3-4 weekends:
New 15 piece Front Suspension Kit
New Shocks
New Grounding Straps
New Body Control Module
New Brakes (Calipers, Rotors, and Pads)
New NBS Brake Cylinder Upgrade
Eastwood Rust Reformer on the frame and rear axle
New A/C Compressor (Air drier and valve)
Replaced the transmission fluid (and filter)
Replaced the Rear Diff Fluid
How I'm justifying it in my head, as even with $2k in parts, that about equal to 2-3 truck payments on a modern vehicle. Except I own mine outright and have for 23 years.
I do have another $2,500 planned on stuff I want done, before we move onto paint next year.
Attachments
IRQVET
2 Door Owners Club
I unloaded the parts cannon this week (again).
Parts Order this week: (LMC and RockAuto)
New Grill
New Headlights
New Distributor
New EGR
New Bumper filler
New Alternator
New Refrigerant Lines
New A/C Condenser
About $1,100 worth of parts. Still cheaper than a new truck payment, lol.
Parts Order this week: (LMC and RockAuto)
New Grill
New Headlights
New Distributor
New EGR
New Bumper filler
New Alternator
New Refrigerant Lines
New A/C Condenser
About $1,100 worth of parts. Still cheaper than a new truck payment, lol.
east302
Full Access Member
Just a heads up, some distributors will come with a long hold-down clamp that goes around the shaft. These fix the position which prevents you from setting the CMP offset. So, save your factory clamp and use that instead.

IRQVET
2 Door Owners Club
Just some slight disassembly as I wait for parts to arrive.

YukonGTmaster
2 Door w/ Barn Doors Club
- Joined
- Mar 18, 2021
- Posts
- 605
- Reaction score
- 1,284
You got er Pontiac!Just a heads up, some distributors will come with a long hold-down clamp that goes around the shaft. These fix the position which prevents you from setting the CMP offset. So, save your factory clamp and use that instead.
View attachment 482916
Similar threads
- Replies
- 94
- Views
- 4K
- Replies
- 2
- Views
- 2K