Rocket Man's 02 Denali Build Thread AKA "THE BEAST"

Disclaimer: Links on this page pointing to Amazon, eBay and other sites may include affiliate code. If you click them and make a purchase, we may earn a small commission.

OP
OP
Rocket Man

Rocket Man

Mark
Supporting Member
Joined
Dec 25, 2014
Posts
25,966
Reaction score
50,662
Location
Oregon
Got bored waiting on parts. The new water pump to cowl heater hose came in and I decided to wrap it in the high temp loom I bought. It has a formed bend that I knew wouldn’t work with this loom so I used heat shrink around that part. It didn’t come out horrible, I’ll run it. I also did the main AC line that comes off the compressor. That one looks legit.
 

Attachments

  • 5FFC8984-C488-4260-9DD2-C1CDE009E69C.jpeg
    5FFC8984-C488-4260-9DD2-C1CDE009E69C.jpeg
    435.8 KB · Views: 12
  • 1060E140-B0D3-417A-B7DA-256D06880BD4.jpeg
    1060E140-B0D3-417A-B7DA-256D06880BD4.jpeg
    390.8 KB · Views: 12
  • 7693EAD8-395E-4AE9-AF9A-C82BDCA78FC3.jpeg
    7693EAD8-395E-4AE9-AF9A-C82BDCA78FC3.jpeg
    436.5 KB · Views: 13

Fless

Staff member
Super Moderator
Joined
Apr 2, 2017
Posts
10,481
Reaction score
20,838
Location
Elev 5,280
Got bored waiting on parts. The new water pump to cowl heater hose came in and I decided to wrap it in the high temp loom I bought. It has a formed bend that I knew wouldn’t work with this loom so I used heat shrink around that part. It didn’t come out horrible, I’ll run it. I also did the main AC line that comes off the compressor. That one looks legit.

That spiral-wound hose is similar to what I used to make at Caterpillar as a "spiral winder," but what I made was for hydraulics. 4 ply, 6 ply, 10 ply 3/8" to 1.5". Fond memories of the night shift in Chillicothe, IL. Made miles of that stuff, 52 feet at a time.
 
OP
OP
Rocket Man

Rocket Man

Mark
Supporting Member
Joined
Dec 25, 2014
Posts
25,966
Reaction score
50,662
Location
Oregon
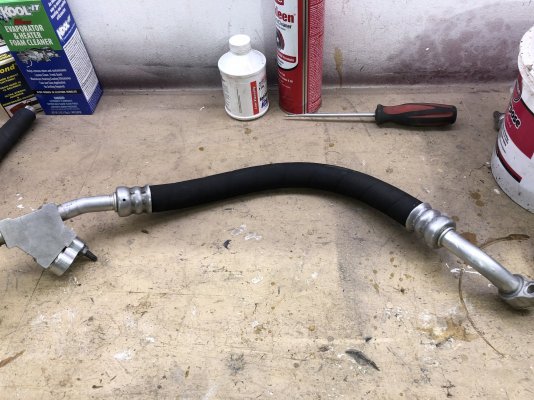
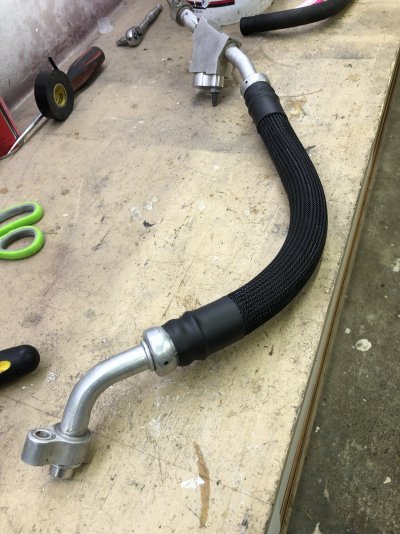
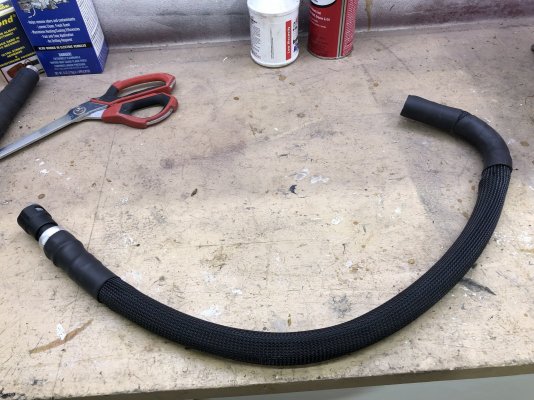
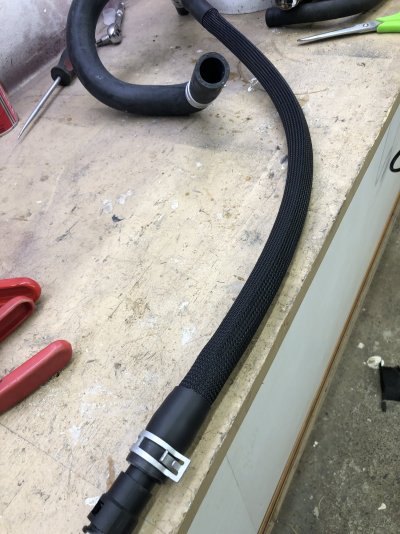
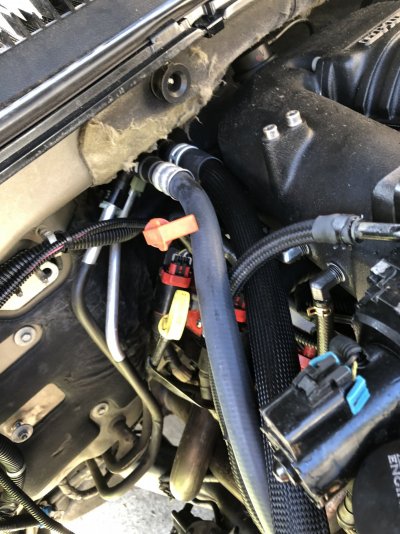
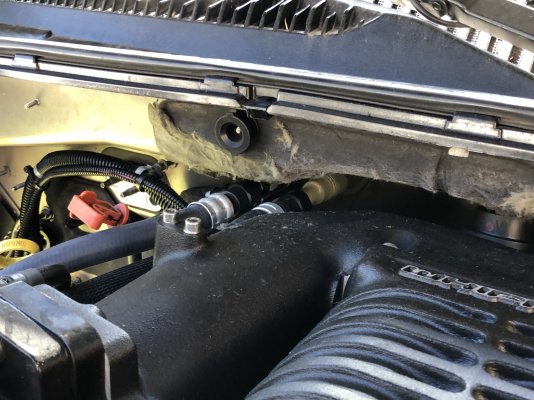
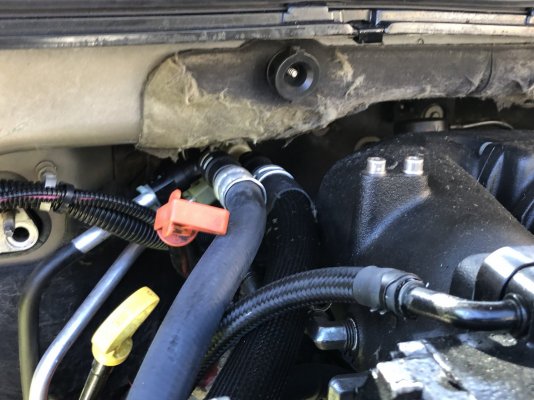
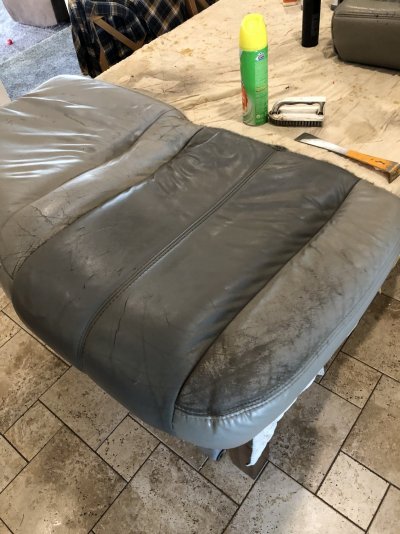
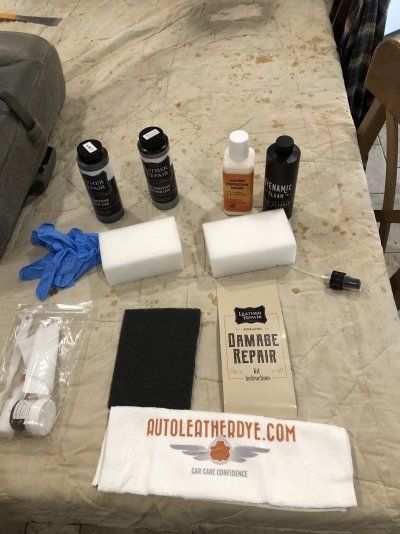
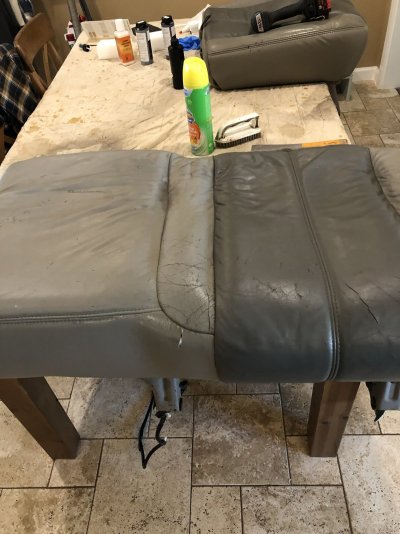
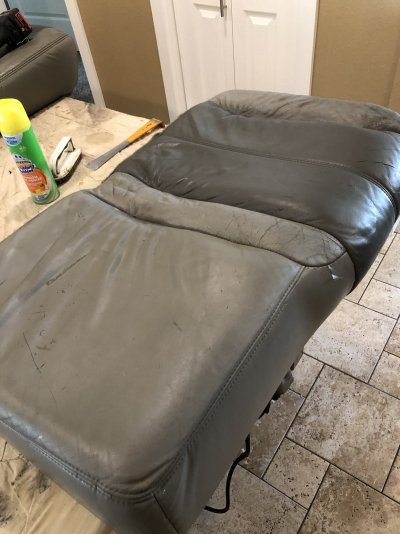
I got the new Dorman Y heater hose and wrapped the part that goes up to the firewall, it came out good. Then I installed it and the other quick connect at the firewall. During the struggle to install everything that first heater hose I wrapped came undone just as it clicked into the fitting at the firewall. I removed the braided stuff. Damn. So now I have one that looks braided and one that doesn’t. I’m leaving it for now since in order to fix it I either need to either drain the system and wrap it from the engine side or buy a quick connect and cut the one off and do it from up top. Good news is I have no leaks, front or rear. I warmed it up and let it burp, then refilled. Still waiting on the rear AC lines. Supposed to be here Tuesday but so is the next heat wave. I’ll work on it when it’s not too hot.
 

Attachments

  • F8A0A5BD-29E4-4048-979D-F965B3FE6A65.jpeg
    F8A0A5BD-29E4-4048-979D-F965B3FE6A65.jpeg
    372.4 KB · Views: 15
  • BE76AD80-25C0-40A7-B69C-229058B15991.jpeg
    BE76AD80-25C0-40A7-B69C-229058B15991.jpeg
    338.5 KB · Views: 15
OP
OP
Rocket Man

Rocket Man

Mark
Supporting Member
Joined
Dec 25, 2014
Posts
25,966
Reaction score
50,662
Location
Oregon
These pics show why it’s so hard to get to those tees with the blower in. Pretty much the only way that was going to happen was with the accumulator out. That hose closest to the blower almost didn’t go back on, it was crooked to get it started and I had to force it. I am super glad I didn’t fu*k up the o-ring installing it, but I ran it up to pressure and no leaks.
 

Attachments

  • F1C746A2-5E0C-4016-A222-1A90A652A37E.jpeg
    F1C746A2-5E0C-4016-A222-1A90A652A37E.jpeg
    339.8 KB · Views: 9
  • C1F26832-9B2E-44FE-859F-BF29E1281C5D.jpeg
    C1F26832-9B2E-44FE-859F-BF29E1281C5D.jpeg
    277.5 KB · Views: 9
OP
OP
Rocket Man

Rocket Man

Mark
Supporting Member
Joined
Dec 25, 2014
Posts
25,966
Reaction score
50,662
Location
Oregon
Since the truck is laid up, it was the perfect time to try the leather repair kit from www.autoleatherdye.com and see what I could do to the second row. I didn’t have high expectations and you can see why. These seats were pretty much wasted due to my dog and the fact they’re 21 years old. But there’s no replacement covers available and I’m sure if I had an upholsterer make some they’d be a few hundred. Here they are right after I pulled them from the truck.
 

Attachments

  • 5C6C798F-A4EE-4276-8BA5-5791F398E3A5.jpeg
    5C6C798F-A4EE-4276-8BA5-5791F398E3A5.jpeg
    227 KB · Views: 14
  • 6B387830-6AC0-445F-B3AE-68431C34AC63.jpeg
    6B387830-6AC0-445F-B3AE-68431C34AC63.jpeg
    260.8 KB · Views: 13
  • 95842F3C-0726-4A71-A078-B80DA7A20E14.jpeg
    95842F3C-0726-4A71-A078-B80DA7A20E14.jpeg
    256.6 KB · Views: 14
  • A77898EE-0EEC-4D77-BF64-B74FAA61A17C.jpeg
    A77898EE-0EEC-4D77-BF64-B74FAA61A17C.jpeg
    217.1 KB · Views: 14
  • 58706461-8842-4795-B26F-1AF8321BCC9B.jpeg
    58706461-8842-4795-B26F-1AF8321BCC9B.jpeg
    180.8 KB · Views: 14
Last edited:
OP
OP
Rocket Man

Rocket Man

Mark
Supporting Member
Joined
Dec 25, 2014
Posts
25,966
Reaction score
50,662
Location
Oregon
Here’s the kit. First I cleaned them with Foaming Bubbles Bathroom Cleaner. It works great but I wouldn’t use it often, it’s probably harsh for the leather.
 

Attachments

  • 044BFFF4-2CBC-4DE8-9D41-40C34BC01B6B.jpeg
    044BFFF4-2CBC-4DE8-9D41-40C34BC01B6B.jpeg
    323.3 KB · Views: 10
  • 9C5DCA05-87B4-4F7E-B63E-6B5CE3836BD2.jpeg
    9C5DCA05-87B4-4F7E-B63E-6B5CE3836BD2.jpeg
    263.3 KB · Views: 9
  • BC7F9082-D544-4C11-AE76-62EB1AA9EC71.jpeg
    BC7F9082-D544-4C11-AE76-62EB1AA9EC71.jpeg
    289.8 KB · Views: 9
  • 0BDF3D24-8CE9-4245-A3CD-9B06B39F0E3A.jpeg
    0BDF3D24-8CE9-4245-A3CD-9B06B39F0E3A.jpeg
    262.6 KB · Views: 11
  • 9E47D889-7947-475D-ABE9-82A1076FAC39.jpeg
    9E47D889-7947-475D-ABE9-82A1076FAC39.jpeg
    288.3 KB · Views: 10
OP
OP
Rocket Man

Rocket Man

Mark
Supporting Member
Joined
Dec 25, 2014
Posts
25,966
Reaction score
50,662
Location
Oregon
Next I attempted to steam the foam in order to tighten things up. It kinda worked but I also messed up and removed the nozzle on the steamer and just stuck the tool in because I wasn’t getting as much steam as I wanted. Which showed me which parts were vinyl because it kind of melted it in a few spots.

The instructions were to repair any tears first using the glue and fabric you glue in the backside of the tear. I had one that was big enough to do that. Next I used the leather filler and the tiny spatula to fill in scrapes and small cuts. There were a lot of those. The stuff can be wet sanded.
 

Attachments

  • 5810E4AD-3A0C-48A9-A70F-B340D14B1F0B.jpeg
    5810E4AD-3A0C-48A9-A70F-B340D14B1F0B.jpeg
    251.3 KB · Views: 11
  • DFC36163-D03C-4FC7-BC30-5FE71895308B.jpeg
    DFC36163-D03C-4FC7-BC30-5FE71895308B.jpeg
    272.3 KB · Views: 11
  • F5CDFCAD-91EB-4660-BD0A-97547B856886.jpeg
    F5CDFCAD-91EB-4660-BD0A-97547B856886.jpeg
    276.3 KB · Views: 11
  • 2761BF36-2F4C-460F-9EE7-83E47F03B80B.jpeg
    2761BF36-2F4C-460F-9EE7-83E47F03B80B.jpeg
    268.5 KB · Views: 10
OP
OP
Rocket Man

Rocket Man

Mark
Supporting Member
Joined
Dec 25, 2014
Posts
25,966
Reaction score
50,662
Location
Oregon
Then I used a sponge to do 4 light coats on the dark panels. The color match was pretty good. Being these seats are 2 tone, they’re kind of a PIA. Getting the dye as close to perfect at the seam where the colors meet was hard.
 

Attachments

  • 329703D3-B6C3-4FDC-B060-153CB1A90EE1.jpeg
    329703D3-B6C3-4FDC-B060-153CB1A90EE1.jpeg
    276.3 KB · Views: 13
  • 9C819C36-1206-4F38-8159-DA8FD48FEF01.jpeg
    9C819C36-1206-4F38-8159-DA8FD48FEF01.jpeg
    273.7 KB · Views: 14
Last edited:

Forum statistics

Threads
129,247
Posts
1,812,813
Members
92,351
Latest member
iasylum
Top