Subbed! I’ll have to go back and catch up when I get time. Glad to see another NBS Denali build thread, you’re in good company. 

Disclaimer: Links on this page pointing to Amazon, eBay and other sites may include affiliate code. If you click them and make a purchase, we may earn a small commission.

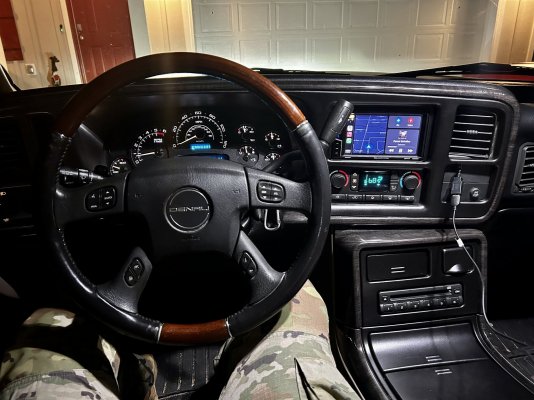
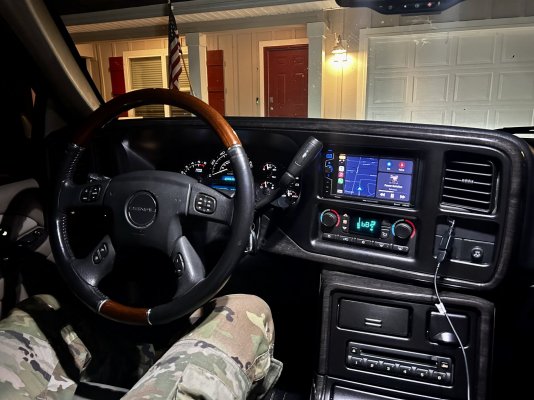
I did the exact same thing you did with the wheel. Originally jsut painted grips on a regular Escalade wheel. But I scored the exact same wheel you did out of a junkyard envoy Denali. And put an envoy Denali center air bag in mine. I love having the Denali in the steering wheel! The same wheel also came in the 2004-2006 platinum trimmed Escalades. That’s why they usually run big bucks online for sale. Lol. Looks great in your truck with the back dash! I’m actually in the process of resurfacing mine. But going with tan to match the rest of my interior.I got my steering wheel in yesterday. It’s from an Envoy Denali and while it’s not in perfect shape, it’s pretty clean overall, and a vast improvement aesthetically over the factory Denali wheel. Plus the price was right (these things can get $$$ if you’ve looked at them) Hopefully I can find some time to install it this week!
View attachment 413003
I'm in the process of a debadge/moulding removal myself. I got the rubber wheel from Amazon (not the 3M one) and it seems to work fine but is s super slow process and I think I'm going through the wheel to fast. I'm not done with one door and have used a 3rd of the rubber wheel. Do you remember what brand you used, and did you need more than one? Question 2, where did you get the part for the hyper flash? And how does it install. Any help or tips would be greatly appreciatedShortly after, my headlights and tail lights arrived. I had attempted to polish up the OEMs but they didn’t last even with wet sanding and buffing them into oblivion. I did make the mistake of not ordering projector style headlights so that’s a zonk on me for downgrading. Still, after getting them aimed correctly with the LEDs it’s an upgrade from the factory output. I hit up the forum again to deal with the hyperflash and installed an LM487 (i believe) and it worked like a charm, lost cruise control though and I’m still looking into that.
I also took my rubber wheel and deleted the gold eyesore pinstripe from the sides and debadged everything else, blacked out the grille emblem w vinyl wrap, and took it to get an alignment after the new suspension parts.
I had a turn signal light and both DRLs out, thankfully my dad keeps several GMT800s at his shop to scavenge parts from, so I harvested what I needed from a Tahoe and Yukon he had sitting in his grave yard. Also scored a couple replacement AC vents, courtesy light housings, and (surprisingly) 2 new A Pillars with Bose tweeters installed. I had not even realized that mine didn’t have tweeters (they had apparently been removed but the harness was still there). I also had my local tint guy strip and retint the front windows to match the factory rears since the driver’s side was peeling.
View attachment 412653
View attachment 412654
View attachment 412655
View attachment 412656
View attachment 412657
I'm in the process of a debadge/moulding removal myself. I got the rubber wheel from Amazon (not the 3M one) and it seems to work fine but is s super slow process and I think I'm going through the wheel to fast. I'm not done with one door and have used a 3rd of the rubber wheel. Do you remember what brand you used, and did you need more than one? Question 2, where did you get the part for the hyper flash? And how does it install. Any help or tips would be greatly appreciated
I did the exact same thing you did with the wheel. Originally jsut painted grips on a regular Escalade wheel. But I scored the exact same wheel you did out of a junkyard envoy Denali. And put an envoy Denali center air bag in mine. I love having the Denali in the steering wheel! The same wheel also came in the 2004-2006 platinum trimmed Escalades. That’s why they usually run big bucks online for sale. Lol. Looks great in your truck with the back dash! I’m actually in the process of resurfacing mine. But going with tan to match the rest of my interior.
Truck looks good with the updated LED lighting and that entertainment system you set up looks awesome!
The previous owner had an aftermarket rear seat entertainment system installed waaaaaay back in 2009, and needless to say it way passed its shelf-life. Being that I wanted to use this truck for long road trips with the kiddos, I figured I would come up with a plan to update it. This was one area where I didn’t find much information on at all on here or elsewhere online, so if anyone else is interested in upgrading theirs I would gladly share my experience with them.
I scored 2 7” DVD/HDMI headrests and a 17” top mounted screen off of Amazon and I started ripping out all of the old equipment. Luckily, everything still had power, the hardware itself was just shot. So after tracing all of the wires and ensuring everything was properly connected, I devised a plan to do the new install. It looks like the original setup was done by a professional shop, as power was tapped into the accessory fuse in the driver’s side panel, and all of the cables were routed through the roof > B pillar > center console.
I went ahead and got a cheapo Carplay head unit off of Crutchfield along with the PAC RP5 GM-11 interface and used their readywire service (for only $25 that was a no brainer) while I was at it. The head unit was plug and play and I was able to retain my Bose amp and steering wheel controls. Perfecto!
I made up a rough diagram for how I wanted everything to work. Basically, the driver’s side headrest would feed video to the center and passenger side screens, and audio to the head unit. I was able to get it all to work and even threw in a roku stick to allow streaming from my phone’s hotspot. All 3 screens can view the same thing or all three have a different source and use the car stereo or headphones. All in all, I put about $750 into the system and needless to say the kids love it and my wife enjoys (somewhat) peaceful vacation trips. Albeit, we have 4 boys so they’re still rambunctious after 30min in close proximity to each other, but that’s another story.
View attachment 412658
View attachment 412659
View attachment 412660
View attachment 412661
View attachment 412663

I’m not raising boys, I’m raising MEN lolCommando!! MY MAN!!!!
Glad I could be of inspiration! And can’t wait to see the wheel installed! Swapping the wheels is a pretty easy job. Had mine off a few times now lol.Brother, your build thread is where I got the idea to go with the Envoy wheel! lol
Thank you! I’m going to be installing it today as soon as I get done with my tint appointment on the Camaro.
Appreciate the help man.I used a 3M rubber wheel and i don’t think i used 20% of it. I actually debadged my Camaro and Silverado with it too and it’s still in my work bench now, so I would definitely recommend getting the 3M one. Set your drill to low speed and use a back and forth motion perpendicular to the direction it’s spinning.
This is the module I used for hyperflash: Hazard Warning LED Flasher Relay... https://www.amazon.com/dp/B082V2FNGS?ref=ppx_pop_mob_ap_share
It installs under the driver side of the dash, there are youtube videos on it it’s easy.


