Paint Prep / Body Work Tips

Disclaimer: Links on this page pointing to Amazon, eBay and other sites may include affiliate code. If you click them and make a purchase, we may earn a small commission.

OP
OP
Matthew Jeschke

Matthew Jeschke

Full Access Member
Joined
Dec 28, 2017
Posts
2,365
Reaction score
1,762
Location
Sahuarita, Arizona
I am still at it. had to strip entire hood. was hell to say the least. a good 15 hours to sand. i think paint is off (except edges as will do that once hood is removed). does that look right? why the crazy texture pattern? is consistent feeling to touch, no raised or shallow spots.
d5bbb02c326c928e95cc019c923ada80.jpg


Sent from my SM-A505U using Tapatalk
 
OP
OP
Matthew Jeschke

Matthew Jeschke

Full Access Member
Joined
Dec 28, 2017
Posts
2,365
Reaction score
1,762
Location
Sahuarita, Arizona
I am getting MUCH closer to painting. Took some questions to the paint store. Here's the answers I got:

Question 1:

(a) DA 40 Grit on hood, sanded for nearly 3 hours. It's kicking up all sorts of dust, same disk different panel nearly eats through paint immediately. Not sure what's going on?

(b) is that seam sealer under the hood that holds the hood to the frame underneath?

Answer (a) I answered this myself. Lots of elbow grease. Was 15 hours of hell sanding but got hood stripped.

Answer (b) skeleton is on back of hood is NOT secured with seam sealer. It's secured with Panel Adhesive. SEM was recommended but $50 just for the adhesive and a special caulking gun was required as well.

Question 2:

Best method to paint around the windshield molding?

Answer: Cut the molding off with a sheet rock knife. A window guy can replace it without removing the windshield.

Question 3:

Little white circles in paint? I see them randomly across truck. Originally worst spots were at base of windows. I sanded those down and feathered them out. I'm assuming that process will spread unless I sand out every single bubble like that?

Answer: best to sand them out. Otherwise process will continue even after seal coat is applied.

Question 4:

(a) Door Stickers, any idea if new ones can be bought / printed? The stickers for child safety locks, vehicle weight, etc.

(b) Yellow tape inside door. Not sure what it's for, if it's critical or if can be removed.

Answer (a) Dealer sells the stickers.

Answer (B) was unsure where to get this or exactly what it was. Said to leave it be.

Questions 5:

Final sanding at 320 is good? I see a lot of videos where they go to 400 then paint. I've done 2 guide coats at 320 on entire truck (minus jams and hood).

Answer: can do a final sand with 400 grit however, somewhat pointless if sealer is applied prior to color as hides scratches as deep as 320 grit.

Question 6:

Sealing Frame - I want to seal up frame where it's bare metal since I have bumpers off. Assuming you sell a good product for that?

Answer: Mix sealer without reducer, it is then an epoxy primer. This is specific to the Omni MP172 primer I bought. Can be used as a epoxy primer (when no reducer is added) or a sealer when reducer is added. MP172 is black, they have it in a few other colors as well.

Question 7:

My seams for rear quarter panels (and hood frame - if applicable) have seam sealer that's pealing off. You sell that too?

Answer: SEM seam sealer is what you get to seal any panels that have been mechanical joined with welds.

Question 8:

Sanding, I have to take off ALL the clear for paint to adhere? Is there a faster process. I am pretty well ONLY sanding with 320. Perhaps I should start with 220? or lower grits then work to 320?

Answer: I want to cry. Apparently I didn't necessarily have to remove ALL the clear coat. I only needed to rough up the surface with 320 grit and sanding / scuff pads. However, NOT TO USE any lower grit than 320. If a lower grit is used it then requires the use of high build primer to hide the scratches.

Question 9: Why does hood have that wild pattern on it? Did I warp / burn metal with the DA?

Answer: No that's factory etching primer that didn't come off the metal. I will need to sand down entire surface with 150 grit sand paper on DA since I DA'd the surface with 40 grit. Otherwise the high build primer may not hide the scratches.

UPDATE: QUESTIONS ABOUT SANDING WERE ALSO IN ALL THE DATASHEETS FOR THE VARIOUS TYPES OF PAINT I'M USING. THEY SPEC WHAT HIDING YOU CAN ACHIEVE / BUILD THEY CREATE AND TELL YOU HOW FINE TO SAND THE SURFACE BEFORE YOU APPLY THAT TYPE OF PAINT.

Video I shared with guy at paint store but he didn't have time to answer it so I went into their shop:

 
Last edited:
OP
OP
Matthew Jeschke

Matthew Jeschke

Full Access Member
Joined
Dec 28, 2017
Posts
2,365
Reaction score
1,762
Location
Sahuarita, Arizona
This job is consuming my life a bit like Grad School was lol I've been studying for 4 hours on how to prepare for my spraying and buffing after.

Additionally, it's cleaning out my pockets. Seems my 1.3 mm tip would work for ALL my paints, except high build primer where I stripped the hood with 40 grit (then moved to 150 grit). That requires a 1.8 mm tip sigh. Then I need a buffing machine. Researched if my DA sander could buff, but buffing really requires a circular motion. Any other process is highly disputed and likely not effective.

I have now MUCH more paint to manage. Had to download all the datasheets and read on pressures to apply each paint, flash times, time between types of paint, etc. etc. etc. Wow this is complicated.

Cool things I'm finding from Eastwood videos on buffing:

1. Use spray bottle for the wet sanding, put tap water and ONE drop of dish soap (not car was soap). Dish soap works as a great lubricant for wet sanding.

2. When moving up in grits, sand in ONLY one direction with each grit. Then remove scratches from previous grit as you sand in other direction with the subsequent finer grit.

DIY Auto School Notes on buffing:

1. If only 2 coats of clear - start with 1500 grit sand paper. If 3 coats can start with 1200 grit. After 1500 he went to 2000. He got a pretty decent reflection (but not glossy).

2. Use a soft sanding block, he uses one with holes on one side as grabs paper better (I bought another thing lol) He worked up to 3000 grit (using wet sand air DA detail sander w/ foam interface pad). Bit better reflection but not glossy.

3. Use a rotary polisher (ug I had to buy anther tool). Must have a foam diamond (raised parts) pad and wool pad. The wool pad cuts harder than the diamond foam pad.

4. Get a medium / hard cutting compound and start with wool pad. BE careful of catching edges with buffing machine. (make sure the part making most compact is spinning away from the edges). USE BUFFING machine at the LOW speed / 1000 - 1500 RPM. The idea is SLOW speed and test panel. You don't want to heat panel up too much doing this.

5. Transition to a finder / swirl removing polish to take out your swirl marks, and use the softer diamond foam pad. Can use buffing machine at a much higher speed now.

I think he was using the 3M polishing products. Starting with a hard cutting compound and moving to their machine polish. This is CRAZY expensive. I purchased Meguiars M86 (hard cut) and M205 (Soft cut / polish) wish me luck. If super cheap you might be able to JUST use the hard cut with wool then softer pad to remove scratches. Really depends on your paint. However, Pete / DIY Autoschool swears by two stage polish systems with two different compounds. He claims the hard cut polish get's embedded in the paint and will never come out unless you remove it with the finer polish / machine polish. I will test that with my non 3m wanna be Maguires polish lol

DIY Auto School - GUN SETUP He had the best demo I've seen yet on how to setup your gun.

1. You MUST always spray with gun perpendicular to surface, otherwise you'll get more paint on one side than other. Additionally, with flat colors you must overlap by 50% on each stroke or you will get tiger striping. He says, ONLY paint until you have coverage. Not necessary to go any further.

2. Setup gun according to datasheet for each paint you use. Most paints need 10 PSI at the tip, but read the data sheet for the paint. 10 PSI typically ISN'T what you regulator reads at the gun. You can tell gun is right when you get even coverage across the fan / pattern.

3. Configuring your pattern. He spread his thumb and pinkie finger apart. Then he held the gun the distance from his thumb to his pinkie from the surface. Next he said the pattern should be a blade that's the same height (size) as the distance the gun is from the surface. SUPER simple but hard to explain.

DIY Auto School - At Home spray booth:

1. VERY CLEAN - blow off the vehicle throughouly, vents, engine, to get the dust out as your spray gun will kick it all up and put it in the paint otherwise.

2. Open a door and place fans there to pull air out. You want to be moving as much air as possible as that will keep paint from falling OUT of paint area and onto your vehicle hardening like dirt. You want to avoid that by pulling that paint out with fans.

3. Wet your floor to additionally help with pulling paint out of air.
 
Last edited:
OP
OP
Matthew Jeschke

Matthew Jeschke

Full Access Member
Joined
Dec 28, 2017
Posts
2,365
Reaction score
1,762
Location
Sahuarita, Arizona
Not sure if anybody can inject a little more information here. I'm a bit confused at this point. I swapped my Advantage High Solid clear coat for a more expensive clear at the paint shop. I had heard that the advantage products are a bit low budget and don't last long which concerned me. My hope is that this is my forever truck. I build it the way I want it and never have to get a different truck (I'm weird I keep my vehicles for a long time).

With my goal of life expectancy in mind, I swapped the Advantage out for a little more expensive clear by Metalux, specifically Metalux 9700. My hope is I don't have to repaint this in a few years, rather that the finish remains good for decades.

I'm trying to also figure out what the effect of a High Solids primer is. If it's on life expectancy, the Advantage was a high solids clear. Where as I think the Metalux is normal.

I'm really all over the place in my question as I'm a bit confused. Anybody know much about clears, and Metalux? I was pretty certain a PPG / OMNI clear would last like that but confused otherwise. It was like $500/gal for PPG clear so I sprung for this Metalux.
 
OP
OP
Matthew Jeschke

Matthew Jeschke

Full Access Member
Joined
Dec 28, 2017
Posts
2,365
Reaction score
1,762
Location
Sahuarita, Arizona
For documentation purposes to all those watching this thread and so I don't forget a week later :eek: I sprayed my first panel, the hood. It's got epoxy primer and high build sandable primer on it and it's horrible lol It'll work but is going to require a LOT Of work.
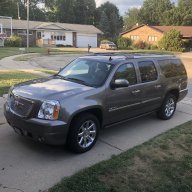
  1. I got my gun mixed up. I the top dial is for fan pattern, the bottom is for amount of paint / feed. I had setup the gun with test paint. Then moved to my epoxy and it didn't spray the same way. I ended up fiddling with the dials and couldn't figure it out. This OMNI paint coats AWESOME! I've sprayed tons of stuff from rattle cans and this stuff goes on really well. I'm CERTAIN I could have sealed the metal with one coat. However, I got terrible zebra stripes as my fan pattern was heavy in the middle. I had to hit the panel a second time to fix that and get complete hiding.

  2. The gun looses about 50% of the pressure by the time it gets to the spray head. I thought it was 66%. I had my pressure set way too high on the regulator. You have to read specs for paint to get the pressure at the spray head for the paint.
  3. You want to get SMALL mixing cups as well as large ones. I only got large ones. The smallest amount of paint I could mix was about 3 times what I needed. I ended up throwing out some paint.

  4. You want LOTS of aerosol cans with carb cleaner in them. I went through an entire can cleaning the gun between epoxy, primer, and end. Also a couple GALLONS of lacquer thinner as well as a few metal buckets. You can recycle the lacquer thinner. FYI The carb cleaner is same stuff that some paint shops sell as a gun cleaner. It cleans the paint instantly.

  5. Mixing High Build Primer. Side of can says 4:1 for the high build. However, I have a 1.8mm tip which can also recommends. HOWEVER, it sprays like absolute crap. I might as well have spit the paint on the panel. Talking to a paint shop guy I learned an unwritten trick. You have to use a bit of reducer. Around 10% reducer to the mix and it will spray fine.

  6. Adjusting fan pattern for more even coverage (tip from body shop friend)... Open fan (top adjustment w/o needle) all the way, then back it off a quarter turn. This should help push the paint from the center out to the edges of the blade (I was having trouble with that).
I think I made a LOT more mistakes. Also have LOTS of disposable gloves and ALWAYS have a pair on. I got in a huge hurry as your under the clock when you do this. I washed the gun w/o gloves and my hands are regretting that right now.
 

wjburken

Elite Member
Supporting Member
Joined
Dec 26, 2017
Posts
10,315
Reaction score
29,545
Location
Eastern Iowa
For documentation purposes to all those watching this thread and so I don't forget a week later :eek: I sprayed my first panel, the hood. It's got epoxy primer and high build sandable primer on it and it's horrible lol It'll work but is going to require a LOT Of work.
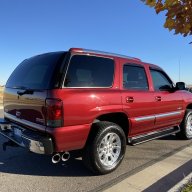
  1. I got my gun mixed up. I the top dial is for fan pattern, the bottom is for amount of paint / feed. I had setup the gun with test paint. Then moved to my epoxy and it didn't spray the same way. I ended up fiddling with the dials and couldn't figure it out. This OMNI paint coats AWESOME! I've sprayed tons of stuff from rattle cans and this stuff goes on really well. I'm CERTAIN I could have sealed the metal with one coat. However, I got terrible zebra stripes as my fan pattern was heavy in the middle. I had to hit the panel a second time to fix that and get complete hiding.

  2. The gun looses about 50% of the pressure by the time it gets to the spray head. I thought it was 66%. I had my pressure set way too high on the regulator. You have to read specs for paint to get the pressure at the spray head for the paint.
  3. You want to get SMALL mixing cups as well as large ones. I only got large ones. The smallest amount of paint I could mix was about 3 times what I needed. I ended up throwing out some paint.

  4. You want LOTS of aerosol cans with carb cleaner in them. I went through an entire can cleaning the gun between epoxy, primer, and end. Also a couple GALLONS of lacquer thinner as well as a few metal buckets. You can recycle the lacquer thinner. FYI The carb cleaner is same stuff that some paint shops sell as a gun cleaner. It cleans the paint instantly.

  5. Mixing High Build Primer. Side of can says 4:1 for the high build. However, I have a 1.8mm tip which can also recommends. HOWEVER, it sprays like absolute crap. I might as well have spit the paint on the panel. Talking to a paint shop guy I learned an unwritten trick. You have to use a bit of reducer. Around 10% reducer to the mix and it will spray fine.

  6. Adjusting fan pattern for more even coverage (tip from body shop friend)... Open fan (top adjustment w/o needle) all the way, then back it off a quarter turn. This should help push the paint from the center out to the edges of the blade (I was having trouble with that).
I think I made a LOT more mistakes. Also have LOTS of disposable gloves and ALWAYS have a pair on. I got in a huge hurry as your under the clock when you do this. I washed the gun w/o gloves and my hands are regretting that right now.

Sounds like you are learning a lot and having a good time doing it. You are a living example of the saying I have in my signature, “Experience is what you get when you didn’t get what you wanted.” The next line, that I didn’t post is, “and you always get it about 60 seconds after you first needed it.” You, young man, are getting more experience than many of use will have when it comes to painting your vehicle because you simply decided you wanted to learn how to do it and jumped in with both feet. Well done.
 
OP
OP
Matthew Jeschke

Matthew Jeschke

Full Access Member
Joined
Dec 28, 2017
Posts
2,365
Reaction score
1,762
Location
Sahuarita, Arizona
I appreciate your complements. I knew this would be a big project. but sisn't realize it would be this big [emoji3061] that said it is exactly as you mention fun experience. Not sure when I will next paint a car but if I do will be much easier. And hopefully easier for anybody who reads this post :)

Sent from my SM-A505U using Tapatalk
 

Sam Harris

Elite Member
Supporting Member
Joined
Sep 26, 2018
Posts
7,445
Reaction score
14,977
Location
Texas
Sounds like you are learning a lot and having a good time doing it. You are a living example of the saying I have in my signature, “Experience is what you get when you didn’t get what you wanted.” The next line, that I didn’t post is, “and you always get it about 60 seconds after you first needed it.” You, young man, are getting more experience than many of use will have when it comes to painting your vehicle because you simply decided you wanted to learn how to do it and jumped in with both feet. Well done.
X2
 

Sam Harris

Elite Member
Supporting Member
Joined
Sep 26, 2018
Posts
7,445
Reaction score
14,977
Location
Texas
I appreciate your complements. I knew this would be a big project. but sisn't realize it would be this big [emoji3061] that said it is exactly as you mention fun experience. Not sure when I will next paint a car but if I do will be much easier. And hopefully easier for anybody who reads this post :)

Sent from my SM-A505U using Tapatalk
Absolutely invaluable information in this thread for someone like me, who has practically no experience painting. Really appreciate you sharing all the details, trials and tribulations.!
 
OP
OP
Matthew Jeschke

Matthew Jeschke

Full Access Member
Joined
Dec 28, 2017
Posts
2,365
Reaction score
1,762
Location
Sahuarita, Arizona
FML x a million. I started painting and need help from a person with body work experience, specifically paints.

I started with doors and am in middle of process. The doors were prepped by sanding them down. Then sealing the doors with self etching primer where metal was showing through.

I went to spray sealer. Am using OMNI Epoxy with 2:1:1 (reducer) as a sealer. I couldn't figure out why the sealer wasn't laying up nice. I kept mixing little by little and testing the interior side of the doors.

It turns out paint wasn't adhering to the etching primer. I'm super confused, can epoxy primer mix with etching primer? Am I doing this wrong?

I have parts that are drying and need to move on in process but I have other parts that are not ready and like I said FML

I tried to clean it all off (starting with one door) and lacquer thinner. It made a HUGE mess. I'm not sure what to do at all. The doors I didn't mess with layed up nice with etching primer after they had a chance to dry better.
 
OP
OP
Matthew Jeschke

Matthew Jeschke

Full Access Member
Joined
Dec 28, 2017
Posts
2,365
Reaction score
1,762
Location
Sahuarita, Arizona
omg this is complicated. I called another friend, bodyman, I had his phone in my cell. He picked up at late hour. He said don't worry about the etching primer. That I just don't need to apply sealer over etch because etch is a sealer. That the poor adheasion with my etching primer had been due to something else... He said an impurity. However, I think it was due to not enough time to dry. I sprayed the etch right before I went to spray sealer and I think that was the issue all along. I probably didn't need to strip the etching primer off with lacquer thinner at all and just messed that door up for nothing with lacquer thinner. Time will tell. I have a spot of etching primer on my hood and am spraying that right now.
 
OP
OP
Matthew Jeschke

Matthew Jeschke

Full Access Member
Joined
Dec 28, 2017
Posts
2,365
Reaction score
1,762
Location
Sahuarita, Arizona
Okay so I find this is a HIGHLY debated subject. I think what happened is the dude I asked originally and told me to strip the sealer and etch off with lacquer thinner was adverse to Etch primer.

I called another buddy who paints hot rods. He said, Etch primer is also a sealer but doesn't hide as well (doesn't hide scratches like a epoxy primer / sealer might). Etching primer may also have to be scuffed up prior to painting over it, and doesn't really need sealer over it as it seals. He said it should take paint just fine. That my issue with adhesion wasn't the etch it was something else. (likely because I'd not let the etching primer dry long enough).

I'm still having many questions in my mind about this. However, one thing is clear there are body guys who think etching sealer is fine and there are those who appear to be animatedly apposed to it. My original process of sealing over the etch was fine, although a bit tricky as it honestly sealer doesn't adhear as well to it, I probably needed to scuff it up a bit.

I seem to have created another problem for myself unrelated to the etching primer though. I got excited to paint and temperature dropped to 60F in my garage. The sealer set up with LOTS of orange peal on my hood. I need to sand it off in a couple days and re-shoot sealer on the hood now :(
 
OP
OP
Matthew Jeschke

Matthew Jeschke

Full Access Member
Joined
Dec 28, 2017
Posts
2,365
Reaction score
1,762
Location
Sahuarita, Arizona
I maybe screwed. temp is not agreeable here to spray a truck and inhave tonhave paint done before christmas. its barely making 70f here and i need 70f for entire painting process :(

Sent from my SM-A505U using Tapatalk
 

wjburken

Elite Member
Supporting Member
Joined
Dec 26, 2017
Posts
10,315
Reaction score
29,545
Location
Eastern Iowa
I maybe screwed. temp is not agreeable here to spray a truck and inhave tonhave paint done before christmas. its barely making 70f here and i need 70f for entire painting process :(

Sent from my SM-A505U using Tapatalk
Can you get a heater for your garage?
 

Sam Harris

Elite Member
Supporting Member
Joined
Sep 26, 2018
Posts
7,445
Reaction score
14,977
Location
Texas
Good idea. I bought a 200,000 BTU propane heater for my garage a couple years ago. It sucks that you have to open the garage door to ventilate, but that sucker keeps all 3 bays toasty warm on about half power. It’s ridiculous. And the garage ceiling is about 16’. I paid around $150 for it. In Az., I’m sure you could get away with a much smaller one.
 
OP
OP
Matthew Jeschke

Matthew Jeschke

Full Access Member
Joined
Dec 28, 2017
Posts
2,365
Reaction score
1,762
Location
Sahuarita, Arizona
I think the short lesson of this is, body guys are paid well to do this work because it's exceedingly complicated. What I've learned is you may get lucky trying to spray the paint on your own but a bunch of things have to align perfectly to do that. Stayed up till 2 AM researching my current issues and it's just the tip of the iceberg. Long story short (will elaborate below), I'm going to have to hire a professional to either (1) visit my house and spray the car in my garage or (2) tow the truck to a paint shop.

Let me elaborate, on my ONE issue I know of at this point, the temperature. The paints are all speced to spray a certain temperatures. It's 70 F at the PEAK of the day, 50F towards end and 30's at night. Not all the paints have specs for the lower temperatures. The color paint can be reduced such that you can spray at 55F, however, the sealer doesn't say anything about that. And the clear doesn't have any spec on temp either (only that if you want a fast cure to do at 140F). When talking with friends who have more experience in this, they say they won't paint below 70F. But I know it can be done (perhaps with diminished results), however, no specs explain how.

Then the spray gun has three settings: input regulator, feed, and spray tip. I watched HOURS of Youtube on how to setup the spray gun. I practiced with every mix, and scrap paint prior to all this as well. However, when I go to spray and it sprays like crap I'm not sure if it's poor atomization due to temperature or due to spray gun settings... or something even stuck in the gun, or bad dryer / filter on line. I just don't have experience to tell those issues apart when looking at how paint lays.

Every time I take another step I have 50 more questions. I think the short of this. If you EVER plan to do this, hire a paint professional do help you at your house or in their shop. And that is, somebody who ACTIVELY paints cars. You want to see some of their work IN PERSON. You can MORE than do body work, that part is time consuming but pretty simple. However, the spraying which only takes a couple hours is EXCEEDINGLY complicated. It's advanced chemistry coupled with art and fineness.

Additionally, the shops have paint booths. Most of which are climate controlled, and have filters to pull junk out of air as well as overspray. They have control over SO many more variables in the shops so they can do a much better paint job. In my opinion that's worth $500, maybe even $1000 to lay down your paint in one. They even rent them out to hobbyist sometimes which is another option. I just cannot drive my truck because it's disassembled :( They have one for $30/hr at the paint store.

Somebody up there is looking out for me.... I'm super lucky as the guy who sold me the paint called to ask how my job was coming along. He's offered to come to my house when he has time and help me out. I'll just continue prepping truck until he can make it out to spray.
 
OP
OP
Matthew Jeschke

Matthew Jeschke

Full Access Member
Joined
Dec 28, 2017
Posts
2,365
Reaction score
1,762
Location
Sahuarita, Arizona
I live in arizona. tried all the stores can only get a decent heater by special order... and spoke with body shop guys, cannot use any heater must run dry and without a flame. otherwise you can blow up the garage as paint will flash off or you will spoil the pait with exhaust from heater.

Sent from my SM-A505U using Tapatalk
 

Forum statistics

Threads
138,047
Posts
1,997,846
Members
102,986
Latest member
AZPatriot1963
Back
Top