Paint Prep / Body Work Tips

Disclaimer: Links on this page pointing to Amazon, eBay and other sites may include affiliate code. If you click them and make a purchase, we may earn a small commission.

OP
OP
Matthew Jeschke

Matthew Jeschke

Full Access Member
Joined
Dec 28, 2017
Posts
2,364
Reaction score
1,762
Location
Sahuarita, Arizona
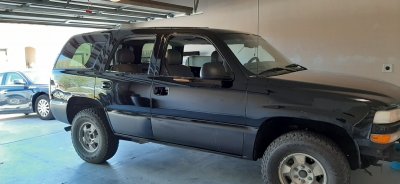
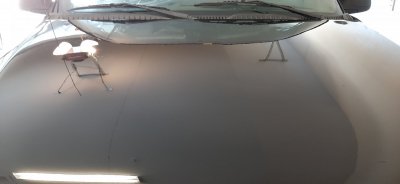
Got paint and clear on the whole truck minus the door from before. Have the truck bed liner / second color to do tomorrow. That door I put on too thin so has to be stripped and resprayed :/

The truck looks absolutely sick. Light orange peal, but LOTS of runs :( My trouble was I was spraying black in my dark garage. When I could see the panel I did alright. I think the pressure may have been a little high on my gun too as I got TONS of overspray. But it mostly worked.

I have a ton of work cut out for me in the color sanding step. But with luck it'll look like new or maybe better than new when I'm done.
20200204_105406.jpg 20200204_105419.jpg 20200204_105309.jpg
 
OP
OP
Matthew Jeschke

Matthew Jeschke

Full Access Member
Joined
Dec 28, 2017
Posts
2,364
Reaction score
1,762
Location
Sahuarita, Arizona
ordered tow mirrors today. my second set... first set were amazon cheapo special and fit bad. ordered ksource... my cousin had them and said they fit like a glove.

then hope to put on a curved lightbar but secure it to beafy z71 luggage rack.

then possibly new headlamp lenses although i kind of like the stock looking lenses.

hopefully i can stop killing my bank account with truck bling then lol

Sent from my SM-A505U using Tapatalk
 
OP
OP
Matthew Jeschke

Matthew Jeschke

Full Access Member
Joined
Dec 28, 2017
Posts
2,364
Reaction score
1,762
Location
Sahuarita, Arizona
A pic of current progress... Short a few things but put on the raptor liner this afternoon. That stuff is SUPER easy to work with. Really cool product. Only wish it was a tinge lighter color and a matte finish. Is more of a gloss. I also should have made my front hood strip of raptor liner larger. It's a bit small. I decided to do tip of hood with raptor liner to keep from getting so many rock chips. I also should have rapped that strip onto the front quarter panels (may still do that but at a later date). The scratches you see are me cutting the paint runs off before color sanding.

I have tow mirrors on the way. Arriving tomorrow.
Then I have to find the clips to install the fender flares. I seem to have lost them :(
Paint the driver side door yet (I messed up so have to redo the clear on it).
Color sand / fix my defects.
Lastly roof rack but no rush on that :)

a.jpg b.jpg
 

Sam Harris

Elite Member
Supporting Member
Joined
Sep 26, 2018
Posts
7,445
Reaction score
14,977
Location
Texas
A pic of current progress... Short a few things but put on the raptor liner this afternoon. That stuff is SUPER easy to work with. Really cool product. Only wish it was a tinge lighter color and a matte finish. Is more of a gloss. I also should have made my front hood strip of raptor liner larger. It's a bit small. I decided to do tip of hood with raptor liner to keep from getting so many rock chips. I also should have rapped that strip onto the front quarter panels (may still do that but at a later date). The scratches you see are me cutting the paint runs off before color sanding.

I have tow mirrors on the way. Arriving tomorrow.
Then I have to find the clips to install the fender flares. I seem to have lost them :(
Paint the driver side door yet (I messed up so have to redo the clear on it).
Color sand / fix my defects.
Lastly roof rack but no rush on that :)

View attachment 240227 View attachment 240228
Wow man that’s just awesome! Great job!! I can’t wait to see her all done!! Way to go!!
 
OP
OP
Matthew Jeschke

Matthew Jeschke

Full Access Member
Joined
Dec 28, 2017
Posts
2,364
Reaction score
1,762
Location
Sahuarita, Arizona
Okay, I cannot resist. I'm now shopping more seriously for headlamp and turn signal lenses. I saw this truck on a youtube group and LOVE the look of those lenses!

I'd like the halo setup. Am looking at DEPO amazon ones. Additionally, I'd like whatever I get to be black / smoked black look so blends in with my paint job. I know a lot of people buy the depot lenses but I'd like to see pics of what this stuff looks like on a black truck lol

84111557_3530550196986052_1291903510979280896_n.jpg
 
OP
OP
Matthew Jeschke

Matthew Jeschke

Full Access Member
Joined
Dec 28, 2017
Posts
2,364
Reaction score
1,762
Location
Sahuarita, Arizona
**** there goes another $150. i will post pics wednesday. ordered new halo headlamps and smoked turn lenses lol

short the lightbar and roof rack to complete my look... you just like another several hundred bucks lol

Sent from my SM-A505U using Tapatalk
 

Sam Harris

Elite Member
Supporting Member
Joined
Sep 26, 2018
Posts
7,445
Reaction score
14,977
Location
Texas
Latest work, hopefully finished spraying paint by end of day lol I had to come back and re-do the door I practiced on.

Video of work and latest mistakes lol
Very nice! Thanks so much for sharing your knowledge, and learning experience with this project! This is invaluable! Looking great!
 
OP
OP
Matthew Jeschke

Matthew Jeschke

Full Access Member
Joined
Dec 28, 2017
Posts
2,364
Reaction score
1,762
Location
Sahuarita, Arizona
I have found after talking with all these body shop guys. painting is really learnong how to think on your toes. there are so many things i had to improvise, fix, do without, etc that its almost impossible to paint without being able to come up with unique solutions.

for instance y buddy said i could have fixed all my runs by pulling them off with painters tape before they dried. these guys come up with tricks off the cuff.

i think if have a painting booth, heater, gd lighting, expensive equipement... then it is a little more foolproof. however painting out of your garage... wow it is an art of improvising lol

Sent from my SM-A505U using Tapatalk
 

Tonyrodz

Resident Resident
Joined
Feb 16, 2012
Posts
33,325
Reaction score
51,787
Location
Central Jersey

wjburken

Elite Member
Supporting Member
Joined
Dec 26, 2017
Posts
10,315
Reaction score
29,545
Location
Eastern Iowa
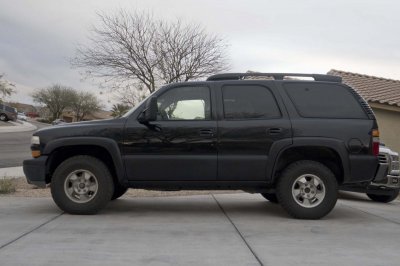
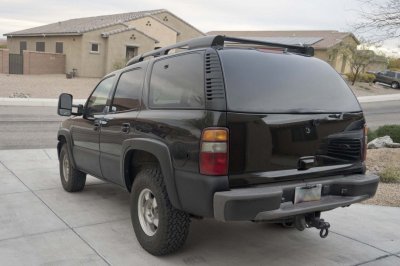
Bit overdue for an update. I've been hustling trying to combat this economic meltdown at work (I'm a real estate agent). Got the driver's side all color sanded, minus the driver door. But I'm not sure if I need to color sand the driver door, it came out that good.

View attachment 243059 View attachment 243060 View attachment 243061 View attachment 243062 View attachment 243063
Looks great!

You should post some before/after pictures just to show folks how far you’ve come with this.
 
OP
OP
Matthew Jeschke

Matthew Jeschke

Full Access Member
Joined
Dec 28, 2017
Posts
2,364
Reaction score
1,762
Location
Sahuarita, Arizona
I would--just so it matches in shine.
Yeah, for sure. Once color sanded the paint isnt quite as shiney / reflective. although after I am done I plan to use 3M machine polish qka swirl remover on whole truck with a DA buffer. I am not sure if that will bring that high reflective shine back?

Sent from my SM-A505U using Tapatalk
 
OP
OP
Matthew Jeschke

Matthew Jeschke

Full Access Member
Joined
Dec 28, 2017
Posts
2,364
Reaction score
1,762
Location
Sahuarita, Arizona
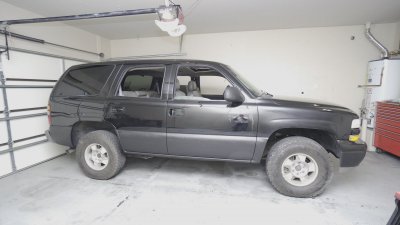
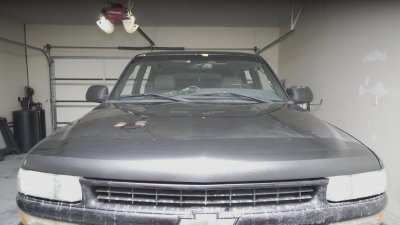
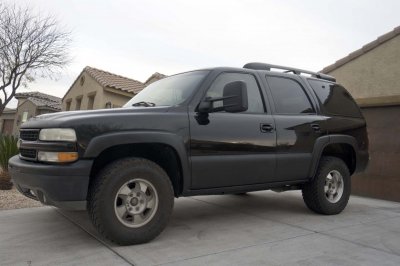
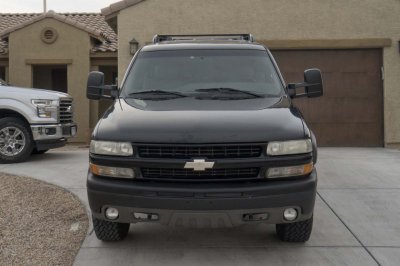
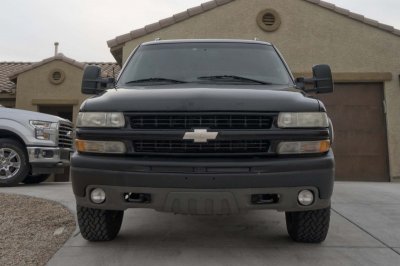
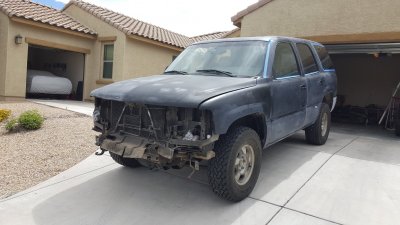
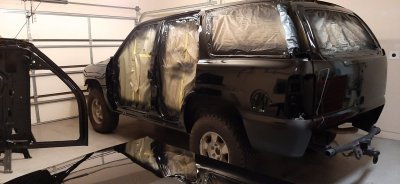
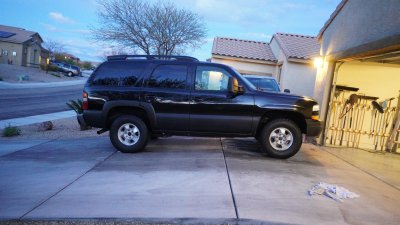
Here's a few before pictures and couple during pictures. There's really two before shots.

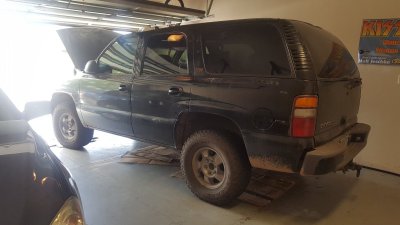
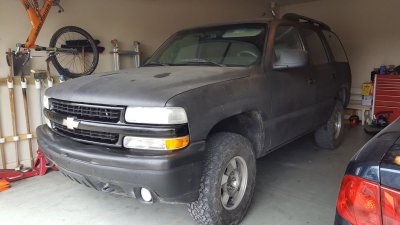
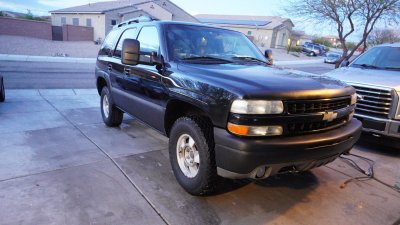
First before shot, I bough the truck with a really bad rattle can plastiDip paint job.

Then I spent a couple months painfully removing that plasti dip. The guy said paint underneath was decent. However, it was pretty well toast. The clear was pealing all over the place and it was really scratched up.

I then decided to start on the body work (basically roughing up paint body was in good shape - no rust minimal dents). It took me about 5 months to do the body work after my job each evening.

I reconfigured my 2 car garage to do the spray job. I should have done a better job of that. Mainly, installing better lighting... And painting one side of each door at a time. They paint MUCH better when flat.

I made LOTS of mistakes. Really, is a type of job that you cannot write a procedure on how to do. You really have to feel your way through it. I'd never have been able to do this without tips from people on forum here and amazingly feedback from body shop guys in town here. They were more than happy to share as many tricks of the trade as they could. Each one for my specific problem lol

I'm pretty excited about this whole restoration project as I find the 2nd Gen Tahoe to be the best in my opinion. Although would like a 3/4 ton version :/ They started making them more like cars in the 3rd & 4th gens. And the 5th gen will be independent suspension on all 4 corners which isn't a truck anymore. This old trucks are beasts with great motors. Hopefully I can breath new life into this one. Although it's not worth 2 cents lol

89926502_10107261575830790_4473385649134632960_o.jpg 90407013_10107261582013400_7740641144639324160_o.jpg 90420063_10107261581913600_473174244897849344_o.jpg 90529138_10107261567896690_8832766270479794176_o.jpg
 

Sam Harris

Elite Member
Supporting Member
Joined
Sep 26, 2018
Posts
7,445
Reaction score
14,977
Location
Texas
Here's a few before pictures and couple during pictures. There's really two before shots.

First before shot, I bough the truck with a really bad rattle can plastiDip paint job.

Then I spent a couple months painfully removing that plasti dip. The guy said paint underneath was decent. However, it was pretty well toast. The clear was pealing all over the place and it was really scratched up.

I then decided to start on the body work (basically roughing up paint body was in good shape - no rust minimal dents). It took me about 5 months to do the body work after my job each evening.

I reconfigured my 2 car garage to do the spray job. I should have done a better job of that. Mainly, installing better lighting... And painting one side of each door at a time. They paint MUCH better when flat.

I made LOTS of mistakes. Really, is a type of job that you cannot write a procedure on how to do. You really have to feel your way through it. I'd never have been able to do this without tips from people on forum here and amazingly feedback from body shop guys in town here. They were more than happy to share as many tricks of the trade as they could. Each one for my specific problem lol

I'm pretty excited about this whole restoration project as I find the 2nd Gen Tahoe to be the best in my opinion. Although would like a 3/4 ton version :/ They started making them more like cars in the 3rd & 4th gens. And the 5th gen will be independent suspension on all 4 corners which isn't a truck anymore. This old trucks are beasts with great motors. Hopefully I can breath new life into this one. Although it's not worth 2 cents lol

View attachment 243087 View attachment 243088 View attachment 243089 View attachment 243090
Man it looks great ! You should be very proud of all you learned and all the hard work you put into that paint job! Way to go!
 
OP
OP
Matthew Jeschke

Matthew Jeschke

Full Access Member
Joined
Dec 28, 2017
Posts
2,364
Reaction score
1,762
Location
Sahuarita, Arizona
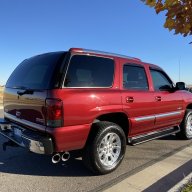
Worked for several more hours. I have to finish color sanding the hood, driver door, and rear hatch (didn't like how it turned out on hatch so redoing). Couldn't help but snap a couple pictures though. It's starting to look REALLY awesome, until you get close and see my paint runs (can never completely sand them out).

I plan on putting a scratch resistant ceramic coating or sorts after I'm done. Then go off road hahaha I bought truck for off road now looks too nice.

NOTE: I'm waiting on plastic rivets to arrive from Amazon. They're a month out :| Then I can attach my front fender flare. I found attaching those works best if you use a combination of 3M emblem glue and plastic molding tape. Use the tape to hold it up, then the glue to get a good even sticky.

A6403331.JPG A6403341.JPG
 

Forum statistics

Threads
138,041
Posts
1,997,693
Members
102,976
Latest member
Capybarbro
Back
Top