kbuskill
***CAUTION*** I do my own stunts!
Very nice. Can’t even tell it needs a bath either!
Thanks... you can trust me, she is filthy... it has rained so much lately that it would have been pointless to wash.
Disclaimer: Links on this page pointing to Amazon, eBay and other sites may include affiliate code. If you click them and make a purchase, we may earn a small commission.
Very nice. Can’t even tell it needs a bath either!
Tall order? You have all those cool LED mods. Think you got me beat. Lol
Dirty like mine that finally got washed today.
View attachment 209322
Esky racks look good man! I’m definitely a fan of the long bodies with esky racks! Just looks so clean! I like it in the white diamon too! Looks good!
That’s exaclty what I thought when I put the esky racks on my XL! Lol.Thanks brother...
I was looking at it today after the install and I guess my eye was just drawn to the rack because it's the newest thing and I was thinking... man that sucker looks long... lol
Slightly irritated....
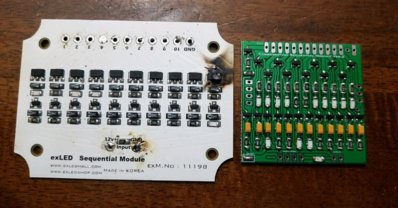
My "new and improved" sequential 3rd brake light is giving me issues...
Actually the light is great it's the modules I bought that have a problem...
View attachment 205990
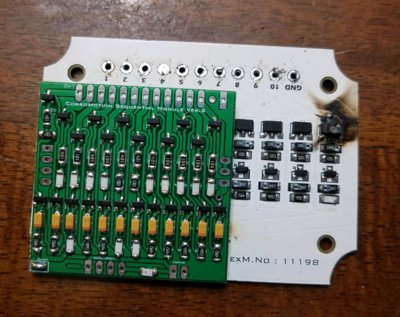
As you can probably guess, that upper right corner shouldn't be burned.
The 10 channel doesn't work on the right side so the last 4 LEDs don't light up any longer.
The same thing on the left side only the last 4 LEDs in the sequence light up first and stay lit the entire time.
Both burned in the same spot.
I messaged the seller/dealer... supposed to call me on Monday so we shall see.
The only good thing about it is it's nothing inside the light so I don't have to open it back up.
They say these modules are good for .5A... I don't know if that is per channel or total but I am only running 50mA to each channel X 10 channels is only .5A total anyway.
I can't imagine they rate them at .5A and run it so close to spec... seems like there would be a little buffer zone.
Oh well cheap Chinese (Korean) crap just like so many things these days.
Ok rant over... I will let you all know how things pan out with it.


Similar to what you have?
https://www.amazon.com/Canbus-Switc...6-8-7910--4-2-145-104-1-0&tag=viglink20600-20


Have you found if the additional steel scrubbing material helps collect more oil or not?Well I modified my catch can by adding some more filter material and mounted it today.
This is a pic of the inside of the can the way it came with just the stainless screen/mesh inside.
View attachment 193529
And then I added a piece of green scrubby to act as a better filter.
View attachment 193530
And then I added a stainless steel pot scrubber to give the oil and water vapor something to condense on a little easier AND to help hold the green filter in place.
View attachment 193531
Then I started looking under the hood for a location to mount it.
Originally I had planned on mounting it above the power steering fluid reservoir on the alternator bracket but I decided that it would probably interfere with getting to the power steering cap.
So I decided to mount it just in front of the fuse box on the driver's side fender.
View attachment 193532
I also like the fact that due to the distance from the engine, the can should stay cooler which will aid in the condensing process of the vapors back to a liquid.
Obviously I need to get some hose tomorrow to actually hook it up. And then begins the steam cleaning.
Stay tuned.... it's about to get good... lol
Have you found if the additional steel scrubbing material helps collect more oil or not?
Also I have the same can, and do you think it matters if the extra stainless steel material is in the top or the bottom of the can?
2001 Yukon SLT
2012 Yukon XL Denali
2011 Yukon Denali RIP 5/20/18
Sent from my SM-G930V using Tapatalk
