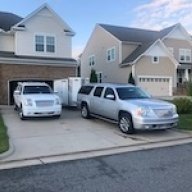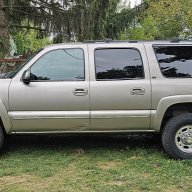
Brought a new (to me) Burb home

Disclaimer: Links on this page pointing to Amazon, eBay and other sites may include affiliate code. If you click them and make a purchase, we may earn a small commission.

OP
OP
Loki223

Loki223

Full Access Member
Joined
Apr 27, 2023
Posts
728
Reaction score
1,609
Location
Elk, WA
Should mention, i haven't forgotten about this. Still have a pile of parts to start throwing on the burb and make myself happier about it. I remember having more free time when i worked more, but wasn't married...

 
OP
OP
Loki223

Loki223

Full Access Member
Joined
Apr 27, 2023
Posts
728
Reaction score
1,609
Location
Elk, WA
Aaaaaannnnndd since i like having a parts pile i just ordered the light up front bowtie, Gm PN # 84751545 found it on ebay. Been looking for one and the last time i checked they were unobtainable. so just pulled the trigger on that. Looks like i should be able to get enough access to install without removing to much. i think the burb might find itself in the garage this weekend to start installing stuff and dwindle down my parts pile
 
OP
OP
Loki223

Loki223

Full Access Member
Joined
Apr 27, 2023
Posts
728
Reaction score
1,609
Location
Elk, WA
Well this looks disgusting

1000015066.jpg


And the seat pad i ordered was wrong. Long pattern vs short pattern. So returning the short pattern and getting the long version now..

20250308_100039.jpg

20250308_100717.jpg

20250308_100742.jpg


And figured out why only one side vibrated. Wiring failed. So just ordered 2 new dorman units

20250308_101616.jpg


But new cushion and leather look great... hopefully the new parts all show. Up this week so i can mess with it next weekend
 
OP
OP
Loki223

Loki223

Full Access Member
Joined
Apr 27, 2023
Posts
728
Reaction score
1,609
Location
Elk, WA
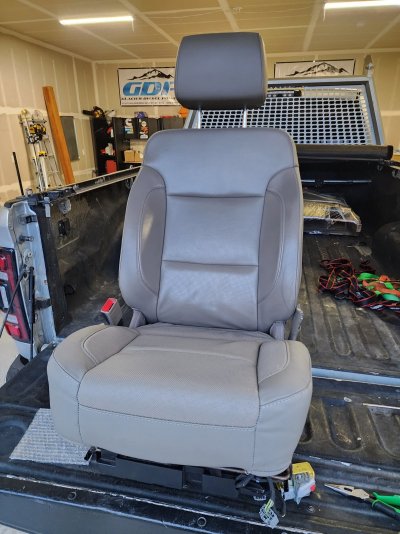
New cushion and leather, courtesy of the seat shop like recommended on here

20250308_100149.jpg

20250308_101822.jpg


And staining on the old ones from previous owners
20250308_102455.jpg
20250308_102513.jpg


I guess until next weekend hopefully
 
OP
OP
Loki223

Loki223

Full Access Member
Joined
Apr 27, 2023
Posts
728
Reaction score
1,609
Location
Elk, WA
Following to see if that is the right heater element. Even in Florida, the heated seat is nice on the way home from work to ease back pain.

TO check yours prior to ordering see my pictures, you'll probably need to unbolt your seat and look under it to ID which one you need. Turns out my 15 wants the long one
 
OP
OP
Loki223

Loki223

Full Access Member
Joined
Apr 27, 2023
Posts
728
Reaction score
1,609
Location
Elk, WA
Also yes, i did go through the effort of seeing if the short one would work, nope. It's a half inch to short. I hate waiting on parts. Lol
 

SpyShops212

Full Access Member
Joined
Jan 29, 2022
Posts
465
Reaction score
434
Well this looks disgusting

View attachment 451930


And the seat pad i ordered was wrong. Long pattern vs short pattern. So returning the short pattern and getting the long version now..

View attachment 451931
View attachment 451932
View attachment 451933

And figured out why only one side vibrated. Wiring failed. So just ordered 2 new dorman units

View attachment 451934

But new cushion and leather look great... hopefully the new parts all show. Up this week so i can mess with it next weekend
Wow someone had a bad period!
 

SpyShops212

Full Access Member
Joined
Jan 29, 2022
Posts
465
Reaction score
434
New cushion and leather, courtesy of the seat shop like recommended on here

View attachment 451935
View attachment 451936

And staining on the old ones from previous owners
View attachment 451937View attachment 451938

I guess until next weekend hopefully
I did this to my two front seat bottoms on my 2018 Escalade luxury. They look good new. All oem parts. The second row was damaged from my daughter’s baby seat. I found someone selling take offs for $230 for both captains. You do not need to remove the seats. You can definitely do it while the seat is in place. Taking out the desk is heavy and can damage your car.
 
OP
OP
Loki223

Loki223

Full Access Member
Joined
Apr 27, 2023
Posts
728
Reaction score
1,609
Location
Elk, WA
It's not that hard to pull the seats honestly. And in my line of work, heavy things are really only heavy to other people. Wife gets annoyed when i pick up things like they are nothing when she could hardly move it. So moving the seat to the truck bed is pretty easy honestly. Plus i think i would cuss more trying to do the seat bottoms with the seats in the burb. Some of the parts are showing up this week, some might not be here until next week sadly. So this weekend is other projects in the gargae, and i'll get back to this next weekend
 
OP
OP
Loki223

Loki223

Full Access Member
Joined
Apr 27, 2023
Posts
728
Reaction score
1,609
Location
Elk, WA
1000015254.jpg


Scored a set of rims for the old girl. Should look pretty good on her. Going to inspect all the suspension and steering components before buying rubber though
 
OP
OP
Loki223

Loki223

Full Access Member
Joined
Apr 27, 2023
Posts
728
Reaction score
1,609
Location
Elk, WA
replacement heated seat showed up yesterday, went to start putting the driver's seat together last night but got called away on other things and didn't get back to it. I'm hoping to dedicate a little time to it tonight to get the driver's seat back together. Regardless of what i get done during the week, plan is for Saturday to dedicate to finishing this phase of the burb. LED bowtie light, rear esky style Morimoto tail lights, and finish both front seats before the wife is allowed to direct my attention elsewhere. After that's done we plan on swinging by a buddies to put it in the air and inspect the suspension and steering. Tires that are on it show signs of unusual wear, so going to inspect and replace any postponed maintenance items like lower BJs and tie rods that might be needed, get those done, then a fresh alignment, then new tires on the new (to me) rims
 

Geotrash

Dave
Supporting Member
Joined
Feb 16, 2018
Posts
7,849
Reaction score
20,430
Location
Richmond, VA
and finish both front seats before the wife is allowed to direct my attention elsewhere.
Good luck with that!

After that's done we plan on swinging by a buddies to put it in the air and inspect the suspension and steering. Tires that are on it show signs of unusual wear, so going to inspect and replace any postponed maintenance items like lower BJs and tie rods that might be needed, get those done, then a fresh alignment, then new tires on the new (to me) rims
Sounds like a plan! Looking forward to hearing what you learn.
 
OP
OP
Loki223

Loki223

Full Access Member
Joined
Apr 27, 2023
Posts
728
Reaction score
1,609
Location
Elk, WA
Today i leaned that 4 of the. 12 or so clips that hold the leather down wanted to fight me about it
1000015404.jpg


1000015403.jpg


Still need to put the plastics back on and put her back in the burb. But those 4 that fought me got me ready for a drink
 

Attachments

  • 1000015403.jpg
    1000015403.jpg
    359.8 KB · Views: 16
OP
OP
Loki223

Loki223

Full Access Member
Joined
Apr 27, 2023
Posts
728
Reaction score
1,609
Location
Elk, WA
You sayin’ you did that project WITHOUT drinkin’?!?! :rotflmao:

In it's entirety. I learned years ago if i want to get something done, the drinking can only start AFTER you are done...i also understand now why so many people say everyone should redo a seat at some point to have the knowledge as to why it's sometimes easier to just let someone else do it next time. lol. I did notice i did this one from the back to front, and the seat shop recommends doing it from the front to the back, so maybe i'll do the passenger seat on Saturday and do it the opposite direct and see if that goes easier or not. Not sure if having the cushion off the brackets would be easier or harder, takes a bit of effort to get the cushion where it wants to be without leather on it, so thinking i might put the cushion on and then go front to back on the snaps. After that, i may let someone else do it if i ever need it done again...

Also Saturday new tail lights go on and a couple other things. Looking forward to being able to say this round of updates are done
 
OP
OP
Loki223

Loki223

Full Access Member
Joined
Apr 27, 2023
Posts
728
Reaction score
1,609
Location
Elk, WA
So, i finished the driver's seat last night and slapped her into the burb. And i just have to say...wow. What a huge difference. Start to finish it probably takes about an hour, i'll know for sure tomorrow when i do the passenger seat. But if i had to guess, about an hour from starting to pull the seat to reinstalling the seat. My timing got broken up pretty badly waiting on parts for the driver's seat. But there is a massive difference, highly recommend to anyone that you should upgrade your seat cushion
 
OP
OP
Loki223

Loki223

Full Access Member
Joined
Apr 27, 2023
Posts
728
Reaction score
1,609
Location
Elk, WA
And i suppose i should mention, i threw this in as well yesterday
671bZMDaE7KZjhgspuYg=w1223-h917-s-no-gm?authuser=0.jpg

VJ-Gkoxn-jz2GMdTR4kw=w1223-h917-s-no-gm?authuser=0.jpg


I'll be honest, i'm kinda disappointed in the brightness of it. For being a genuine GM product, i expected the glowing ring to be brighter and more like a DRL. It's noticeable at night, but i was just thinking it would be brighter...But regardless, that's another project done on the burb, so i have less to do tomorrow morning.
 
OP
OP
Loki223

Loki223

Full Access Member
Joined
Apr 27, 2023
Posts
728
Reaction score
1,609
Location
Elk, WA
And for the sake of others, GM P/N 84751545 is for the LED back lit bow tie on the grill. it is basically plug and plus, you bore out a hole behind the emblem and connect the wires. The kit has you insert the wires through the grill, and then insert the wire ends into a plug. They snap in, black to black, white to grey is what i did. as it made the most sense. From there connect it to the supplied T harness that runs over to the driver's side headlight. It honestly only took a couple of minutes. Pull the plastic cover off the top of the grill, i used a long screw drier to release one of the clips on the stock bowtie from behind. and pop that off. drill the hole, run the wires up and connect them into the plug, then route the wire where you want it and put everything back together. Took longer to hunt down the correct PN then it did to actually do the install
 

Forum statistics

Threads
138,098
Posts
1,999,051
Members
103,023
Latest member
justafarmer
Back
Top