If it ain’t free, it ain’t fer me…..Get yourself a roll of STEGO tape, that stuff kicks a$$.
")
Disclaimer: Links on this page pointing to Amazon, eBay and other sites may include affiliate code. If you click them and make a purchase, we may earn a small commission.
If it ain’t free, it ain’t fer me…..Get yourself a roll of STEGO tape, that stuff kicks a$$.
Pm your address you’ll get a free oneIf it ain’t free, it ain’t fer me…..
Only if its really free paw paw and i pay for postage….. then u gots a dealPm your address you’ll get a free one
I got it all covered. I got free to me stuff goin on too.Only if its really free paw paw and i pay for postage….. then u gots a deal


I usually reference used or pulled parts from ebay to verify where clips and bolts are located on the backside of thingsSomeone with a Denali care to send me a photo showing your wiring harness to fuse box connections. I have a couple that I need to verify the routing path on and see where each of them enter the bottom of the fuse box. I appreciate it.
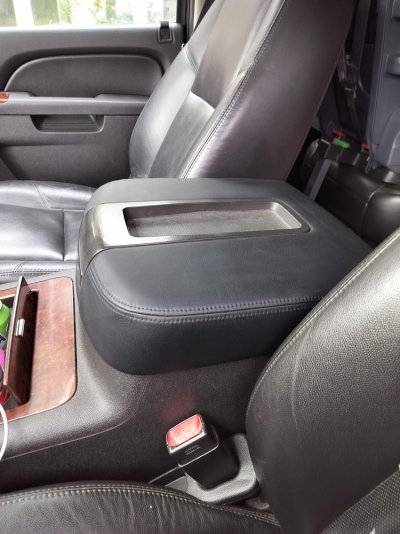
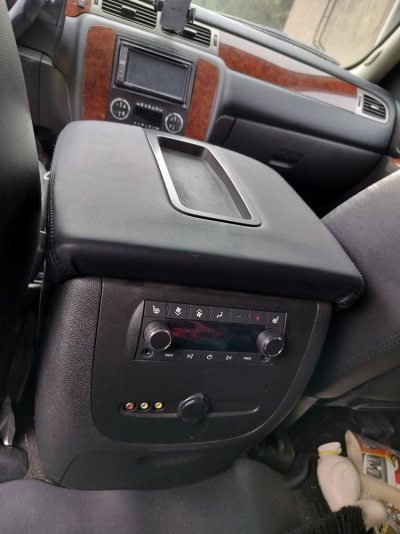
Almost forgot to show off the final result. Overall I rate it 2/10 when it comes to difficulty, and I do prefer it looking a bit cheap compared to it being all torn up.In today's episode of "Tuning with Temu"; crazed sailor brings an armrest out to sea.
(figured I have quite a bit of spare time after working hours so why not)
Overall, disassembly was a lot easier than expected, just gotta know the underside plastic separates revealing the screws holding the hinge and latch in place.
Removing the old fabric was as easy as plucking off staples with a flathead.
Beneath it is a separate layer of dense foam, just gotta see to it that it stays in place during the next bit.
Starting from the inside edge, just trace the form fit fabric along the inner edge line and staple it down, then attempt to stretch outwards and around the outer edges in as even of a fashion as possible and staple it down. Staples need to be really short and don't bother trying it with an office stapler, get a bob the builder type stapler.
Found a weird old spray bottle of upholstery foam from the late 90's and figured why not and sprayed it down until soaking wet and left it to dry for two hours according to instructions. Came back to see it looked all ruined, pale white stuff all over the surface. Turns out it wasn't the case, was able to wipe it off with soap and water and now the fabric feels a lot more hardened and springy, not soft and stretchy like before, and no longer accepts greasy fingerprints. Ten points to whatever chemical coctail that was.
Still gotta wait another week for an assembled picture of the finished project but I'm bored so here goes;
View attachment 461374View attachment 461375
Far from perfect but hey at least it's not any worse right? For 8 bucks I'd give this one a recommend.
Installed Dorman aluminium(british accent) heater T's. 1 year old SKP T's came off no problem, but the Dorman hoses left their clip on the T. One spilled its o-rings and spacers. Think I got them back in right... Also replaced small sections of wiring loom that had disintegrated.
View attachment 463555
Replaced my 2 year old OEM thermostat that seems to stick. Slapped a Motorad 180 deg in there. Old one opened up (fully?) anywhere from 194 to 203 degrees. So far this Motorad seemes to drop temp around 188 deg. I will try a lower fan-on temp like maybe 195. (factory fan 1 on temp is ~201 degF)
Think I found the sticking point on the GM thermostat.
View attachment 463556
View attachment 463557
Accessory rear console. Been discontinued for who knows how long now. For those with middle row captain seats.What's that from? Pickup?
oo I have that one! Fingers crossed it will not interfere with the cargo grate that's gonna arrive on wednesday so that I can finally get rid of this godawful "separate cargo space" loophole solution that is a literal cargo pallet in the trunkAccessory rear console. Been discontinued for who knows how long now. For those with middle row captain seats.
This is what it looks like actually on a K2.Added tow-hooks to the front. They had been removed by a previous owner when they installed the Rough Country bullbar.
View attachment 463634
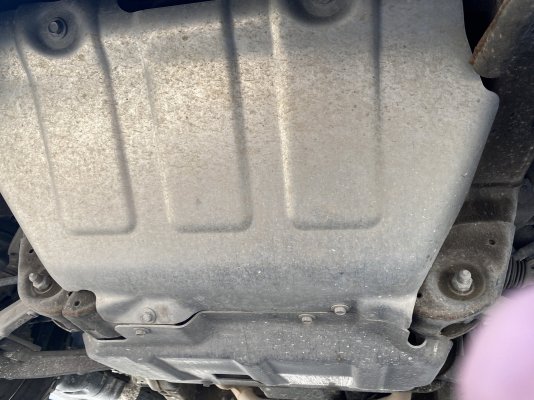
Also, did a little hammering on the corner of the upgraded aluminum splash-guard. Had to drill a hole to align with the factory frame hole, and I was soooo close by just eyeballing it. Only needed to use a hand file to add 1/8" of clearance to line up.
View attachment 463635
There's still a little hump there from whatever the K2 frame has on it, but I'm not too worried. Anything is better than the plastic splash-guard.
That OEM stat was sticking from the start. Costs 3x what others cost!
Even though it was within normal operating range, the variability made me worry it might stick for good someday.
So far the Motorad is consistently at 188 degrees where I notice the temp dropping for the first time,
and as cool as the engine will get. Also I did remove the jiggler valve, which leaves about a 1/8" hole. (What I wanted)
For whatever reason I liked the way the Motorad looked over the Aisin/Vernet.
Gates (good reviews?), Lingenfelter (bad reviews?) look just like the Motorad.
Ultra-power, Dorman and maybe Autotechnica look like the OEM design.
Mine was a 180, Motorad also have a 174 and 160.. and another design..
ECT modifier for spark timing shows upto -3 degrees at 212F coolant temp and 0 degrees at 194F.
So at 203F there would be upto -1.5 degree of timing pulled.
Looks like staying between 176-194 should be 0 timing pulled (or added).
View attachment 463599