You are using an out of date browser. It may not display this or other websites correctly.
You should upgrade or use an alternative browser.
You should upgrade or use an alternative browser.
What did you do to your NNBS GMT900 Tahoe/Yukon Today?
- Thread starter phattyford
- Start date
Disclaimer: Links on this page pointing to Amazon, eBay and other sites may include affiliate code. If you click them and make a purchase, we may earn a small commission.
Tonyrodz
Resident Resident
Is that a crack in the housing?I feel small posting this after that horrible tornado story above. Great job and much respect to you.
I just wanted to share my repairs from today.
I had an engine light on the dash throwing a code P0449. Did the usual searches and homework and replaced the vapor canister.
View attachment 240641
https://www.amazon.com/gp/aw/d/B00RW3A04E?psc=1&ref=ppx_pop_mob_b_asin_title
IMHO this is the original and has quite a bit of miles on it.
View attachment 240645
View attachment 240646
After the install codes are clear and no engine light.
View attachment 240647
Also replaced the belts.
View attachment 240648
Is that a crack in the housing?
Yeah looks like it.
HiHoeSilver
Away!
I have this, too. Hopefully mine goes like yours!
avalonandl
Full Access Member
Air shocks arrived from Rock Auto. Will have them installed this March.
hopefully it stays gone, takes 2-3 days sometimes for it to set has to cycle thru cold/hot, certainly looks like it was the issue.
your getting up there in the miles I had on my 00

hopefully it stays gone, takes 2-3 days sometimes for it to set has to cycle thru cold/hot, certainly looks like it was the issue.
your getting up there in the miles I had on my 00
Laying on your back the toughest parts IMO were, beginning with the hardest: (Unless you have access to a lift then it’s cakewalk)
Disconnecting the old line off the charcoal canister. It’s tight up there next to the fuel tank and axle pinion. I could not get the clip to release so I carefully used a pick tool and flathead screwdriver to break it apart until it slid off. I coated the seal on the new one with sill glyde and it snapped into place very nicely. Even getting the new one into place and snapped on was a bear just because it’s tight area and dark and trying to use a work light to see.
Getting to the head of the bolt to change the mounting bracket on the top side of the frame. It’s 13mm and I used a ratchet wrench and sprayed some WD-40 on the threads.
Getting the new zip ties into the vent tube was a ***** too. Need a creeper with a back support so you can recline up. Trying to sit half way up and reach up was murder on the back. Matter of fact if I were to do it again I’d sit outside the fender on a bucket and just reach up in there and do it blind. Also want to make sure the filter end which is bigger on the replacement part is snug so it doesn’t rattle around in the body panel.
There is some rust and scale and dirt debris back there too so I used ear plugs and safety glasses though I still got some in my mouth and nose holes and shoes.
List of tools I used:
13MM ratchet wrench
WD-40
Sill-Glyde
Various type pick tools
Long shank flathead screw driver
Work light
Side cutters for cutting the old nylon ties and to cut the old hose off the valve to make it easier to maneuver things out of there.
Hope this helps.
I also found a loose damned diff cover bolt leaking and had to snug that up!!!! WTF?! Lots of that going on around here lately it seems!
When I did mine I just disconnected the filler tube from the body and pulled it down, attached the new one and pushed it back up and clipped it back on, I think it has one bolt and one plastic clip makes it super easy.Laying on your back the toughest parts IMO were, beginning with the hardest: (Unless you have access to a lift then it’s cakewalk)
Disconnecting the old line off the charcoal canister. It’s tight up there next to the fuel tank and axle pinion. I could not get the clip to release so I carefully used a pick tool and flathead screwdriver to break it apart until it slid off. I coated the seal on the new one with sill glyde and it snapped into place very nicely. Even getting the new one into place and snapped on was a bear just because it’s tight area and dark and trying to use a work light to see.
Getting to the head of the bolt to change the mounting bracket on the top side of the frame. It’s 13mm and I used a ratchet wrench and sprayed some WD-40 on the threads.
Getting the new zip ties into the vent tube was a ***** too. Need a creeper with a back support so you can recline up. Trying to sit half way up and reach up was murder on the back. Matter of fact if I were to do it again I’d sit outside the fender on a bucket and just reach up in there and do it blind. Also want to make sure the filter end which is bigger on the replacement part is snug so it doesn’t rattle around in the body panel.
There is some rust and scale and dirt debris back there too so I used ear plugs and safety glasses though I still got some in my mouth and nose holes and shoes.
List of tools I used:
13MM ratchet wrench
WD-40
Sill-Glyde
Various type pick tools
Long shank flathead screw driver
Work light
Side cutters for cutting the old nylon ties and to cut the old hose off the valve to make it easier to maneuver things out of there.
Hope this helps.
I also found a loose damned diff cover bolt leaking and had to snug that up!!!! WTF?! Lots of that going on around here lately it seems!
trailblazer
Full Access Member
- Joined
- Jan 22, 2019
- Posts
- 293
- Reaction score
- 407
I just got done re-tightening the rear shock bolts. I have done this four times now and apparently I did a crappy job of torquing the top bolts. The rattle is finally gone it it has been driving me insane for weeks. So smoooooooooooth again MY GAWD that was driving me crazy.
gooffeyguy
Tom
Sill-Glyde? Anything like Astroglide? LoL
On that note, friends have given me a hard time when they see that I keep a tube of KY in my tool chest. I use it on O-rings, especially fuel injectors. It help lubricate when installing them and is water based and not oil based that will eventually dry them out and cause them to crack
2001 Yukon SLT
2012 Yukon Denali XL
2011 Yukon Denali RIP 5/20/18
Tonyrodz
Resident Resident
KY has many fine usesSill-Glyde? Anything like Astroglide? LoL
On that note, friends have given me a hard time when they see that I keep a tube of KY in my tool chest. I use it on O-rings, especially fuel injectors. It help lubricate when installing them and is water based and not oil based that will eventually dry them out and cause them to crack
2001 Yukon SLT
2012 Yukon Denali XL
2011 Yukon Denali RIP 5/20/18
R3cord303
Posse In Effect
Im not sure what happened to the exposure on the first picture, but I just got done taking off the roof rack. Right now I’ve got the bolts run back in with toyota FIPG sealing them to the roof to hopefully prevent leaks, which is ugly as hell, but what I’m gonna do is get some black ABS filament for my 3D printer and whip up some caps to cover them. That’ll purdy it up just fine.
I think it looks a lot better anyway how it is but that’ll be the finishing touch


I think it looks a lot better anyway how it is but that’ll be the finishing touch
iamdub
Full Access Member
Im not sure what happened to the exposure on the first picture, but I just got done taking off the roof rack. Right now I’ve got the bolts run back in with toyota FIPG sealing them to the roof to hopefully prevent leaks, which is ugly as hell, but what I’m gonna do is get some black ABS filament for my 3D printer and whip up some caps to cover them. That’ll purdy it up just fine.
I think it looks a lot better anyway how it is but that’ll be the finishing touch
View attachment 240710 View attachment 240711
I know 3D printing is fun, but I got a whole assortment of snap-in caps and various sizes of plastic rivets off Amazon for $9. I've replaced a handful of missing rivets holding splash shields and other parts on my girl's car and some I tore when I removed the fender liners on the Tahoe.
https://www.amazon.com/GOOACC-Unive...astic+rivet+assortment&qid=1581902865&sr=8-18
I painted the caps for the roof rack delete but decided on a different route. The caps are still stabbed in this cardboard and stored on a shelf. Not sure what I'll do with them.
George B
¯\_(ツ)_/¯
I installed my splash guards over the weekend. I feel the end result is acceptable. Since I didn’t want to cut up the ends of my running boards just yet I ended up going a different route. What I did was sort of reform the ends of the running boards with my heat gun. I gained about 3/8” that way and then slid the boards back about 1/2”. Got just enough clearance to put the guards on. They have a slight static rub when they articulate but not much. Looks good to me.
Here is the factory board end.
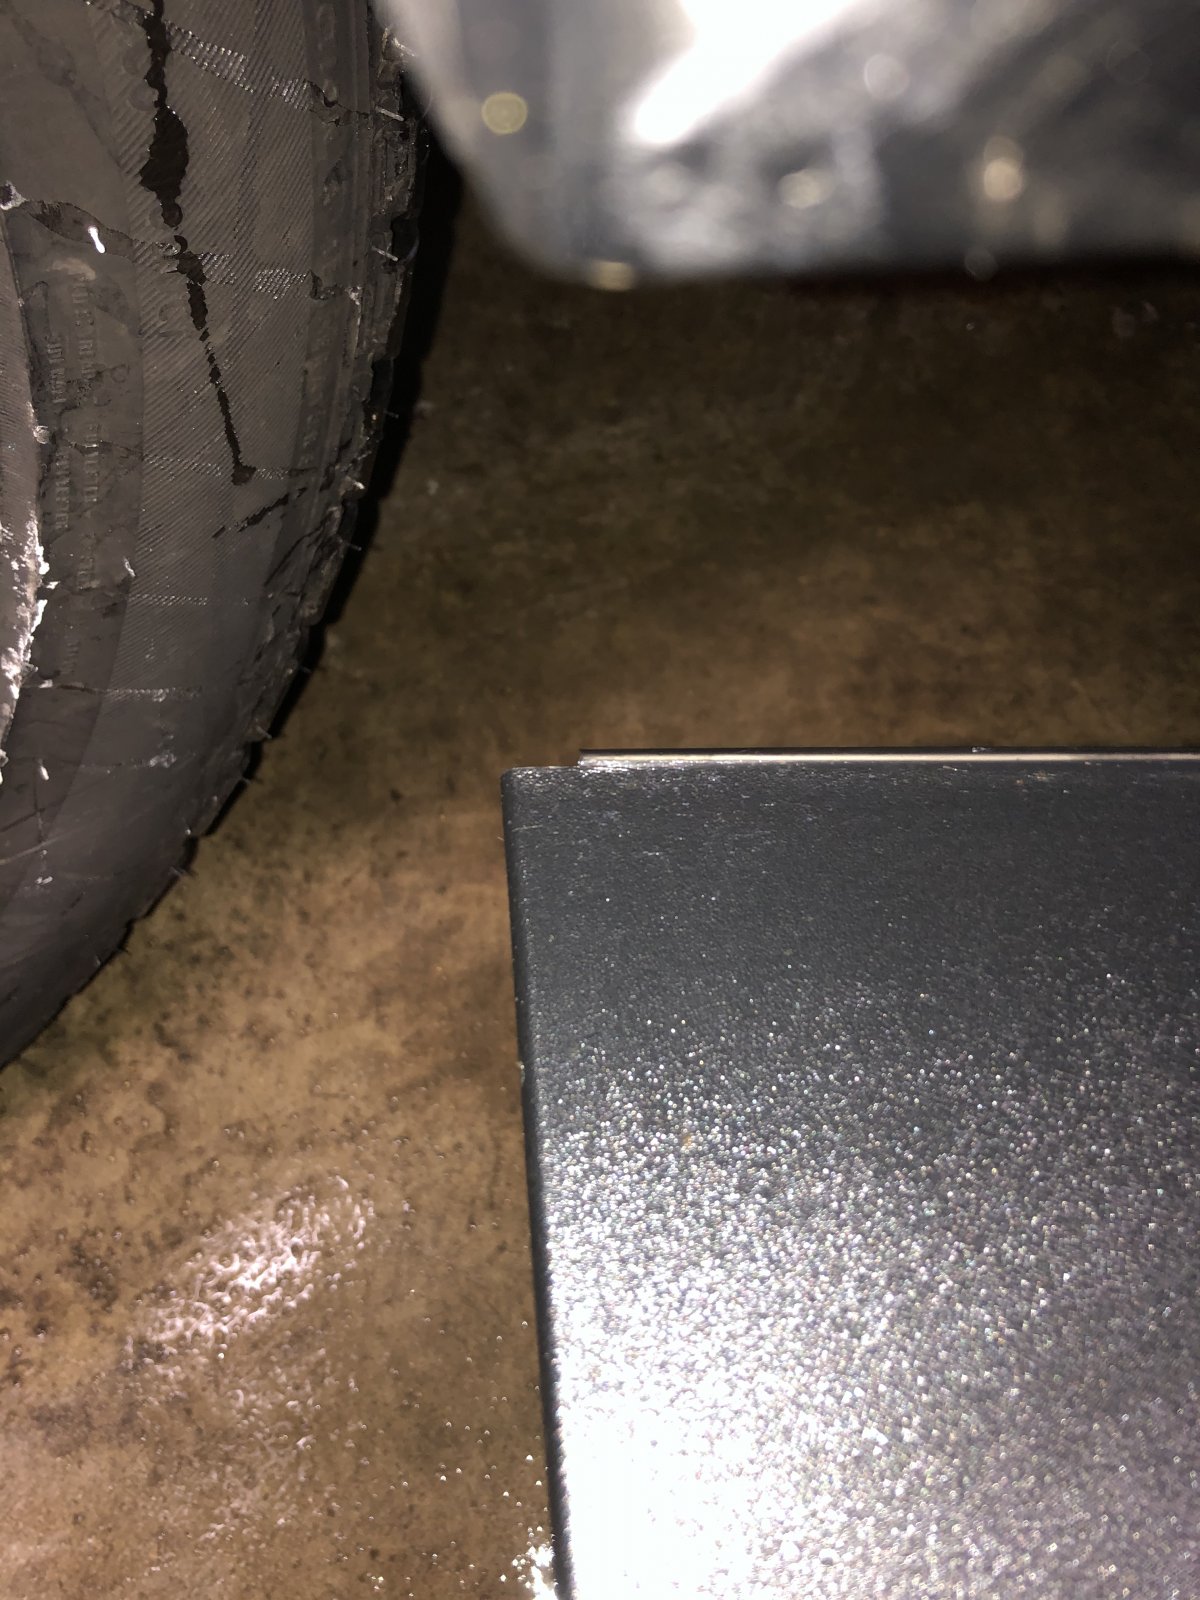
Here is the modified end.
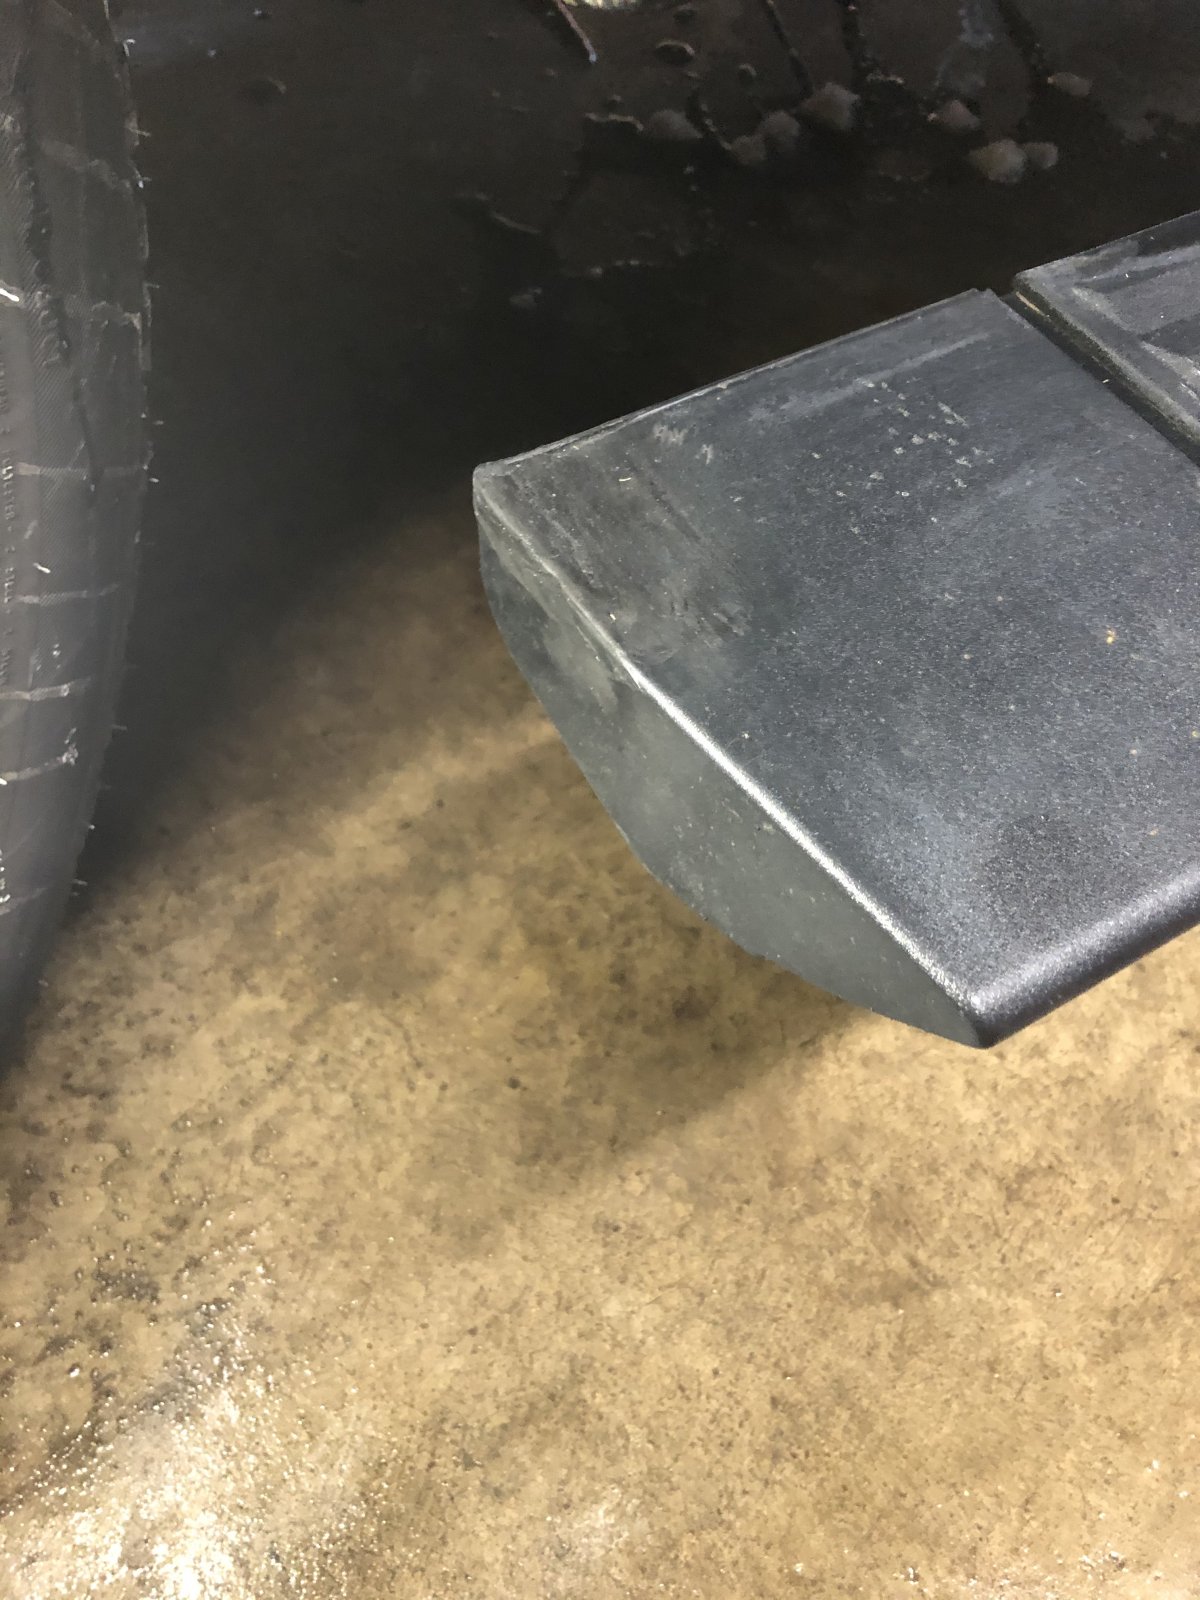
Here is how they fit up with the boards.
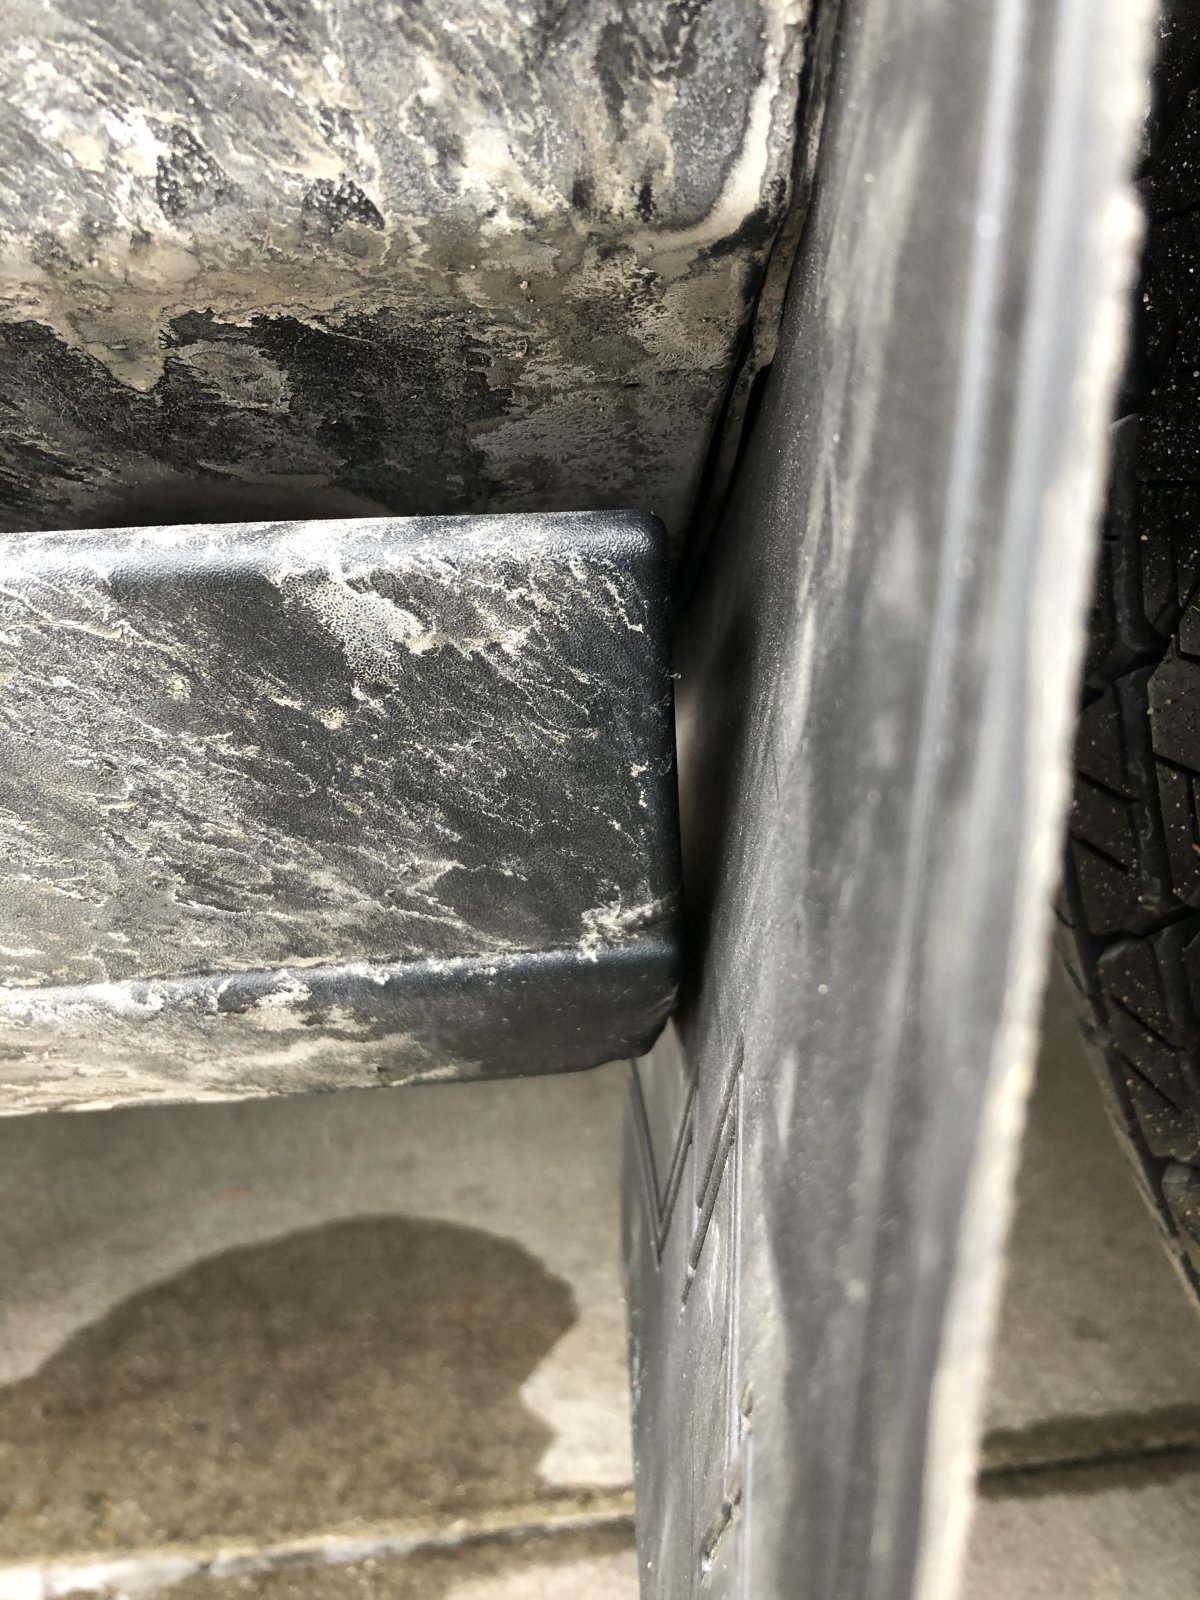
Final product minus a much needed wash.

Here is the factory board end.
Here is the modified end.
Here is how they fit up with the boards.
Final product minus a much needed wash.
Hehe. I got a similar set from Amazon:I know 3D printing is fun, but I got a whole assortment of snap-in caps and various sizes of plastic rivets off Amazon for $9. I've replaced a handful of missing rivets holding splash shields and other parts on my girl's car and some I tore when I removed the fender liners on the Tahoe.
https://www.amazon.com/GOOACC-Unive...astic+rivet+assortment&qid=1581902865&sr=8-18
I painted the caps for the roof rack delete but decided on a different route. The caps are still stabbed in this cardboard and stored on a shelf. Not sure what I'll do with them.
View attachment 240714
WINOMO 500Pcs Car Door Trim Panel Clip Fasteners Universal Mixed Bumper Rivet Fastener Clip Assorted Kit https://www.amazon.com/dp/B076BRH7JZ/ref=cm_sw_r_cp_api_i_5.EsEbXK3PC6C
Been used many times already! Pretty handy.
iamdub
Full Access Member
Hehe. I got a similar set from Amazon:
WINOMO 500Pcs Car Door Trim Panel Clip Fasteners Universal Mixed Bumper Rivet Fastener Clip Assorted Kit https://www.amazon.com/dp/B076BRH7JZ/ref=cm_sw_r_cp_api_i_5.EsEbXK3PC6C
Been used many times already! Pretty handy.
I'd have to pass on that one just cuz they're not organized! lol
drove it.... hunid-hunidtwenty
 nothing too extreme
 me & the 6.2 have a love affair
hunid-hunidtwenty nothing too extreme me & the 6.2 have a love affairgooffeyguy
Tom
Need some KY or Sill-Glyde?drove it....
2001 Yukon SLT
2012 Yukon Denali XL
2011 Yukon Denali RIP 5/20/18
R3cord303
Posse In Effect
Any of you guys that have dealt woth terrible front end noises- what did you check for? I’m looking at all the pivot points and nothing seems to be worn or leaking. It had all new control arms and ball joints put in 25,000 ago. Its been getting a little worse but only really in parking lots. We just did 5 hours on the highway and some back roads and it doesnt make any damn noise then, handles and drives fine, but you get in a parking lot and it sounds like an elephant walking across a 100 year old hardware floor
lowh07
Full Access Member
- Joined
- Dec 1, 2017
- Posts
- 445
- Reaction score
- 1,772
Cleetus & Cars was a lot slower than expected. I should’ve registered the Tahoe. Still, gives me motivation so get the LSA blower installed. Should be in the 11s when all said and done. Enough to beat most of the corvettes/mustangs/camaros I saw
Similar threads
- Replies
- 6
- Views
- 1K
- Replies
- 3
- Views
- 4K
- Replies
- 56
- Views
- 12K