Want to replace your backup camera

Disclaimer: Links on this page pointing to Amazon, eBay and other sites may include affiliate code. If you click them and make a purchase, we may earn a small commission.

okfoz

Full Access Member
Joined
Apr 29, 2014
Posts
387
Reaction score
152
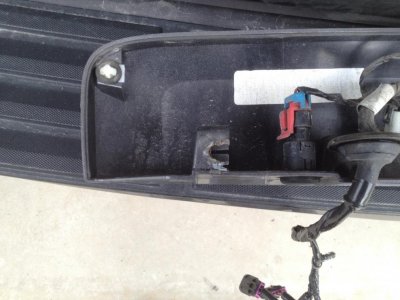
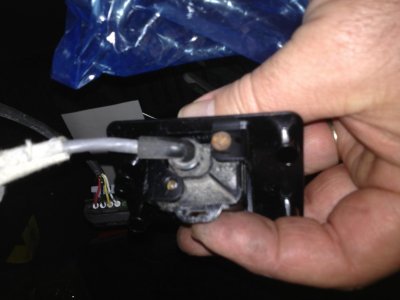
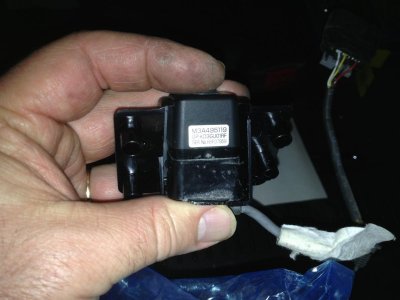
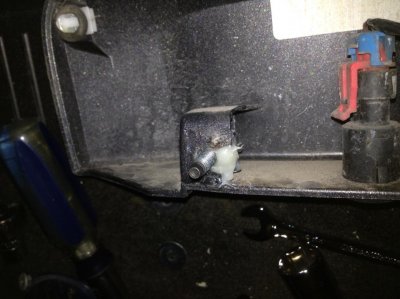
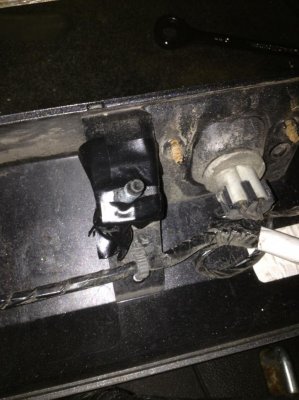
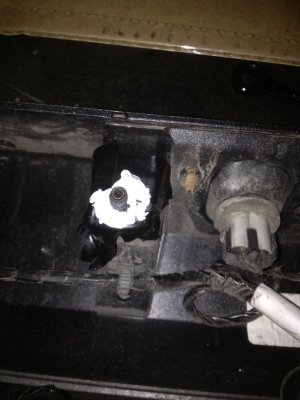
If your backup camera does not work, flickers, stops working in the rain, blinks in and out, you have tried everything else... Here is how I replaced the camera.

I figured it was my camera because it was intermittent, when it was raining it quit working, and it flickered, and was always dim.

Difficulty: 3/5
PITA: 4/5
Chances you will break something: Almost 99.7%

Tools/items you will more than likely need:
-small bladed screwdriver
-10mm deep well socket
-10mm through bolt socket
-13mm socket
- T30 Torx bit, a screwdriver will work but you might need some real umph to remove the two bolts for the power liftgate if you have it.
-interior trim popper
-Vise-Grip pliers
-Adjustable wrench, has to be a rather big one for the nut on the window wiper
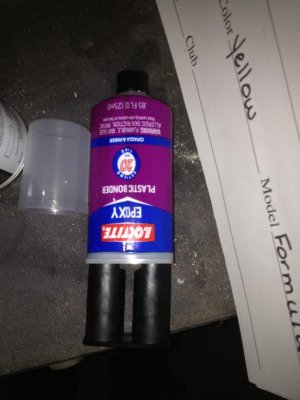
-Plastic Epoxy
-long Needle nose pliers
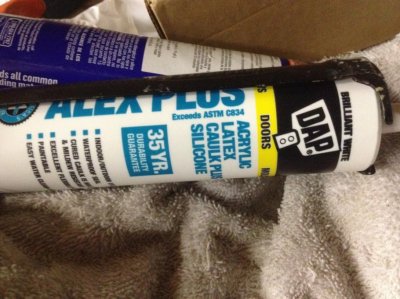
-silicone or latex silicone


First I would recommend starting here: it is not a repair for the OE one in the rear trim piece with the license plate lights, but it gets you part way there with the removal of the interior lift-gate panels..

https://www.youtube.com/watch?v=m2FbeaDzvkY

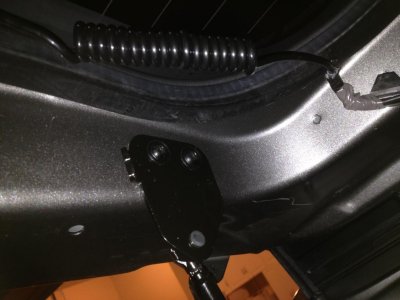
If you have the power liftgate, then you also have to remove the two bolts on the left side of the lisfgate.
 

Attachments

  • auto hatch bolts.jpg
    auto hatch bolts.jpg
    89.9 KB · Views: 131
Last edited:
OP
OP
O

okfoz

Full Access Member
Joined
Apr 29, 2014
Posts
387
Reaction score
152
The next thing you need to do is remove the upper trim piece from the upper liftgate motor arm. It is a snug fit, but it comes out... Once off, you can lower the arm into the liftgate motor well to get it out of the way enough to raise and lower the liftgate...

The next thing you have to do is remove the trim piece from the rear wiper. And remove the 13mm nut.

*** NOTE My wiper arm was corroded to the bolt, so I was not able to remove the arm itself, which would have made this slightly easier. However I was able to loosen the large nut enough to be able to flip the wiper motor over... So technically I never removed the wiper arm itself.

From the inside you have to use the bolt through ratchet, and hold the bolt with the blade screwdriver..

You have to then swing the rear wiper motor 180° to access one of the nuts for the rear trim piece.
 

Attachments

  • wiper motor 180deg.jpg
    wiper motor 180deg.jpg
    94.7 KB · Views: 137
  • wiper 180deg.jpg
    wiper 180deg.jpg
    88.3 KB · Views: 133
  • through bolt ratchet 2.jpg
    through bolt ratchet 2.jpg
    88.4 KB · Views: 139
Last edited:
OP
OP
O

okfoz

Full Access Member
Joined
Apr 29, 2014
Posts
387
Reaction score
152
Unplug the two plugs going through the hatch hole for the camera, glass release button, and the license plate lights. Remove the plastic clips, holding the wire loom in place...

NOTE: Its easiest to use the bladed screwdriver and slide the plugs off the holder...

There are four nuts that hold the rear trim piece in place.. This is where you are going to break something You Have Been Warned.

IF you can remove the nuts, good for you, if you find that you hear cracking and they just seem to be spinning, Congratulations you have discovered the GM trap of traps. They have put lock-tite on the bolts to put on the rear trim piece... more or less its a stupid design...

There are two plastic retainer clips that still need to be popped, on the top right and left corners. I used the long long needle nose pliers to reach in and pinch them and push them through the holes.

Close the liftgate and then gently as you can pull the rear trim piece off. You WILL be breaking the little tabs where the bolts go through, I would have loved to figure out another way but I did not figure one out.

Once you have the panel off it will have broken tabs, hopefully they are not so severe that they are not repairable.

Here is what I ended up with:
 

Attachments

  • trim piece.jpg
    trim piece.jpg
    93.9 KB · Views: 164
  • trim piece 2.jpg
    trim piece 2.jpg
    91.2 KB · Views: 152
OP
OP
O

okfoz

Full Access Member
Joined
Apr 29, 2014
Posts
387
Reaction score
152
Unplug the camera plug from the harness inside the rear trim housing piece.

The thing you will discover is the camera assembly is actually attached by melted plastic to the rear trim piece. Fortunately that is only the retainer and you can simply remove the two screws to remove the actual camera... Unfortunately for me I had to drill out one of my screws on the original.

When putting it back together, make sure you can see the sticker and do not forget the spacer piece for the camera. It kind of snaps into place, but falls apart easily enough... probably a trick I did not pick up on in my 1 min of messing with it.

I would check to make sure the camera is in the housing the correct way... I didn't try, but I think you could put the camera in upside down... plug it in ad-hock with the rear hatch open and make sure the camera is right side up... Have someone turn the car on and put it in reverse and check the video...
 

Attachments

  • camera from rear.jpg
    camera from rear.jpg
    76.2 KB · Views: 120
  • sticker on camera.jpg
    sticker on camera.jpg
    84 KB · Views: 118
Last edited:
OP
OP
O

okfoz

Full Access Member
Joined
Apr 29, 2014
Posts
387
Reaction score
152
With the hatch closed, and the window open, I then took the vise grips and grabbed the head of the bolts used to hold the rear trim piece and the 10mm deep well sockets to unscrew the nuts. This was not easy... I used the 1/4" drive, and the nuts on mine were very difficult to remove with the lock-tight on them. Matter of fact they were hot by the time I got them off...

If you lose one in the liftgate, you can reach in and grab them at when you open the hatch.

Fortunately the lock-tite was a one time use, so putting the nuts back on the bolts is really easy.

I then took the epoxy and mixed up a lot of it... be generous.

Took the head of the bolts and dipped them in the epoxy, and put them into the slots...
 

Attachments

  • Plastic Epoxy.jpg
    Plastic Epoxy.jpg
    87.6 KB · Views: 86
  • bolt glue in trim piece.jpg
    bolt glue in trim piece.jpg
    90.6 KB · Views: 102
OP
OP
O

okfoz

Full Access Member
Joined
Apr 29, 2014
Posts
387
Reaction score
152
I did my best to clean it up as best I could with a screwdriver and paper towels, then I applied black electrical tape (it is what I had). And then I put a dob of the silicone/caulking around the bolts.

The reason I did this was:
1) I did not want the glue to set up before I installed the panel, If I did not have them exactly lined up I might not have been able to install the panel into the liftgate.
2) The tape kept the epoxy from gluing the panel to the liftgate
3) The silicone sealant was an idea I got when removing the bolts, I noticed there was some sort of silicone sealant applied to the bolts in an attempt to keep some water out... not a bad idea IMHO. The silicone latex will act as a makeshift lock-tite application and keep the nuts from backing out. And still make it possible to remove them later on.

I used the tip of the screwdriver to spread the acrylic silicone over the tape.
 

Attachments

  • tape over glue.jpg
    tape over glue.jpg
    93.3 KB · Views: 99
  • siliconized latex on bolt.jpg
    siliconized latex on bolt.jpg
    86.5 KB · Views: 93
  • Acrylic Latex.jpg
    Acrylic Latex.jpg
    94.3 KB · Views: 81
Last edited:
OP
OP
O

okfoz

Full Access Member
Joined
Apr 29, 2014
Posts
387
Reaction score
152
Make sure the wires are routed correctly inside the housing. As a little insurance policy I took some dielectric grease and squirted some on my camera plug. It will keep the moisture out...

Now you have to feed the wires through the big hole, stuff the big plug first and then the smaller plug. Then align the bolts carefully and finally align the plastic clips to the hatch and snap the clips.

Open the glass and reach in with the 10mm deep well socket and put the nuts on the studs going through the sheet metal.

As I snugged up the nuts, the acrylic silicone oozed a little giving my desired locktite, to help the bolts from backing out.
 

Attachments

  • bolt from top.jpg
    bolt from top.jpg
    90.9 KB · Views: 76
  • trim piece bolt from inside.jpg
    trim piece bolt from inside.jpg
    96.3 KB · Views: 80
OP
OP
O

okfoz

Full Access Member
Joined
Apr 29, 2014
Posts
387
Reaction score
152
FInally
Flip the wiper motor back over, There is a wedge shaped adapter on the outside, make sure it is lined up correctly, tighten up the large plastic nut, and feed the bolts back in through the rubber grommets. There are two washers that chances are fell off the wiper motor, do not forget those either.

Install the two nuts, I did not need to use my screwdriver to tighten them up, but you may have different results.

Close the hatch, make sure everything works.

and reassemble the rear hatch interior panels...

Good luck...

---------- Post added at 10:27 PM ---------- Previous post was at 10:23 PM ----------

If I think of anything else, I will let you know... its getting late and I am tired, so hopefully I did not miss anything.
 
OP
OP
O

okfoz

Full Access Member
Joined
Apr 29, 2014
Posts
387
Reaction score
152
Can someone move this to the how-to section, I realized I put it in the wrong place. thanks

John
 

NoWayMan

TYF Newbie
Joined
Feb 21, 2016
Posts
1
Reaction score
0
Thanks a ton for putting the effort into this post - I'd already tried to remove the lock-tighted nuts from my liftgate, and wondered why only one came off... After reading your experience, it was apparent that I'd spun the bolt inside the plastic!

I have managed to replace my backup camera with your tips, but of course broke some stuff along the way as you warned: A few comments / notes from my experience:
  • I could not get the two bolts holding the rear wiper motor off, even when trying to either hold or turn the screw-driver slotted end. Though I'd already removed the wiper nut, in the end I could have skipped that entire set of steps, as I ended up using an open end wrench on the 10mm nut behind the wiper motor. This was not convenient at all, but possible with my arm stuck up into the liftgate from one of the lower openings.
  • The epoxy seemed to work and hold well, I used a "Locktite" version made for plastics.
  • As I had one nut that came off, I only had to repair three of the studs - however, in reinstalling the panel, I think that one twisted in the plastic, even though I was trying to be careful with the torque applied. My suggestion is to epoxy all of the studs into the panel, regardless of whether or not the nut came off OK.
  • In order to have some sort of 'washer' between the epoxied bolts and the liftgate body panel, I made some from a plastic milk jug - just cut a 3/4" circle and snipped a cross in the center so I could push it down over each stud. My only real goal here was to have some protection from any motion that could have rubbed through the paint.
  • It is not possible to install the camera upside down, it only fits into the opening one way.
  • In taking my failed camera out of the panel, the small connector with four pins appeared to be corroded - one of the pins actually pulled out of the camera and stayed in the connector. When installing my replacement camera, I used a little dielectric grease to help the O-ring hopefully seal out any future moisture.
  • If you are looking to replace this model year camera, hopefully you will get lucky like I and find an eBay seller with an item like this:
  • I was able to purchase an entire liftgate harness, from the four plugs to the rear glass button, both license plate lights and bulbs, and backup camera assembly, for only $75 - most other places I found online wanted north of $200 for just the camera.
Good luck to anyone else that tries to take on this project, it was definitely worth the effort to get my backup camera working, just in time for camping seasion! Many thanks John -
 

BBott

TYF Newbie
Joined
Jul 4, 2019
Posts
1
Reaction score
0
Thanks a ton for putting the effort into this post

Been a few years, but I read this thread a couple of times while searching for DIY instructions for replacing/troubleshooting backup camera on a 2011 Yukon XL.

Checked the fuse. Good. Checked the mirror power. Good. There is some control module somewhere apparently, didn't find that..I assumed also good. Then took a leap of faith and figured that somehow the camera just simply went on the fritz after 8 years.

NoWayMan, your suggestion to look on eBay was gold. I found an applique for cheaper than I could find a replacement camera (which as we can deduce from the posts above was never meant to be replaced) and that saved not only money, but a huge amount of time.

Next, I found this video and it walked step by step through the removal and install.


I suspect there were a few edits made to the video where he was cursing at whoever put the locktite on some of the threads, but it all came out OK and I broke nothing in the end.

Good luck to whoever finds themselves in a similar position. It's not so scary a procedure after all!
 

Tahoe25Years

TYF Newbie
Joined
Oct 1, 2020
Posts
2
Reaction score
2
I am looking to add an additional backup camera to my trailer by installing the exact same backup camera as factory supplied and wire it in with a switch to select the trailer camera.
I just need an OEM or equivalent camera (easy to get), and connectors to tap into the original harness and a convenient place to install the switch.
Has anyone done something like this?
Or I could possibly use a wireless camera and then just need selector switch where the cables come up to the display in the dashboard.
Has anyone tried this? Ideas?
Bryan
2012 GMC Yukon Denali
 

GreenTahoe2004

TYF Newbie
Joined
Dec 14, 2021
Posts
29
Reaction score
12
I am looking to add an additional backup camera to my trailer by installing the exact same backup camera as factory supplied and wire it in with a switch to select the trailer camera.
I just need an OEM or equivalent camera (easy to get), and connectors to tap into the original harness and a convenient place to install the switch.
Has anyone done something like this?
Or I could possibly use a wireless camera and then just need selector switch where the cables come up to the display in the dashboard.
Has anyone tried this? Ideas?
Bryan
2012 GMC Yukon Denali
If you have a Garmin DriveSmart automobile GPS or better, you could use wireless BC40 (AA batteries) or BC50 (12V) backup cameras. Apparently, depending on the configuration, the camera will turn on when the vehicle or backup light is powered up and turn off when the vehicle is moving forward
 

GreenTahoe2004

TYF Newbie
Joined
Dec 14, 2021
Posts
29
Reaction score
12
A video link to aid in troubleshooting Tahoe / Yukon Backup camera issues such as dead cameras and control module issues
 

GreenTahoe2004

TYF Newbie
Joined
Dec 14, 2021
Posts
29
Reaction score
12
Been a few years, but I read this thread a couple of times while searching for DIY instructions for replacing/troubleshooting backup camera on a 2011 Yukon XL.

Checked the fuse. Good. Checked the mirror power. Good. There is some control module somewhere apparently, didn't find that..I assumed also good. Then took a leap of faith and figured that somehow the camera just simply went on the fritz after 8 years.

NoWayMan, your suggestion to look on eBay was gold. I found an applique for cheaper than I could find a replacement camera (which as we can deduce from the posts above was never meant to be replaced) and that saved not only money, but a huge amount of time.

Next, I found this video and it walked step by step through the removal and install.


I suspect there were a few edits made to the video where he was cursing at whoever put the locktite on some of the threads, but it all came out OK and I broke nothing in the end.

Good luck to whoever finds themselves in a similar position. It's not so scary a procedure after all!
Gen3 Tahoe/Suburban/Yukon backup camera troubleshooting video link (including module location
 

Forum statistics

Threads
137,719
Posts
1,990,324
Members
102,710
Latest member
cdhpc2
Back
Top