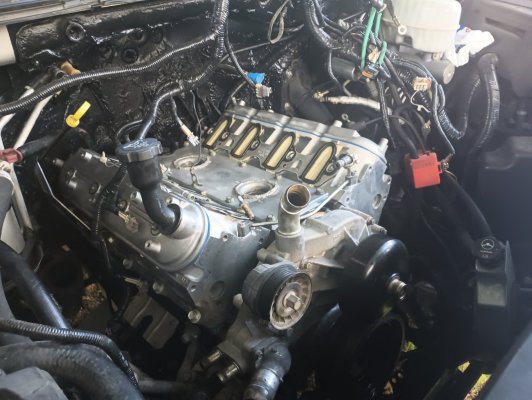
TTY head bolts with engine in-vehicle

Disclaimer: Links on this page pointing to Amazon, eBay and other sites may include affiliate code. If you click them and make a purchase, we may earn a small commission.

OP
OP
strutaeng

strutaeng

Full Access Member
Joined
Aug 10, 2023
Posts
1,988
Reaction score
4,284
Location
Dallas, Texas
I finally finished cleaning the pistons!

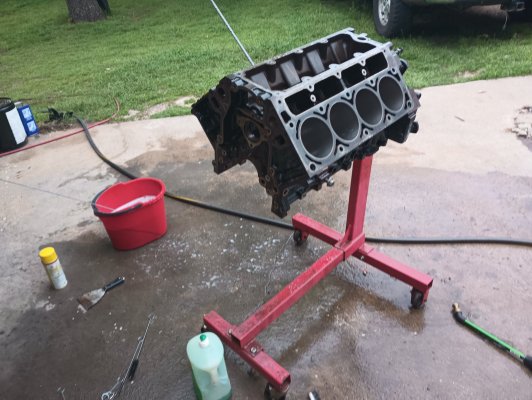
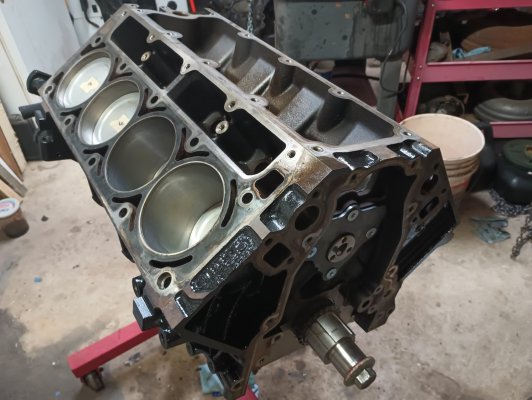
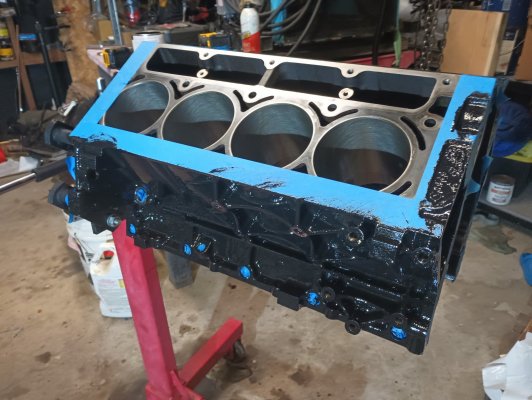
Today I washed the block. Soapy water, brush cleaning kit, then dried immediately with compressed air and sprayed it with PB Blaster.

I decided to do a quick paint with Rust-Oleum, paintbrush special.

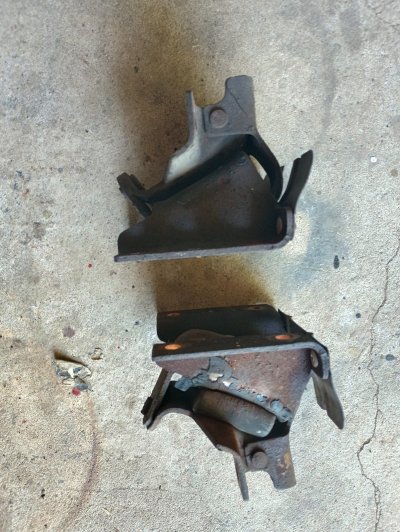
I also realized one of my motor mounts is broken! The rubber block on side side of those clamshells is missing. Doh!
 

Attachments

  • IMG_20240323_222956378.jpg
    IMG_20240323_222956378.jpg
    281.9 KB · Views: 35
  • IMG_20240323_183244555.jpg
    IMG_20240323_183244555.jpg
    308.2 KB · Views: 42
  • IMG_20240323_163005297_HDR.jpg
    IMG_20240323_163005297_HDR.jpg
    548.6 KB · Views: 36
OP
OP
strutaeng

strutaeng

Full Access Member
Joined
Aug 10, 2023
Posts
1,988
Reaction score
4,284
Location
Dallas, Texas
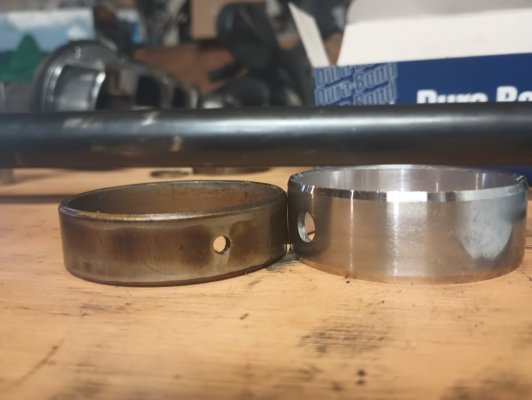
More progress. Changed the cam bearings. The replacement bearings are wider, supposed to be a good thing. I'd bought the Summit Racing dedicated LS cam installing tool. This my second time using it, and it's pretty good, I think. Installed the cam (Summit SUM-8718R1)

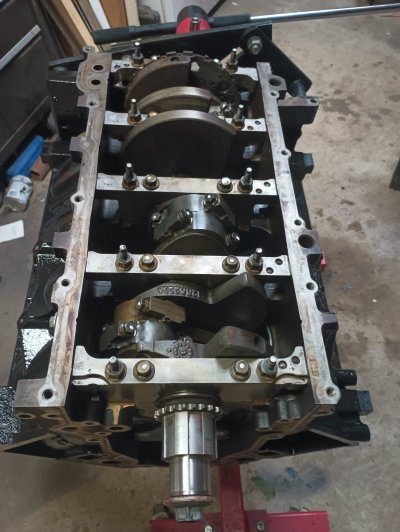
Also washed the crank, checked the main bearing clearance with plastiguage. I only checked the 1 & 2 rods with plastiguage since everything was looking pretty consistent.

Installed piston/rings. I decided to buy a fixed ring compressor and I liked it much better that the other engine I put together with the adjustable type. Definitely recommend it. Only bad thing is you need one for each specific bore.
 

Attachments

  • IMG_20240324_142755845.jpg
    IMG_20240324_142755845.jpg
    137.2 KB · Views: 28
  • IMG_20240324_221907689.jpg
    IMG_20240324_221907689.jpg
    255.1 KB · Views: 39
  • IMG_20240324_221955156.jpg
    IMG_20240324_221955156.jpg
    248.3 KB · Views: 28
Last edited:
OP
OP
strutaeng

strutaeng

Full Access Member
Joined
Aug 10, 2023
Posts
1,988
Reaction score
4,284
Location
Dallas, Texas
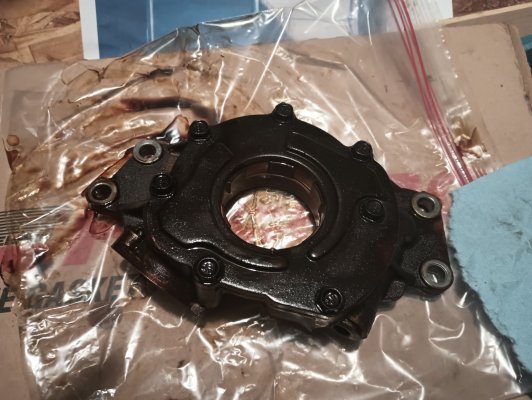
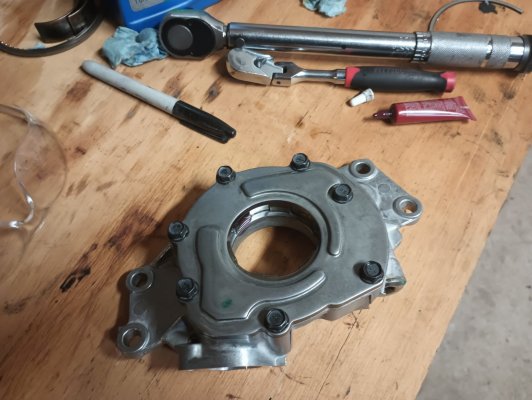
Next is the oil pump. I was gonna just slap it back in...then decided to clean just the outside and next thing you know, I completely disassembled it, LoL.

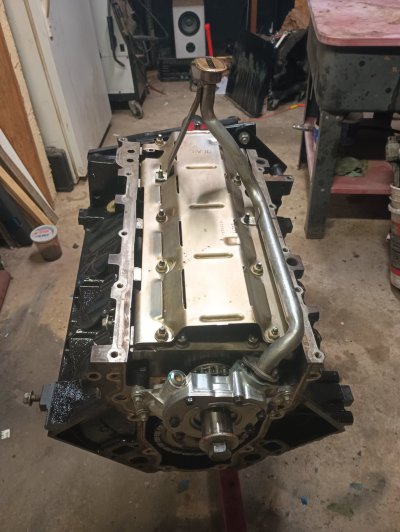
The pump gears looked excellent after cleaning. Also cleaned the timing chain and installed it. I need a pickup tube o-ring. I'll get one from the local parts store tomorrow.
 

Attachments

  • IMG_20240325_191220311.jpg
    IMG_20240325_191220311.jpg
    267.6 KB · Views: 34
  • IMG_20240325_210510476.jpg
    IMG_20240325_210510476.jpg
    233.3 KB · Views: 28
  • IMG_20240325_213025548.jpg
    IMG_20240325_213025548.jpg
    287 KB · Views: 35
OP
OP
strutaeng

strutaeng

Full Access Member
Joined
Aug 10, 2023
Posts
1,988
Reaction score
4,284
Location
Dallas, Texas
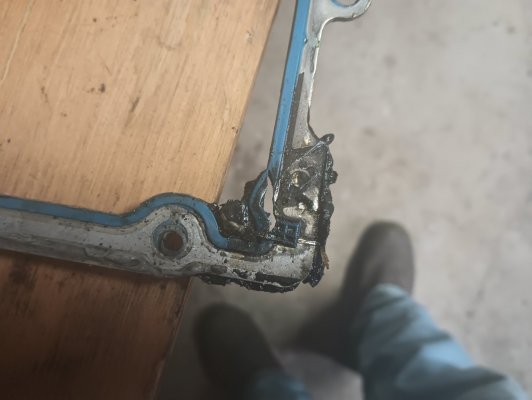
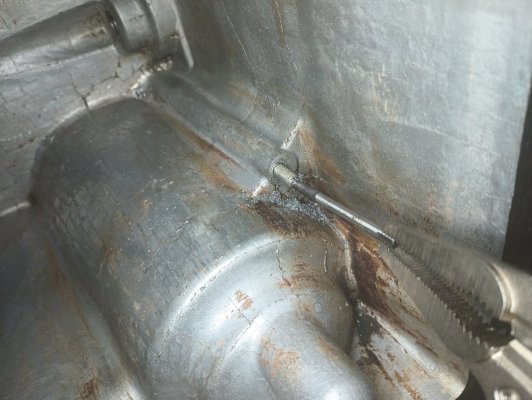
No real update. 2 years ago when I replaced my oil pan gasket I accidentally sheared off one of the little baffle bolts (thought it was also 18 lb-ft torque! Doh!) So I got to fix my mistake yesterday by drilling out the bolt and removing it with a spiral extractor. I got the bolt replaced.

I was planning on reusing that oil pan gasket but saw that it was torn at like 2 corners.

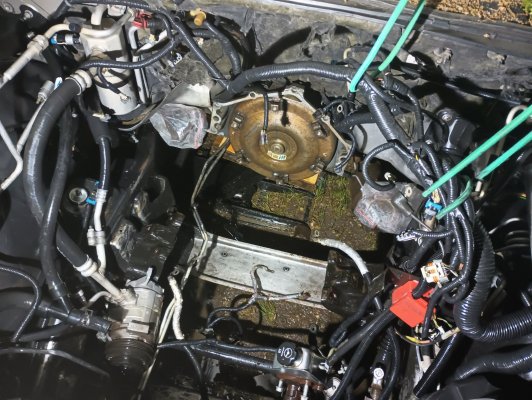
I went to Summit Racing to get some break-in oil, a new gasket and bought this "Boom Mat" spray-on damping stuff in an aerosol can. I'm going to try spraying the fiberglass firewall with it. I kinda hate how it looks and all the dust and itching it causes if you are working near it. I don't know if that's going to work? I'll wash the engine bay before dropping in the engine.

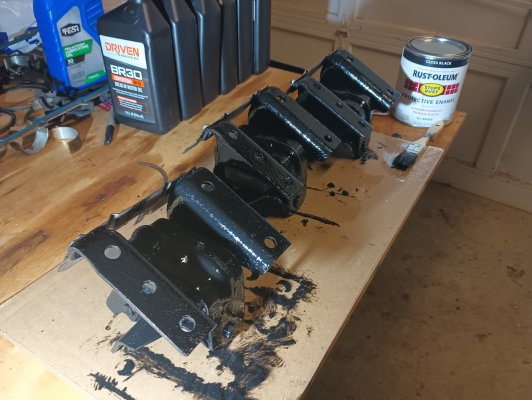
I also picked up a pair of engine mounts. Local guy on FBMP had them listed taking offers. When I showed up he said I could have them free. Just painted them up 'cause that makes me feel better, LOL
 

Attachments

  • IMG_20240326_210506708.jpg
    IMG_20240326_210506708.jpg
    148.9 KB · Views: 37
  • IMG_20240326_205159987.jpg
    IMG_20240326_205159987.jpg
    302.1 KB · Views: 33
  • IMG_20240327_211059849.jpg
    IMG_20240327_211059849.jpg
    271.3 KB · Views: 34
OP
OP
strutaeng

strutaeng

Full Access Member
Joined
Aug 10, 2023
Posts
1,988
Reaction score
4,284
Location
Dallas, Texas
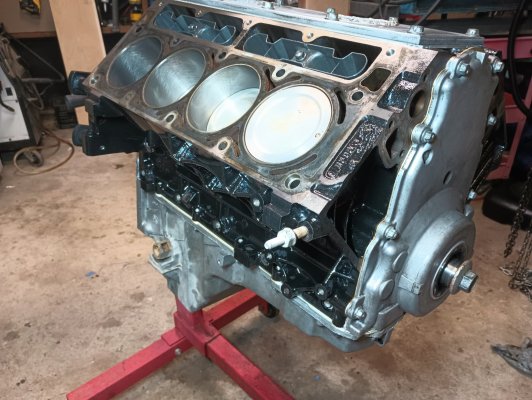
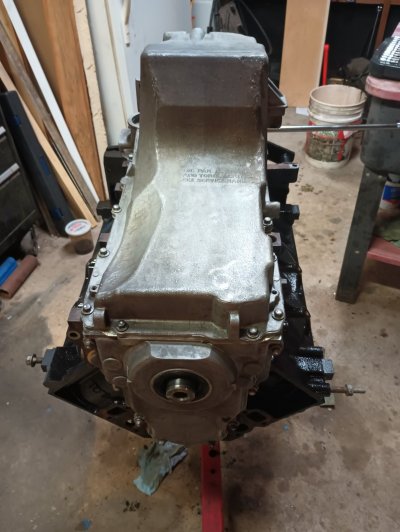
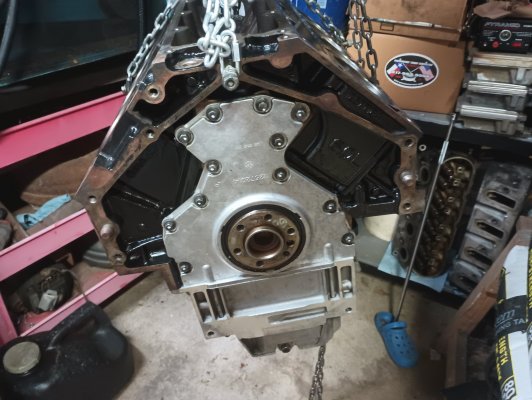
I got the covers installed: rear, front and oil pan.

I dropped in the lifters and trays.

Hopefully tomorrow I'll install the heads and miscellaneous sensors.
 

Attachments

  • IMG_20240328_221236806.jpg
    IMG_20240328_221236806.jpg
    356.6 KB · Views: 29
  • IMG_20240328_212601922.jpg
    IMG_20240328_212601922.jpg
    236.5 KB · Views: 34
  • IMG_20240328_201415945.jpg
    IMG_20240328_201415945.jpg
    273.1 KB · Views: 31
OP
OP
strutaeng

strutaeng

Full Access Member
Joined
Aug 10, 2023
Posts
1,988
Reaction score
4,284
Location
Dallas, Texas
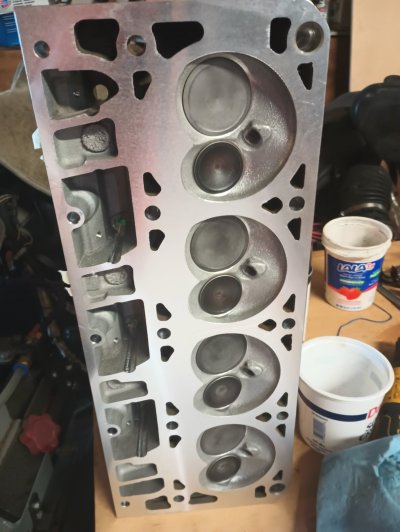
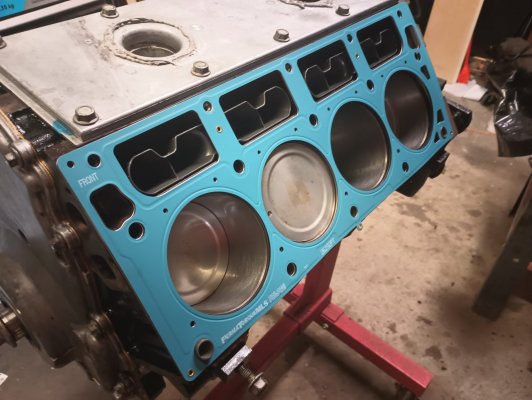
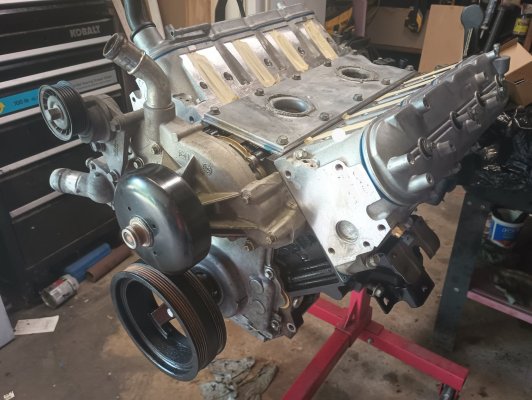
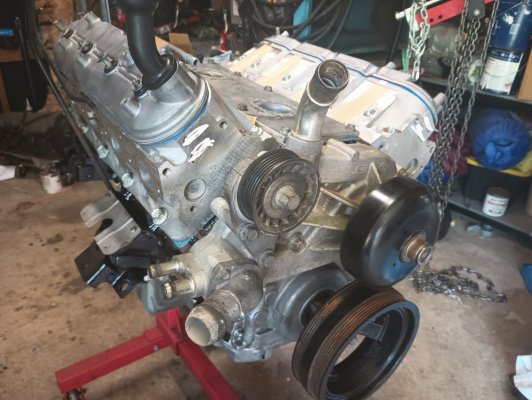
I had some remachined 317 heads for another engine I'm building but don't really have a truck in mind for it. So they get installed here.

Water pump and miscellaneous sensors go back. I broke the ECT sender, so I got a replacement.

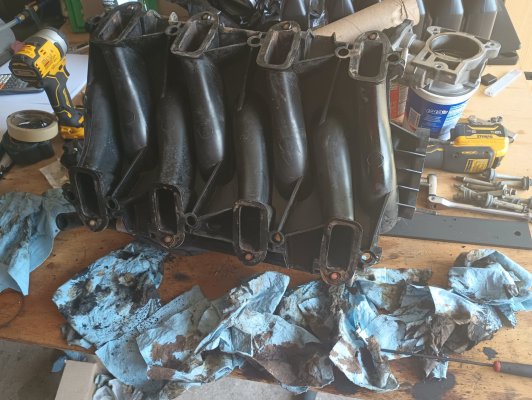
I cleaned my intake...damn, what a mess!

Note that service manual is for the first design head bolts; I found a handy TTY spec/cheat sheet that has both: https://help.summitracing.com/knowledgebase/article/SR-05187/en-us
 

Attachments

  • IMG_20240330_113726071.jpg
    IMG_20240330_113726071.jpg
    200.7 KB · Views: 30
  • IMG_20240330_113730872.jpg
    IMG_20240330_113730872.jpg
    225.8 KB · Views: 41
  • IMG_20240330_155255883.jpg
    IMG_20240330_155255883.jpg
    370.7 KB · Views: 33
  • IMG_20240330_160549590~2.jpg
    IMG_20240330_160549590~2.jpg
    288.4 KB · Views: 35
  • IMG_20240330_160558092~3.jpg
    IMG_20240330_160558092~3.jpg
    269.2 KB · Views: 32
Last edited:

ivin74

05 NBS Nali
Joined
Aug 3, 2014
Posts
2,420
Reaction score
2,557
Location
Htown, Texas
For Torque To Yield, once you get them all torqued to 22 ft-lb, you can put the torque wrench away and use a ratchet with a cheater pipe or a breaker bar since you are looking at degrees of turn, not torque.

ARP hardware is also a good option.
I used arp hardware, the arp bolts get tighten with a torque wrench.


The ARPs are three pass in the stock procedure. First pass is 30-35lbs, second is 50-55lbs, and the final pass is 70-75lbs for the large bolts, 25lbs for the small bolts if I recall correctly.
 
Last edited:

ivin74

05 NBS Nali
Joined
Aug 3, 2014
Posts
2,420
Reaction score
2,557
Location
Htown, Texas
ARP hardware is worth it in my opinion and it’s a lot simpler to just tighten the shit out of them vs the stock bolts where you have to tty and go through that bs plus you can reuse arp stock is usually one and done as the bolt stretches out
I've have also used oem bolts and tighten the bolts as if they were arp bolts and have not had one to fail yet.
 
Last edited:
OP
OP
strutaeng

strutaeng

Full Access Member
Joined
Aug 10, 2023
Posts
1,988
Reaction score
4,284
Location
Dallas, Texas
I've have also used oem bolts and tighten the bolts as if they were arp bolts and have one to fail yet.
What?!

I was thinking of "Hooks Law stress-strain equation" as I was yielding the bolts on the last 2 passes: the force kinda seems to vary to keep the rotation going to keep the angle going at a constant rate.... Kinda hard to explain... certainly takes some grunt to do that, LoL. I'm glad I had lunch prior to doing that.
 

ivin74

05 NBS Nali
Joined
Aug 3, 2014
Posts
2,420
Reaction score
2,557
Location
Htown, Texas
What?!

I was thinking of "Hooks Law stress-strain equation" as I was yielding the bolts on the last 2 passes: the force kinda seems to vary to keep the rotation going to keep the angle going at a constant rate.... Kinda hard to explain... certainly takes some grunt to do that, LoL. I'm glad I had lunch prior to doing that.
That's why it used the arp tighten method.
 
OP
OP
strutaeng

strutaeng

Full Access Member
Joined
Aug 10, 2023
Posts
1,988
Reaction score
4,284
Location
Dallas, Texas
That's why it used the arp tighten method.
I guess what I'm shocked about is that TTY (torque-to-yield) and ARP (torque-to-ft-lb) are completely different metallurgy and NOT interchangeable with one another...

I'm not gonna argue that you had good results in your case; rather, I'm going to follow manufacturers' recommendations...
 

Donal

Full Access Member
Joined
Mar 30, 2021
Posts
261
Reaction score
376
Location
Americus Georgia
I guess what I'm shocked about is that TTY (torque-to-yield) and ARP (torque-to-ft-lb) are completely different metallurgy and NOT interchangeable with one another...

I'm not gonna argue that you had good results in your case; rather, I'm going to follow manufacturers' recommendations...
Sounds like its time to do a stretch to failure comparasion test for the used oem versus the ARP bolt. I will search for maybe two of each.
Note that these are cap screws not bolts. But a common misuse of the terms. Bolts have nuts. Cap screwss screw into a theaded hole in a machine or machine component.
 

wjburken

Elite Member
Supporting Member
Joined
Dec 26, 2017
Posts
10,315
Reaction score
29,545
Location
Eastern Iowa
I guess what I'm shocked about is that TTY (torque-to-yield) and ARP (torque-to-ft-lb) are completely different metallurgy and NOT interchangeable with one another...

I'm not gonna argue that you had good results in your case; rather, I'm going to follow manufacturers' recommendations...
This has been discussed a few times.


Two different approaches.
Bolted joint design is an interesting study.

Both ARP and TTY/TTA bolts are fine, if one understands what is going on. They just use different methods to achieve the necessary clamping force.

TTY/TTA bolt specs are calculated to take into account how many degrees of turn of the bolt, after an initial torque is achieved, are required to induce the proper amount of strain/stretch in the bolt to achieve the necessary clamping force. This takes the amount of friction in the threads and under the bolt head out of play as they can vary widely.

For ARP, they take the path of having a consistent level of friction and therefore can prescribe the proper torque needed to achieve the needed clamping force. That is why they have ARP Ultra-Torque lubricant and some pretty specific installation instructions.


Note that these are cap screws not bolts. But a common misuse of the terms. Bolts have nuts. Cap screwss screw into a theaded hole in a machine or machine component.
I get where you’re coming from with you’re explanation of the difference between a bolt and a screw having been designing “bolted” and “screwed” connections for quite sometime,

but when ARP actually refers to them as bolts, I’ll use the term bolt when referring to them.
 

Trey Hardy

Full Access Member
Joined
Jun 12, 2020
Posts
3,552
Reaction score
9,637
I've have also used oem bolts and tighten the bolts as if they were arp bolts and have not had one to fail yet.
Last engine I did the heads had been off 3-4 times and it ended up pulling the threads out the block. I was using stock bolts at the time.
Ended up buying a time sert kit to repair the block
 

Fless

Staff member
Moderator
Joined
Apr 2, 2017
Posts
16,618
Reaction score
34,387
Location
People's Republic of Colorado
What?!

I was thinking of "Hooks Law stress-strain equation" as I was yielding the bolts on the last 2 passes: the force kinda seems to vary to keep the rotation going to keep the angle going at a constant rate.... Kinda hard to explain... certainly takes some grunt to do that, LoL. I'm glad I had lunch prior to doing that.

Popeye.jpg
 
OP
OP
strutaeng

strutaeng

Full Access Member
Joined
Aug 10, 2023
Posts
1,988
Reaction score
4,284
Location
Dallas, Texas
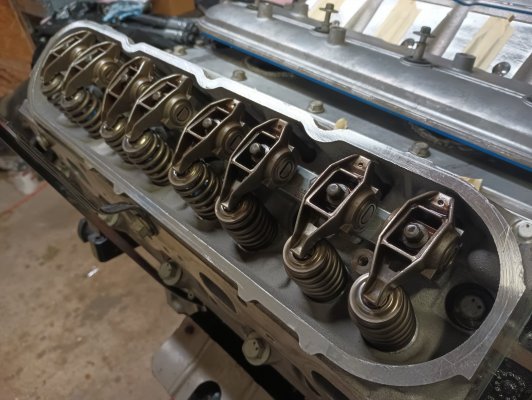
I got the rockers installed on both sides. I had bought a pushrod checker (adjustable length type), but couldn't really figure out how to use it. And I don't have calipers that measures that length.

I watched a video from Richard Holdener on how to check. I got 1 1/4 turns from zero lash to where the rockers were seated. So the original 7.400" pushrods seem the correct length still. Torqued to spec...


Attachments

  • IMG_20240331_211211691.jpg
    IMG_20240331_211211691.jpg
    281.8 KB · Views: 37
OP
OP
strutaeng

strutaeng

Full Access Member
Joined
Aug 10, 2023
Posts
1,988
Reaction score
4,284
Location
Dallas, Texas
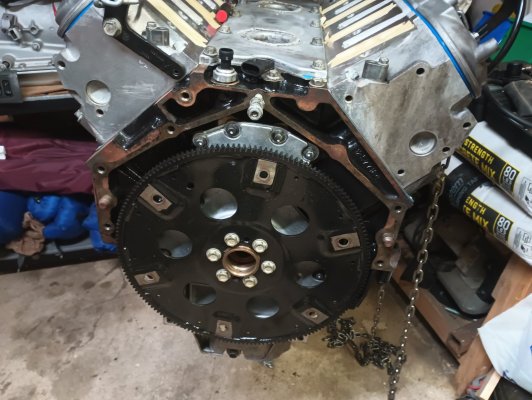
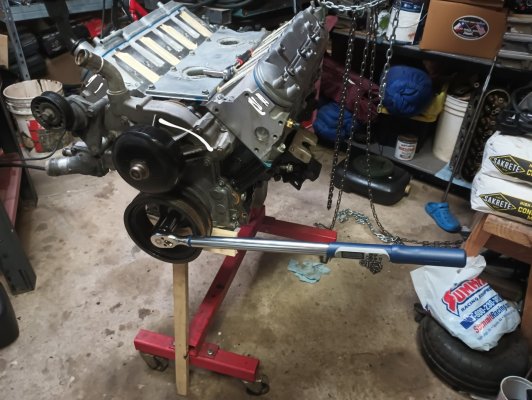
I pressure washed the engine bay. Got the flex plate installed and the harmonic balancer. Dang, 240 lb-ft on the old balancer bolt, then remove and install the new one: 50 lb-ft, plus 140 degrees!
 

Attachments

  • IMG_20240401_195056388.jpg
    IMG_20240401_195056388.jpg
    275.7 KB · Views: 34
  • IMG_20240401_194011504.jpg
    IMG_20240401_194011504.jpg
    407 KB · Views: 37
  • IMG_20240401_203012582~2.jpg
    IMG_20240401_203012582~2.jpg
    287.3 KB · Views: 37
OP
OP
strutaeng

strutaeng

Full Access Member
Joined
Aug 10, 2023
Posts
1,988
Reaction score
4,284
Location
Dallas, Texas
Took last week off because one of my girls had her first communion. So we had family over.

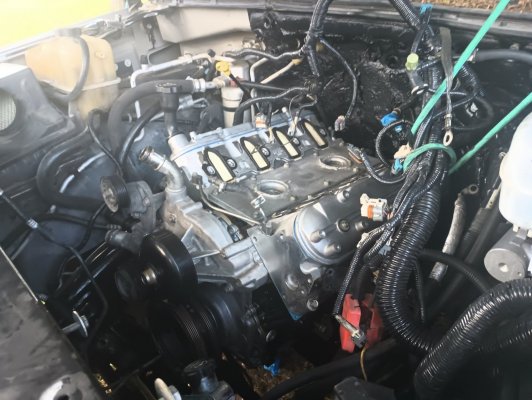
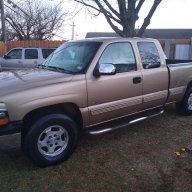
I got the engine back into the truck today. I hope this week to complete everything back on it.
 

Attachments

  • IMG_20240414_190900596.jpg
    IMG_20240414_190900596.jpg
    279.1 KB · Views: 35
  • IMG_20240414_190912427.jpg
    IMG_20240414_190912427.jpg
    270.8 KB · Views: 36

Forum statistics

Threads
138,038
Posts
1,997,626
Members
102,975
Latest member
jkhuntzinger
Back
Top