OP
OP
strutaeng
Full Access Member
I got most everything put back together. I ran into a few issues:
1. I dropped the threaded piece for the PS installer kit. Looked and looked and kept looking and nothing. Doh! I'd bought one so I wouldn't have to rent one, and that's exactly what I'll have to do.
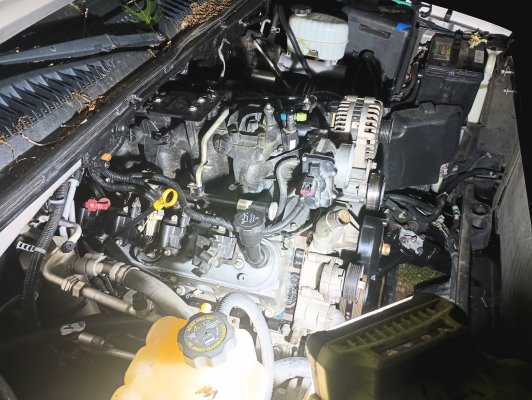
2. I decided to fire it up and idled pretty well for about a minute. I saw some smoke on the driver's side and initially thought just oil was burning off something but it kept getting worse. It had 60 psi of oil pressure and sounded good. I did a quick visual and saw fuel on the driver's fuel rail, so I immediately shut it off. By then the idle had dropped and engine felt like it was about to die.
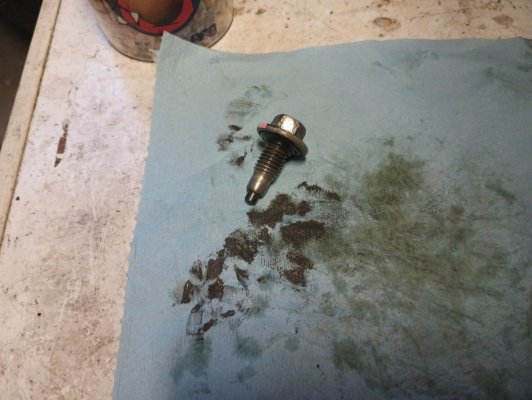
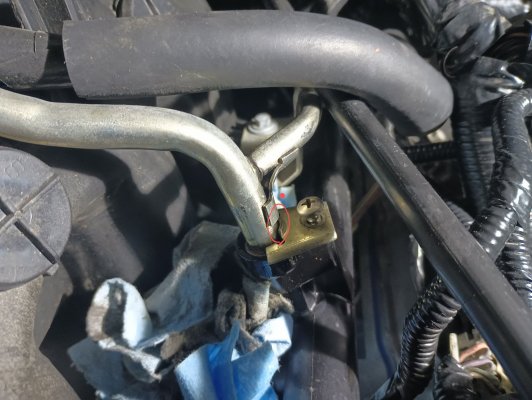
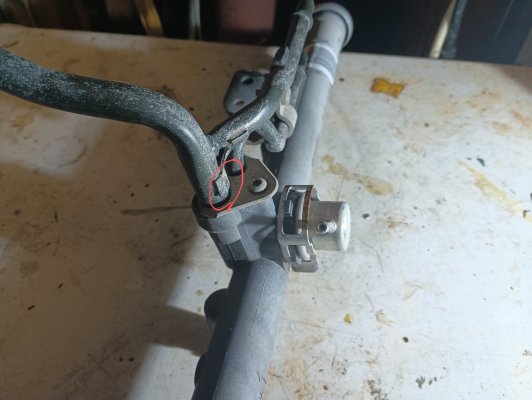
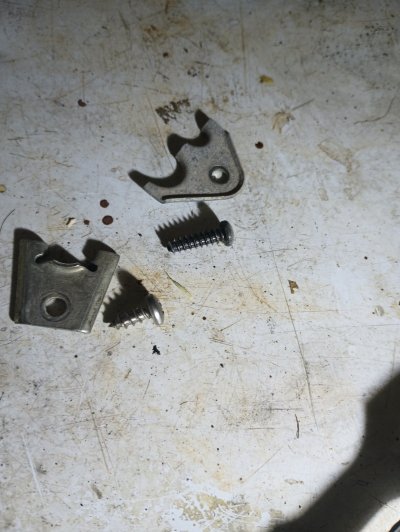
I saw the cross over pipe was leaking at the fuel rail. I hadn't noticed that the screw was a regular Philips head screw. PO must have done that!I took a photo and this morning I realized the hold down clamp was installed backwards! WTF! I have another fuel rail sitting around but it's the return style. I'll steal the OEM screw for the time being.
I'm surprised this thing hadn't leaked before and caught on fire.
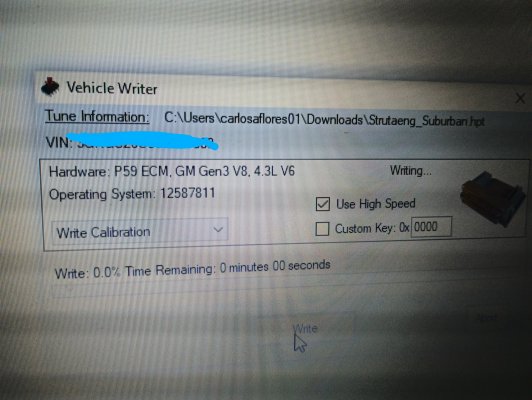
3. I tried to write the tune using HP Tuners after I shut it off, and didn't succeed. It was timing out for some reason. By then it was quitting time and stunk like gas, so I called it a night.
1. I dropped the threaded piece for the PS installer kit. Looked and looked and kept looking and nothing. Doh! I'd bought one so I wouldn't have to rent one, and that's exactly what I'll have to do.
2. I decided to fire it up and idled pretty well for about a minute. I saw some smoke on the driver's side and initially thought just oil was burning off something but it kept getting worse. It had 60 psi of oil pressure and sounded good. I did a quick visual and saw fuel on the driver's fuel rail, so I immediately shut it off. By then the idle had dropped and engine felt like it was about to die.
I saw the cross over pipe was leaking at the fuel rail. I hadn't noticed that the screw was a regular Philips head screw. PO must have done that!
I'm surprised this thing hadn't leaked before and caught on fire.
3. I tried to write the tune using HP Tuners after I shut it off, and didn't succeed. It was timing out for some reason. By then it was quitting time and stunk like gas, so I called it a night.
Attachments
Last edited:

")