Has anyone done their own Leveling Kit?

Disclaimer: Links on this page pointing to Amazon, eBay and other sites may include affiliate code. If you click them and make a purchase, we may earn a small commission.

Snblinn

Member
Joined
May 24, 2022
Posts
30
Reaction score
25
Location
Powhatan, Va
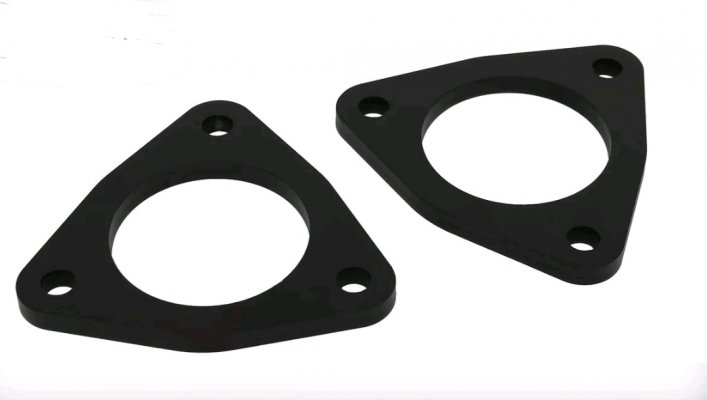
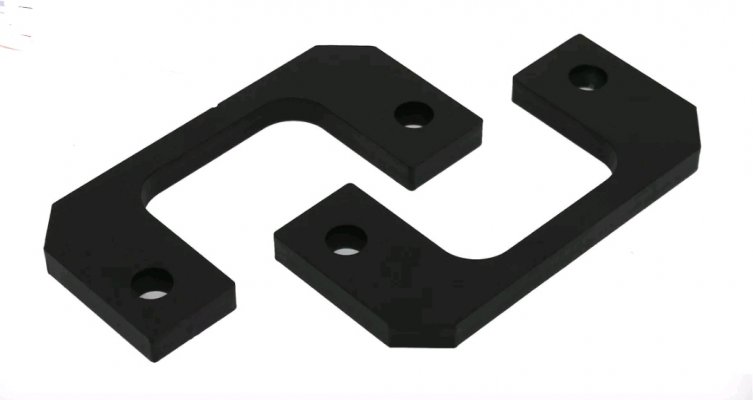
I have been researching Leveling Kits for awhile now. Most manufacturers seem very proud of their flat pieces of 6160 aluminum and 4 - grade 8 bolts.

Has anyone made a 1/4 or 3/8 upper spacer out of 6160 or stainless steel?
 

Attachments

  • Screenshot_20220526-135413_eBay.jpg
    Screenshot_20220526-135413_eBay.jpg
    97.8 KB · Views: 3
  • Screenshot_20220526-135539_eBay.jpg
    Screenshot_20220526-135539_eBay.jpg
    93.6 KB · Views: 3

olyelr

Full Access Member
Joined
Mar 19, 2011
Posts
1,645
Reaction score
776
Location
Elk Rapids, MI
Ive done them a few times. Either of them could be fairly easily made with the proper tools and knowledge. Just beware, the thickness of the spacer does not translate to the same height increase….the spacers are much thinner than the amount of lift that is gained.
 

iamdub

Full Access Member
Joined
Apr 23, 2016
Posts
20,770
Reaction score
44,644
Location
Li'l Weezyana
I have been researching Leveling Kits for awhile now. Most manufacturers seem very proud of their flat pieces of 6160 aluminum and 4 - grade 8 bolts.

Has anyone made a 1/4 or 3/8 upper spacer out of 6160 or stainless steel?

If you have the means and time, it'd be no different, functionally, than the mass-produced ones. At least for the lower spacers, you can get a set of billet aluminum ones for ~$20. They usually come with Grade 5 hardware, so factor in another ~$5 if you want Grade 8 and don't have this hardware already. Is $25 worth your time and labor?

I'd assume since you're considering making your own that you might already know. But, as olyelr mentioned, the spacer thickness equates to about half of the net lift. So, a 1/4" spacer would net about 1/2" of lift, 3/8" would net around 3/4".
 

Dlayne

Full Access Member
Joined
Mar 12, 2017
Posts
101
Reaction score
76
Location
Bend, OR
As mentioned should be straight forward to make. If you have the auto-ride, just be sure to adjust the sensors.
 
OP
OP
Snblinn

Snblinn

Member
Joined
May 24, 2022
Posts
30
Reaction score
25
Location
Powhatan, Va
I enjoy fabing parts, more for the learning process and skill building. Now to decide to go with top or bottom of the strut level.

I do have mag-ride, so the "bracket" for the rod should not be to difficult to make.

I would choose grade 8 hardware and prefer stainless.

Thanks for the responses.
 

iamdub

Full Access Member
Joined
Apr 23, 2016
Posts
20,770
Reaction score
44,644
Location
Li'l Weezyana
I enjoy fabing parts, more for the learning process and skill building. Now to decide to go with top or bottom of the strut level.

I do have mag-ride, so the "bracket" for the rod should not be to difficult to make.

I would choose grade 8 hardware and prefer stainless.

Thanks for the responses.

You're limited with a top strut spacer by the amount of threads on the mounting studs. I'm sure you can get away with 1/4 or 3/8" if those are already manufactured. I'd probably do a top strut spacer if it were me.

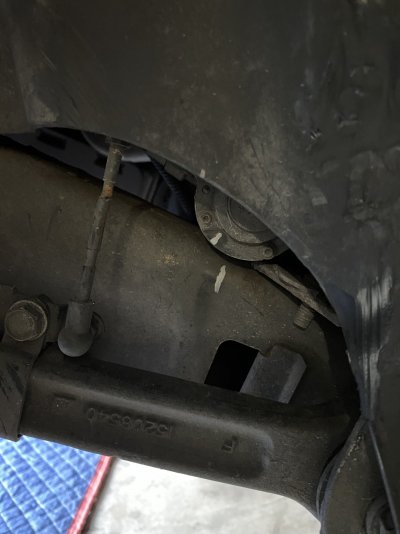
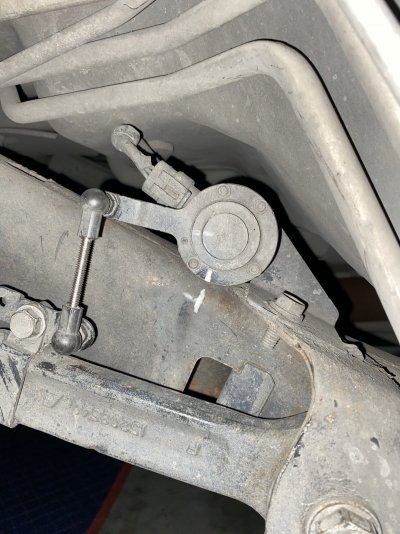
A 1/2"-3/4" lift wouldn't need very much adjustment in the ride height sensor. You might can slot the mounting holes a little to adjust it. Before you deviate from stock at all, accurately mark where the sensors currently are at it's present height, parked on a level surface. I marked the rotating part to the stationary part with a silver Sharpie then scribed a line in the center of that mark with a razor knife to have (literally) a razor sharp reference. I lowered mine, so I needed shorter links. I popped the ball socket ends off the stock link rods and screwed them onto 10-24 stainless all-thread. I think that all-thread rod came two 6" pieces in a pack. You can use stainless 10-24 screws and cut the heads off when cutting them to length if you decide to make links instead of adjusting the sensors.


Just as an example. This is before I got the idea to mark the body instead of the frame-

Before:
img_0311-jpg.jpg


After:
img_0314-jpg.jpg
 
OP
OP
Snblinn

Snblinn

Member
Joined
May 24, 2022
Posts
30
Reaction score
25
Location
Powhatan, Va
Thanks, great tips. I traditionally measure 5 times, draw my designs/plans a few times. Then rethink and research before cutting my first piece.

Thanks again, Steve.
 
OP
OP
Snblinn

Snblinn

Member
Joined
May 24, 2022
Posts
30
Reaction score
25
Location
Powhatan, Va
I tend to over research almost any purchase. TV, surround sound receiver, PC, camera, ect...I read specs and reviews then narrow down to 2 and decide. Of course cost to features is a concern.

After reading posts and viewing the "Show off your 2015+ leveled Tahoes and Yukons!", I took into account ride height/stance unloaded and ride height/stance loaded with trailer/ gear. Traditional rear struts vs. auto-level rear struts, I "think" I have it narrowed down to a 2.5 inch above strut level

My Suburban has auto-level air shock in the rear, they keep the rear at a static height. I think mine sits pretty low in the front.
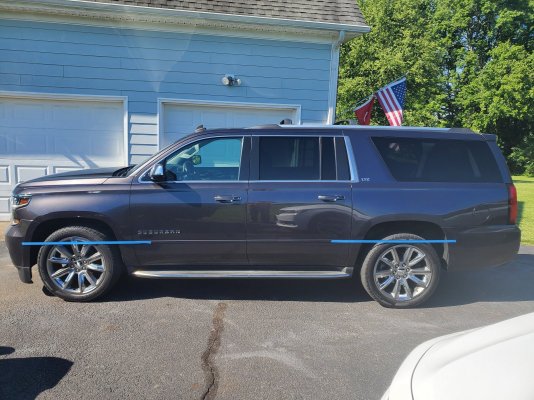
Side.jpg
I used some painters tape to the door ding body line.
 
OP
OP
Snblinn

Snblinn

Member
Joined
May 24, 2022
Posts
30
Reaction score
25
Location
Powhatan, Va
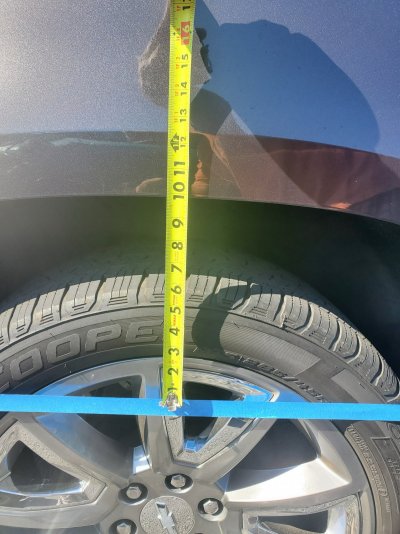
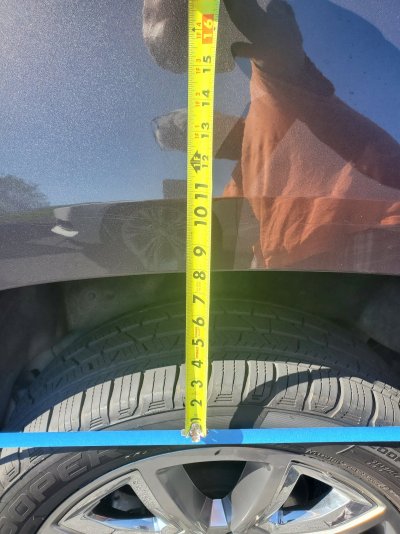
There only appears to be 2 inches difference from front to rear. But if you see how much tire is showing above the tape on the front, I would need to raise it more than 2.5 inches to make the tires fit the wheel well front and back.

The rear wheel wells are lower than the front on a level suburbal. My 01 Expedition was simular, think 66' Bronco.
 
Top