Esky Lights!

Disclaimer: Links on this page pointing to Amazon, eBay and other sites may include affiliate code. If you click them and make a purchase, we may earn a small commission.

OP
OP
Excon11

Excon11

Banned
Joined
Oct 12, 2009
Posts
438
Reaction score
3
Location
North Dakota
Yeah I was looking at the HID reverse mod as well but have no idea how to do that? Shed some light on that topic please, id love to do it. :Handshake: I found a wiring diagram online with the color coding of what goes where but Little confused on how I secure the wires and converters. Heres the pic I found
 

Attachments

  • Esky.jpg
    Esky.jpg
    35.2 KB · Views: 44

zach2011

Platinum Member
Joined
May 18, 2009
Posts
1,640
Reaction score
4
Someone tell me if this is right. I read the chart and put it into a list, and I wanna know if it's right for future use. :


Direct connections:

  • Brown Escalade wire ties directly to brown Tahoe wire. Does not connect to converter.
  • Green Escalade wire ties directly to green Tahoe wire. Does not connect to converter.


Wire combinations. (Escalade to converter)

  • Blue Escalade wire is tied to green converter wire.
  • Black Escalade wire is tied to white converter wire.


Wire combinations. (Converter to Tahoe) for RESISTOR 1

  • Green converter wire is connected to yellow Tahoe wire. The green wire is also tied to resistor 1. Therefore it is split in 2 places.
  • White converter wire is connected to black Tahoe wire. The white wire is tied to the other side of resistor 1.


Wire combinations. (Converter to Tahoe) for RESISTOR 2:

  • The white wire stated above is also tied to one side of resistor 2. Therefore the wire is split into 3 places. The remainder of the wire is tied to the black Tahoe wire as stated before.
  • Red converter wire is connected to blue Tahoe wire. The red wire is also connected to the other side of resistor 2.


Unused wires
  • Brown converter wire is not used.
  • Yellow converter wire is not used.
  • Pink&black Escalade wire is not used.
  • Yellow&black Escalade wire is not used.
 

Modded

That Guy
Joined
May 3, 2009
Posts
6,942
Reaction score
107
And personally the aesthetics of the lights are breathtaking.

The "aesthetics" on the Esky tails aren't shit unless you get the Esky D-pillar caps too, to match the squared style of the lights!
If you get the tails w/o the pillars the esky tails stick out the side!:yucky:
 

TEXAS DEMON

with a vengeance
Joined
Sep 7, 2009
Posts
338
Reaction score
0
Location
texas
i did something similar with a 05 yukon. i installed esky tails and the bottom part was sticking out because it wass missimng the side molding. it does make it look weird.
 

iwaslowr

ɹǝqɯǝɯ ɹoıuǝs
Joined
May 4, 2009
Posts
1,640
Reaction score
32
Location
Austin, Tx.
The "aesthetics" on the Esky tails aren't shit unless you get the Esky D-pillar caps too, to match the squared style of the lights!
If you get the tails w/o the pillars the esky tails stick out the side!:yucky:

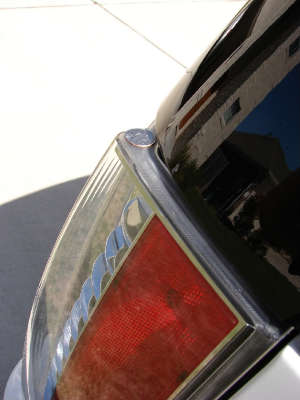
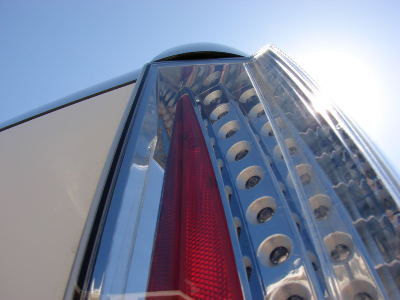
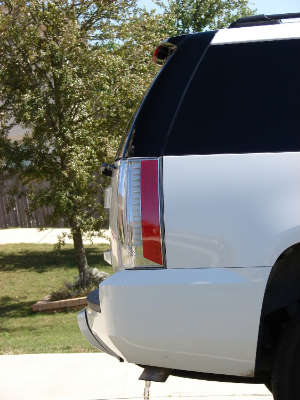
The Esky tails are shaped differently from the Yukon appliques, but it is less noticeable than you'd think... IF you look at it from the top or bottom it can be seen, but otherwise the difference is minimal...

DSC03539.jpg
DSC03541.jpg
DSC03536.jpg
 
OP
OP
Excon11

Excon11

Banned
Joined
Oct 12, 2009
Posts
438
Reaction score
3
Location
North Dakota
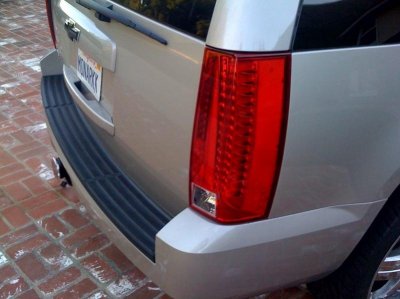
Yeah I mounted them and couldn't tell the difference.
 

Attachments

  • esky tails.jpg
    esky tails.jpg
    54.3 KB · Views: 71

Modded

That Guy
Joined
May 3, 2009
Posts
6,942
Reaction score
107
The Esky tails are shaped differently from the Yukon appliques, but it is less noticeable than you'd think... IF you look at it from the top or bottom it can be seen, but otherwise the difference is minimal...

I have always liked your lights, the red is in the right places!
 

iwaslowr

ɹǝqɯǝɯ ɹoıuǝs
Joined
May 4, 2009
Posts
1,640
Reaction score
32
Location
Austin, Tx.
Yeah I was looking at the HID reverse mod as well but have no idea how to do that? Shed some light on that topic please, id love to do it. :Handshake: I found a wiring diagram online with the color coding of what goes where but Little confused on how I secure the wires and converters. Heres the pic I found
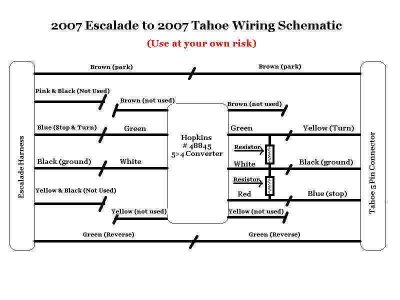
I am glad you found it... that looks like the one I used!!! :Handshake: About securing the wires, if you mean splicing and re-connecting this is what I did: Layed out all items in a row on my workbench - the Esky tail lights with their wiring harness still attached followed by the trailer adapter(and resistors) and Yukon wiring harness(I bought new one's so my factory tails remained in tact). Once the desired least practical length of everything together could be determined I cut the wiring with a little extra room to play with since additional length will be removed by the time the splices are completed. I then removed insulation from the wiring ends and connected one splice at a time and confirmed that the expected functionality had been obtained by plugging the new harness/tails into the Yukon's harness and testing. Once all connections were confirmed to be correct I began soldering the wires together, covering the splice with heatshrink tubing followed by wrapping electrical tape around the entire length of each splice. Once all splices were completed I wrapped electrical tape around all of the wiring and splices to keep everything bundled together. The resistors I used had two mounting points on each which allowed me to mount them to one another with some small bolts/nuts purchased at Home Depot. Small rubber grommets were used to serve as a spacer between them(they apparently heat up when in use). Once installed the additional weight of the trailer adapter and resistors on the new harness concerned me, so I used zip ties to suspend it all to where the additional weight would hang from the body/frame instead of pulling downward on the housing harness. After everything was completed I had my stock tails/harnesses in tact as well as the Esky's with their harness... and from that point on it was "plug and play". This mod does take alot of time and effort (It took me a total of six hours to build both harnesses), and is more expensive than other LED tails, but is well worth the outcome :imo:
 
Last edited:
OP
OP
Excon11

Excon11

Banned
Joined
Oct 12, 2009
Posts
438
Reaction score
3
Location
North Dakota
Ok Im about to start everything still waiting on my resistors but little confused on how to wire each from the end of the tail light. Do I cut off the connecter pins or just plug the wires into them?
 
OP
OP
Excon11

Excon11

Banned
Joined
Oct 12, 2009
Posts
438
Reaction score
3
Location
North Dakota
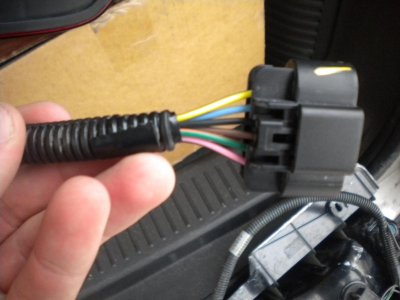
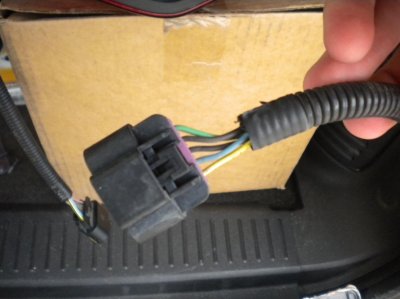
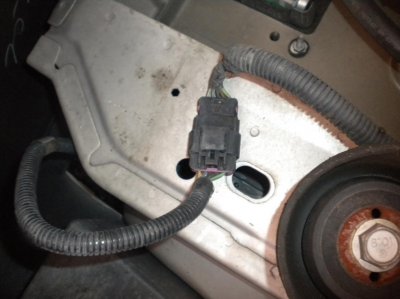
K I took some pics Im guessing I have to cut both harnesses right? Right before the black connectors? Iwaslower can u shed some light on this :Handshake:
 

Attachments

  • DSCN0213.jpg
    DSCN0213.jpg
    81.3 KB · Views: 18
  • DSCN0214.jpg
    DSCN0214.jpg
    82.5 KB · Views: 16
  • DSCN0210.jpg
    DSCN0210.jpg
    83.5 KB · Views: 14

Forum statistics

Threads
129,266
Posts
1,813,032
Members
92,370
Latest member
montanaboy65
Top