01 Yukon Denali Build Thread

Disclaimer: Links on this page pointing to Amazon, eBay and other sites may include affiliate code. If you click them and make a purchase, we may earn a small commission.

drdave81

Full Access Member
Joined
Oct 7, 2020
Posts
261
Reaction score
401
Location
Waterford, MI
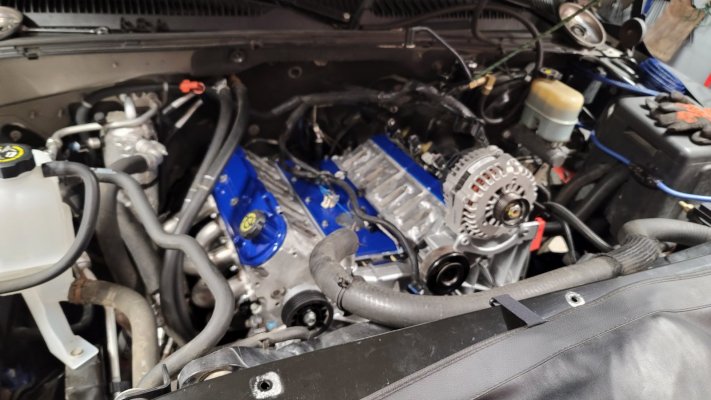
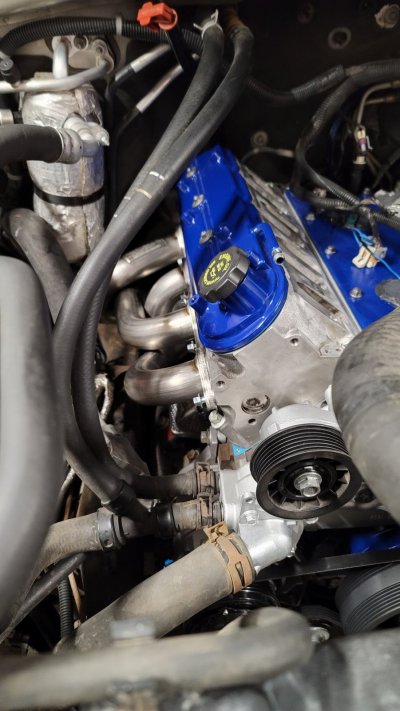
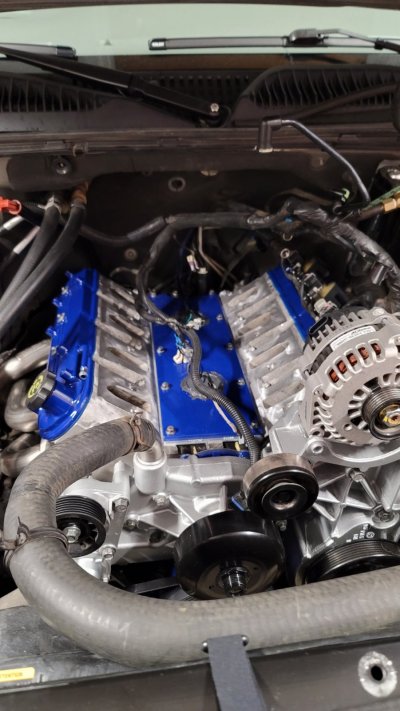
I suppose it's time to do one of these. It's a 2001 Yukon Denali and had 194,700 miles on it. I bought it back in Oct 2020. I got it off someone who had picked it up in Colorado so it was almost rust free. Two little spots around the rear wheel wells. Mechanically it was in pretty good shape, you could tell a previous owner had kids judging by the stains in the carpets though. Some of the first things I did were to pull the seats and clean the carpets as best I could...... still not great though. Changed all the lights to LEDs, added a double din radio so I had a back up camera for hooking up our camper, and get rid of a tape deck lol. There were lots of little things before letting it sit for that first winter. I had picked it up before my lease on my 19 Ram was up so I'd have time to get it where I wanted it. Also, ended up being one less MI winter on the salty roads.
20201008_181504.jpg

The following spring, I had the two rust spots fixed and dropped it 2/4 with the belltech kit with helper bags.
Screenshot_20210604-183745_Gallery.jpg

20210413_074049.jpg


That summer I did the 07+ brake upgrade which was a big improvement over the old brakes, poly sway bar bushings front and rear. I picked up the DJM rear sway bar links, but ended up having to go back to the stock ones after many rounds of emails and phone calls with DJM. I could not get the right side to not contact the shock. DJM determined it was likely the brand of shock I had installed, which was Belltech. They said they hadn't tested it with that so assumed it was too wide. So I'm still sitting with the rear sway bar at a horrible angle.
 
OP
OP
drdave81

drdave81

Full Access Member
Joined
Oct 7, 2020
Posts
261
Reaction score
401
Location
Waterford, MI
I also changed out the taillights and headlights, blacked out the grille and changed the "Denail" badges to black. I was back and forth on whether I color match the grille or black it out. With the headlights having a black housing, and seeing the new Rams with the all black front end, I decided to pick up another grille from the junkyard and plastidip it to see if I like it. Ultimately it's going to stay black. I am not a fan of chrome so it had to go. The stock wheels got the quick plastidip treatment as well, until I could decide on which wheels I ultimately wanted to go with.
20211020_101213.jpg

20211020_101229 (1).jpg
 
OP
OP
drdave81

drdave81

Full Access Member
Joined
Oct 7, 2020
Posts
261
Reaction score
401
Location
Waterford, MI
There have been lots of other odds and ends, clean up, etc. Nothing too major to really bring up other than finally deciding on going with black TBSS replicas for my wheels.
20220529_105140.jpg

Now on to the upcoming plans. I have a massive pile of parts in the garage for the engine. It will be getting a BTR stage 2 truck cam, 799 heads, American Racing long tubes, bigger injectors (size TBD), rocker trunnion upgrade, all new timing chain, oil pump, water pump, motor mounts, balancer, E-fan conversion, etc, etc, etc.
20220611_140644.jpg

I also need to get both bumpers and running boards repainted at some point. The previous owner didnt know how to properly judge distance from objects. The roof has some oxidization, so that needs attention as well.

I'm hoping to start tear down on the engine in the next couple weeks, I have a couple other small things to get taken care of in the garage first though.
 
OP
OP
drdave81

drdave81

Full Access Member
Joined
Oct 7, 2020
Posts
261
Reaction score
401
Location
Waterford, MI
Had a bit of time over the long weekend to start some tear down. So far everything looks really good. Could still see crosshatch in the cylinder walls yet. Just a lot of small seeps from many gaskets made for a nice mess all over everything. Lots of cleaning in my future! I keep finding more of those "while I'm in here" things. Like, it's easy to get to the cam sensor and oil pressure sensor, might as well.
20220703_161859.jpg

20220703_183354.jpg

20220704_161414.jpg
 
OP
OP
drdave81

drdave81

Full Access Member
Joined
Oct 7, 2020
Posts
261
Reaction score
401
Location
Waterford, MI
Completely disassembled, waiting on a few extra parts to show up and the cleaning........ oh the cleaning!!!! It seems every gasket was seeping just enough to make a mess everywhere. I couldn't find a couple bolts to the front cover until I scraped the chunks off lol. I still need to get the back side of the block and the bell housing to the trans cleaned off somehow. I should start reassembly today, get the oil pan back on, front axle back up and in place now that the new oil pump is on. This engine has been really well maintained by previous owners as indicated by how well everything looks internally. I can still see the cross hatch in the cylinder walls, cam bearings look good, no signs of wear anywhere.
 

Tonyrodz

Resident Resident
Joined
Feb 16, 2012
Posts
33,169
Reaction score
51,366
Location
Central Jersey
Completely disassembled, waiting on a few extra parts to show up and the cleaning........ oh the cleaning!!!! It seems every gasket was seeping just enough to make a mess everywhere. I couldn't find a couple bolts to the front cover until I scraped the chunks off lol. I still need to get the back side of the block and the bell housing to the trans cleaned off somehow. I should start reassembly today, get the oil pan back on, front axle back up and in place now that the new oil pump is on. This engine has been really well maintained by previous owners as indicated by how well everything looks internally. I can still see the cross hatch in the cylinder walls, cam bearings look good, no signs of wear anywhere.
You really lucked out.
 
OP
OP
drdave81

drdave81

Full Access Member
Joined
Oct 7, 2020
Posts
261
Reaction score
401
Location
Waterford, MI
Well this got dragged out longer than I anticipated........ like these always do. So, I got everything apart, took forever to clean. Got some other parts replaced, painted and reinstalled. I got the pass side head bolted on, installed pushrods and rockers, and found the #8 intake rocker arm bolt hole was stripped out. These were heads I bought off someone on FB marketplace. He had paperwork showing they were pressure tested, so I guess I assumed they were good to go. Don't do that lol. Never really thought to check that, wish I had though. So I pulled the head back off and sent it out to get a helicoil put in, machine shop was backed up over 2 weeks, but I've dealt with him forever so I trust him over another shop. Just IMed ScottyBoy about a wire harness for the e-fan conversion, because I kind of forgot about that. Intake will probably go back on in the next day or so along with the down tubes for the exhaust. I need to power back up and get the files off the PCM for blackbear to have them get an initial tune set up for me and then should be good to go soon..... hopefully.
There were some other parts I wanted to replace/clean up but it was just really dragging on and getting more and more expensive. Down the line maybe.......
 

Attachments

  • 20220830_145600.jpg
    20220830_145600.jpg
    226.9 KB · Views: 36
  • 20220830_145608.jpg
    20220830_145608.jpg
    228.8 KB · Views: 31
  • 20220830_145616.jpg
    20220830_145616.jpg
    226 KB · Views: 42
OP
OP
drdave81

drdave81

Full Access Member
Joined
Oct 7, 2020
Posts
261
Reaction score
401
Location
Waterford, MI
Ah yesss. Good call on the coolant connectors. They're on the way now along with an e-fan harness from Scottyboy. I'm going to reuse the stock injectors just for now. Costs were piling up, and while I know bigger ones will really benefit this build, they're easy enough to change out this fall/winter.
 

Buggdave

Full Access Member
Joined
Jul 26, 2015
Posts
103
Reaction score
238
Location
SLC , Utah
Good call on the American racing headers, i just installed mine on my rebuild for my 02 Denali. The fitment is first class. My LQ4 was in similar shape when i tore it down this last winter with the cylinder walls still in good shape. The “while your in here” scope creep is real. What are your plans for running your engine? With the 799 heads and new cam, you will benefit from some tweaking to get the most out of your mods.
 
OP
OP
drdave81

drdave81

Full Access Member
Joined
Oct 7, 2020
Posts
261
Reaction score
401
Location
Waterford, MI
Good call on the American racing headers, i just installed mine on my rebuild for my 02 Denali. The fitment is first class. My LQ4 was in similar shape when i tore it down this last winter with the cylinder walls still in good shape. The “while your in here” scope creep is real. What are your plans for running your engine? With the 799 heads and new cam, you will benefit from some tweaking to get the most out of your mods.
I'll be getting it tuned by blackbear to get that "tweaking".
It'll just be a more fun 3 season driver. With no rust, it won't be seeing Michigan winters. I grabbed an 08 crew cab Silverado for that, $5k and needed the typical AFM delete. It was ticking pretty good lol.
 
OP
OP
drdave81

drdave81

Full Access Member
Joined
Oct 7, 2020
Posts
261
Reaction score
401
Location
Waterford, MI
So I ran into a problem with one of the 799 heads a couple weeks ago. The person I bought them from had them pressure tested at a shop, everything was good there. What I didn't know was that there were multiple bolt holes stripped out near the back of the head. After I bolted the head on, I found the last rocker arm bolt hole was stripped out. So the head came back off, sent out, helicoiled and went back on........ only to find the rear intake bolt hole and rear valve cover bolt hole are also the same. I've paused for now to decide if I just reinstall the old 317 heads for now and drive it for another month, maybe 2. Or do I leave it down for the winter, get the 799 heads ported/fixed, do a NNBS intake swap and maybe more.
I've been sitting on it, partially just out of frustration with this dragging out way longer than it needed to, and really to figure out which way I want to go with this. I'm kind of leaning toward just leaving it down until spring, since I'll only drive it until snow flies in MI, which would be a couple months at most by this point.
 

Blackcar

Full Access Member
Joined
Mar 31, 2018
Posts
919
Reaction score
863
It depends which bolt holes are stripped but you might be able to fix those yourself leave intake on and valve cover use hole in each to guide your drill for helicoii on intake valve cover I believe three bolts for each port and valve cover you won't need to tighten it very tight leaving intake and valve cover on keeps shaving and debris out of engine you got the important one done, (Rocker Arm) The very back intake and valve cover bolts probably to close Tho. That sucks good luck I know what you mean just get away from it for a while.
 
OP
OP
drdave81

drdave81

Full Access Member
Joined
Oct 7, 2020
Posts
261
Reaction score
401
Location
Waterford, MI
It depends which bolt holes are stripped but you might be able to fix those yourself leave intake on and valve cover use hole in each to guide your drill for helicoii on intake valve cover I believe three bolts for each port and valve cover you won't need to tighten it very tight leaving intake and valve cover on keeps shaving and debris out of engine you got the important one done, (Rocker Arm) The very back intake and valve cover bolts probably to close Tho. That sucks good luck I know what you mean just get away from it for a while.
They're in the back so it won't be easy to get at with a drill, partially tucked under the firewall/cowl.
 

Forum statistics

Threads
137,687
Posts
1,989,633
Members
102,689
Latest member
Woned2004
Back
Top