Travieso Forged 6.0 Swap Build Thread

Disclaimer: Links on this page pointing to Amazon, eBay and other sites may include affiliate code. If you click them and make a purchase, we may earn a small commission.

OP
OP
Travieso

Travieso

Boooooooost !
Joined
Jul 19, 2009
Posts
2,277
Reaction score
64
Location
Los Skandeles, CA
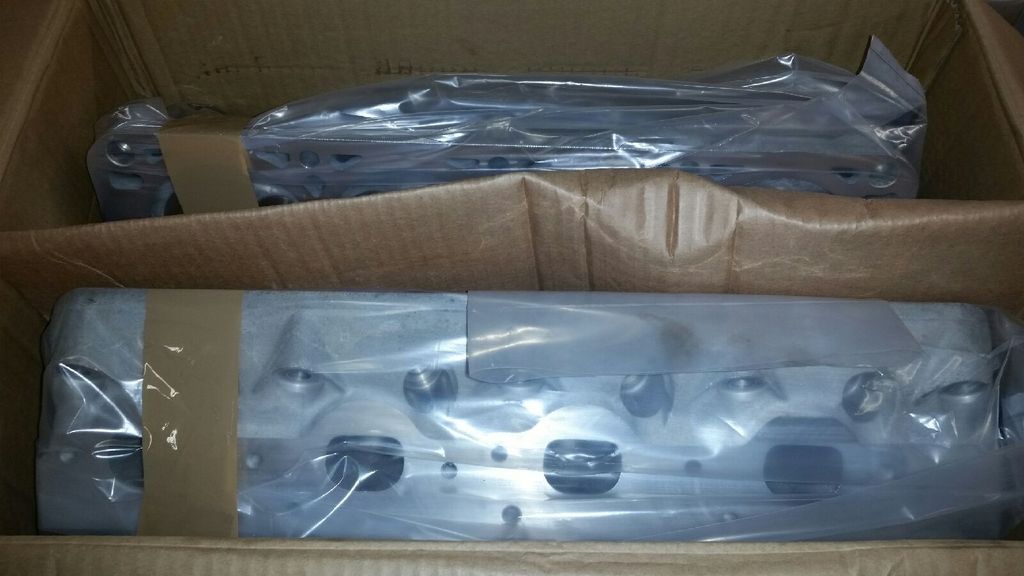
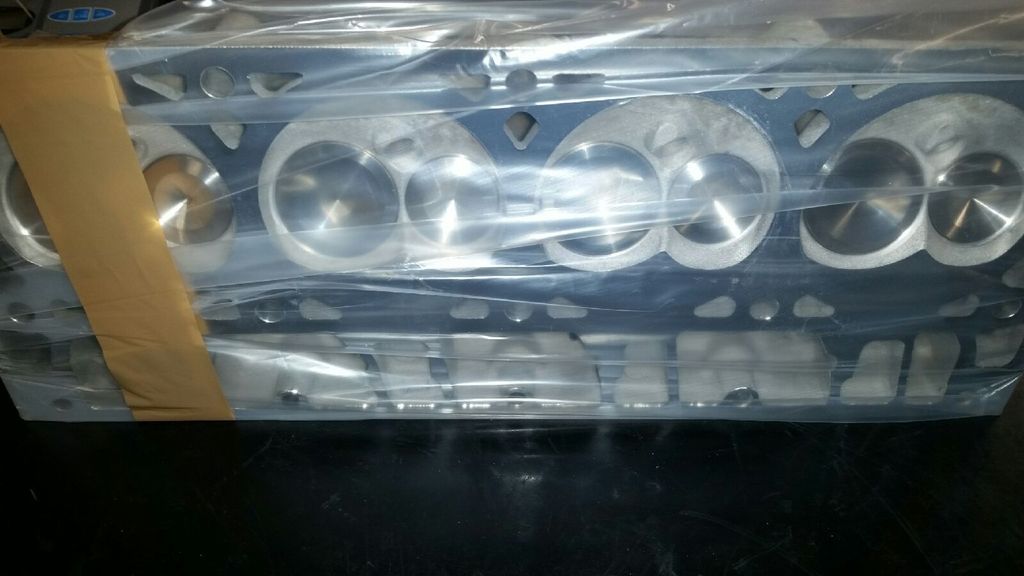
My Heads are done and they look like a work of art, lol These are the pictures I got from the Machine Shop (West Coast Cylinder heads) I Have to go pick them up Hopefully sometime next week, When I have time...

Spec:
  • GM 317 Core
  • 2.02"/1.575" Stainless Steel Valves
  • PRC .650" Lift Dual Valve Spring Kit Complete with Dual
    Springs, Titanium Retainers, Seats, & Seals
  • Minimal Surface Removed


20160205_140654_zps3szicxcx.jpg


20160205_140944_zpsjhovrkj6.jpg
 
Last edited:
OP
OP
Travieso

Travieso

Boooooooost !
Joined
Jul 19, 2009
Posts
2,277
Reaction score
64
Location
Los Skandeles, CA
Hey Everyone it's been a while since I've been here, But I thought I would open up a new Built Thread to let you guys know what I've been up too...

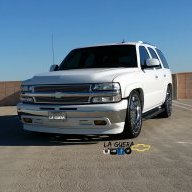
So The 5.3 Wasn't Enough and I was looking for more power. So I decided to Bite the bullet and Build me a Forged 370 Motor That's a 6.0 LQx Honed to .030. I Will try to document as Much as I can, it's a big learning curved and I've spend Numerous HOURS Researching Everything Hopefully the Next guy that does this type of swap, this thread would be beneficially to him.. Lets start I took lots of pictures I know all of you guys like pictures so here Is where I'm at.

The Goal is to build a reliable street friendly truck with as much as possible OEM Parts

Motor:
370 10.1 (2005 LQ9) Balanced and BluePrinted ✔
Manley 14051-8 Rods✔
Manley Performance Piston Rings 46113-8✔
Manley Platinum Series Pistons 592530C-8✔
ARP Main Stud Kits 234-5608✔
ARP Head Studs 134-3609 ✔
ARP Cam Sprocket Bolts 134-1003✔
ARP Motor Mount Bolt Kits 434-3102 ✔
Clevite H-Series Rod Bearings CB663HN✔
Clevite H-Series Main Bearings MS2199H✔
Katech Blue Printed Oil Pump✔
Katech Timing Chain✔
GM 317 Heads Core✔
2.02"/1.575" Stainless Steel Valves
PRC .650" Lift Dual Valve Spring Kit Complete with Dual Springs, Titanium Retainers, Seats, & Seals Minimal Surface Removed (To Keep Compression low)✔
LS9 Head Gasket 7 Layer Composite✔
Chevrolet Performance Hydraulic Roller Lifters 12499225✔
TSP - 7.4 Pushrods✔
TSP - Camshaft✔
Siemens Deka 80lb Ev6 USCAR


Transmission:
4L80E Transmission Build:
4L80e √
TransGo Performance Shift Kits 4L80E-HD2 √
Hughes deep transmission pan √
Yank PT Series 3000 RPM 4L80 Converter √
Tru cool 40k Transmission Cooler √
Custom Transmission Cross Member √


Exterior:
2000-2002 Chevy Silverado 2500/3500 HD Hood√
Cadillac Escalade Chrome Roof Luggage Rack √
Cadillac Escalade Rear Vent Caps √
Cadillac Escalade Third Brake Light √
Color Matched (Front Valance, Lower Valance, Rear Bumper and vent caps) √
Clear Corner Parking Lights √
HID’S 6K and 3K Fog Lights √
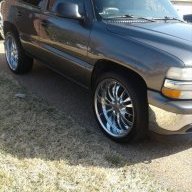
24” MOZ Wheels 305/35/24’s √
De-Badged / De-Mold / Removed Center Rook rack √
LED Tail lights √
Painted Ferrari red Calipers √
Tinted Windows √
Custom cut Lower Valance for Volant Ram Air Scoop √

Interior Mods:
20% over Tint On The 2 Front Doors √
Denali Dash Bezel √
Replaced ALL Inside Lights With "Cool White" LEDs √
A Pillar Pod Gauge✔
Boost Gauge Autometer #4301 ✔
Fuel Pressure Gauge Autometer #4363✔
AFR Gauge (PLX Wideband AFR) √
07 Silverado 3500 Speedometer Instrument Cluster W/ Transmission Temperature Gauge √
Custom LED Cluster √


Suspension Mods:
McGaughy's 2" Drop Spindles ✔
KYB Steering Stabilizer shock ✔
3/4 Ton Chevy Stock Torsion Keys in Front 1" to 3" Lower ✔
Belltech Street Performance Front Shocks ✔
Eibach Front Sway Bars ✔
Z71 Front Bump Stops ✔
Belltech Street Performance Rear Shocks ✔
DJM 5" TB Rear Coil Springs ✔
DJM Rear 3/4" Urethane Rear Bump Stops ✔
DJM Free Travel Mod ✔
DJM Rear Hardware kit ✔
Eibach Rear Sway Bars ✔


Performance Mods:
LPP Headers (1 3/4" primaries and a 3" collector) No Cats ✔
22" Magnaflow exhaust ✔
3" inch Custom Exhaust ✔
Custom Live Tune with HP Tuners✔
Magnuson SuperCharger Radix W/ ARP Bolts ✔
Magnuson HD tensioner ✔
Metco Double Bearing Idler Pulley's 100mm ✔
Magnuson 90 mm Inlet Tube ✔
4" Custom Cold Air Intake Inlet✔
Torque Rush Performance X-Link ✔
90 mm LS2 Throttle Body ✔
8mm Supercharger Connection Spark Plug Wires ✔
NGK TR6 plugs ✔
Hypertech 160* t-stat ✔
Pinned The Crank ✔
Outlaw Radix Intake √
Volant Ram Air Scoop √


Built Rear End:
4.30 Gears USA Standard √
Detroit TrueTrac √
Master install kit with timken Bearings and Rear Axle Seals √


Custom Aluminum Built Drive shaft: Rated for 1,000 HP
Speed Balanced to 9000 RPM √
Full 1350 u joints (Heavy Duty U-Joints) √
1350 Yokes √


Future Mods:
Fuel System
EFI Nitrous System
Methanol Injection Kit
Spohn panhard bar
Helper bags
(Never ends)


The Day the motor came out
20151212_110603_zpsppomfrjg.jpg

20151212_110707_zps09rkzdfx.jpg

20151212_130256_zpshzejnjq0.jpg

20151212_135633_zpsipbufghq.jpg

20151212_134602_zpsbflduhev.jpg

20151212_130809_zps0si7cdaj.jpg

20151212_154517_zpsuhcpcmbu.jpg


The Magnuson Radix Sitting on The Table
20151212_110610_zpsmyk7y80c.jpg


Parts Delivered to me (yes I got chewed out for putting dirty boxes on wife's comforter) lol
20151214_191718_zpsmawijkgm.jpg


I was Originally going to powder coat alot of stuff, but Since my Powder coater isn't local anymore I didn't want to spend a fortune in shipping so I decided to paint alot of the stuff

4L80 Transcover and Magnuson Bracket Still haven't decide if im gonna polish the HD Tensioner
20151209_121735_zpsyvetqwdk.jpg


Next was to Clean up the Coil packs and Brackets, These were filthy
20151229_113042_zpscsa9df9r.jpg

20151229_111456_zpssfi7hqdq.jpg

20151229_111301_zps1ni4suol.jpg

20151229_111232_zpsrfcc6ree.jpg


Done, Although they almost look the same the brackets were painted

20151229_142917_zpsogqf6jfw.jpg
 
Last edited:
OP
OP
Travieso

Travieso

Boooooooost !
Joined
Jul 19, 2009
Posts
2,277
Reaction score
64
Location
Los Skandeles, CA
Does anyone know how to edit the very first post? I Don't see the Edit button on the lower Left Corner
 

Fosscore

Full Access Member
Joined
Apr 16, 2014
Posts
10,883
Reaction score
19,823
Hit up one of the moderators. There is a time limit for editing older posts. @07Burb or @NathanJax should be able to set you right.
 
OP
OP
Travieso

Travieso

Boooooooost !
Joined
Jul 19, 2009
Posts
2,277
Reaction score
64
Location
Los Skandeles, CA
Finally had some time to pick up my heads, took a few pics for you guys

Minimal Resurface
20160217_151923_zpsxvtseaap.jpg


Stainless Steel Valves Exhaust and Intake
20160217_151940_zpsuv0hq3g6.jpg


PRC .650 Springs
20160217_152047_zpsazc5***k.jpg


20160217_152057_zpsfuqo4ybs.jpg


Cast 317
20160217_152159_zpssyrb9whg.jpg
 

bottomline2000

Full Access Member
Joined
Oct 21, 2009
Posts
1,722
Reaction score
991
Location
Dallas, TX
Finally had some time to pick up my heads, took a few pics for you guys

Minimal Resurface
20160217_151923_zpsxvtseaap.jpg


Stainless Steel Valves Exhaust and Intake
20160217_151940_zpsuv0hq3g6.jpg


PRC .650 Springs
20160217_152047_zpsazc5***k.jpg


20160217_152057_zpsfuqo4ybs.jpg


Cast 317
20160217_152159_zpssyrb9whg.jpg
Did the port and polish or just clean them up? If so, how's the port work look?
 

bottomline2000

Full Access Member
Joined
Oct 21, 2009
Posts
1,722
Reaction score
991
Location
Dallas, TX
Decided not to do the port job, They just have a 3 angle performance valve job, With upgrade stainless steel valves..
Nothing wrong with that. I had spoken to lot of "top" machine shops here and one guy flat out told me the job was too small and not worth it...ugh...heads are where you can make big gains and the bigger valves and blower should work well together.
 
OP
OP
Travieso

Travieso

Boooooooost !
Joined
Jul 19, 2009
Posts
2,277
Reaction score
64
Location
Los Skandeles, CA
Nothing wrong with that. I had spoken to lot of "top" machine shops here and one guy flat out told me the job was too small and not worth it...ugh...heads are where you can make big gains and the bigger valves and blower should work well together.


Correct I just didn't see the extra money for P & P Heads, I talked to a few machine shops and they agreed also, eventually when I upgrade the blower to something Bigger I'll get a nice set of heads to go along with it.. For now I think it should be more then enough with my current set up.

So Stage 1 - Fuel System
Stage 2 - TVS2300 or Whipple 2.9 with Stage 2-3 heads
 
OP
OP
Travieso

Travieso

Boooooooost !
Joined
Jul 19, 2009
Posts
2,277
Reaction score
64
Location
Los Skandeles, CA
So I had some time off today and decided to work on the truck a little bit since I have some down time and waiting on the motor figure I would do something productive, Nothing big just routine maintenance

Covered all Plugs getting ready to Pressure wash the engine Compartment there was transmission fluid all over the place.
20160310_134714_zpspalusp7a.jpg


20160310_134720_zpsne3kgdyc.jpg


Done not noticeable difference in picture but in real life big difference.

20160310_143827_zpshh9kzfct.jpg

20160310_143836_zpsvvpd2jvm.jpg


Took the ***** out on my driveway so she could dry and get some sun, Since all it knows is being in the garage

20160310_144319_zpsbmrowdln.jpg


I also went ahead and finally put my bumpstops that I had for more then 3 years and finally now decided to put on, lol Thanks to @Fosscore

20160311_155100_zpsy8rpihzu.jpg

20160311_162002_zpszcttmgdd.jpg

20160311_162022_zpsfaevjfxx.jpg
 

Fosscore

Full Access Member
Joined
Apr 16, 2014
Posts
10,883
Reaction score
19,823
Nice work man. I can see the difference in that engine compartmet. Every little bit counts. Add a bit of rattle can down low just to coat it and make it look pretty too.

Damn those are some pancake bump stops. Nice work! Looks like you took the wheels off for easier access. Good call.

I noticed a bit more travel today after cutting mine down yesterday. Was worth the effort, but still dodging the same potholes that they won't fix.
 
OP
OP
Travieso

Travieso

Boooooooost !
Joined
Jul 19, 2009
Posts
2,277
Reaction score
64
Location
Los Skandeles, CA
Damn those are some pancake bump stops. .
Yeah That's the first thing I noticed compared to yours, lol Oh well this will be just a trail and error, Only reason why I put them on was because I already had them. Hopefully It wont hit metal to metal when the truck is loaded with passengers and cargo. I did take off the wheels I just couldn't get my hands underneath the bumpstops a little more work but got it done. I gotta do some suspension maintenance Im gonna take some stuff apart and clean up and rattle can some stuff black to spruce it up a little bit.
 

Fosscore

Full Access Member
Joined
Apr 16, 2014
Posts
10,883
Reaction score
19,823
Tight fit under that axle pad. Nice work. I bet you will be good loaded up. You should put the Air Lift bags part number 60742 inside your springs for some extra lift. Can air them up to 35 psi and hold that rear end good. Mine are aired out at the moment but they do lift the ass if you need it.

$80 for the kit. 2 bags and air lines.

I flew over a train track last night a little faster than I normally drive over it and got the extra travel but it hit the stops hard. Sounded horrible, but did what it was supposed to. Frame on polyurethane. No dramas.
 
OP
OP
Travieso

Travieso

Boooooooost !
Joined
Jul 19, 2009
Posts
2,277
Reaction score
64
Location
Los Skandeles, CA
Thanks man, yeah I plan on doing some rear and front suspension definitely going with Spoon rear Lower and upper control arms and the panhard bar when the budget allows. I should have a update on the motor sometime next week.
 
OP
OP
Travieso

Travieso

Boooooooost !
Joined
Jul 19, 2009
Posts
2,277
Reaction score
64
Location
Los Skandeles, CA
So I finally picked up the short block and did some painting I think it came out very good.

This is how I pickled up the motor all wrapped up for me
20160328_153202_zpsyy9xdks9.jpg


Spend about 1 hour making sure I masked everything and about 3 rolls of painters tapes, Wanted to make sure their wasn't any over spray inside the engine. It was easier for me to put the rear and front covers on I didn't feel like mocking up a cardboard template, so I went this route. The front and rear Covers are gonna get painted black to add some contrast

Here are the pics
20160329_145309_zpsqafxyjkf.jpg

20160329_145315_zpsulvafjpv.jpg


3 coats of primer
2 light coats and one medium coat
20160329_150932_zps8rmx4uu3.jpg


then 3 coasts of Chevy Orange

20160329_163307_zpsd7qx7bxn.jpg

20160330_131152_zpsbiwuhltg.jpg


Waiting on the new heart Transplant
20160330_140018_zpsrrjuwrrr.jpg


the goods
20160330_140916_zps8mz2kfgw.jpg

20160330_141021_zpsmwjzkrwo.jpg

20160330_141031_zps36wnbyh7.jpg

20160330_141044_zpshghrkyn9.jpg

20160330_141100_zpsfkvbndza.jpg

20160330_141118_zps2csfphpa.jpg

20160329_120850_zpsrtjdzrlg.jpg


This is were I left off, Tomorrow hopefully if i have some spare time I will paint the oil pan black.
20160330_154410_zpsrsjeuw5f.jpg


I also worked on the rear end just wasn't happy with how I left it last time
20160325_132953_zpsrf7xwbhi.jpg

20160325_134254_zpspi53je3c.jpg
 

Forum statistics

Threads
138,037
Posts
1,997,597
Members
102,974
Latest member
kikeap
Back
Top