Need to Replace Upper Control Arms and Ball Joints

Disclaimer: Links on this page pointing to Amazon, eBay and other sites may include affiliate code. If you click them and make a purchase, we may earn a small commission.

Justinthewoods

TYF Newbie
Joined
Oct 14, 2023
Posts
18
Reaction score
24
Location
Denver, Colorado
Hey guys,


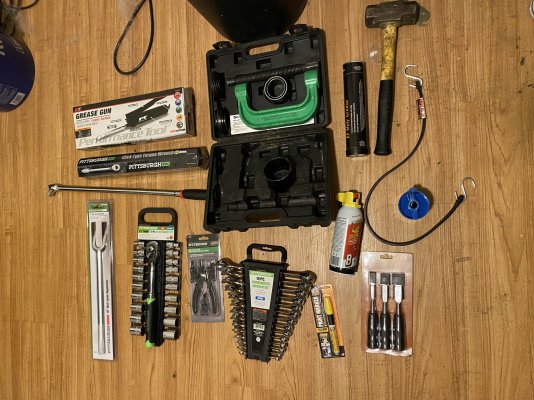
The endlessness list of stuff I need to fix on my Tahoe goes on. So I got new tires today and then took my truck for an alignment. Was told my ball joints on both sides were messed up and the one on the control arms looked like its going to giving out soon. I got a quote for 1494.33. I decided to do them myself (never have done this repair before). I found a video online and doesn`t seem out of my skill level to do. I looked through a couple threads here and seen that Moog was good for the control arms and ball joints. This is what I have for the part list: https://www.rockauto.com/en/moreinfo.php?pk=7612636&cc=0&pt=10401&jsn=3&optionchoice=0-0-1-1 https://www.rockauto.com/en/moreinfo.php?pk=7612640&cc=0&pt=10401&jsn=483 https://www.rockauto.com/en/moreinfo.php?pk=418936&cc=0&pt=10070&jsn=487 Is this all I need as far as parts? I know Moog makes different series, are the control arms I have listed above good as OEM? Also I was wondering why is the driver side only 80 bucks compared to 141 for the passenger, is that normal? As always I love this group so much!!!! You guys have been such a help to me! Hope everyone has a good upcoming holiday.


IMG_2088.jpg
 
Joined
Apr 11, 2018
Posts
7,124
Reaction score
14,375
Location
St. Louis
I'd suggest to also pick up a couple replacement upper mounting bolts, and possibly a couple alignment cam plates. The bolts are flat on the sides and slip through the alignment cam plates one way. They have a tendency to get rusted to the bushing on the arm (especially the front one on each side) and either break when removing or are in just bad shape. They're cheap
 

solli5pack

Full Access Member
Joined
Jun 17, 2023
Posts
482
Reaction score
740
Definitely pick up two sets of these and guide pins as well. The bolts on my 08 Yukon were so rusted in place I had to spend two days cutting them out with a sawzall to get the arms off. Soak your old bolts with some liquid courage (wd40) and hopefully they come off easily


Screenshot_20231122_103315_Amazon Shopping.jpg
 

mikez71

Full Access Member
Joined
Mar 9, 2023
Posts
3,210
Reaction score
3,974
I just replaced upper and lower arms with Moog CK series (greaseable metal) Not sure what type is better, but those were the higher end Moog units. Looks like you are looking at the adjustable ball joint. ?

Replacing was fairly easy, somewhat time consuming.

undo front axle nuts (if 4WD)
remove wheels/jack up truck

Since I had a front spacer under shock, I had to undo upper arm from knuckle first.
(with jack under lower arm)

Then lower the lower arm and remove front struts. (with brakes removed and hanging nearby).

remove upper arm
loosen lower arm/balljoint nut.
angle the axle stub out of of the wheel bearing/knuckle, you may have to remove lower arm, support old balljoint with floorjack if u do

Install new lower arm, insert axle, install strut, install upper arm.

finish everything up and I like to tighten everything with the truck sitting on the ground.

I spent about $450 for the 4 arms.
Originally had a quote of about $1000 to do both lower balljoints.

FWIW my (2012) adjusters were not rusted. I could see how they would be in a winter state.
 

Joseph Garcia

Elite Member
Supporting Member
Joined
Aug 2, 2018
Posts
10,285
Reaction score
14,891
Unless you are quite well set up with tools, this could be a lengthy job for you. If you've got the time, go for it, but plan on this being a rather lengthy job with lots of grazed knuckles.

I recommend that you purchase OEM control arms WITH the ball joints ALREADY attached, as this will be a time saver for you. Check GMPartsDirect.com for pricing after entering your VIN, to get the proper parts.
 

89Suburban

Bull in the china shop
Space X Supporting Member
Joined
Jan 10, 2013
Posts
17,826
Reaction score
50,782
Location
SE PA
If you have the plastic OE locating inserts for the camber plates make sure to take pics and mark them to reinstall the same way/position. If worst case you have to go beating/cutting on the cam bolts be careful of the locating pins they can be accidently knocked out and lost.
 
OP
OP
Justinthewoods

Justinthewoods

TYF Newbie
Joined
Oct 14, 2023
Posts
18
Reaction score
24
Location
Denver, Colorado
I'd suggest to also pick up a couple replacement upper mounting bolts, and possibly a couple alignment cam plates. The bolts are flat on the sides and slip through the alignment cam plates one way. They have a tendency to get rusted to the bushing on the arm (especially the front one on each side) and either break when removing or are in just bad shape. They're cheap
Hey do you have a link for those or part number? I`m gonna purchase everything today and do it next weekend
 

Dustin Jackson

Full Access Member
Joined
Aug 9, 2018
Posts
1,788
Reaction score
2,064
I would recommend doing the entire arm as that includes the bushings and balljoints, I would do upper and lower while in there:
Upper left: MOOG RK80669
Upper right: MOOG RK80670
Lower left: MOOG RK620888
Lower right: MOOG RK620889


Might as well do tie rods while you're in there:
Outter x2: MOOG ES800223
Inner x2: MOOG EV800084


Might as well do wheel bearings while you're in there:
both sides: MOOG 515096


Front sway bar end links:
MEVOTECH TXMS50820
 
Joined
Apr 11, 2018
Posts
7,124
Reaction score
14,375
Location
St. Louis
Hey do you have a link for those or part number? I`m gonna purchase everything today and do it next weekend
Dorman - Help Alignment Cam Bolt part# 13512

When I did mine last year and ended up breaking one of the alignment cam bolts I ran to the local Advanced Auto and bought 2 of them, which was good because the one on the other side broke also, lol.
 

OR VietVet

GMT800 2005 Tahoe Z71
Navy Supporting Member
Joined
Oct 8, 2014
Posts
23,694
Reaction score
44,104
Location
Willamette Valley
Hopefully a mod can move this to Street Suspension for better response results. Work like this is my bread and butter. If you have the knowledge, will power, tools, time and don't mind scraped knuckles, this is all doable. Lots of videos or a knowledgeable friend. This is not work you will do with a screwdriver. Be careful. Can bite you if not careful. Thread tie rods back to the same area as old ones. Good luck. Do complete arms.
 
OP
OP
Justinthewoods

Justinthewoods

TYF Newbie
Joined
Oct 14, 2023
Posts
18
Reaction score
24
Location
Denver, Colorado
Hopefully a mod can move this to Street Suspension for better response results. Work like this is my bread and butter. If you have the knowledge, will power, tools, time and don't mind scraped knuckles, this is all doable. Lots of videos or a knowledgeable friend. This is not work you will do with a screwdriver. Be careful. Can bite you if not careful. Thread tie rods back to the same area as old ones. Good luck. Do complete arms.
Gonna give her a go tomorrow wish me luck. Think I have everything as far as tools go but we’ll see
 

Attachments

  • IMG_2234.jpeg
    IMG_2234.jpeg
    448.7 KB · Views: 43
Joined
Apr 11, 2018
Posts
7,124
Reaction score
14,375
Location
St. Louis
Tie rods and idler arm if they’re worn since you’re in there and will need an alignment. Also, I like the DK Camber alignment cams, they have holes instead of one long slot, and they stay put. https://a.co/d/4OvXmcz
Problem with those is that to make adjustments you have to loosen it up quite a bit to lift the cam up over the pin to get to the next hole. With the slot style just losen the nut a bit and turn the bolt with a wrench on the head, done.
 

Coveman

Full Access Member
Joined
Jun 28, 2021
Posts
151
Reaction score
246
The factory puts a plastic insert in the camber cam to hold it in stock position, and I’ve seen those stay put for a long, long time. Once the plastic insert is removed, however, I’ve had the camber re-adjust itself (bumps, hard braking) and then you’re troubleshooting front end wobbles and shakes. I was on a road trip last Christmas when this happened to me, so a got a cheap camber tool that helped get me back on the road.

YIQI Adjustable Magnetic Gauge Tool Camber Gauge Castor Strut Wheel Alignment for Car Truck https://a.co/d/gPyY6ss

Checking the toe isn’t hard either, and after rebuilding my 99 Burb’s front end I aligned it with a level, string and a tape measure. When I took it in for alignment it was balls on. I had marked everything too, but just counting threads on the new tie rods turned out to leave the toe out of spec. Plenty of diy alignment youtubes if you are so inclined.
 

the 18th letter

Full Access Member
Joined
Feb 14, 2010
Posts
1,078
Reaction score
1,199
Location
Northern New Jersey
I would recommend doing the entire arm as that includes the bushings and balljoints, I would do upper and lower while in there:
Upper left: MOOG RK80669
Upper right: MOOG RK80670
Lower left: MOOG RK620888
Lower right: MOOG RK620889


Might as well do tie rods while you're in there:
Outter x2: MOOG ES800223
Inner x2: MOOG EV800084


Might as well do wheel bearings while you're in there:
both sides: MOOG 515096


Front sway bar end links:
MEVOTECH TXMS50820
Why not do a set of shocks as well lol
 

Forum statistics

Threads
137,705
Posts
1,990,102
Members
102,699
Latest member
moto
Back
Top