What did you do to your NBS GMT800 Tahoe/Yukon Today?

Disclaimer: Links on this page pointing to Amazon, eBay and other sites may include affiliate code. If you click them and make a purchase, we may earn a small commission.

Rocket Man

Mark
Supporting Member
Joined
Dec 25, 2014
Posts
26,679
Reaction score
52,949
Location
Oregon
I think that one you were trying with is dual-layered. I don't bother messing with the factory grommets. It's just not worth the hassle or risk of nicking a wire or causing a leak. Bring a piece of your power wire to an auto parts store or hardware store (Home Depot, Lowe's, etc.) and look for a grommet like this:

View attachment 399938

You want one that fits firmly on the jacket of your power wire. Here's mine where I ran it through the floorboard, near one of the right rear seat mounts:

View attachment 399939


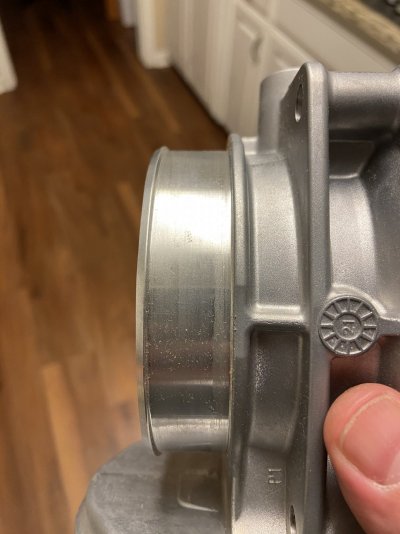
I drilled the hole to the OD of the recess in the grommet ("PANEL HOLE DIAMETER" in the following image), cleaned the drilling burrs from around the edge of the hole then painted the metal and let it fully dry. The wire needed a little spritz of lubricant ever so often to slide through the grommet cuz it was a firm fit. Which, is what you want for proper sealing.

View attachment 399947


"OCD" you say? :D

View attachment 399940

View attachment 399941


Not directly. The seats are bolted to the cab floor, to sheet metal. A circuit needs to have the same ampacity throughout all of its conductors. Otherwise, the ampacity of the smallest (weakest) point will be the circuit's maximum. The battery is grounded to the frame. The body (sheet metal) is grounded to the frame with some rather electrically weak cables. You can ground that amp to sheet metal or to seat frames, etc. that are bolted to the same sheet metal, but that sheet metal needs a matching ground to the frame. So, you'd need an 8 gauge ground from the body's sheet metal to the frame or engine block. I have a 4 gauge ground from the body to the engine block, which is grounded to the frame with 1/0. It's actually the original factory main ground that went from the battery to the engine block, just relocated to the sheet metal:

View attachment 399942


It's a good ground, but still to the body. The body-to-battery (or frame or engine) needs to be at least 8 gauge.


Honestly, it's all probably okay. But, there's still room for doubt. For the minimal cost of ensuring your grounds are sufficient, you can ensure the amp won't be starved of power, minimizing its heat and how hard it'll have to work which maximizes its life.
You really should upgrade to low-profile cable ties. They’re so much cleaner looking. ;) I can’t get an Amazon link for some reason ( what happened to their link button?) but here’s a screenshot and a pic of some I used. I really like how they lay flat and look more like a small strap.
 

Attachments

  • 3DEC21E5-EB89-4AF6-9F7C-71DF7B90343A.png
    3DEC21E5-EB89-4AF6-9F7C-71DF7B90343A.png
    589.3 KB · Views: 25
  • DC8E8C86-0AAC-4A2E-88D6-846643EE176B.jpeg
    DC8E8C86-0AAC-4A2E-88D6-846643EE176B.jpeg
    383.1 KB · Views: 21

Rocket Man

Mark
Supporting Member
Joined
Dec 25, 2014
Posts
26,679
Reaction score
52,949
Location
Oregon
Nope. Need to pick one up. ordered. Be here tomorrow. Yeah, first thing I thought of was an exhaust leak. Shouldn’t be, used ARP bolts with the headers, but hey, that would be awesome if that’s what it is.
One of those bolts could have loosened up or an exhaust gasket could have failed.
 

Fless

Staff member
Moderator
Joined
Apr 2, 2017
Posts
16,366
Reaction score
33,846
Location
People's Republic of Colorado

iamdub

Full Access Member
Joined
Apr 23, 2016
Posts
20,821
Reaction score
45,012
Location
Li'l Weezyana
You really should upgrade to low-profile cable ties. They’re so much cleaner looking. ;) I can’t get an Amazon link for some reason ( what happened to their link button?) but here’s a screenshot and a pic of some I used. I really like how they lay flat and look more like a small strap.

I like those! I just went with whatever work bought me a 1,000 count bag of. :yaoface2:

It'll be covered once I cut out that carpeted trim panel so the tie's aesthetics won't matter. But I'll keep these in mind for visible zip ties.
 

Alex_M

Full Access Member
Joined
Sep 27, 2021
Posts
380
Reaction score
686
My fuel pressure regulator has the vacuum port on the top (flex fuel) rather than the side, no where can I find the right vacuum line elbow that is 90 degrees, only the 45 degree slanted one. I tried a generic 90deg rubber elbow but it cracked after a few months, anyone have any ideas or the same issue?

the most common 45degree connector below:
View attachment 399616
Cut the hard line near the intake manifold, leave about 1" of hard line. Get a foot of vacuum hose that will snugly fit over the remaining hard line and make yourself a loop to the regulator.
 

Rocket Man

Mark
Supporting Member
Joined
Dec 25, 2014
Posts
26,679
Reaction score
52,949
Location
Oregon
Found the share icon on Amazon…why they gotta keep changing shit? I see it’s the same as @Fless linked.

SecuriTie CTCH8-60100UVB Low-Profile Cable Ties, 8 Inch., 60 Lbs. Tensile Strength, Wire & Cord Management / Industrial / Household Use, Nylon Zip Tie, 100 Pk, UV Black https://a.co/d/a7p9XMn
 

Sam Harris

Elite Member
Supporting Member
Joined
Sep 26, 2018
Posts
7,445
Reaction score
14,977
Location
Texas
My fuel pressure regulator has the vacuum port on the top (flex fuel) rather than the side, no where can I find the right vacuum line elbow that is 90 degrees, only the 45 degree slanted one. I tried a generic 90deg rubber elbow but it cracked after a few months, anyone have any ideas or the same issue?

the most common 45degree connector below:
View attachment 399616
I don’t think this is it, but just in case.. (meant to say: just in case it will work) this is one of the lines that came with my TBSS Evap swap kit: 12574897:
@Fless
 

Attachments

  • image.jpg
    image.jpg
    281.6 KB · Views: 34
  • image.jpg
    image.jpg
    217.2 KB · Views: 25
  • image.jpg
    image.jpg
    192.9 KB · Views: 23
Last edited:

Sam Harris

Elite Member
Supporting Member
Joined
Sep 26, 2018
Posts
7,445
Reaction score
14,977
Location
Texas
Damn, that was fast!

Gotta get out the calipers..
Ok, after many, many hours.. many hours… I finally measured the best I could with my cheapie calipers. They don’t have a long enough throat, to reach the middle of the indentation for the clamp, so had to just measure across the top.. so the measurement includes 2-3mm of the ridge unfortunately. Anyway, that measurement came out to 101mm, so at least I have an idea of what size I’ll need for the intake tube.. now to find one.!

ETA: It is an OEM LS3 throttle body (just ported), so whatever kit fits that may work, with some adaptation.


Attachments

  • IMG_9241.jpeg
    IMG_9241.jpeg
    266.7 KB · Views: 22
  • image.jpg
    image.jpg
    254.8 KB · Views: 21
Last edited:

iamdub

Full Access Member
Joined
Apr 23, 2016
Posts
20,821
Reaction score
45,012
Location
Li'l Weezyana
Ok, after many, many hours.. many hours… I finally measured the best I could with my cheapie calipers. They don’t have a long enough throat, to reach the middle of the indentation for the clamp, so had to just measure across the top.. so the measurement includes 2-3mm of the ridge unfortunately. Anyway, that measurement came out to 101mm, so at least I have an idea of what size I’ll need for the intake tube.. now to find one.!

ETA: It is an OEM LS3 throttle body (just ported), so whatever kit fits that may work, with some adaptation.


Googled this up right quick: https://ls1tech.com/forums/generati...-oem-90mm-dbw-throttle-body.html#post16215623

He said 4", which makes sense. You measured 101mm and 4" is 101.6mm.
 

Scottydoggs

Full Access Member
Joined
Dec 16, 2017
Posts
2,883
Reaction score
4,525
Location
NJ
bought a pair of front outer window scraper/seals, two pass side regulator motors. already have all 4 new regulators i got them years ago just waiting for the day i needed them. one is dead. one is slow. one squeals.....

now to see how long i put off doing the work..... need to open up 3 doors replace 3 regulators and the 2 seals and i also got a new driver side heated seat, seat memory, pedal switch as every time it rains my heated seat comes on full heat and wont turn off. bet the shot seal lead to that BS. junk dont even touch the glass.
 

blueinkd

Full Access Member
Joined
Nov 21, 2017
Posts
646
Reaction score
1,559
bought a pair of front outer window scraper/seals, two pass side regulator motors. already have all 4 new regulators i got them years ago just waiting for the day i needed them. one is dead. one is slow. one squeals.....

now to see how long i put off doing the work..... need to open up 3 doors replace 3 regulators and the 2 seals and i also got a new driver side heated seat, seat memory, pedal switch as every time it rains my heated seat comes on full heat and wont turn off. bet the shot seal lead to that BS. junk dont even touch the glass.
Care to share the link of the outer scraper/seals?? I'm thinking these are the felt seals that ride against the glass on top of the door, if that makes sense. Mine are brittle and broken
 

Gmg0547

Full Access Member
Joined
Sep 8, 2022
Posts
116
Reaction score
292
Finally finished painting the dash and got it back together. Feels good to get it all the same color and back in business.
 

Attachments

  • IMG_20230528_102528002_HDR.jpg
    IMG_20230528_102528002_HDR.jpg
    226.5 KB · Views: 22
  • IMG_20230528_102509364_HDR.jpg
    IMG_20230528_102509364_HDR.jpg
    281.5 KB · Views: 25

Scottydoggs

Full Access Member
Joined
Dec 16, 2017
Posts
2,883
Reaction score
4,525
Location
NJ

Forum statistics

Threads
137,782
Posts
1,992,165
Members
102,777
Latest member
wwiizz
Back
Top