FrankU
Full Access Member
Greased Wheezer Saturday , oiled up the seats and cleaned them with Leatherique. Then a quick clay bar followed by Collinite Marine Aviation 870 wax for the outside.
Disclaimer: Links on this page pointing to Amazon, eBay and other sites may include affiliate code. If you click them and make a purchase, we may earn a small commission.
ya it has a 250amp fuseI hope it has a fuse at the battery end?

Weld away then, you’re safe!ya it has a 250amp fuse
When I tint my windows I always run thin black pinstripe along the upper edge after trimming it. Hasn't let me down yet.Yes I was surprised too and it was a nice learning experience. Once you pop the door panel off and put the window down about half way there are two 10mm bolts pinching the window bottom to the regulator chassis. The glass is pinched between two pieces of metal with rubber tips like mini vises. I wish I had more time to take pics and do a really good write up. But I can say for sure after working on many vehicles over my lifetime this was the easiest to figure out. And was nice to do some homework in case a regulator takes a crap you have an idea what to do. The bottom of those windows have no metal frame attached FYI it is all glass and that is it.
The nasty part was cleaning the years of crap off the glass below where the seals are and the felts. I had to use a lot of rags and simple green to break through it and clean that all up. Anyway here are the after pics. All the window tint I ever tried to do on my own was very tough in the past trying to do it in the vehicle. Taking the glass out of the doors made a huge difference in labor IMHO. I have that crappy static cling 5% on the rear 3 glasses but it works for now.
Another tough part is trying to trim the film straight around the edges. Cut it within a few inches with a pair of scissors. Set it in place with the adhesive soap solution. Squeegee it out. Use a sharp razor to scrape along the edge of the glass to trim fit it. Once you start to get it set and drying out use a new sharp razor to do your 1/8" to 1/4" edge cut around the perimeter. Still hard as hell. Also used a heat gun to help dry it and cure it. Not perfect but good enough for me.
I have plans to put some 35% on the front row sides tomorrow. I am worried about that though because the factory tint hides a lot of the rookie blemishes and mistakes. I figure I will try the passenger side first and if it turns out too ****** I can back track.
View attachment 277525 View attachment 277526
Yes I was surprised too and it was a nice learning experience. Once you pop the door panel off and put the window down about half way there are two 10mm bolts pinching the window bottom to the regulator chassis. The glass is pinched between two pieces of metal with rubber tips like mini vises. I wish I had more time to take pics and do a really good write up. But I can say for sure after working on many vehicles over my lifetime this was the easiest to figure out. And was nice to do some homework in case a regulator takes a crap you have an idea what to do. The bottom of those windows have no metal frame attached FYI it is all glass and that is it.
The nasty part was cleaning the years of crap off the glass below where the seals are and the felts. I had to use a lot of rags and simple green to break through it and clean that all up. Anyway here are the after pics. All the window tint I ever tried to do on my own was very tough in the past trying to do it in the vehicle. Taking the glass out of the doors made a huge difference in labor IMHO. I have that crappy static cling 5% on the rear 3 glasses but it works for now.
Another tough part is trying to trim the film straight around the edges. Cut it within a few inches with a pair of scissors. Set it in place with the adhesive soap solution. Squeegee it out. Use a sharp razor to scrape along the edge of the glass to trim fit it. Once you start to get it set and drying out use a new sharp razor to do your 1/8" to 1/4" edge cut around the perimeter. Still hard as hell. Also used a heat gun to help dry it and cure it. Not perfect but good enough for me.
I have plans to put some 35% on the front row sides tomorrow. I am worried about that though because the factory tint hides a lot of the rookie blemishes and mistakes. I figure I will try the passenger side first and if it turns out too ****** I can back track.
View attachment 277525 View attachment 277526

You need a suite of radio antennas to complete the look.A little payback today for all the time and money invested.
View attachment 277580
When I tint my windows I always run thin black pinstripe along the upper edge after trimming it. Hasn't let me down yet.
I’m not a big fan of the eyebrow tint thingI couldn’t even begin to say what the eyebrow % is. You can’t see it or the gap for the camera mount from outside. This is theothertwin. They left the camera mount in place on thecopcar, but no eyebrow tint.
View attachment 277586
My wife's old car came with some 35% on the front windows, i loved it.
not factory, but who ever did it did a fantastic job.
i have not had too good of luck doing my own tint.
for some things its ok, but i suspect most of it is the crappy tools i use.
I have a "pre cut" kit for the ol vette, first attempt went poorly.
The cheap tool ended up tearing the tint if i press hard enough to get all of the fluid out, and if i press hard enough to not damage the tint, it looks like ass when it dries.
So the second set of precuts are sitting on the "Vette parts shelf" until i care again.
The heat gun idea would probably work, so far i have just been using the summer sun to fully cure it.
And i have a rattly window on the rear driver side of the hoe, it has been on the list to take it apart to see what's up with it.
usually there is some sort of felt lined adjuster, I'm hoping that's all there is.
I also saw signs that the rear door panel had been removed, and either broke a clip or just didn't put it back together right (gap).
It does cut the sun. If it were visible from the outside, I’d take it off in a heartbeat.I’m not a big fan of the eyebrow tint thing
Nice work. I need to do that on my Silverado. I did the ones on the Beast, and used the HF crimping tool and soldered too, then returned the crimper lol. I like the idea of incorporating the braided cover. I made some fuel and pcv lines like that, used the heat shrink to finish the ends. It works great.This 6" one was too short to bother with the mesh, so it's all heat shrink:
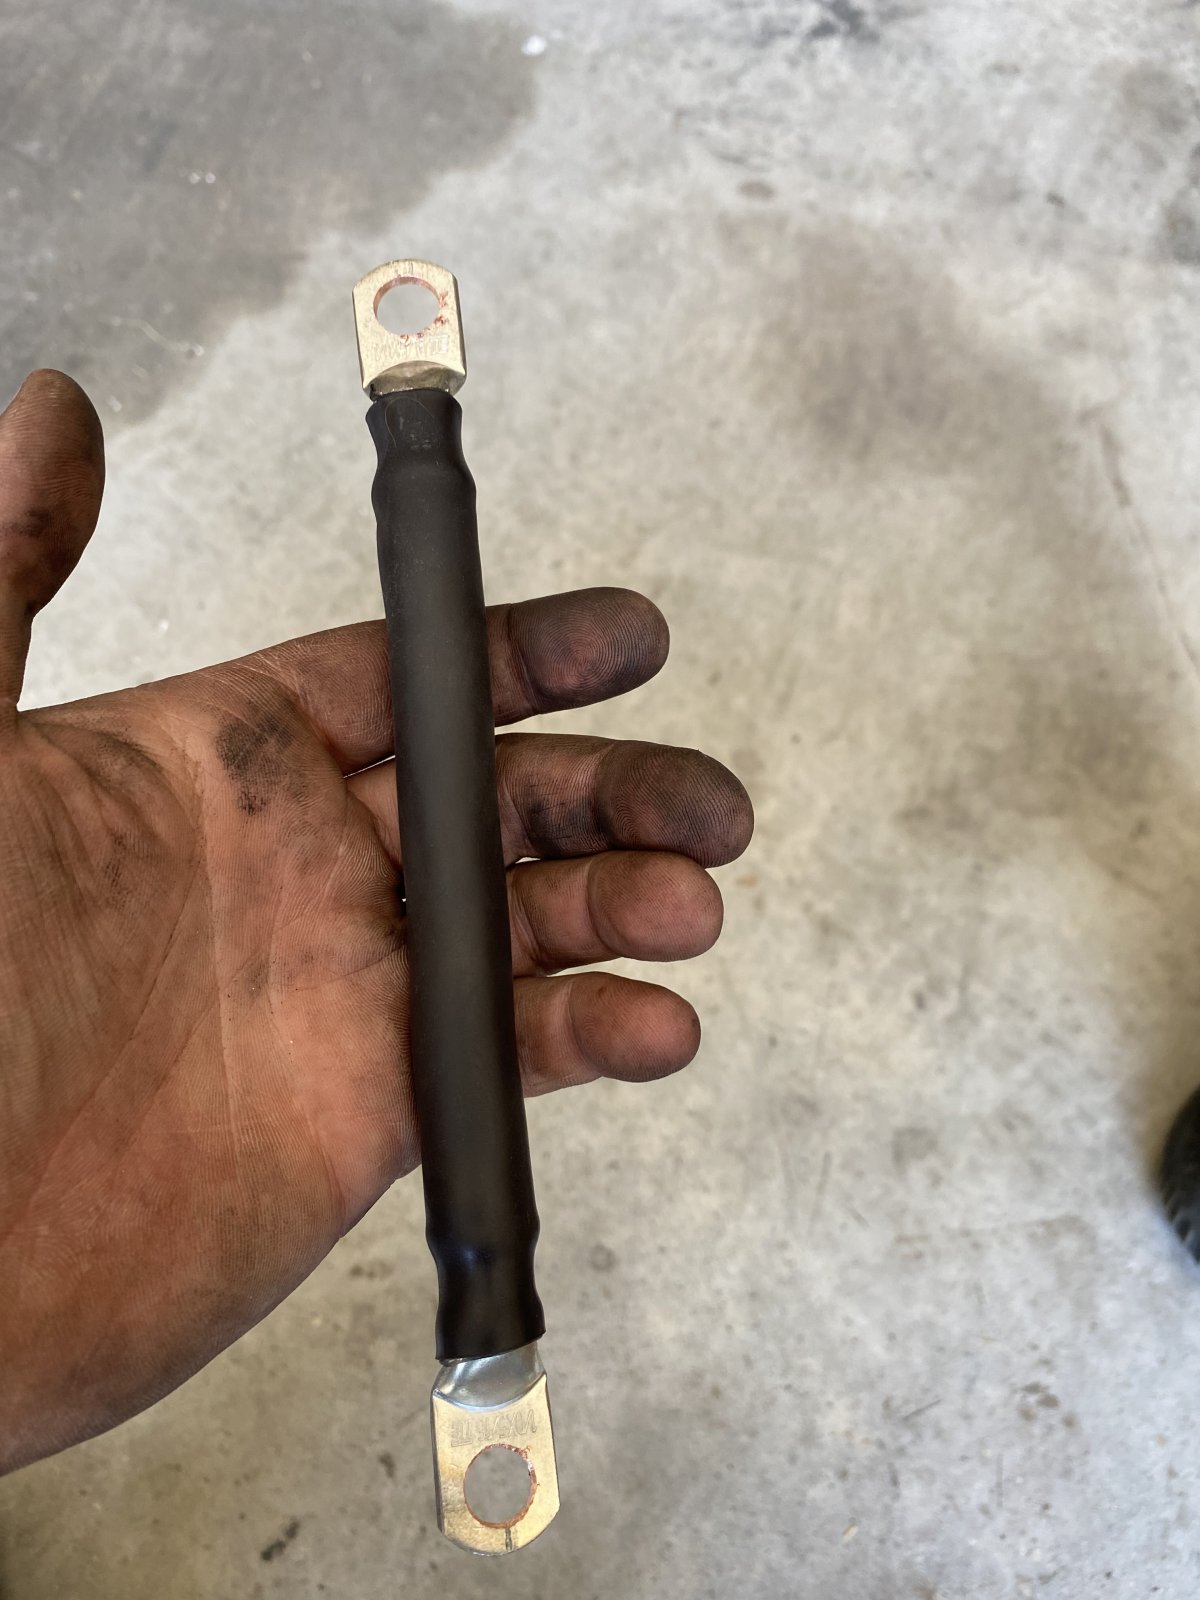
It runs from the engine block (at the bolt for the power steering pump bracket) to the frame (under an engine mount bolt):

Copied the factory alternator-to-main fuse cable:
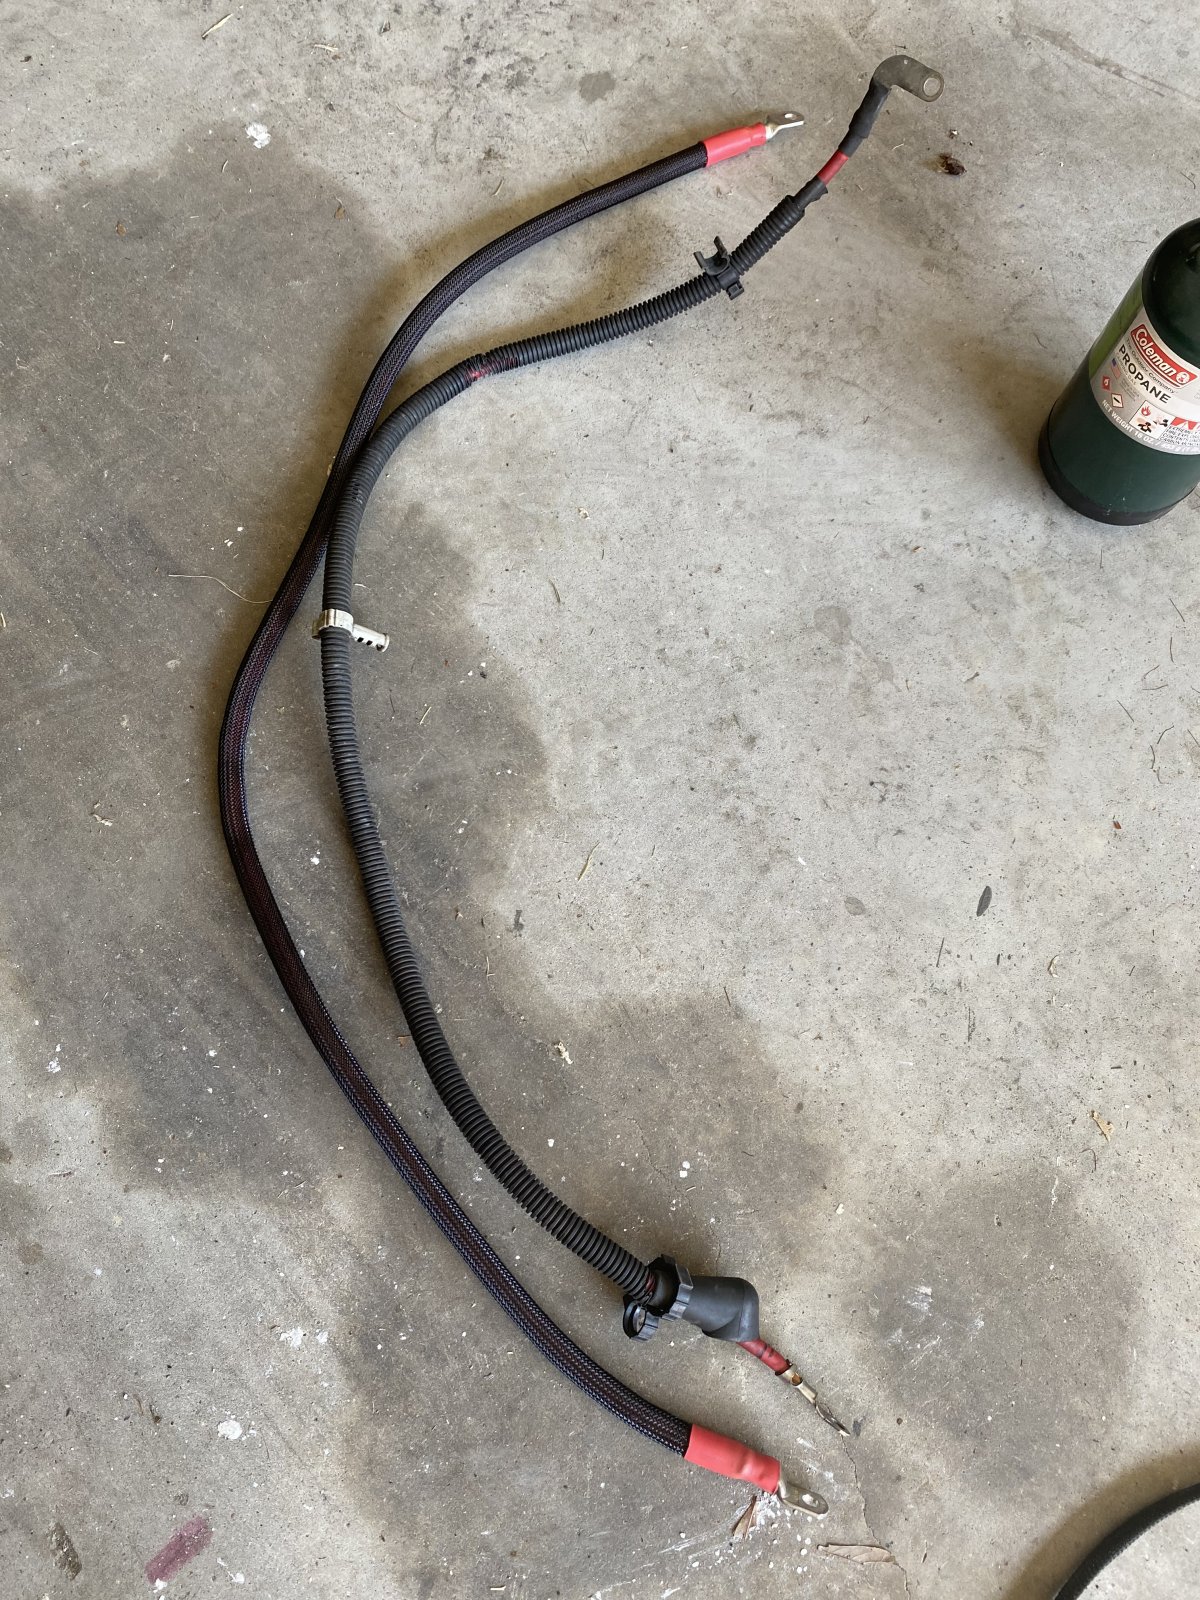
With very minor trimming of the mount on the firewall, the lug fit fine:

Followed the original routing and was even able to slip the terminal boot on after a little squirt of B'laster:

I want to replace the battery terminals with some marine post-to-stud adapters. I'll make the positive lead from the battery to the main fuse when I get those terminals. I'd like to make a starter wire as well.
Nice work. I need to do that on my Silverado. I did the ones on the Beast, and used the HF crimping tool and soldered too, then returned the crimper lol. I like the idea of incorporating the braided cover. I made some fuel and pcv lines like that, used the heat shrink to finish the ends. It works great.
Did your parts come in? Also does anyone know if these lower or raise the motor at all from the factory spot? I’ve got some clearance issues on the Speed Engineering long tubes.Yep, same for both sides.
Hummer - 25847739
I gave Rock Auto my business tonight instead of Amazon. They were twenty cents less too! Won't be here in an hour but I won't need them until next week. All three OE mounts on the way.
Did your parts come in? Also does anyone know if these lower or raise the motor at all from the factory spot? I’ve got some clearance issues on the Speed Engineering long tubes.
Sent from my iPhone using Tapatalk