UQS Amp Upgrade

Disclaimer: Links on this page pointing to Amazon, eBay and other sites may include affiliate code. If you click them and make a purchase, we may earn a small commission.

abrasumente

Member
Joined
Mar 30, 2023
Posts
51
Reaction score
96
In this thread I will be documenting my progress in upgrading my UQA (Premium Bose, non-nav) amplifier to the UQS amp found in the Escalades. This project would not be possible without the meticulous documenting of Reebok59 as seen in this thread, along with some googling to try and pinpoint the differences between the amps. This thread also assumes that all the 5.1 wizardry of the UQS system is performed by the factory head unit. If that's not the case, this will go nowhere fast.


I'll attempt to photograph the important steps of the project and document any issues I find along with my solutions and modifications. Fair warning, I tend to get engrossed in the project... I keep a running album of pix on fb documenting my build too, and I ended up taking like six when I did the motor swap when I first got it :insane:

Couple reasons behind the swap as opposed to going aftermarket:

1) I've done complete aftermarket 5 channel installs before and while I love quality audio, dropping the coin on a full aftermarket job including a sound processor means I'm gonna have way less money for go fast parts.
2) The UQA system I have now sounds OK for being base Bose, I'm hoping the UQS will be a big step. I don't need block breaking subwoofers anymore.
3) Lookie-loos taking a peek and seeing 8k of audio in the back hatch might mean finding new glass and I'm really not interested in that either.
 
Last edited:
OP
OP
abrasumente

abrasumente

Member
Joined
Mar 30, 2023
Posts
51
Reaction score
96
One of the biggest differences I've noticed right off the bat is that the UQS amp uses a preout level input for each channel- LF, RF, LR, RR, CTR, and SUB. This means the factory head unit outputs a low voltage (presumably AC) signal to the amplifier, which then kicks it up to a more powerful AC signal usable by the speakers. Since I'm using an aftermarket radio with one of the adapter boxes, that signal should be in a range that won't fry the amp. I will take readings of what that signal voltage is and post in this thread for anyone else who may be interested, whether using aftermarket or stock.


Additionally, it seems that the amp splits the sub channel- the UQS amp has two sub outputs, but only one input. I wish I'd known this when I was at the JY the other weekend, I would've grabbed the additional subwoofer. I may go back this weekend and grab it. EDIT there are NOT two subs, but rather the subwoofer is a dual voice coil design according to the 2007 GM upfitter wiring diagram. I will also have to find a suitable location for the center channel speaker. I have a feeling because of the internal circuitry of the amplifier, if it's not somewhere audible, things are gonna sound weird.
 
Last edited:

mattbta

Full Access Member
Joined
Jun 19, 2012
Posts
1,051
Reaction score
1,888
Location
Frisco, TX
Good luck. I did this on my NBS/gmt-800. Reprogrammed my six disc headunit but now considering sourcing the touchscreen nav just for fun.

It does sound great!
 
OP
OP
abrasumente

abrasumente

Member
Joined
Mar 30, 2023
Posts
51
Reaction score
96
So I tried contacting Bose for a datasheet. No help there (big surprise). With some basic searching, I was able to identify the major components on the board- once I have it all compiled I'll upload it to a hosting service for future reference.

Being that I need several free hours to do this swap successfully and that ain't happening til the weekend, I decided to pull the amp apart and inspect it.
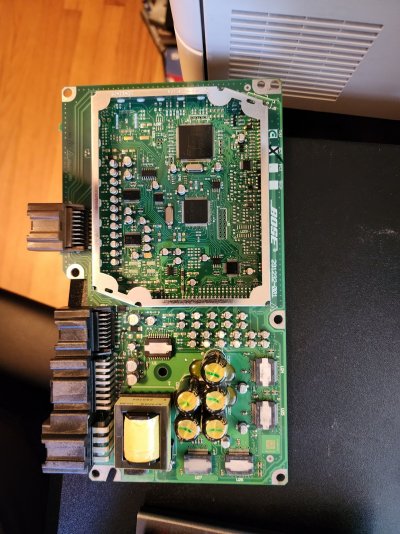
20230425_174835.jpg
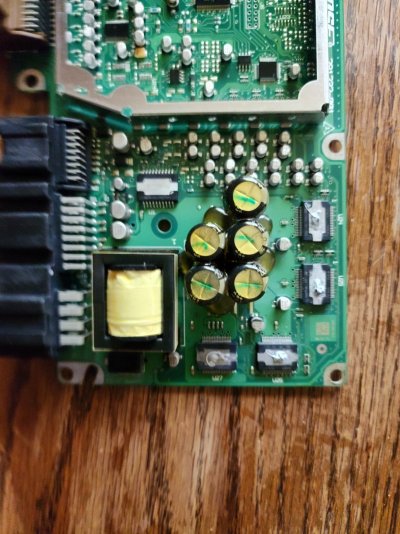
No visual damage. Nichichon capacitors are used, which is good- I don't care so much for their rated voltage (25v) which is probably close to actual voltage on the speaker line. Regardless, they all read pretty damn close to their rated capacitance of 2200uf, so they're probably fine.

On to the nitty gritty. Those four squares on the right hand corner are the amps. I feel pretty confident U27 is a 4 channel amp controlling LF, RF, LR, RR. At 2 ohms with 1% thd it'll deliver 32 watts to each channel according to the data sheet. U26, 25, and 24 must control the front tweeters, the D pillar speakers, and the sub/center channel, but I can't identify which is which since this is a multilayer board. Those amps are 37 watts at the same ratings, so pretty closely matched all things considered. I suspect these speakers have a very high sensitivity, since these power ratings are only slightly higher than Walmart Sony decks (usually like 22 w rms output).

The Dolby DTS dsp chip is integrated into this board- thats the slightly smaller black chip right below the big microcontroller chip. That means the factory head unit just spits output and all the decoding is handled on the amp. However, I'll venture that it's not gonna impact my little project.
 
OP
OP
abrasumente

abrasumente

Member
Joined
Mar 30, 2023
Posts
51
Reaction score
96
I have successfully swapped in a UQS amp into my UQA-equipped Suburban.

It was essentially the same as the swap as detailed by Reebok59, with the exception that the sub and center channel input are located on connector X4 (brown plug). Since I'm using an aftermarket radio, I used the sub RCA out for that input. I'm going to look into mixing the front left/right RCA's together to emulate the center chanel since it also requires its own input and is not "constructed" by the amp. I don't have a center channel speaker right now so not too worried at the moment. My radio has its own voice input, vehicle speed sound adjustment, etc so I didnt bother running anything for that. Even got my factory chimes back!

I will upload a few pictures and some detailed info for anyone wanting to do this shortly. It is 100% worth the effort and can be done in an afternoon. I wish I'd gotten more pictures but was in a hurry as the wife and kid were wanting to go out, and I wanted my jams.
 
OP
OP
abrasumente

abrasumente

Member
Joined
Mar 30, 2023
Posts
51
Reaction score
96
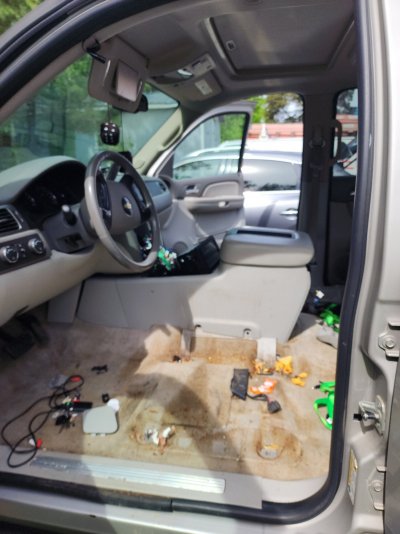
So this also gave me an opportunity to clean out from under my front seats. There were a lot of free Doritos under there in case I got hungry. I'll have to tell my buddy I appreciate him thinking of me, especially with the taco bell hot sauce packs too.20230429_095737.jpg

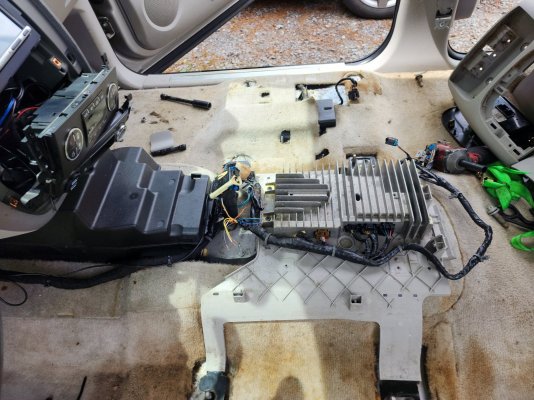
As yall can probably tell by this point, I'm something of an electronics hobbyist. I keep thermal compound on hand as I work on PCs and laptops pretty regularly. Just a dab will do it if you open the amp up. Guarantee Gelid will transfer heat way better than whatever low cost toothpaste GM used from the factory. None is required on U1 as a thermal pad is used here. Thermal pads are reusable as long as you don't tear them up. If you do, a 1.5mm pad should be sufficient here.
20230429_101209.jpg
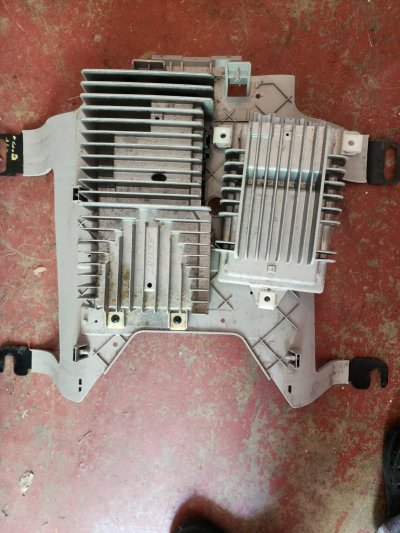
A size comparison between the UQA and UQS amps. I'm gonna open up the UQA amp probably tomorrow just to see what's going on with the guts.20230429_102600.jpg

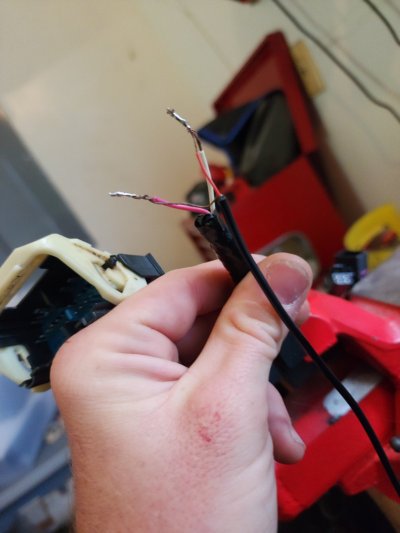
Okay, some important stuff here. If you go the route I did with using an aftermarket radio with preouts and you want to tie into the harness to supply a sub and center speaker, you'll need to strip one end of an RCA plug. BE CAREFUL when you do it. The coax wires are very thin, and there aren't many of them. Each one you nick or cut will drive up the resistance of the circuit and probably introduce noise and other undesirable characteristics. The bare wire is negative, the coated is positive. This corresponds to the middle pin of the RCA jack as positive, and the outer metal "shield" as negative. You will want to SOLDER, not butt connector, and certainly not wire nut, these connections to the corresponding wire color of your harness. In my case, this was bare wire-pink, coated wire-white. I then proceeded to triple-tape each section individually with electrical tape, and then triple-taped the whole junction again to eliminate any possibility of rub or other issues.
20230429_120903.jpg
Mounted in the truck
20230429_123613.jpg
 
OP
OP
abrasumente

abrasumente

Member
Joined
Mar 30, 2023
Posts
51
Reaction score
96
My pictures fell off at this point as the wife started asking when I'd be done, so I had to hustle it up. I cut four sets of speaker wires out at the passenger side kick panel- light blue, dark blue, yellow, and brown. Brown is left side positive, yellow left side negative, dark blue right side positive, light blue right side negative. Your colors may be different than mine. It doesn't matter which wires go to which speaker, as long as the polarity and color per side matches. I used butt connectors for the time being here, but will order a factory connector and repair when I pull the seats back out to shampoo that nasty @$$ carpet.

Routed everything under the passenger seat carpet. There is a handy wire channel already present for most of the run, so I just tucked the wires in that.

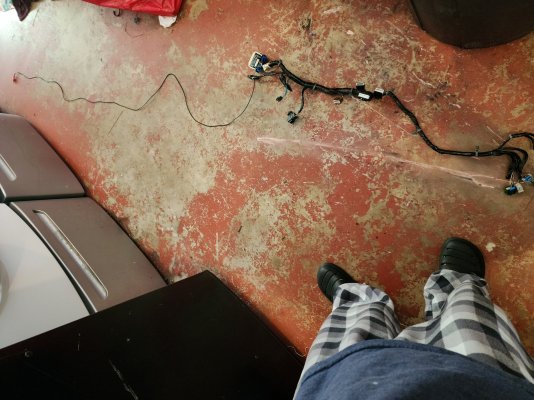
Regarding the sub channel RCA line, I left it as long as I could. Peep my steel toe safety crocs and OSHA regulation pajama pants in this shot.20230429_121204.jpg

Once I had everything installed I used zip ties to secure the RCA cable back up the dash wiring harness and ran it back into the radio cubbyhole. I didn't have time to measure voltages today so I kept the volume low, the sub output down, and shut the eq off until I get a chance tomorrow to measure everything. But let me tell you, even without setting anything, this amp dunks on the UQA amp. I figured it'd sound better but I seriously wasn't expecting THAT much of an improvement.

More updates to come tomorrow. I'm gonna add a modified wiring table in Excel and some signal/line voltages in here too.
 
OP
OP
abrasumente

abrasumente

Member
Joined
Mar 30, 2023
Posts
51
Reaction score
96
I also ordered a new set of 3.2 ohm D pillar speakers from ebay. The speaker connector is keyed. I cut the keyed plastic off the male connector and connected to each new speaker without issue. I kinda don't care for how these speakers are mounted- one corner slips under an ear molded into the D pillar, the opposite corner screws down. Seems like that's a good recipe for speaker rattling, especially with 16 year old plastic.

Slightly off topic- how is the video to the roof-mounted display handled? I'm wondering if the signal can be hijacked somehow to display something different than whatever's on the head unit. Audio in that vein would probably be sourced from bluetooth headphones and not the IR setup.
 
OP
OP
abrasumente

abrasumente

Member
Joined
Mar 30, 2023
Posts
51
Reaction score
96
Boooo!! I can enjoy life again WITHOUT chimes!

Not sure if this what you're asking..
I appreciate you looking but I was referring to the rear seat entertainment system, my description was pretty crappy lol

Those chimes ARE loud, I'll give you that
 

Forum statistics

Threads
129,203
Posts
1,812,067
Members
92,305
Latest member
DefiantOne

Latest posts

Top