You are using an out of date browser. It may not display this or other websites correctly.
You should upgrade or use an alternative browser.
You should upgrade or use an alternative browser.
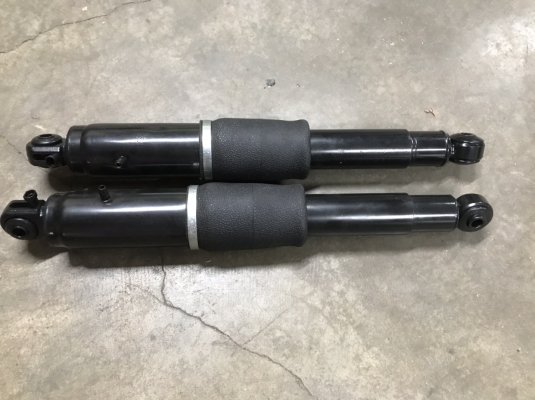
I’m back with an Esky this time
- Thread starter Snowbound
- Start date
Disclaimer: Links on this page pointing to Amazon, eBay and other sites may include affiliate code. If you click them and make a purchase, we may earn a small commission.
Snowbound
Jim
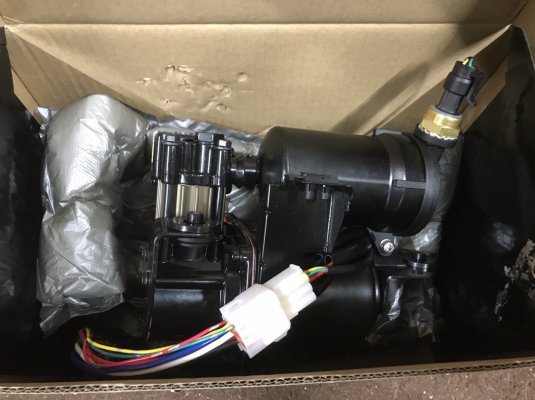
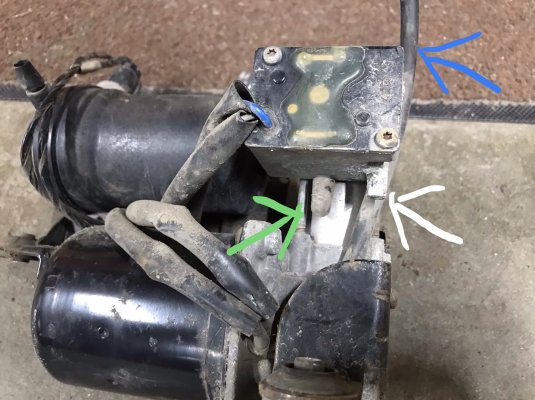
Looking at the compressor, the air inlet is different. The pics should show better than I can explain.
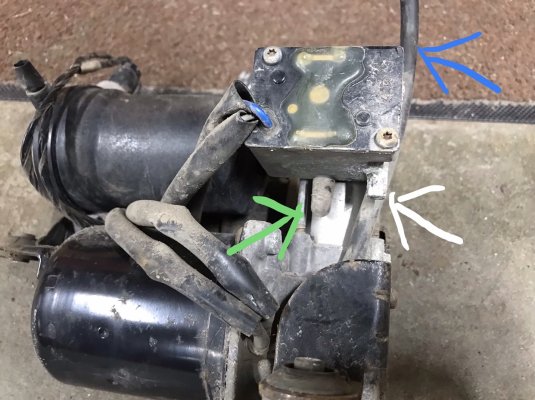
The white arrow is the air inlet. The blue arrow is pointing at a line that is Tee’d into the air inlet. The green arrow is pointing to a vacuum cap.
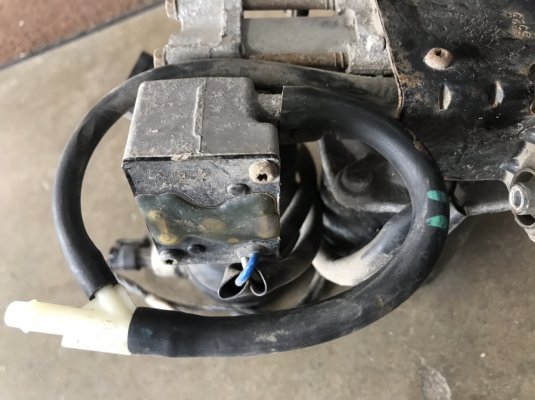
The new compressor

The white arrow is air inlet. The blue arrow is a line that jumps the line with blue arrow from first pic to the vacuum cap (green arrow from first pic).
I’m assuming to take out the Tee and attaching air inlet only to the port with white arrow. I’m not sure why the original has inlet to two ports and replacement has line attaching the two. Couldn’t find an answer or clear pics of what the purpose or differences between the two. Thoughts?
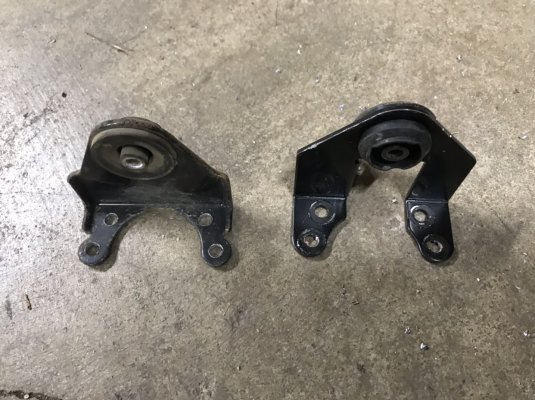
Then I went to install the compressor and the forward mounting tab is different. It should slide thru a hole in mounting bracket to allow compressor to be put up in place. The replacement unit has a fatter mounting tab that didn’t allow compressor to be slid forward so I couldn’t install it. Again, pics will explain better.

The new unit has the tab bolted to the motor. The original is spot welded on.

Drilled the spot welds and opened up the holes to match the bolt holes.
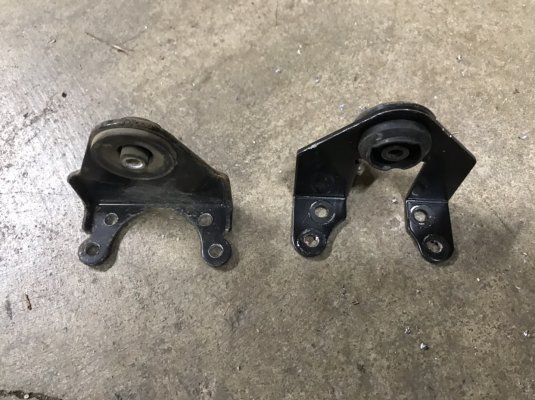
Swapped out the bushings

And got it attached to the motor.

That was an easy obstacle to overcome and I’m ready to install it but I need to find out what each port is for and if I should use the Tee or just attach inlet directly. I’ll search more after work today. Hard to find any info or breakdowns on this compressor.
Sent from my iPhone using Tapatalk

The white arrow is the air inlet. The blue arrow is pointing at a line that is Tee’d into the air inlet. The green arrow is pointing to a vacuum cap.
The new compressor

The white arrow is air inlet. The blue arrow is a line that jumps the line with blue arrow from first pic to the vacuum cap (green arrow from first pic).
I’m assuming to take out the Tee and attaching air inlet only to the port with white arrow. I’m not sure why the original has inlet to two ports and replacement has line attaching the two. Couldn’t find an answer or clear pics of what the purpose or differences between the two. Thoughts?
Then I went to install the compressor and the forward mounting tab is different. It should slide thru a hole in mounting bracket to allow compressor to be put up in place. The replacement unit has a fatter mounting tab that didn’t allow compressor to be slid forward so I couldn’t install it. Again, pics will explain better.

The new unit has the tab bolted to the motor. The original is spot welded on.

Drilled the spot welds and opened up the holes to match the bolt holes.

Swapped out the bushings

And got it attached to the motor.

That was an easy obstacle to overcome and I’m ready to install it but I need to find out what each port is for and if I should use the Tee or just attach inlet directly. I’ll search more after work today. Hard to find any info or breakdowns on this compressor.
Sent from my iPhone using Tapatalk
Last edited:
I don't understand what t? there should just be a air outlet on the pump and you just reconnect the line that came off the old pump, then that line will split to both the shocksLooking at the compressor, the air inlet is different. The pics should show better than I can explain.
The white arrow is the air inlet. The blue arrow is pointing at a line that is Tee’d into the air inlet. The green arrow is pointing to a vacuum cap.
The new compressor

The white arrow is air inlet. The blue arrow is a line that jumps the line with blue arrow from first pic to the vacuum cap (green arrow from first pic).
I’m assuming to take out the Tee and attaching air inlet only to the port with white arrow. I’m not sure why the original has inlet to two ports and replacement gas line attaching the two. Couldn’t find an answer or clear pics of what the purpose or differences between the two. Thoughts?
Then I went to install the compressor and the forward mounting tab is different. It should slide thru a hole in mounting bracket to allow compressor to be put up in place. The replacement unit has a fatter mounting tab that didn’t allow compressor to be slid forward so I couldn’t install it. Again, pics will explain better.

The new unit has the tab bolted to the motor. The original is spot welded on.

Drilled the spot welds and opened up the holes to match the bolt holes.
Swapped out the bushings

And got it attached to the motor.

That was an easy obstacle to overcome and I’m ready to install it but I need to find out what each port is for and if I should use the Tee or just attach inlet directly. I’ll search more after work today. Hard to find any info or breakdowns on this compressor.
Sent from my iPhone using Tapatalk
Snowbound
Jim
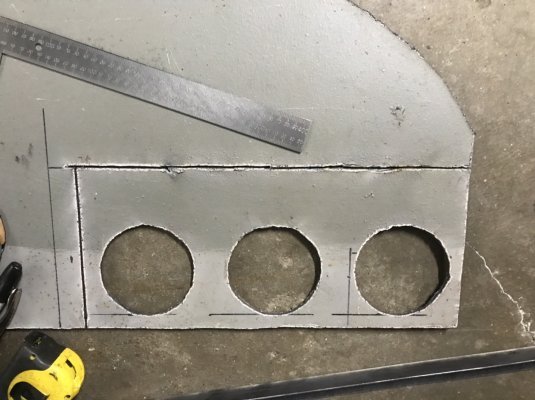
I did get a little more work done on my trailer. I had to fill a cut out that the PO did. He had an auxiliary fuel tank and pump under the trailer. The filler neck came up to this.

Used cardboard template and cut out a piece of 14 gauge steel.

Tack welded into place.

Cleaned it up with a grinder.

Bent the bottom up and around and welded it solid on backside and them primed it.

I didn’t like the trailer lights. They were the generic type like that are on Jeeps. I have reverse lights hooked up on this thing and I couldn’t see anything. So I cut some brackets from 3/16” plate I had.
Went with some 4” round LED lights. The stop/tail/turn lights have a halo for tail and the centers light up with stop/turn. And for reverse lights, some clear LED 4”. These should light it up behind me.

I have to clean up the slag left behind from my plasma torch and run them thru the sandblast cabinet before I weld them on the trailer.
Sent from my iPhone using Tapatalk

Used cardboard template and cut out a piece of 14 gauge steel.

Tack welded into place.

Cleaned it up with a grinder.

Bent the bottom up and around and welded it solid on backside and them primed it.

I didn’t like the trailer lights. They were the generic type like that are on Jeeps. I have reverse lights hooked up on this thing and I couldn’t see anything. So I cut some brackets from 3/16” plate I had.

Went with some 4” round LED lights. The stop/tail/turn lights have a halo for tail and the centers light up with stop/turn. And for reverse lights, some clear LED 4”. These should light it up behind me.

I have to clean up the slag left behind from my plasma torch and run them thru the sandblast cabinet before I weld them on the trailer.
Sent from my iPhone using Tapatalk
Snowbound
Jim
I don't understand what t? there should just be a air outlet on the pump and you just reconnect the line that came off the old pump, then that line will split to both the shocks
I don’t know why it was there either. I’ll get a picture a little later to show how it was connected.
Sent from my iPhone using Tapatalk
Snowbound
Jim
I don't understand what t? there should just be a air outlet on the pump and you just reconnect the line that came off the old pump, then that line will split to both the shocks
I found this doing an image search. It’s an Arnott replacement. Notice the Y connector? That’s what I have. I said tee, but same difference, it’s actually the same thing, it’s a Y.
Why is that there? The motor is attached to a box which holds the crankshaft that drives the piston up and down. Inlet is tied into that box. Like a crankcase vent. But the replacement has “crankcase vent” jumped up to the box on side of cylinder. I’m thinking that the box on side of cylinder is a pressure release solenoid of some sorts. Does that make sense?

Sent from my iPhone using Tapatalk
Snowbound
Jim
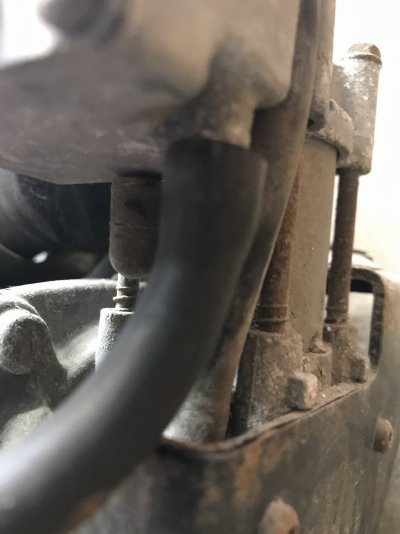
What I’m referring to.
Blue arrow to crankcase
Black arrow to what I’m calling pressure release valve or solenoid.

Sent from my iPhone using Tapatalk
Blue arrow to crankcase
Black arrow to what I’m calling pressure release valve or solenoid.

Sent from my iPhone using Tapatalk
the pump system has a release valve, the purpose of that is to allow the pump to release some air out of the system just before the pump kicks on to lower the amp draw needed to start pumping air so that is why it is designed like that.I found this doing an image search. It’s an Arnott replacement. Notice the Y connector? That’s what I have. I said tee, but same difference, it’s actually the same thing, it’s a Y.
Why is that there? The motor is attached to a box which holds the crankshaft that drives the piston up and down. Inlet is tied into that box. Like a crankcase vent. But the replacement has “crankcase vent” jumped up to the box on side of cylinder. I’m thinking that the box on side of cylinder is a pressure release solenoid of some sorts. Does that make sense?

Sent from my iPhone using Tapatalk
Tonyrodz
Resident Resident
Maybe that's the new improved design.
Snowbound
Jim
Similar threads
- Replies
- 33
- Views
- 4K
- Replies
- 7
- Views
- 462
- Replies
- 19
- Views
- 2K
- Replies
- 8
- Views
- 858

