Best backup camera install

Disclaimer: Links on this page pointing to Amazon, eBay and other sites may include affiliate code. If you click them and make a purchase, we may earn a small commission.

OP
OP
Crippin87

Crippin87

Full Access Member
Joined
Mar 2, 2017
Posts
198
Reaction score
150
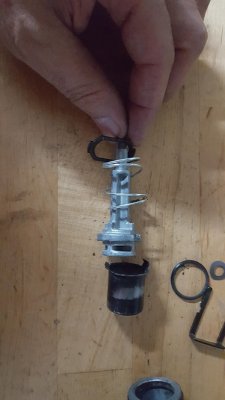
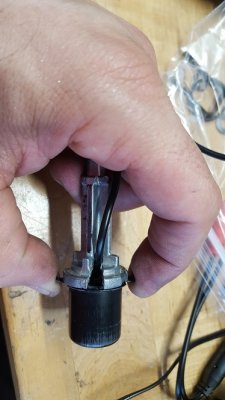
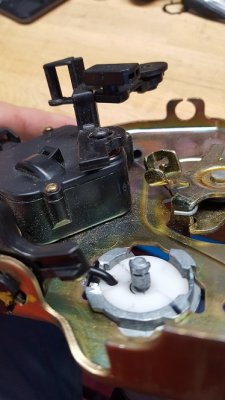
Now it's time to put it all back together. Replace the spring then the ring that goes over it all. I used a pair of thin needle nose pliers to compress everything down enough to put the pin back in that holds it all down. This can be a pain but it can be done lol

IMG_0879.JPG
 
OP
OP
Crippin87

Crippin87

Full Access Member
Joined
Mar 2, 2017
Posts
198
Reaction score
150
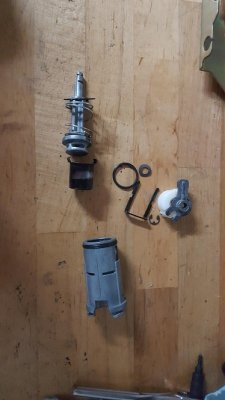
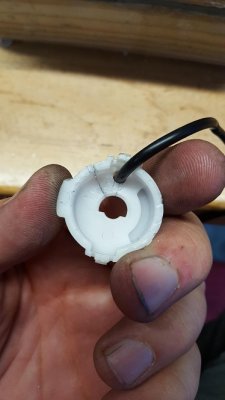
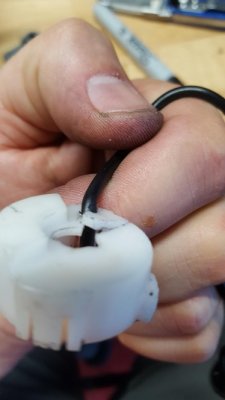
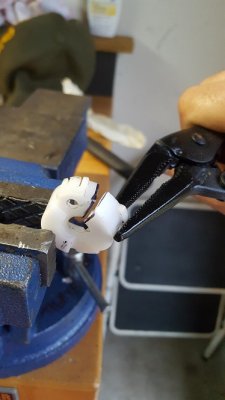
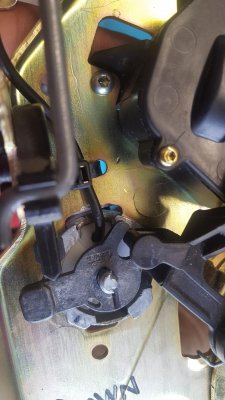
You can now replace the white piece that that snaps in the back and covers everything but before you, you will need to notch a hole in the side to allow the camera wires to slide through. This is about the perfect spot to put the hole.

IMG_0880.JPG


IMG_0881.JPG
 
OP
OP
Crippin87

Crippin87

Full Access Member
Joined
Mar 2, 2017
Posts
198
Reaction score
150
All you need to do now is replace the metal piece on the very end and put the washer and lock ring back on.

IMG_0882.JPG
 
OP
OP
Crippin87

Crippin87

Full Access Member
Joined
Mar 2, 2017
Posts
198
Reaction score
150
Well, I got mine installed, but was not able to figure out how to retain function of the button due to the way it all reassembles (as ivin74 pointed out, it's quite tightly fit together).

One other thing to remember as you're installing it is the need to temporarily power it on and mark the camera top and bottom. Otherwise it will be crooked since it is cylindrical with no discernable top/bottom.

Now that it's done, I'm happy with the results, but if I had to do it over again, I would not have since it was such a frustrating process (and my license plate camera worked fine).

One other thing to note, the diameter of the camera is less than that of the inside of the button. I used electrical tape to wrap several times around the camera to give it a larger diameter.

I've attached a photo of what it looks like (my monitor is in my rear view mirror).

If I can get good enough on CAD, I will 3D print something that will ot only mount the camera, but make the button work. I'm also considering just putting an actuator on the glass release and putting a button in the dash.

rearview.jpg
I finally got the write up done. Now that you can see how I did mine, what did you do differently in yours?
 

ivin74

05 NBS Nali
Joined
Aug 3, 2014
Posts
2,420
Reaction score
2,557
Location
Htown, Texas
Thanks it's my first so I was hoping it would turn out alright lol
If anyone tries it let me know how it turns out for them. I'm hoping I was able to explain everything well enough for them to do it on their own.

Great write up and very detail. I should be getting my camera today and will be doing the mod Saturday.
 

YukonXL04

The Riverboat
Joined
Sep 3, 2013
Posts
2,489
Reaction score
178
Location
Arlington, TX
Dang. Good job! When I first saw the assembled pic I wasn't sure how it was done lol... But now I see and shouldn't be too hard for others to follow.
 

shreksbrother

Full Access Member
Joined
May 9, 2017
Posts
324
Reaction score
290
Location
Auburn Hills, MI
I finally got the write up done. Now that you can see how I did mine, what did you do differently in yours?

Wow, that is quite impressive for sure! My mistake in design was putting the camera directly in the button and leaving the keyed portion out.

No worries, I will hit a junkyard soon and pull another button out to follow your excellent DIY.

Thanks for posting it!
 
OP
OP
Crippin87

Crippin87

Full Access Member
Joined
Mar 2, 2017
Posts
198
Reaction score
150
Wow, that is quite impressive for sure! My mistake in design was putting the camera directly in the button and leaving the keyed portion out.

No worries, I will hit a junkyard soon and pull another button out to follow your excellent DIY.

Thanks for posting it!
Oh ok gotcha. Is there any you could salvage your existing one?
 
OP
OP
Crippin87

Crippin87

Full Access Member
Joined
Mar 2, 2017
Posts
198
Reaction score
150
Haha thanks guys I appreciate it! I figured it wasn't too crazy hard and someone else might want to try it. It's a good alternative for where to put it, because believe me I looked high and low for where people put them and I never really did find a spot I liked. Doing it this way it's hidden, looks factory, and makes really hard for someone to try and steal lol.
 

ivin74

05 NBS Nali
Joined
Aug 3, 2014
Posts
2,420
Reaction score
2,557
Location
Htown, Texas
I would like to add to this thread, I hope James doesn't mind.
This mod has been on my mind for some time, I bought the camera James mention on post #3 a year ago but never really put the effort in getting it done. So this past week I made it happen, when I opened up the keyhole that was on my SUV I noticed that the keyhole was nothing like James (keyhole with a key mechanism). That made this mod a piece of cake.

FYI, I'm not sure what year GM started deleting the keyhole mechanism.

For those of you that wanna tackle this mod and don't have a keyhole mechanism, this is how I did the mod.

20190629_151828.jpg 20190629_151815.jpg


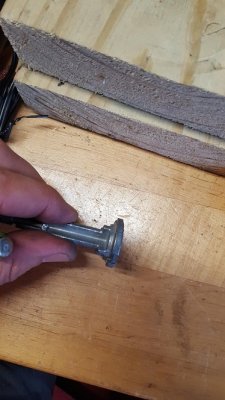
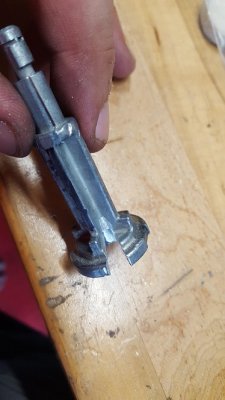
Once you separate all the keyhole components take the shaft and cut the end of it.

20190629_192514.jpg
20190702_182902.jpg
 
Last edited:

ivin74

05 NBS Nali
Joined
Aug 3, 2014
Posts
2,420
Reaction score
2,557
Location
Htown, Texas
Continue to post 58

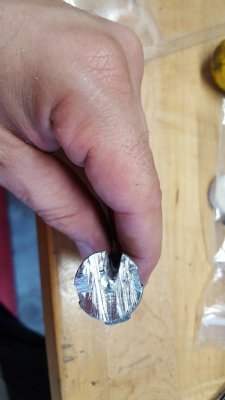
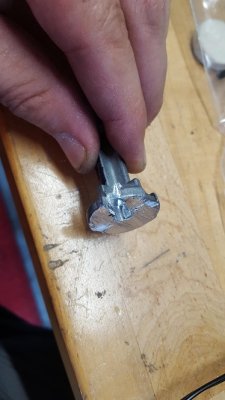
Next, you need to cut a slot on the shaft, make sure its 90 degrees from the keyhole cap mounting tabs.

20190629_193645.jpg 20190629_193634.jpg


slightly drill or Dremel a hole on the shaft end, right on the center, this will keep the camera wire from being in a bind.

20190629_193655.jpg

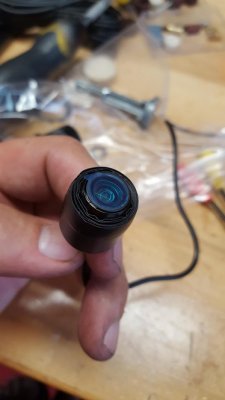
Another thing you have to do is add electrical tape around the camera to keep it centered on the keyhole cover.

20190629_193719.jpg

Now you can install the camera on the keyhole cover, install the keyhole cover back on the shaft and test the camera to make sure you have the camera facing the correct direction. This part is very critical and time-consuming. as you can see on my picture I marked the shaft with a sharpy (that mark is facing the top of the hatch). 20190629_193747.jpg
 
Last edited:

Forum statistics

Threads
138,046
Posts
1,997,798
Members
102,983
Latest member
AllyNJ

Latest posts

Back
Top