LowCountryTim's 2011 Tahoe Build Thread

Disclaimer: Links on this page pointing to Amazon, eBay and other sites may include affiliate code. If you click them and make a purchase, we may earn a small commission.

LowCountryTim

Member
Joined
May 28, 2024
Posts
40
Reaction score
119
Location
South Carolina
Purchased about a year ago for the right price. 250k on the odometer. Plan is to make some improvements on a budget while teaching my son (who just got his learner's permit) a few things, then letting him use it when he receives his full license.

Tentative list of items:

-replace charcoal canister (slow fill) - COMPLETE
-replace driver side motor mount - COMPLETE [also replaced the passenger side]
-replace dashboard
---get the gauge cluster refurb'd while it's out?
---upgrade factory radio to tesla-style
-replace interior carpet
-replace seat foam driver's seat
-new wheels/tires 285/45r22
-McGaughty's 2" spindle drop
---replace lower control arm bushings (worn)
---replace struts Bilstein 5100
-Belltech rear spring 3" drop
-new front/rear bumper covers
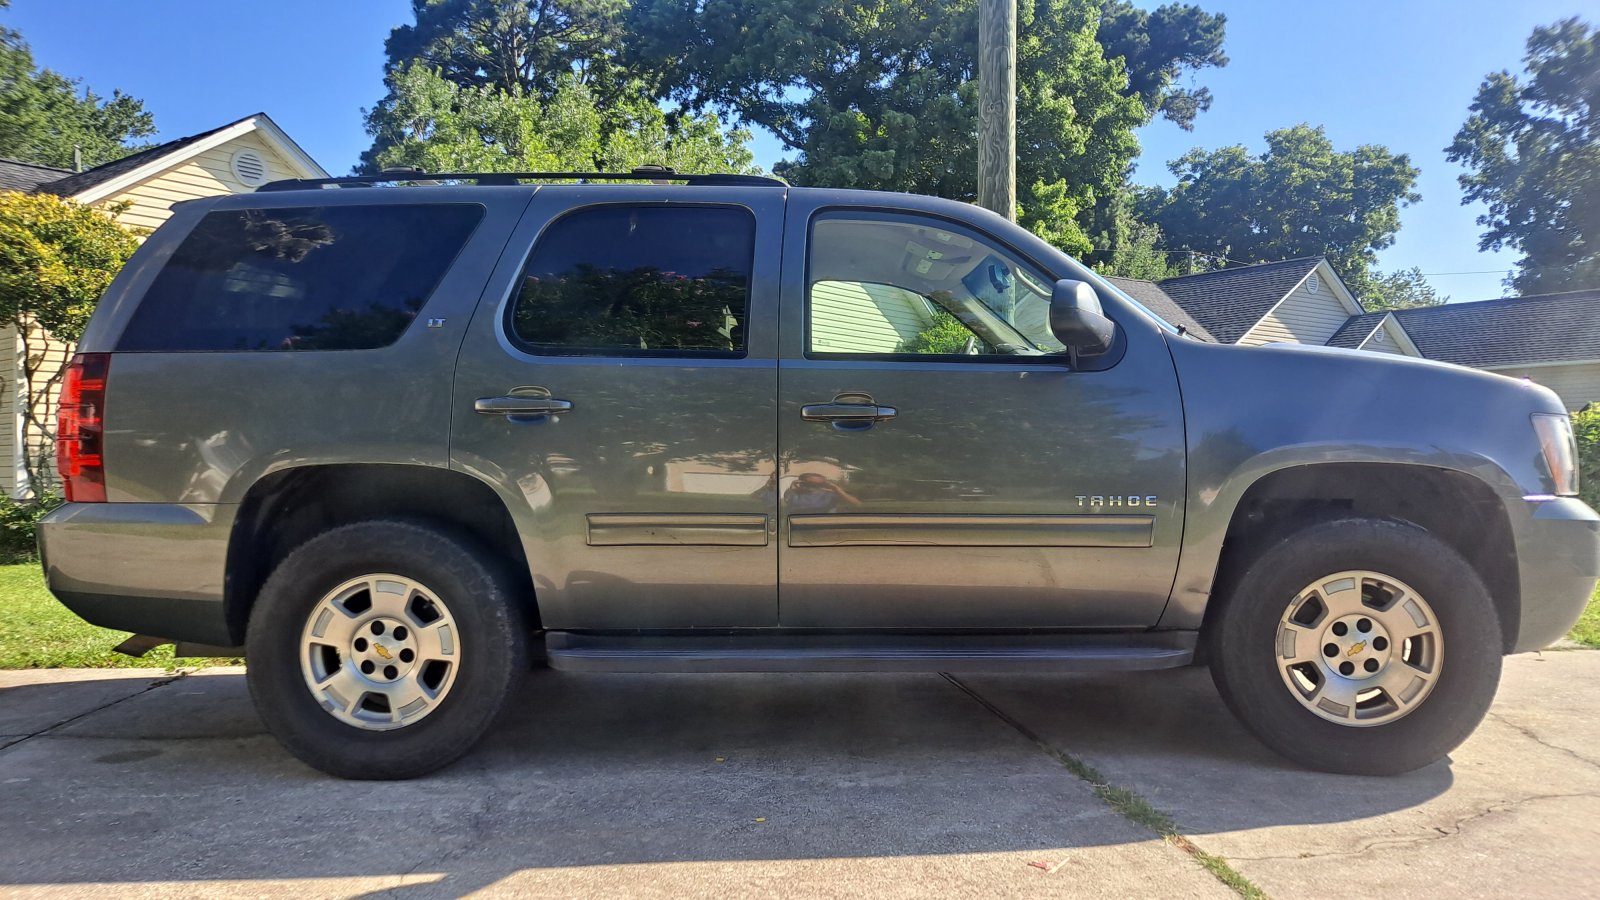

20240529_091845.jpg
 
Last edited:
OP
OP
LowCountryTim

LowCountryTim

Member
Joined
May 28, 2024
Posts
40
Reaction score
119
Location
South Carolina
Charcoal canister was an easy one. Maybe 15 minutes.

I didn't order a new one until I had removed the old one to see if it was the canister. Upon removal charcoal started falling out, so I knew that one was toast. Checked the lines for any loose charcoal, didn't find any.

I removed the spare tire before starting-- not required but I can definitely see where it made things a lot easier.

Broke the plastic retainer clip.

1716989374512.png


20240529_092009.jpg
 
OP
OP
LowCountryTim

LowCountryTim

Member
Joined
May 28, 2024
Posts
40
Reaction score
119
Location
South Carolina
Both parts counters wanted $830 for the new dashboard.

Stumbled upon parts.gmparts.com, ordered it from one of the local dealers and got a much better price. Lowest price ($705) was over an hour from me at some other dealer. Not worth the drive to pick it up.

You can get some smoking hot deals with the 20% off coupon. If you need some genuine GM stuff, I recommend checking it out.

1717014385582.png

1717014407559.png
 

BacDoc

Full Access Member
Joined
Apr 11, 2024
Posts
731
Reaction score
915
Location
Vero Beach Florida
Love your attitude and style Tim!

One thing you should do is get some type of after market stick on trim that says “Low Country “ and instead of the mountain profile on the High Country maybe you can get some type of “Tim” script lol !

Keep us posted
 
OP
OP
LowCountryTim

LowCountryTim

Member
Joined
May 28, 2024
Posts
40
Reaction score
119
Location
South Carolina
Love your attitude and style Tim!

One thing you should do is get some type of after market stick on trim that says “Low Country “ and instead of the mountain profile on the High Country maybe you can get some type of “Tim” script lol !

Keep us posted
Funny you should say that.. 3M adhesive remover arrived today. Plan on shaving all the trim and badging.

But now you've got my wheels turning.. and I have a vinyl cutter. Maybe there's some matte black vinyl in my future? Don't want anything too pronounced, but a low-key low-country badge-esque decal might be worth a go. And nothing lost if I don't like it.

Motor mount showed up tonight. Looks like more photos incoming.
 
OP
OP
LowCountryTim

LowCountryTim

Member
Joined
May 28, 2024
Posts
40
Reaction score
119
Location
South Carolina
Driver's side motor mount replaced. 2 hours. Definitely resolved the clunk on throttle. Still feeling a clunk going over a bump (ie backing over curb) Wonder if it's the passenger side motor mount? Any way to easily diagnose that?

What I used:

-18" socket extension (for the 3 bolts to the motor; no extension used on the top front bolt to the motor)
-36" socket extension (for the 3 bolts to the frame)
-15mm swivel socket
-15mm ratcheting wrench (for removing the intermediate steering column)

Everything went super smooth.

Time to get started:
20240530_080058.jpg


18" extension and swivel socket made this too easy:
20240530_081245.jpg
20240530_081434.jpg


Top front bolt just needed the socket wrench:
20240530_081634.jpg


Used the 36" extension to tackle the bolts to the frame; removed the fuse cover to make it easier:
20240530_082435.jpg
 
OP
OP
LowCountryTim

LowCountryTim

Member
Joined
May 28, 2024
Posts
40
Reaction score
119
Location
South Carolina
36" extension:
20240530_083138.jpg


I used a block of wood to jack on the block. Seen some people use the cat, seen others use the oil pan. That all seemed a little sketchy to me. Just make sure you chock the wheels on your floor jack:
20240530_084116.jpg


All cleaned up 2 hours later:
20240530_100711.jpg


Other things of note..

Whe you remove the steerig column make sure your steering wheel doesn't spin. You'll get a "Service Stabilitrak" message bc your wheel is 360 out (ask me how I know). I disconnect, spun 360 (luckily guessed the right direction), reconnected and error was resolved.

Also there's some loomed wires that pass below the motor mount. Make sure they don't get pinched when you drop the motor.
 
OP
OP
LowCountryTim

LowCountryTim

Member
Joined
May 28, 2024
Posts
40
Reaction score
119
Location
South Carolina
So... this happened.

Got the logos and trim (which was barely hanging on for dear life) removed from the tailgate and driver's side.

Also got the panels cut. Hopefully I'll get them polished and sealed tonight.

I love the SC heat but unfortunately I lack an indoor space, so I have to wait until after 6pm to get anything accomplished with the car chemicals. Worst thing you can do it try and cut/polish a panel that is hot.

20240530_152648.jpg
 

Sparksalot

Elite Member
Joined
Sep 20, 2020
Posts
6,775
Reaction score
20,587
Location
Bastrop County, Texas
So... this happened.

Got the logos and trim (which was barely hanging on for dear life) removed from the tailgate and driver's side.

Also got the panels cut. Hopefully I'll get them polished and sealed tonight.

I love the SC heat but unfortunately I lack an indoor space, so I have to wait until after 6pm to get anything accomplished with the car chemicals. Worst thing you can do it try and cut/polish a panel that is hot.

View attachment 429501
I almost stopped on mine when I got to this point.

IMG_8909.jpeg
 
OP
OP
LowCountryTim

LowCountryTim

Member
Joined
May 28, 2024
Posts
40
Reaction score
119
Location
South Carolina
I almost stopped on mine when I got to this point.

View attachment 429502
lol.. it's like leaving "RAD" when you shave "SILVERADO"

Thought about the heat gun, but that adhesive remover it's pretty sweet. Just let it dwell. A few minutes makes it so easy.

This morning I looked at the panels I cut last night (difficult to judge without sunlight, and I can't afford a sungun) everything is looking really good. I think with the polish it will be stunning (for a 13 year old vehicle)
 

vcode

Full Access Member
Joined
Feb 15, 2015
Posts
785
Reaction score
780
A lot of people use aftermarket dash pads on these. Depends on how factory you want it to look and how bad the current dash is.
 
OP
OP
LowCountryTim

LowCountryTim

Member
Joined
May 28, 2024
Posts
40
Reaction score
119
Location
South Carolina
A lot of people use aftermarket dash pads on these. Depends on how factory you want it to look and how bad the current dash is.

Funny you should mention that....

20240530_154452.jpg


TBH I was fine with the dash cover. However, after I bought the Tahoe I soon realized that the ambient light sensor was missing. Fallen into the abyss that is the dashboard.

Removing the cover was a fun- [read:explicative] filled adventure. On the plus side, I can read the radio now.
 

Sparksalot

Elite Member
Joined
Sep 20, 2020
Posts
6,775
Reaction score
20,587
Location
Bastrop County, Texas
Funny you should mention that....

View attachment 429662

TBH I was fine with the dash cover. However, after I bought the Tahoe I soon realized that the ambient light sensor was missing. Fallen into the abyss that is the dashboard.

Removing the cover was a fun- [read:explicative] filled adventure. On the plus side, I can read the radio now.
Damn, I think yours wins the most broken.
 

vcode

Full Access Member
Joined
Feb 15, 2015
Posts
785
Reaction score
780
Funny you should mention that....

View attachment 429662

TBH I was fine with the dash cover. However, after I bought the Tahoe I soon realized that the ambient light sensor was missing. Fallen into the abyss that is the dashboard.

Removing the cover was a fun- [read:explicative] filled adventure. On the plus side, I can read the radio now.
Yeah, I don't think I would have put a dashskin on that.
 
OP
OP
LowCountryTim

LowCountryTim

Member
Joined
May 28, 2024
Posts
40
Reaction score
119
Location
South Carolina
So a total of three hours to do the passenger side motor mount, but that includes a 30 min break after I wrestled the new mount in. Sometimes ya need to take a breather and regroup. Must less frustration. So if you went straight at it start-to-finish it's 2.5 hours.

I removed the starter and took the mount out in that direction and passed it down between the frame and the engine. I also unsnapped the cooler lines to give me a little more room. Honestly it wasn't too bad. And I was completely shocked (and pleased) that the new mount really just guided itself right into place.. unlike removing the old one which took a bit of persuasion.

Having said that, we know what wasn't causing the clunk. :sigh:

20240608_105514.jpg
 
OP
OP
LowCountryTim

LowCountryTim

Member
Joined
May 28, 2024
Posts
40
Reaction score
119
Location
South Carolina
So the mystery of the "sounds like a clunk from the front when I back over a bump" continues...

1717930439367.jpeg


Next thought is maybe the strut.. Looks original to me, been meaning to replace anyway...

What do y'all think about these bushings? With front wheels suspended there's no wiggle or slop, but I'm wondering if I should just go ahead and press new bushings in there when I'm doing the struts? TBH they look ok to me.. granted I have no idea what I'm doing.

20240608_104417.jpg
20240608_104504.jpg
 

Trey Hardy

Full Access Member
Joined
Jun 12, 2020
Posts
3,552
Reaction score
9,637
So the mystery of the "sounds like a clunk from the front when I back over a bump" continues...

View attachment 429987

Next thought is maybe the strut.. Looks original to me, been meaning to replace anyway...

What do y'all think about these bushings? With front wheels suspended there's no wiggle or slop, but I'm wondering if I should just go ahead and press new bushings in there when I'm doing the struts? TBH they look ok to me.. granted I have no idea what I'm doing.

View attachment 429988View attachment 429990
You can get complete replacement upper and lower control arms with new bushings and ball joints that will make the swap a lot easier for the diy guy with them being that cracked up I’d lean towards replacement
Last time I looked I think the lower arms were maybe 150$ a piece give or take
The uppers I’m not sure cause I ran aftermarket upper control arms
 

Forum statistics

Threads
138,038
Posts
1,997,635
Members
102,975
Latest member
jkhuntzinger
Back
Top