You could do that. Since you weren't experiencing any oil pressure loss, you might just get away with it, too. Probably what I would do. It's probably what the Vice Grip Garage guy would do, too.After some consulting it turns out you aren't supposed to look at the cam bearings so that was my mistake. I think I am going to proceed with my AFM delete and pretend I never saw the cam bearings.
You are using an out of date browser. It may not display this or other websites correctly.
You should upgrade or use an alternative browser.
You should upgrade or use an alternative browser.
Disclaimer: Links on this page pointing to Amazon, eBay and other sites may include affiliate code. If you click them and make a purchase, we may earn a small commission.
FasterBass
Full Access Member
- Joined
- Apr 3, 2022
- Posts
- 110
- Reaction score
- 159
OP
OP
Dustin Jackson
Full Access Member
- Joined
- Aug 9, 2018
- Posts
- 1,788
- Reaction score
- 2,064
Double checking, the L33 camshaft is compatible to be an AFM delete cam for the 08 5.3 LMG motor?
iamdub
Full Access Member
Well guys took the morning off work to take the cam out and here is what I found. At this point I am pretty bummed out, I don't know if I should just throw new cam bearings in it or look into having the bottom end rebuilt. I figure if the cam bearings are this bad the rest of it is probably the same condition. I don't want to rebuild half a motor when the rest of it is on its last legs. What should I do?
View attachment 373973
View attachment 373974
I only see a problem with that hammered lobe. The bearing is fine. That's normal wear for the mileage. You think the ones running 300K+ look any better? The front one wears like that- it's normal. Clean all surfaces and slide that new cam in with lots of assembly lube. If I'm not mistaken, you have to have the rods outta the way to replace the cam bearings due to the tool needed. Or maybe it's just a PITA with all that in the way. If you go that far, you might as well do a full rebuild.
Last edited:
iamdub
Full Access Member
After some consulting it turns out you aren't supposed to look at the cam bearings so that was my mistake. I think I am going to proceed with my AFM delete and pretend I never saw the cam bearings.
This is the way.
iamdub
Full Access Member
Double checking, the L33 camshaft is compatible to be an AFM delete cam for the 08 5.3 LMG motor?
Yes. Its specs are identical to those of the AFM cam, just with all matching lobes. Your stock tune would be 100% compatible with the L33 cam. There are other similarly-spec'ed cams that would run just fine on the stock tune, but they're not as optimal and would benefit from custom tuning. If you can find an L33 cam, you can save a good chunk of change by not needing custom tuning. You can have AFM disabled from the tune for about $60. This is all my exact original course of action before a friend sold me the Stage2, causing me to change everything mid-build. Some friend, eh?
OP
OP
Dustin Jackson
Full Access Member
- Joined
- Aug 9, 2018
- Posts
- 1,788
- Reaction score
- 2,064
@iamdub AFM already turned off with blackbear tune. My L33 cam came in the mail today, it looked a little weird so I was just double checking. Thank you for the assurance about the cam bearings. I will start to put it back together this weekend and take pictures for you good people.
iamdub
Full Access Member
@iamdub AFM already turned off with blackbear tune. My L33 cam came in the mail today, it looked a little weird so I was just double checking.
Ah. Then you're all set. Yeah, it does have a few visible differences. It's has a 3-bolt cam gear versus the Gen 4's single bolt. This is why you use the cam gear that has the Gen 4 timing triggers but Gen 3's cam bolt pattern.
Thank you for the assurance about the cam bearings.
Yup- let it ride. Don't beat on it and keep clean oil in it and you could double its current mileage.
I will start to put it back together this weekend and take pictures for you good people.
Document, document, document! If you ever have any doubts about something, having pics to refer to can bring peace of mind. Of course, ask others first if you're unsure of something!
OP
OP
Dustin Jackson
Full Access Member
- Joined
- Aug 9, 2018
- Posts
- 1,788
- Reaction score
- 2,064
Gonna start putting it together tomorrow but I have a few questions
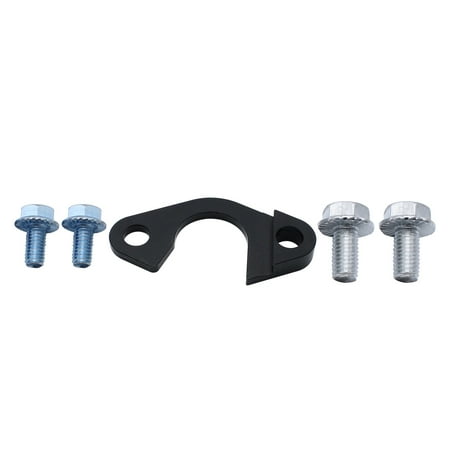
Can I reuse the cam retaining plate?
How
Can I reuse the cam retaining plate?
How
@iamdub You think I can reuse the cam retaining plate?Ah. Then you're all set. Yeah, it does have a few visible differences. It's has a 3-bolt cam gear versus the Gen 4's single bolt. This is why you use the cam gear that has the Gen 4 timing triggers but Gen 3's cam bolt pattern.
Yup- let it ride. Don't beat on it and keep clean oil in it and you could double its current mileage.
Document, document, document! If you ever have any doubts about something, having pics to refer to can bring peace of mind. Of course, ask others first if you're unsure of something!
iamdub
Full Access Member
Gonna start putting it together tomorrow but I have a few questions
Can I reuse the cam retaining plate?
How
@iamdub You think I can reuse the cam retaining plate?
No. For less than $20, you have absolutely nothing to gain by trying to. That gasket holds a large volume of pressurized oil passing from one galley to the other. It's vital. I used Mahle B31822 and ARP 134-1002. I did not want the Gen 4 countersunk plate and screws.
OP
OP
Dustin Jackson
Full Access Member
- Joined
- Aug 9, 2018
- Posts
- 1,788
- Reaction score
- 2,064
@iamdub what about intake manifold gaskets? I just realized I don’t have a new set of thoseNo. For less than $20, you have absolutely nothing to gain by trying to. That gasket holds a large volume of pressurized oil passing from one galley to the other. It's vital. I used Mahle B31822 and ARP 134-1002. I did not want the Gen 4 countersunk plate and screws.
iamdub
Full Access Member
@iamdub what about intake manifold gaskets? I just realized I don’t have a new set of those
Definitely change those as well. They can cause all kinds of issues ranging from a nearly harmless imbalance in fueling to heavy fuel trimmings, rough operation and multiple persistent codes if there's a leak. @swathdiver knows all about this. They're reusable, but not after 160K. Now, six months or a year after the delete, if you need to pull the manifold for some reason, you should be able to reuse the gaskets. I used Mahle #MS16340.
Last edited:
OP
OP
Dustin Jackson
Full Access Member
- Joined
- Aug 9, 2018
- Posts
- 1,788
- Reaction score
- 2,064
Today was a slow day, just organizing tools and parts, cleaning mating surfaces.
I found that I am probably not qualified to clean the heads. I have experience cleaning iron blocks so I went to town on the aluminum head with a steal carbide blade and then a razor. It felt like those tools were being too aggressive on the head and the plastic blades didn’t have much affect so I’ll take the heads to a machine shop to be cleaned and undo any damage I hay have caused.
Cleaning. The block went well, used a steal carbide blade and a shop vac to get the top, sides, and front cleaned and prepped.
Used that A-37 bearing and hammered them in. I found that when I did it pieces of the block would chip off, I tried using a hammering pin to press it in directly on the bearing but the edge of the block still seemed to flake like in the picture. I made sure to run a shop vac through the top of the block after I put those in.
iamdub
Full Access Member
Today was a slow day, just organizing tools and parts, cleaning mating surfaces.
I found that I am probably not qualified to clean the heads. I have experience cleaning iron blocks so I went to town on the aluminum head with a steal carbide blade and then a razor. It felt like those tools were being too aggressive on the head and the plastic blades didn’t have much affect so I’ll take the heads to a machine shop to be cleaned and undo any damage I hay have caused.
Cleaning. The block went well, used a steal carbide blade and a shop vac to get the top, sides, and front cleaned and prepped.
Used that A-37 bearing and hammered them in. I found that when I did it pieces of the block would chip off, I tried using a hammering pin to press it in directly on the bearing but the edge of the block still seemed to flake like in the picture. I made sure to run a shop vac through the top of the block after I put those in.
View attachment 374249
View attachment 374248
View attachment 374250
I'd always invest in having a shop do the heads. A 3- or 5-angle valve job and cleaning pass on the deck can do wonders.
Crank up that compressor and blow out the oil galleys from every way you can reach.
That valley is clean!
Oil Pump Pickup Girdle Tube Pipe Hold Down Brace with Screws Oil Pump Girdle Bracket Replacement for LS1 LS2 LS3 | Walmart Canada
Buy Oil Pump Pickup Girdle Tube Pipe Hold Down Brace with Screws Oil Pump Girdle Bracket Replacement for LS1 LS2 LS3 from Walmart Canada. Shop for more Additional Auto Replacement Parts available online at Walmart.ca
www.walmart.ca
I added something like this to secure the oil pickup pipe and avoid any o ring issues down the line.
Dont forget Assembly lube to give the moving parts some love before the oil flows everywhere.
+1 on sending the heads to a shop if there is any question about the sealing surfaces. And, I also agree that a valve job is a wise investment.Today was a slow day, just organizing tools and parts, cleaning mating surfaces.
I found that I am probably not qualified to clean the heads. I have experience cleaning iron blocks so I went to town on the aluminum head with a steal carbide blade and then a razor. It felt like those tools were being too aggressive on the head and the plastic blades didn’t have much affect so I’ll take the heads to a machine shop to be cleaned and undo any damage I hay have caused.
Cleaning. The block went well, used a steal carbide blade and a shop vac to get the top, sides, and front cleaned and prepped.
Used that A-37 bearing and hammered them in. I found that when I did it pieces of the block would chip off, I tried using a hammering pin to press it in directly on the bearing but the edge of the block still seemed to flake like in the picture. I made sure to run a shop vac through the top of the block after I put those in.
View attachment 374249
View attachment 374248
View attachment 374250
When I did my heads, I didn’t do any of that though because my engine was relatively low mileage. I used permatex chemical gasket remover and it worked perfectly. No damage.
Sparksalot
Elite Member
I grew up doing 3 angle grinding on heads. It was really satisfying to see the end resultI'd always invest in having a shop do the heads. A 3- or 5-angle valve job and cleaning pass on the deck can do wonders.
Crank up that compressor and blow out the oil galleys from every way you can reach.
That valley is clean!
OP
OP
Dustin Jackson
Full Access Member
- Joined
- Aug 9, 2018
- Posts
- 1,788
- Reaction score
- 2,064
Now that I am starting to assemble the motor what kinds of things should I know as far as keeping the internals of the engine clean and what to do for my first startup? I was told a few different things, one person said to use engine cleaner like kerosene and let that idle for a bit and then change the oil immediately to help get all the gunk out of the motor, should I also flush the coolant? Another person said to pour a quart of oil over the valves before installing the valve covers.
So far I've just been using a shop vac to try to keep things clean. Occasionally I'll run a magnet on a stick around to see what I find but I haven't found anything of concern.
So far I've just been using a shop vac to try to keep things clean. Occasionally I'll run a magnet on a stick around to see what I find but I haven't found anything of concern.
When Installing cam I put a generous coating of assembly lube on it as well as the pushrod tips, springs, rocker arms. I used a L96 cam to keep VVT in my LMG which appears to work well.
Put some oil in new oil pump so it wasn't bone dry. Lifters came from texas speed as a kit and were in a bag of oil to which i added more to soak them for and hour. Started up with injectors disconnected so system primed and then connected and fired up and had instant strong oil pressure show on gauge. I had a drive after letting engine warm up and leak check etc, did more checks after and changed oil after a few hundred kms. Using synthetic oil for every change now, several thousand kms later I have not burned any oil like I did before .
Put some oil in new oil pump so it wasn't bone dry. Lifters came from texas speed as a kit and were in a bag of oil to which i added more to soak them for and hour. Started up with injectors disconnected so system primed and then connected and fired up and had instant strong oil pressure show on gauge. I had a drive after letting engine warm up and leak check etc, did more checks after and changed oil after a few hundred kms. Using synthetic oil for every change now, several thousand kms later I have not burned any oil like I did before .
Last edited:
There is only so much you can do working in a home shop to keep dirt out. I used disposable shop rags and parts cleaner to keep everything as clean as I could. I used compressed air in the cylinder head bolt holes, and just did the best I could.Now that I am starting to assemble the motor what kinds of things should I know as far as keeping the internals of the engine clean and what to do for my first startup? I was told a few different things, one person said to use engine cleaner like kerosene and let that idle for a bit and then change the oil immediately to help get all the gunk out of the motor, should I also flush the coolant? Another person said to pour a quart of oil over the valves before installing the valve covers.
So far I've just been using a shop vac to try to keep things clean. Occasionally I'll run a magnet on a stick around to see what I find but I haven't found anything of concern.
For startup, here was my process:
-Used assembly lube on the cam, lifters, and rockers.
-Removed the front cover from the oil pump before installing it and put a couple of fingers worth of red grease in it. I didn't pack it, just got enough in it to help seal the rotor so it would prime easier.
-I didn't bother with unplugging the injectors. You can get the same effect by putting your foot to the floor on the gas pedal while you crank it the first time and it will shut off the injectors automatically. But I didn't do that either. I just cranked it and left it fire up. Had immediate oil pressure all 3 times I've done it.
Changed the oil after the first 100 miles.
Similar threads
- Replies
- 10
- Views
- 325
- Replies
- 2
- Views
- 183