Morimoto Bi-Xenon retrofit - Installation thread

Disclaimer: Links on this page pointing to Amazon, eBay and other sites may include affiliate code. If you click them and make a purchase, we may earn a small commission.

RichardCranium

Full Access Member
Joined
Dec 13, 2016
Posts
936
Reaction score
1,847
Location
Mebane, North Carolina
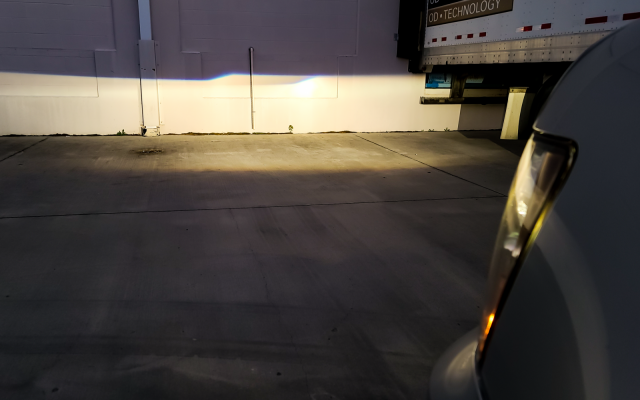
Long story short, I had a thread from 2018 for a retrofit that I had adjustment issues with.....so I parted it out and went LED. Since that info was no longer relevant, I wanted to clean the thread up and remove all the old stuff, since I just successfully completed the retrofit on the 2 d attempt. In the end, the whole thread got trashed.....so that works too. Below is my current install, with pics and notes, for reference if anyone follows.

Shopped at LightWerkz, and per fellow forum member @Geoffsfas10 recommendation, and got the Mini Stage 3 H1 8.0 kit.

IMG_20210311_192101.jpg
 
OP
OP
RichardCranium

RichardCranium

Full Access Member
Joined
Dec 13, 2016
Posts
936
Reaction score
1,847
Location
Mebane, North Carolina
First things first, splitting the OEM headlights. This was my 5th pair to split, so I feel like a veteran. Pop the bulbs out, take off the rubber seals around the high/low beams, and place them on a large pan. Throw it in the oven at 200° for 10 minutes (one headlight at a time). I put mine in with the clear lens up, so keep it scratch-free. You'll likely need one oven mit to hold it, while you work a seam to split it.

Using any sort of wide and thin blade prying tool, work a seam in an area of the headlight not seen when installed. Just in case you leave some marks, they'll be hidden from plain site. I always go for this seam.....

20210314_120204.jpg
 
OP
OP
RichardCranium

RichardCranium

Full Access Member
Joined
Dec 13, 2016
Posts
936
Reaction score
1,847
Location
Mebane, North Carolina
When you are rotating the headlight around, be really cautious of how you handle it. Those tabs can all bend or break off very easily, since they are warm from the oven.

I always have a towel down, and pivot the headlight on a corner like this.

20210314_120301.jpg
 
OP
OP
RichardCranium

RichardCranium

Full Access Member
Joined
Dec 13, 2016
Posts
936
Reaction score
1,847
Location
Mebane, North Carolina
Once split, I always put the clear lens down facing upwards, to keep dust out.

Now you are ready to modify and test fit. First thing you need to do is remove the bolt-in deflector shield on the low beam side. Then you'll have to grind down the knurl the deflector mounted to, so the HID projector can sit flush.

My trusty pneumatic angle grinder with Matco bits.....
20210314_155000.jpg


The raised part where the deflector was mounted, before......
20210314_155006.jpg


....and after. It doesn't have to be pretty or perfect, as the HID projector will cover it. You just need for the bump to be completely gone.
20210314_160038.jpg
 
OP
OP
RichardCranium

RichardCranium

Full Access Member
Joined
Dec 13, 2016
Posts
936
Reaction score
1,847
Location
Mebane, North Carolina
In order to fit this projector, it took a small amount of filing in the headlight bore (where the low beam bulb protrudes through) to accommodate enough room for the Morimoto projector shaft to fit through. A little patience, and working your way around the inside with a file will get enough clearance worked out. Just file a little, and try to fit the projector through the hole often. All you want is enough room to get it through, no excessive play.

After finally getting the right diameter, I was able to fit the projector with the smaller rubber bushing and only the securing nut on the backside.

At this point, the only modifications I've done are grinding down the perch for the deflector and file the bore to accommodate the diameter of the projector shaft.

@Geoffsfas10 can testify from his own install, no more is really needed to secure the HID, especially if you did minimal filing so the shaft has fairly low clearance. The projector won't be moving.

20210328_173045.jpg
 
OP
OP
RichardCranium

RichardCranium

Full Access Member
Joined
Dec 13, 2016
Posts
936
Reaction score
1,847
Location
Mebane, North Carolina
After test fitting the projector in the step above, I was ready to finish up the installation of the projectors so I could start the aiming process.

Before you are ready to proceed from here, you need to modify one more thing. That hole where the deflector was mounted, you should drill that out with about a 1/8" bit. You'll be feeding two 20ga wires through there for the solenoid to activate the armature for "high beam" activation later.

Here is the assembly of the later style projector. Once the projector is set and locked in (not too tight, so it can be rotated to level later), start the assembly. This black plastic ring allows for the newer style dust cap to be threaded on.
20210328_173303.jpg


The bulb fits in....

20210328_173423.jpg


This horseshoe clip fits in and sits flush, it keeps the bulb in place. Pretty cool.

20210328_173439.jpg


Clip installed....

20210328_173451.jpg
 
OP
OP
RichardCranium

RichardCranium

Full Access Member
Joined
Dec 13, 2016
Posts
936
Reaction score
1,847
Location
Mebane, North Carolina
And final step, the dust cap installed.

20210328_173509.jpg


Just realized I don't have a pic of my relay harness or other hardware. I'll grab some over the weekend and add them in, if anyone wants any ideas of where to mount them.

Here is the projector completed, and ready to take out and aim.

20210401_154058.jpg


20210401_200908.jpg


20210401_200048.jpg


High beams, with splitters to retain the halogen high beams as well.

20210401_200858.jpg
 
OP
OP
RichardCranium

RichardCranium

Full Access Member
Joined
Dec 13, 2016
Posts
936
Reaction score
1,847
Location
Mebane, North Carolina
The initial journey to a local store, to use a wall out back to aim.

20210401_200120.jpg


Only had to rotate one side, and it was a small amount. Here it can be seen I need to adjust the drivers side up some, to give a good crossover pattern between both sides.

20210401_200700.jpg
 
OP
OP
RichardCranium

RichardCranium

Full Access Member
Joined
Dec 13, 2016
Posts
936
Reaction score
1,847
Location
Mebane, North Carolina
Here are the options I chose with the kit:

Bi-Xenon Morimoto Mini Stage III (H1) × 1
Bixenon Projectors: Bi-Xenon: Morimoto H1 8.0 (LHD)
Compatible Ballasts/Igniters: Morimoto XB35 2.0 (35W)
H1 HID Bulbs: H1: 5500K HID Bulbs
Shroud Style: Mini Gatling Gun
Wiring Harness (match stock bulb size): HD Relay: H11/H9/H8
Anti-Flicker Capacitor: No
Shroud Adapters: None
 

Geoffsfas10

Full Access Member
Joined
Nov 27, 2019
Posts
806
Reaction score
1,761
Location
St. Louis
Man this write up is better then the one i did that you used as a base. What a slacker i am haha. Looks great as usual, i wish more people would realize that this retrofit is really THIS simple!!
 

NathanJax

Vacation Nathan
Staff member
Administrator Moderator Supporting Member
Joined
May 9, 2009
Posts
49,141
Reaction score
943,577,202
Location
Jax, Fl
Great thread! Wish I could have seen the old thread.............
 

1BADI5

Elite Member
Joined
Feb 2, 2014
Posts
1,833
Reaction score
2,991
Location
DMV
How much would you charge for a set?

I like brakes, engines and suspension.......that type of work, not so much.

Nice job Dick
 
OP
OP
RichardCranium

RichardCranium

Full Access Member
Joined
Dec 13, 2016
Posts
936
Reaction score
1,847
Location
Mebane, North Carolina
Man this write up is better then the one i did that you used as a base. What a slacker i am haha. Looks great as usual, i wish more people would realize that this retrofit is really THIS simple!!
My original thread with Morimoto D2S projectors (back in 2018) was pretty thorough too, but I had to modify a LOT more to get the projectors to fit. This was so much easier, and I always take lots of pics in case anyone has questions. Def got motivated from your thread, especially when I realized how disappointed I actually was with the AlphaRex/LED combo.
Great thread! Wish I could have seen the old thread.............
:idiot::idiot::idiot:
How much would you charge for a set?

I like brakes, engines and suspension.......that type of work, not so much.

Nice job Dick
Where are you? I'd help anyone out local with some. Hardest part really is just splitting the headlights, its patience more than anything.
 

1BADI5

Elite Member
Joined
Feb 2, 2014
Posts
1,833
Reaction score
2,991
Location
DMV
I'm in Maryland.......so not close enough lol
 

omandave

TYF Newbie
Joined
Jan 30, 2017
Posts
22
Reaction score
18
Awesome write up and photos! Also nice finished look...

Would you be willing to add one more photo, of the final, adjusted/aimed cutoff? Asking because I am not clear that I have my own aimed quite right...

I bought a set from a company, and was less than impressed... DIY would have been better...

Looks Amazing!
 

iamdub

Full Access Member
Joined
Apr 23, 2016
Posts
20,821
Reaction score
45,011
Location
Li'l Weezyana
Nice! Thank you for writing this up with good pics. I never cared much for this type of retrofit cuz the projectors looked like big fish eyes. These minis look good. I'm with @omandave- lets see some money shots.
 

cmatt

Full Access Member
Joined
Apr 29, 2009
Posts
637
Reaction score
701
Nicely done @RichardCranium. You’ve got me wanting to do my burb now. In fact I purchased a set of these https://www.amazon.com/dp/B08MWYDSBG/ref=cm_sw_em_r_mt_dp_VTQ4HC3NCPNABZTJWE07?_encoding=UTF8&psc=1
headlights with the C shaped led and was going to swap in some led bulbs. Now I think I’ll look at doing a bi-led retrofit to those with the M led 2.0 projectors. I’ll reach out to Lightwerkz and see if they have any info on whether there’s enough room in the housing.

I also plan to make the C shaped led the DRL
E0E5193D-C294-424F-BFC6-8906014196DC.jpeg
 

Geoffsfas10

Full Access Member
Joined
Nov 27, 2019
Posts
806
Reaction score
1,761
Location
St. Louis
Nicely done @RichardCranium. You’ve got me wanting to do my burb now. In fact I purchased a set of these https://www.amazon.com/dp/B08MWYDSBG/ref=cm_sw_em_r_mt_dp_VTQ4HC3NCPNABZTJWE07?_encoding=UTF8&psc=1
headlights with the C shaped led and was going to swap in some led bulbs. Now I think I’ll look at doing a bi-led retrofit to those with the M led 2.0 projectors. I’ll reach out to Lightwerkz and see if they have any info on whether there’s enough room in the housing.

I also plan to make the C shaped led the DRL
View attachment 356996
Ive talked to them about those housings. Theres plenty of room but the projector mounting sucks in them so youll have to custom mount them. They have a video on their youtube channel with the set they did
 

Forum statistics

Threads
137,672
Posts
1,989,113
Members
102,675
Latest member
j_jerry79

Latest posts

Back
Top