You are using an out of date browser. It may not display this or other websites correctly.
You should upgrade or use an alternative browser.
You should upgrade or use an alternative browser.
What did you do to your NBS GMT800 Tahoe/Yukon Today?
- Thread starter vwbeaner
- Start date
Disclaimer: Links on this page pointing to Amazon, eBay and other sites may include affiliate code. If you click them and make a purchase, we may earn a small commission.
- Joined
- May 9, 2018
- Posts
- 7,154
- Reaction score
- 13,944
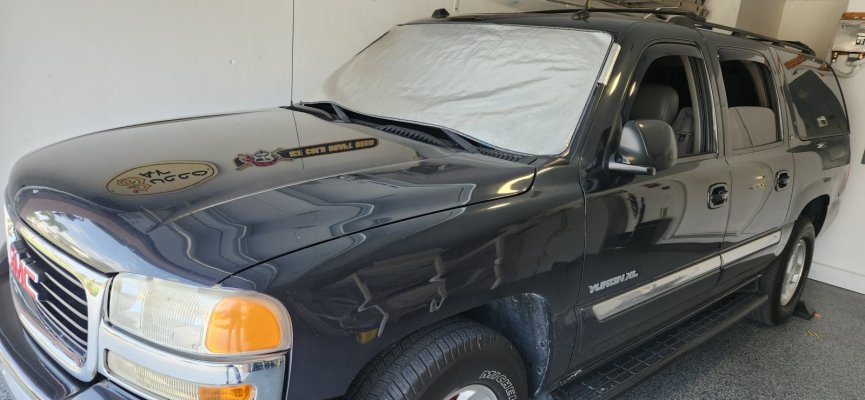
Interesting….. I’d be interested as long as the shade is not much different than non-tinted.Just had 3m crystalline 70% installed on my windshield
My return air isn’t working so I figured this would be the easiest way to help cool the cabin while driving
I’ve already noticed a difference
I’m in central texas
It’s got a light blue haze to itInteresting….. I’d be interested as long as the shade is not much different than non-tinted.
Scottydoggs
Full Access Member
finally got a day off on a sat with out it raining out or being 100 degrees, so over a month ago i bought a full set of power stop Z17 pads and rotors. got them swapped out today.
old rotors were 7-8 years old, have been pad slapped 3 times, had a slight warp i could feel, and they were just not stopping as good as they had in the past. so far power stops feel pretty solid.
side note. last year i bought this brake compression tool. omg, used it for the first time and that things a game changer.
Amazon.com: YATOINTO Brake Caliper Compression Tool,Caliper Piston Compressor Tool with Extra 2Pcs Large Plates 1.57"-2.95" for Disc Brake Pad Spreader,Brake Caliper Press Tool with 4 Break Caliper Hangers,Red : Automotive
Buy YATOINTO Brake Caliper Compression Tool,Caliper Piston Compressor Tool with Extra 2Pcs Large Plates 1.57"-2.95" for Disc Brake Pad Spreader,Brake Caliper Press Tool with 4 Break Caliper Hangers,Red: Brake Spreading Tools - Amazon.com ✓ FREE DELIVERY possible on eligible purchases
www.amazon.com
- Joined
- May 9, 2018
- Posts
- 7,154
- Reaction score
- 13,944
I use a sunshade that’s designed for keeping off snow. Laid on the outside, keeping the glass cool. ( Works good to lower interior heat by 20 degrees in this Florida sunshine.It’s got a light blue haze to it View attachment 487977
But I like this tint !!
Attachments
Last edited:
clandr1
Full Access Member
Yesterday I drained and refilled my power steering fluid reservoir, and today I went to take my truck to lunch and found coolant on my garage floor. Looks like my original radiator finally developed a leak after 21 years and 299,000 miles. Can't say I didn't get my money's worth.
More frustratingly, I've been battling some inconsistent A/C compressor cycling the last 2-3 weeks. It started after my battery died and was replaced. Low and high side pressures are within range, relay is good, blend door actuator has been replaced, the low pressure cutoff switch has been replaced, but for some reason the A/C compressor will short cycle, not cycle at all, or cycle normally. It's been pretty frustrating. I'm at the point where I'm about to just take it to a shop with a Tech 2 scanner and hope they can diagnose the issue.
More frustratingly, I've been battling some inconsistent A/C compressor cycling the last 2-3 weeks. It started after my battery died and was replaced. Low and high side pressures are within range, relay is good, blend door actuator has been replaced, the low pressure cutoff switch has been replaced, but for some reason the A/C compressor will short cycle, not cycle at all, or cycle normally. It's been pretty frustrating. I'm at the point where I'm about to just take it to a shop with a Tech 2 scanner and hope they can diagnose the issue.
mikez71
Full Access Member
- Joined
- Mar 9, 2023
- Posts
- 3,240
- Reaction score
- 4,014
Discovered something while changing mirror glass...

I haven't noticed any wasps, so I think it's old.
Got 2 mirrors for $25 from ebay, so far so good. No more brown mirror!
I could not remove either old mirror without cracking them though..
Noticed only after installing that my driver side mirror's range of motion is lower down than the passenger side.
(I have mirror adjusted pretty much to uppermost limit on driver side)
Not sure if it was like that before (I suspect it was), or what causes it..
Last edited:
- Joined
- Sep 19, 2018
- Posts
- 4,671
- Reaction score
- 13,219
Discovered something while changing mirror glass...
View attachment 488103
I haven't noticed any wasps, so I think it's old.
Got 2 mirrors for $25 from ebay, so far so good. No more brown mirror!
I could not remove either old mirror without cracking them though..
Also notice my driver side mirror's range of motion is lower down than the passenger side.
(I have mirror adjusted pretty much to uppermost limit on driver side)
I had a local glass shop remove the old glass and install the new glass in one of my mirrors.
Also, I've had 2 or 3 trucks where the driver's-side electric mirror wouldn't adjust up [or down] far enough. After a maximum adjustment with the switch, I've nudged the mirror that tiny bit in the desired direction with my finger. So far, this has 'centered' the mirrors enough that the switch covers all desired mirror positions.
I'm not claiming this is good for the mirror's works, but I've had no trouble yet because of it.
joe
- Joined
- Jan 20, 2015
- Posts
- 432
- Reaction score
- 1,434
Flipped 200K today

Tonyrodz
Resident Resident
I like your cluster.Flipped 200K today View attachment 488204
clandr1
Full Access Member
Yesterday I drained and refilled my power steering fluid reservoir, and today I went to take my truck to lunch and found coolant on my garage floor. Looks like my original radiator finally developed a leak after 21 years and 299,000 miles. Can't say I didn't get my money's worth.
More frustratingly, I've been battling some inconsistent A/C compressor cycling the last 2-3 weeks. It started after my battery died and was replaced. Low and high side pressures are within range, relay is good, blend door actuator has been replaced, the low pressure cutoff switch has been replaced, but for some reason the A/C compressor will short cycle, not cycle at all, or cycle normally. It's been pretty frustrating. I'm at the point where I'm about to just take it to a shop with a Tech 2 scanner and hope they can diagnose the issue.
Last night I replaced the radiator. Only took about an hour! I love how easy these trucks are to work on.
And for those of you who notice - I used distilled water to fill it up, not the garden hose on the ground
")
Attachments

Last edited:
mikez71
Full Access Member
- Joined
- Mar 9, 2023
- Posts
- 3,240
- Reaction score
- 4,014
Removed front headliner. Finally no more foam bits sprinkling on my dashboard!
Watched a good series of videos starting with this one..
Why did GM use torx screws for the sun visor, much less two different sizes? To screw with us!
My torx sockets wouldn't fit the recesses.
Luckily an allen wrench fit the smaller hinge screws, and a mini flat blade screwdriver just fit the larger clip screw.

My 2005 did not have the retainer clips behind the roof vents.
You can rotate the housing and the vents come right out, instead of pulling them out like the video.. unless it's tight and you're unable to rotate them.
Found a use for the ring part of my plastic prybar..

Wiring plugs took a lot of squeezing to get out past the A-pillar.

With the headliner wiring removed, the rear blower is on full blast.
Still need to remove the rear headliner and sunroof shade..
I might try to remove the old material myself..

Then to find a decent shop to reline it.. All the video's I've watched, the finished product is not as nice as OEM..

Watched a good series of videos starting with this one..
Why did GM use torx screws for the sun visor, much less two different sizes? To screw with us!
My torx sockets wouldn't fit the recesses.
Luckily an allen wrench fit the smaller hinge screws, and a mini flat blade screwdriver just fit the larger clip screw.
My 2005 did not have the retainer clips behind the roof vents.
You can rotate the housing and the vents come right out, instead of pulling them out like the video.. unless it's tight and you're unable to rotate them.
Found a use for the ring part of my plastic prybar..
Wiring plugs took a lot of squeezing to get out past the A-pillar.
With the headliner wiring removed, the rear blower is on full blast.
Still need to remove the rear headliner and sunroof shade..
I might try to remove the old material myself..
Then to find a decent shop to reline it.. All the video's I've watched, the finished product is not as nice as OEM..
Last edited:
strutaeng
Full Access Member
Oh...you didn't have to remove your dash to pull that harness that goes under the steering wheel?! Pillars/HVAC cover only have to be removed on the passenger side?Removed front headliner. Finally no more foam bits sprinkling on my dashboard!
Watched a good series of videos starting with this one..
Why did GM use torx screws for the sun visor, much less two different sizes? To screw with us!
My torx sockets wouldn't fit the recesses.
Luckily an allen wrench fit the smaller hinge screws, and a mini flat blade screwdriver just fit the larger clip screw.
View attachment 488270
My 2005 did not have the retainer clips behind the roof vents.
You can rotate the housing and the vents come right out, instead of pulling them out like the video.. unless it's tight and you're unable to rotate them.
Found a use for the ring part of my plastic prybar..
View attachment 488271
Wiring plugs took a lot of squeezing to get out past the A-pillar.
View attachment 488272
With the headliner wiring removed, the rear blower is on full blast.
Still need to remove the rear headliner and sunroof shade..
I might try to remove the old material myself..
View attachment 488273
Then to find a decent shop to reline it.. All the video's I've watched, the finished product is not as nice as OEM..
View attachment 488274
I've got the 2 SUVs and my extended cab Silverado to so, so I can only afford to do the entire job myself (have never done it before). It seems like a good time to add some Dynamat or Lizardskin (optional, of course). I added some Lizardskin to my 06 SUV interior door panels and seemed like the cabin is quieter now.
You are definitely motivating me to do mine now!
Last edited:
mikez71
Full Access Member
- Joined
- Mar 9, 2023
- Posts
- 3,240
- Reaction score
- 4,014
Nope, I did remove the dash screws on the side and a few on the top edge, so I could flex the dash cover..
-BUT- it was the frame underneath the dash that was really blocking it.
I pulled the door weatherstrip back in one spot to give a little more clearance.
Cluster removed and pulled the headlight module bracket off to reach in there better.. (to unplug that connector)
Not sure how it squeezed through, takes a little doing. Not terrible..
(I already had my knee bolster and dash bezel out, but it took ~2 hours I think.. )
A/B/C pillars need removed, they pull out easily, much easier than the later models. Grab handles.
D pillar on passenger side so you can remove the HVAC trim and unplug those wires. Need to remove D pillar driver side for the rear headliner...
(my speaker separated from the trim, will need to epoxy back together)
All the videos recommend glue that comes out of a spray gun. I'm not setup for that, plus I'm afraid I'll make a mess of it..
Hopefully a shop can do it well for reasonable.. If it has creases or looks sloppy, I won't be happy.
Part of me thinks about leaving it out and installing an overhead mesh rack for more storage..
All the headliners at the junkyard are sagging too.. I guess it's a Chevy thing?
Last edited:
strutaeng
Full Access Member
Nice! Thanks for the tips.Nope, I did remove the dash screws on the side and a few on the top edge, so I could flex the dash cover..
-BUT- it was the frame underneath the dash the was really blocking it.
I pulled the door weatherstrip back in one spot to give a little more clearance.
Cluster removed and pulled the headlight module bracket off to reach in there better.. (to unplug that connector)
Not sure how it squeezed through, takes a little doing. Not terrible..
(I already had my knee bolster and dash bezel out, but it took ~2 hours I think.. )
A/B/C pillars need removed, they pull out easily, much easier than the later models. Grab handles.
D pillar on passenger side so you can remove the HVAC trim and unplug those wires.
(my speaker separated from the trim, will need to epoxy back together)
All the videos recommend glue that comes out of a spray gun. I'm not setup for that, plus I'm afraid I'll make a mess of it..
Hopefully a shop can do it well for reasonable.. If it has creases or looks sloppy, I won't be happy.
Part of me thinks about leaving it out and installing an overhead mesh rack for more storage..
All the headliners at the junkyard are sagging too.. I guess it's a Chevy thing?
Yes, the Weldwood Landau Top and Trim adhesive is what the pros use. I bought a gallon of it already from Amazon. And I do have the headliner material for my 04, which doesn't have the moonroof (my 06 does have it tho.)
One guy I saw on YT said when reinstalling it, use cloth gloves so you don't put finger indentations on the headliner.
Tonyrodz
Resident Resident
I've done a few headliners, I've also reglued some that were hanging in a few small spots--I've used 3M adhesive spray in a spray can. I've always gotten great results using it.Nope, I did remove the dash screws on the side and a few on the top edge, so I could flex the dash cover..
-BUT- it was the frame underneath the dash the was really blocking it.
I pulled the door weatherstrip back in one spot to give a little more clearance.
Cluster removed and pulled the headlight module bracket off to reach in there better.. (to unplug that connector)
Not sure how it squeezed through, takes a little doing. Not terrible..
(I already had my knee bolster and dash bezel out, but it took ~2 hours I think.. )
A/B/C pillars need removed, they pull out easily, much easier than the later models. Grab handles.
D pillar on passenger side so you can remove the HVAC trim and unplug those wires.
(my speaker separated from the trim, will need to epoxy back together)
All the videos recommend glue that comes out of a spray gun. I'm not setup for that, plus I'm afraid I'll make a mess of it..
Hopefully a shop can do it well for reasonable.. If it has creases or looks sloppy, I won't be happy.
Part of me thinks about leaving it out and installing an overhead mesh rack for more storage..
All the headliners at the junkyard are sagging too.. I guess it's a Chevy thing?
mikez71
Full Access Member
- Joined
- Mar 9, 2023
- Posts
- 3,240
- Reaction score
- 4,014
Right, I don't know why so many seem to recommend against the spray cans..
In the videos, the cans seem to spray more evenly than the videos where they're using spray guns....
In the videos, the cans seem to spray more evenly than the videos where they're using spray guns....
Tonyrodz
Resident Resident
Maybe it depends if the guy spraying knows what he's doing--or not. I've seen the pros using the spray gun with excellent results--but again, they were pros. Using the can is much easier and predictable for the DIY guy. Just don't go heavy, spraying the board AND the underside if the headliner, let it tack up 1st before applying both together. Make sure it's perfectly flat and smooth--there's no do overs.Right, I don't know why so many seem to recommend against the spray cans..
In the videos, the cans seem to spray more evenly than the videos where they're using spray guns....
mikez71
Full Access Member
- Joined
- Mar 9, 2023
- Posts
- 3,240
- Reaction score
- 4,014
Found out what was rattling in my liftgate everytime I closed it..

I removed my sunroof cover...
Now to find the energy to clean off all the old headliner material...
I dunno, it's not too bad gutted...
I'd rather fix my suspension and drivetrain clunks.. and rattlecan noise at light throttle. I don't think it's knock, maybe an exhaust manifold leak? idk
Should be all done fixing the important stuff in 20years or so....
Similar threads
- Replies
- 5
- Views
- 374
- Replies
- 25
- Views
- 1K
- Replies
- 40
- Views
- 3K