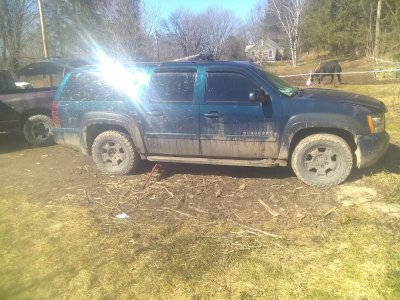
Rc silverado front lift and skyjacker rear lift coils

Disclaimer: Links on this page pointing to Amazon, eBay and other sites may include affiliate code. If you click them and make a purchase, we may earn a small commission.

Tozan

Overlander
Joined
Nov 12, 2016
Posts
596
Reaction score
877
Location
Yavapai Arizona
You might want to replace all the adjustment hardware on the control arms. Last time I did an alignment mine kept coming loose so I replaced all the bolts and nuts to solve the problem.
 
OP
OP
87carl

87carl

Full Access Member
Joined
Feb 21, 2016
Posts
328
Reaction score
168
You might want to replace all the adjustment hardware on the control arms. Last time I did an alignment mine kept coming loose so I replaced all the bolts and nuts to solve the problem.

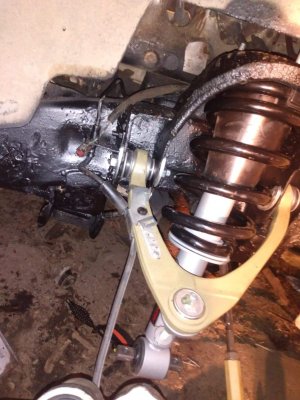
I have had that happen on a previous chevy I had. For this suburban i got moog upper control arm bolts and cam plates to avoid that
only hardware I am reusing on the front is lower control arm bolts crossmember bolts, abs wire bracket and brake hose bracket bolts
 
OP
OP
87carl

87carl

Full Access Member
Joined
Feb 21, 2016
Posts
328
Reaction score
168
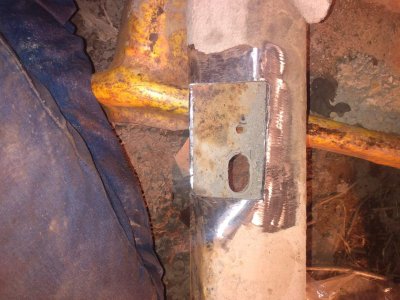
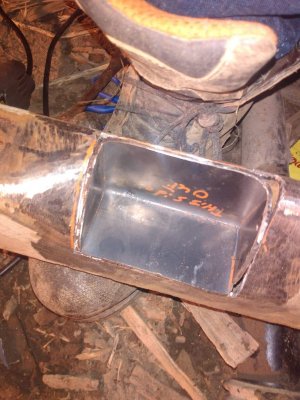
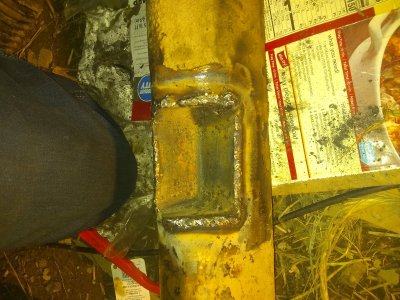
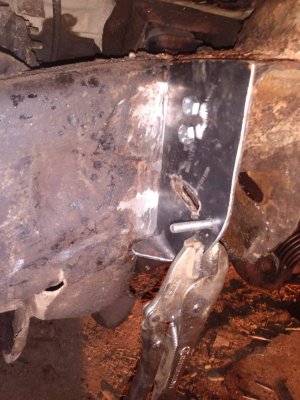
Last 2 nights have been long late nights so haven't had chance to update this first night I reinforced the rearward passenger side upper control arm mount and flipped brake line bracket upside down and installed the upper control arm, strut, calliper and brake hose. Last night cut the crossmember on the differential like the lifts instructions say to. I didn't like the idea of having a big hole in a crossmember so I cut it an extra 1/8 inch bigger in each direction than instructions said to and made a filler piece out of 1/8 inch plate and welded it up solid. Cut the fins on the differential and added the differential 1 inch drop spacers and reinstalled the crossmember set up the knuckle wheelbearing dust shield rotor and wheel spacer for passenger side. Had to trim the nub off the studs on wheelbearing so they didn't stick past spacer. Installed the lower control arm and knuckle and cv shaft. Getting knuckle to line up with upper control arm was a challenge to do till it fell of a jack then it suddenly lined up lol also did brakes on that side. Only thing left to do on passenger side is grease ball joints and tie rods bleed brakes and put tire on then I can move to the driver side and start reinforcing those upper control arm mounts and install that side. Also i ordered spohn adjustable panhard and rear control arms, crown performance stainless extended rear brake hoses and a sway link for a jeep jk with 3 inches lift it's 12.25 long and looks like our stock rear sway links hopefully it fits.
received_133501758692978.jpeg received_1635602496630922.jpeg received_503903410775693.jpeg received_3900995159963715.jpeg IMG_20210317_210050822.jpg
 
OP
OP
87carl

87carl

Full Access Member
Joined
Feb 21, 2016
Posts
328
Reaction score
168
Updated title seems I'm covering more than just rear coils on here.

I can't wait to get it done. doing it with mostly hand tools in a driveway takes forever I should have done it in my friends shop on the lift. And if I just followed lift instructions and didn't do all the extra welding it would be alot faster. That's if they actually sent the instructions with the lift. And If I wasn't replacing literally everything too lol But yea I want this truck to be right. Hell I want it better than stock. nothing running bad angles no squeeks or rattles and tough enough to handle any abuse I throw at it. With enough clearance I'm not scraping the bottom on everything. I tend to abuse my vehicles so far only my dodge trucks have been able to survive more than a year I want this one to survive also.
 
Last edited:
OP
OP
87carl

87carl

Full Access Member
Joined
Feb 21, 2016
Posts
328
Reaction score
168
With brake hose bracket upside down abs wire can't clip to it without hitting the bolt and frame so drilled 2 holes in upper control arm mount to clip abs wire. note how close bracket is to the alignment cams but they do clear and have full range of motion IMG_20210318_162519316.jpg IMG_20210318_162526873.jpg IMG_20210318_162721251.jpg
 
OP
OP
87carl

87carl

Full Access Member
Joined
Feb 21, 2016
Posts
328
Reaction score
168
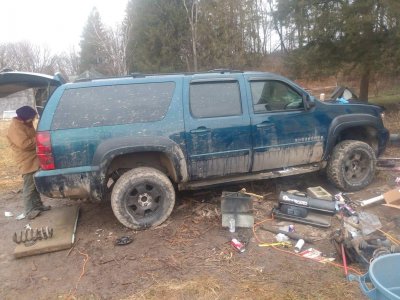
Passenger side front is done other than bleeding brakes and hooking up the sway bar. It will settle some when we start to drive but currently is sitting 4 inches higher than it used to in the rear and 6.5 inches higher in the front. Way more than it should be with a 3.5 lift in front and 2.5 in rear. Small amount might be in tires old fronts where bald and got moved to rear and rears which have alot of tread got moved to the front. Got 2 new ones that will go on the rear in couple days. Included stock hight picture from when I started this project for reference ignore the mess of tools and parts I gotta clean up before I move over to do the driver side front. center caps for rims will go on after I torque lug nuts.
received_213639870514336.jpeg
IMG_20210312_135231694.jpgreceived_3852837451441725.jpeg
 
OP
OP
87carl

87carl

Full Access Member
Joined
Feb 21, 2016
Posts
328
Reaction score
168
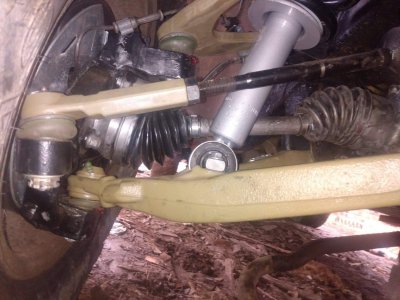
So far the only thing that bugs me is the cv angles but hopefully that will straighten out some when suspension settles
 

Bill 1960

Testing the Limits
Joined
Dec 17, 2020
Posts
1,480
Reaction score
2,857
Have you checked the CV for binding at full suspension droop and with the steering at full lock? If it’s not binding then you may have premature wear but at least it’s not gonna break the first time you hit a rock while turning. Visually it looks right on the edge of the CV articulation range, but photos can be tricky.
 

Forum statistics

Threads
129,221
Posts
1,812,375
Members
92,325
Latest member
Tom McCormick
Top