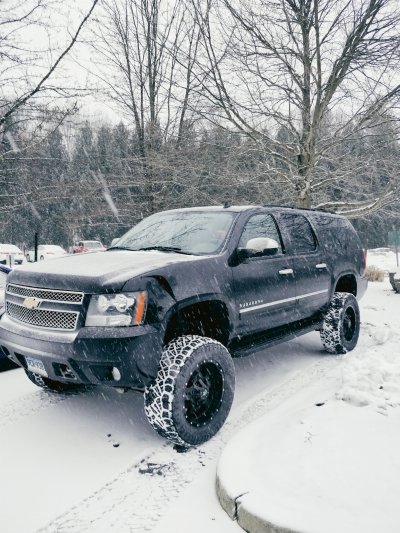
ArcticTwist's 2012 Suburban Build

Disclaimer: Links on this page pointing to Amazon, eBay and other sites may include affiliate code. If you click them and make a purchase, we may earn a small commission.

arctictwist

Member
Joined
Sep 18, 2018
Posts
57
Reaction score
34
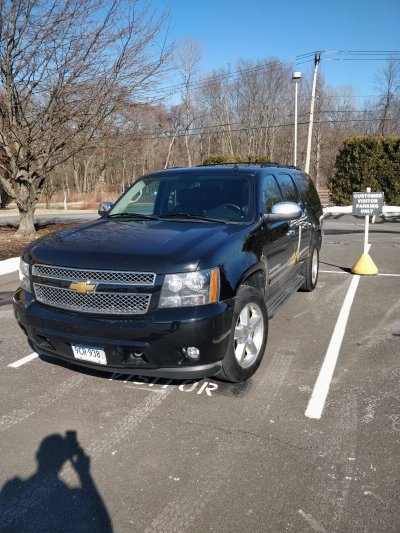
First, I picked up this suburban.
I7zQ54w.jpg

Its a 2012, LTZ with about 96k on it. I didnt actually want an LTZ because of the autoride (just another thing when lifting), chrome and wood grain. But i couldnt find an LT with captains chairs and the touch screen. (little did i know i would hate this stock unit and want to change it anyways) I traded in my 2016 ltz silverado all black edition for this because I honestly wasnt happy with it. Ive got a family now and the suv will be better for a lot of things, plus i can now afford to modify. I hate leaving my vehicles stock! So, on to the start of my build. First thing i did was husky mats front to back. No pictures, theyre just mats.

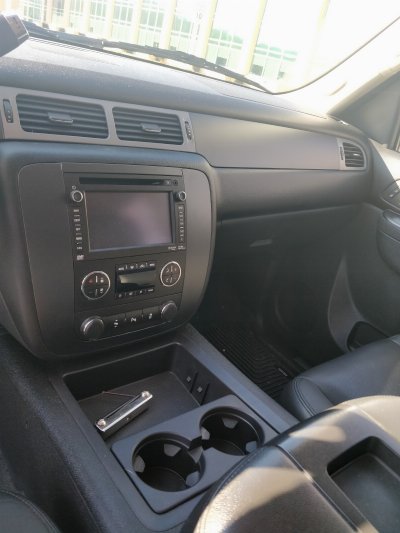
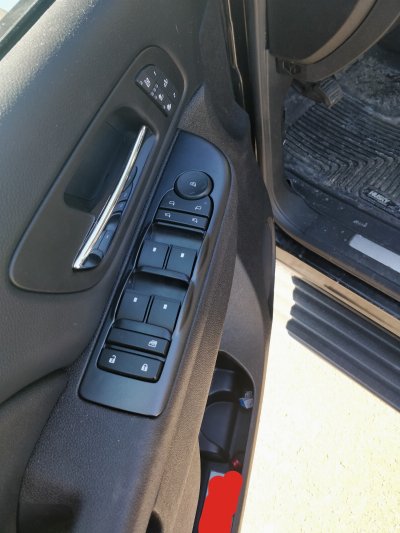
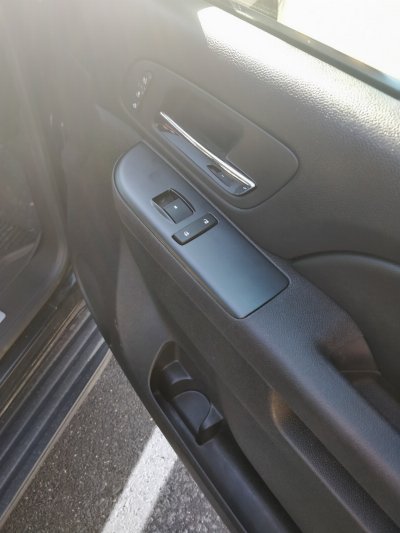
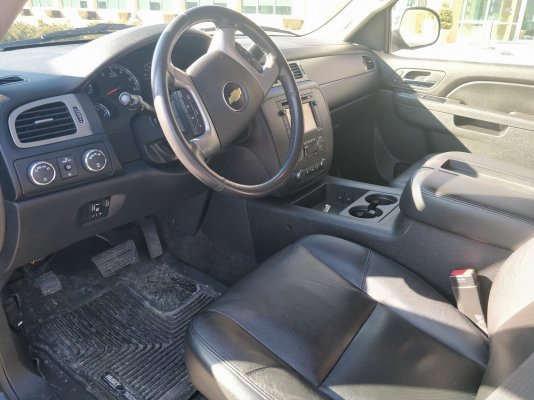
Next i had to deal with that wood grain.
XxvHYZ1.jpg
QAEty9o.jpg
lvfQFFm.jpg
7usHWdd.jpg

So i wrapped the dash and door trim with matte black metallic from vvivid. I ordered the LT black center console insert as well.

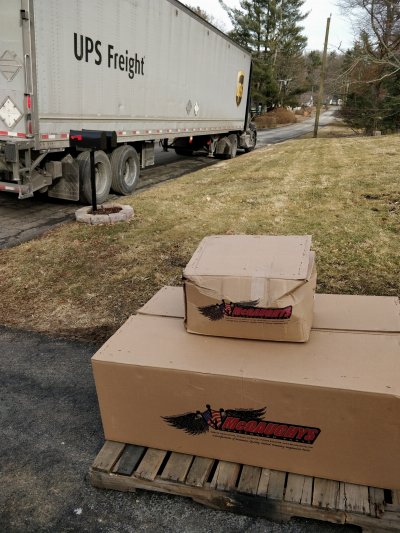
Ive got some more stuff in the works. Heres a little preview of some of that.
N712hJy.jpg
 

08HoeCD

Full Access Member
Joined
May 6, 2016
Posts
2,052
Reaction score
1,931
I like the woodgrain! Lol

Carry on, brother. :)
 

Fosscore

Full Access Member
Joined
Apr 16, 2014
Posts
10,472
Reaction score
18,075
From the pics it looks pretty good for 96k. Look forward to the suspension change pics.
 

Rocket Man

Mark
Supporting Member
Joined
Dec 25, 2014
Posts
25,966
Reaction score
50,662
Location
Oregon
Nice truck. How hard was it to wrap those pieces? I have a bagged 08 Silvy that has carbon fiber stick-on on all those pieces that I hate but either I have to replace all that trim which just goes back to wood (I believe) which is expensive or wrap them. The stick-on will not come off, damn high bond tape.
 

Miami-Dade

Staff member
Super Moderator
Supporting Member
Joined
Dec 8, 2016
Posts
3,672
Reaction score
4,339
Your 2012 Suburban LTZ looks perfect in&out!! Nice find!
 
OP
OP
arctictwist

arctictwist

Member
Joined
Sep 18, 2018
Posts
57
Reaction score
34
Nice truck. How hard was it to wrap those pieces? I have a bagged 08 Silvy that has carbon fiber stick-on on all those pieces that I hate but either I have to replace all that trim which just goes back to wood (I believe) which is expensive or wrap them. The stick-on will not come off, damn high bond tape.
Thanks man, the only hard part was the door switch panels. Getting those rounded humps right next to the switches was a PITA. Some of them ended up bubbling a little on my after a day or two. Its not bad so i havent redone it yet. Well see. All the dash parts were pretty easy to do. You dont Have to go back to wood if you replace. You can get all the brushed silver pieces from an LT.

From the pics it looks pretty good for 96k. Look forward to the suspension change pics.

Coming sooooon. (im installing it tomorrow!)

Your 2012 Suburban LTZ looks perfect in&out!! Nice find!

Thanks man, i was pretty particular in my search. This one was in pretty damn good shape, the only thing was the hood had that gm paint defect where the color coat was all cracked underneath the clear. Dealer painted it for me to get the sale!
 
OP
OP
arctictwist

arctictwist

Member
Joined
Sep 18, 2018
Posts
57
Reaction score
34
Welllll that project sucked. I dont think ill ever install a lift like that on my own again (i did have some help from my dad, but most of this was on me) But Here it is!
7-9' Mcguaghys lift, 20x9 0 offset RBP wheels, 35" nitto ridge grapplers, 1.5" spaces in the back the even out the track width.

hPQSHp2.jpg

some notes. I had lots of issues. First of all, Mcgaughys instructions are CRAP. So many details, important images missing. A lot of details are wrong all together. I was supplied bolts in the wrong sizes for certain things, or just not all for some things, the rear drop bracket (front end) holes didnt line up, there was no amount of prying in the world that was going to move that, they do not tell you you are going to have to remove the shocks in back entirely, which was a tricky deal, they also dont tell you how to deal with the short ass wires or air hose going to the shock. They only gave my new sensor rods for the back, so i gotta get the front sorted out still,..... oh yea the front compression struts didnt fit it well either, that took some doing. Everything in the kit instructions looks like you have easy access to everything, you dont. A lot of bolts were a ***** to get in place. ...... I think thats the end of my rant.

I had to do a lot of figuring on my own, or refer to other lift kit instructions. The rear control arm drop bracket confused the crap out of me, i found pro comps lift uses the same design and their instructions give you a nice shot of how it goes on. They also give you a way to deal with the wires and air hose, but i didnt see how i was getting that wire loom open very far so i just extended the wires, the air hose was easy, figured that out on my own.

Positives, The kit is well built. Everything is pretty thick and the welds all look good. The finish was nice, im sure it got messed up a bit with the install. Alignment went really well at the shop they said. The front kit does a nice job of angling the differential. I only drove about 35 today in 4wd but didnt notice any drive line vibrations.

Next up will be some chrome removal. I have the stuff, need the time.
 
OP
OP
arctictwist

arctictwist

Member
Joined
Sep 18, 2018
Posts
57
Reaction score
34
This forum has been a great help in this process so far! Thanks to everyone who helped out, and a special thanks to @01Konvict for answering a bunch of my questions, and his helpful posts throughout the forum that i found!
 

Forum statistics

Threads
129,243
Posts
1,812,758
Members
92,349
Latest member
Ihaveatahoetoo
Top