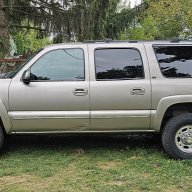
Revert back to OEM Z55 suspension, good or bad idea?

Disclaimer: Links on this page pointing to Amazon, eBay and other sites may include affiliate code. If you click them and make a purchase, we may earn a small commission.

LSCALADE

Full Access Member
Joined
May 6, 2025
Posts
227
Reaction score
604
You are just going to have to rotate the spring to fit it correctly on the mount, no big deal the bottom mount is just flat perch so the spring should not have an issue if its tweaked a few degrees.

On the mount itself there are reliefs for the back of the studs to fit so the rubber portion can lay flat against the top mount.
 
OP
OP
C

chutkin

Member
Joined
Dec 17, 2024
Posts
38
Reaction score
32
Hi guys,
Thanks for the help. I managed to assemble one of the shocks. It was not that hard.
Is there torque specification for the center nut on the shock?
I tighten it till it stopped but did not put much force since I need to keep strut stem from rotating by 9mm wrench.
Here are some pics:
20251116_164531.jpg


20251116_164545.jpg


Thanks for your help!
Ivo
 

Joseph Garcia

Elite Member
Supporting Member
Joined
Aug 2, 2018
Posts
10,522
Reaction score
15,270
Hi guys,
Thanks for the help. I managed to assemble one of the shocks. It was not that hard.
Is there torque specification for the center nut on the shock?
I tighten it till it stopped but did not put much force since I need to keep strut stem from rotating by 9mm wrench.
Here are some pics:
View attachment 472346

View attachment 472347

Thanks for your help!
Ivo
Glad to see that you got the strut broken down and re-assembled.

Just curious...... What did it cost you for the second set of spring compressors, and how much time did you spend with only the strut breakdown and strut re-assembly portion of the project?

I'm asking to see if it is worth it in the future for me to go your route (strut breakdown and strut re-assembly) doing the work on your own, versus having a local shop perform only the strut breakdown and strut re-assembly portion of the project. It cost me $50 to have my local shop perform the strut breakdown and strut re-assembly portion of the project.
 

SpareParts

Elite Member
Supporting Member
Joined
Sep 17, 2023
Posts
2,113
Reaction score
4,805
Location
North Idaho
It takes me about 1/2 hour to R&R the strut from the spring. A guy can do both sides from jacking it up to letting it down in under 2 hours.
4 compressors are overkill. 2 work just fine using that tool but 4 are added safety for sure.
If you are only planing on doing it once i would just pay the $100 and have them do both. The tool is right around $50
That tool has saved me money for sure. I have swapped struts at least 5 times in the last 8 or so months.
 

mikez71

Full Access Member
Joined
Mar 9, 2023
Posts
3,343
Reaction score
4,146
OP
OP
C

chutkin

Member
Joined
Dec 17, 2024
Posts
38
Reaction score
32
Thanks mikez71, useful info.

@ Joseph Garcia
It took me about 45 to 60 minutes to assemble it from new components. It could be done for less but I am doing it for the first time and did many measurements and trials. Spring compressors are about $45 here.

To get old shocks from the car took me about an hour per side.

It is also my hobby, so I am not counting on time and money here. May be I will never use this spring compressors again :)

Thanks for the help guys!

Ivo

 
OP
OP
C

chutkin

Member
Joined
Dec 17, 2024
Posts
38
Reaction score
32
Hi guys,

This project progressing but very very slow... hopefully in right direction :)

It turned to huge restoration.

I ended up renting four post lift in a workshop.

What I am doing so far:

1. Front Z55 suspension, including upper control arms. This was big PITA. Control arms bushings were so rusty that I have to cut arms and bolts to remove them. I found interesting piece of hardware plugged in front shock connectors:

20260121_072639.jpg


Hera are some pics of control arms hell:

20260130_201553.jpg


20260130_201558.jpg


20260130_213747.jpg


2. Sway bar bushings and links, front and back. It was also hard to remove them. Also made some repairs on front sway bar mounts:

Before:

20260111_140452.jpg


20260111_140607.jpg


After:

20260129_192351.jpg


20260129_192400.jpg


3. Steering rack assembly and tie rod ends. The old one was leaking a lot.

4. Front differential mounts. I tried to replace only the bushings but they smashed when pressing them, so I order new mounts.

5. Front and back calipers and support rebuild.

To be continued :)
 
OP
OP
C

chutkin

Member
Joined
Dec 17, 2024
Posts
38
Reaction score
32
Not to open another thread...

Since I am doing a lot of staff here, cylinder heads, oil pan gasket, timing chain etc., I thought, I will be good idea to change motor mounts and transmission mount. Looks never been changed before (19 years and 180K miles).

I have only option to buy from Rockauto and they offer sets of motor and transmission mount or individual parts:

First option:


Cannot buy Anchor because of some expert restrictions.

Second option:

GM OEM:


The price difference is significant here.

Does anyone has any experience with this DAE brand? Good/bad/terrible?

Thanks for your help,
Ivo
 
OP
OP
C

chutkin

Member
Joined
Dec 17, 2024
Posts
38
Reaction score
32
To add to the motor mounts topic, I see passenger side of the engine is very close to the firewall. Even some valve cover bolt tear the insulation.
Here are pictures of what I mean:

20260131_143836.jpg
20260131_143846.jpg
 
OP
OP
C

chutkin

Member
Joined
Dec 17, 2024
Posts
38
Reaction score
32
Hi all,

Front end is almost done. See picture of the passenger side :)

20260217_213058.jpg


20260217_213105.jpg


I have trouble with brake lines. I was able to loosen hoses but flare nut is "welded" to brake line. I think it is covered with some type of plastic paint or so. If I apply some force the line starts to bent but the flare nut does not move.

20260217_213118.jpg


Is there some safe way to free up these nuts?

Thanks for your help!
Ivo
 

mikez71

Full Access Member
Joined
Mar 9, 2023
Posts
3,343
Reaction score
4,146
I would wire brush the threads and try penetrating oil.. (espcially since you say there is a film, maybe rust protection?)

The line can probably bend a several degrees without damage.. It may stay stuck to the nut until it's loosened..

Put a vice grip under the threads of your old hose fitting (Don't smoosh the threaded section), and twist opposite direction of nut simultaneously?
If you can get two wrenches next to each other and squeeze them together, it's more solid and effective than leveraging with one wrench..

And you really must need motor mounts with your pass. valve cover hitting the firewall!
I'd say any mount is better than what's in there.. I know nobody wants to do it twice, but it's not that bad if worst case you need to replace again..
 
Last edited:
OP
OP
C

chutkin

Member
Joined
Dec 17, 2024
Posts
38
Reaction score
32
Hi Mike,

Sorry for not explaining it clear.

The problem is between nut and black pipe. I was able to remove hose by turning it wile the nut is stuck to the black pipe.

The strangest thing is that it is not that rusty...

Thanks for the help!
Ivo
 

SpareParts

Elite Member
Supporting Member
Joined
Sep 17, 2023
Posts
2,113
Reaction score
4,805
Location
North Idaho
I'm not positive but it sure looks like your upper control arm adjusters are on upside down.
 

mikez71

Full Access Member
Joined
Mar 9, 2023
Posts
3,343
Reaction score
4,146
I'm not positive but it sure looks like your upper control arm adjusters are on upside down.
I agree, and it looks like his original ones were that direction..
Looks like it should not matter either? (Unless adjustment range is impacted somehow?)

I think it looks better his way!
 
Last edited:

mikez71

Full Access Member
Joined
Mar 9, 2023
Posts
3,343
Reaction score
4,146
Hi Mike,

Sorry for not explaining it clear.

The problem is between nut and black pipe. I was able to remove hose by turning it wile the nut is stuck to the black pipe.

The strangest thing is that it is not that rusty...

Thanks for the help!
Ivo

Ah OK.. Is that paint on any other connection?

Maybe try solvent/thinner to see if you can dissolve the paint substance?

Might plan for a new metal line just in case...
 
OP
OP
C

chutkin

Member
Joined
Dec 17, 2024
Posts
38
Reaction score
32
Hi guys,

I put adjusters in the correct way.Thanks for spotting it!

20260218_205427.jpg


20260218_205441.jpg


I got very good at that... :) I can do it for less than 30 minutes per side :)

About brake line nuts... the pipes are coated with some plastic or paint. I have to burn about 1 cm of it and nut got free.

Next is engine in job :rolleyes:

20260218_211319.jpg
 

adventurenali92

Full Access Member
Joined
Feb 16, 2015
Posts
7,737
Reaction score
9,210
Location
Big Bear Lake, ca
Nice work being done so far!! Really cool to hear about these awesome rigs living good lives abroad! Share some photos of the whole truck when ya get a chance!
 

petethepug

Michael
Joined
May 4, 2016
Posts
3,790
Reaction score
4,359
Location
SoCal
Nice work Ivo. Fun BIG American truck to have in Europe. Seat heaters & dual ac/heating for winter makes it a limo. Did you get the heated steering wheel too?
 
OP
OP
C

chutkin

Member
Joined
Dec 17, 2024
Posts
38
Reaction score
32
Nice work Ivo. Fun BIG American truck to have in Europe. Seat heaters & dual ac/heating for winter makes it a limo. Did you get the heated steering wheel too?
Yes, it is Fun :)

Unfortunately, there is no heated steering wheel. I was about to ask, if I get one from somewhere, is it "bolt on" or additional wires/fuses/relays required?

Also, gas here f... expensive. I may convert it to LPG in the future. My daily driver is LPG converted 2004 Monte Carlo SS Supercharged and it makes fuel expenses reasonable.

BR,
Ivo
 

Forum statistics

Threads
138,046
Posts
1,997,810
Members
102,984
Latest member
1948Buickroadie
Back
Top