My 2014 SSV, Overlanding/Ham Radio rig project.

Disclaimer: Links on this page pointing to Amazon, eBay and other sites may include affiliate code. If you click them and make a purchase, we may earn a small commission.

tamitall

TYF Newbie
Joined
Jul 27, 2021
Posts
26
Reaction score
44
Location
Ann Arbor, MI
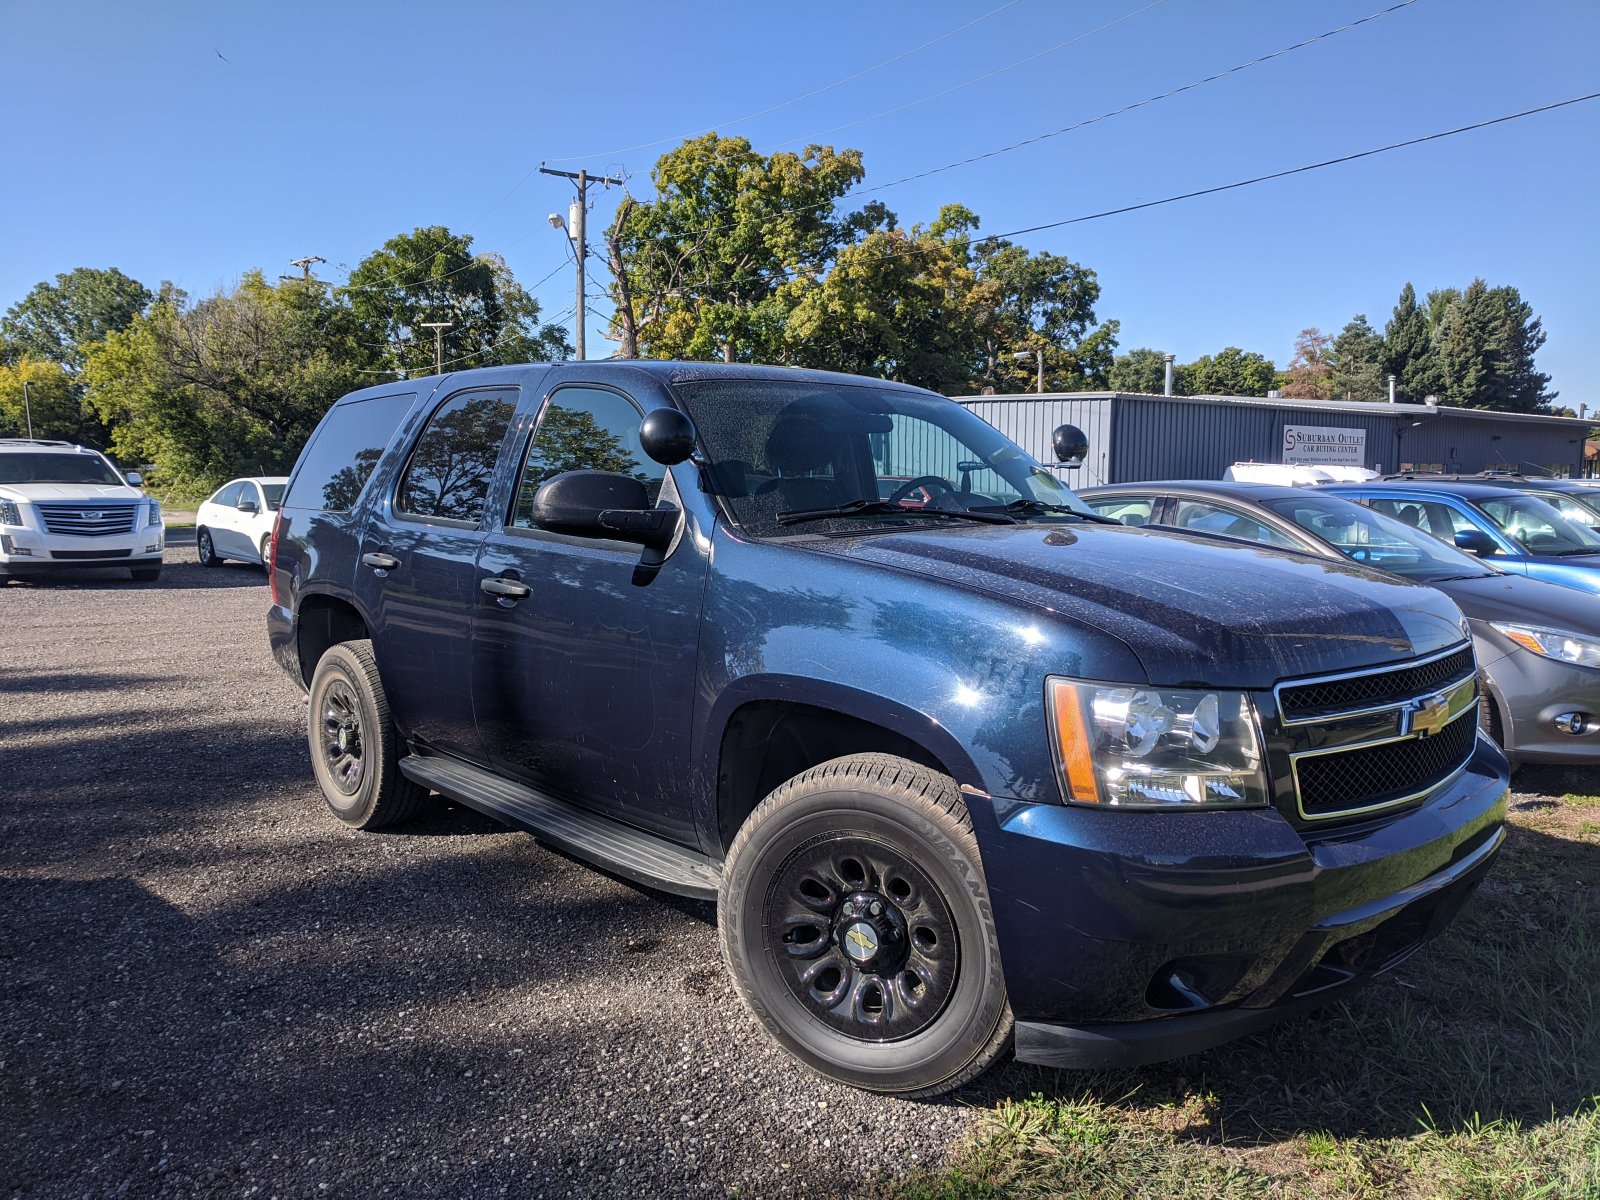
We picked it up fall 2020 from a dealership who had purchased it at auction. it came with no center console and heavily worn cloth seats in front, and leather(ette?) seats in the rear that looked unused.

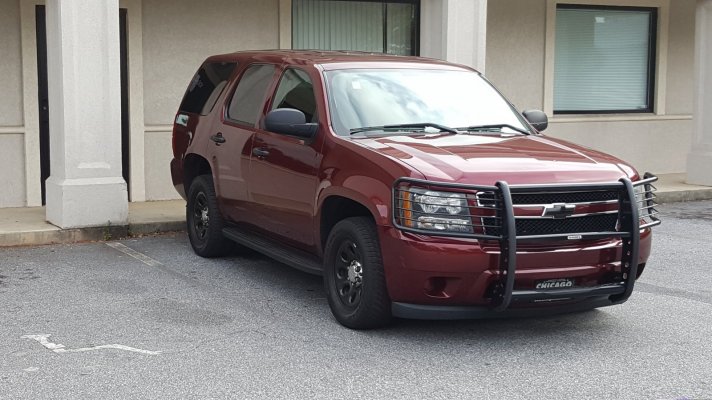
Here it is the day (before) we got it.
IMG_20200920_103449.jpeg


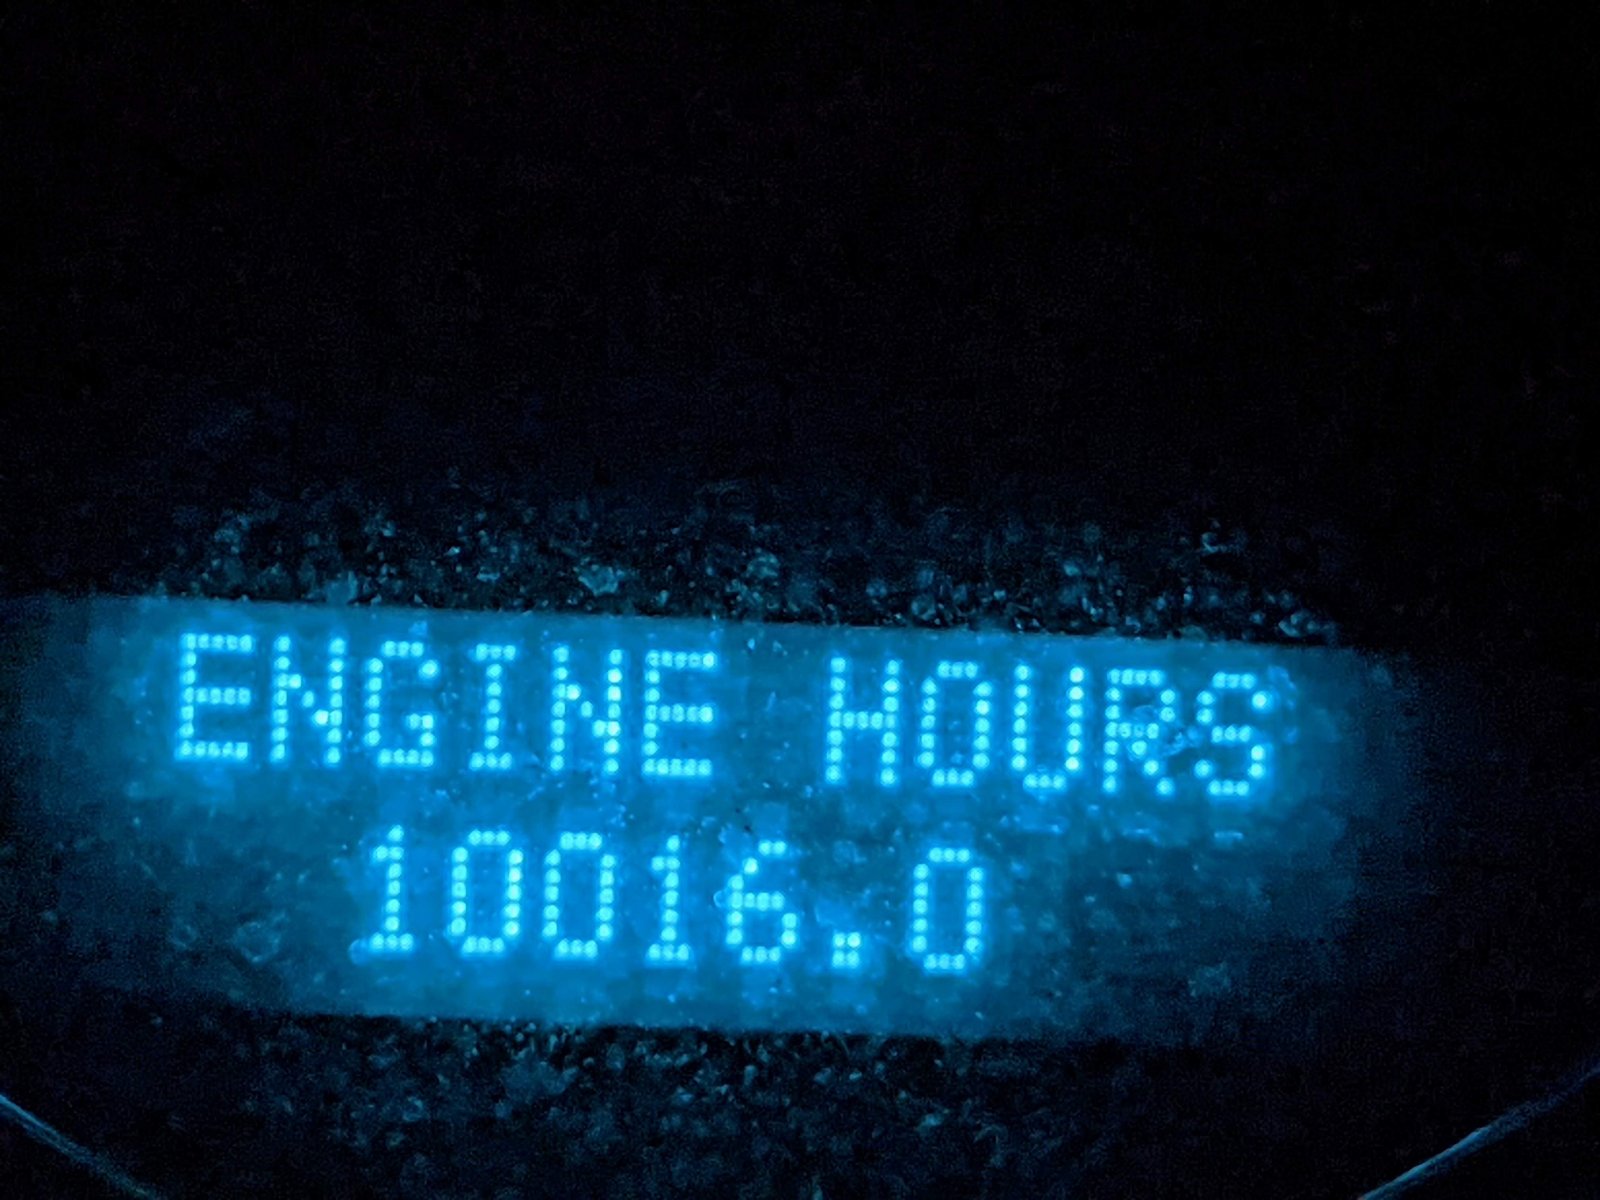
It only had 62k on it when we picked it up. A little investigation showed:
PXL_20201218_011152045.jpeg


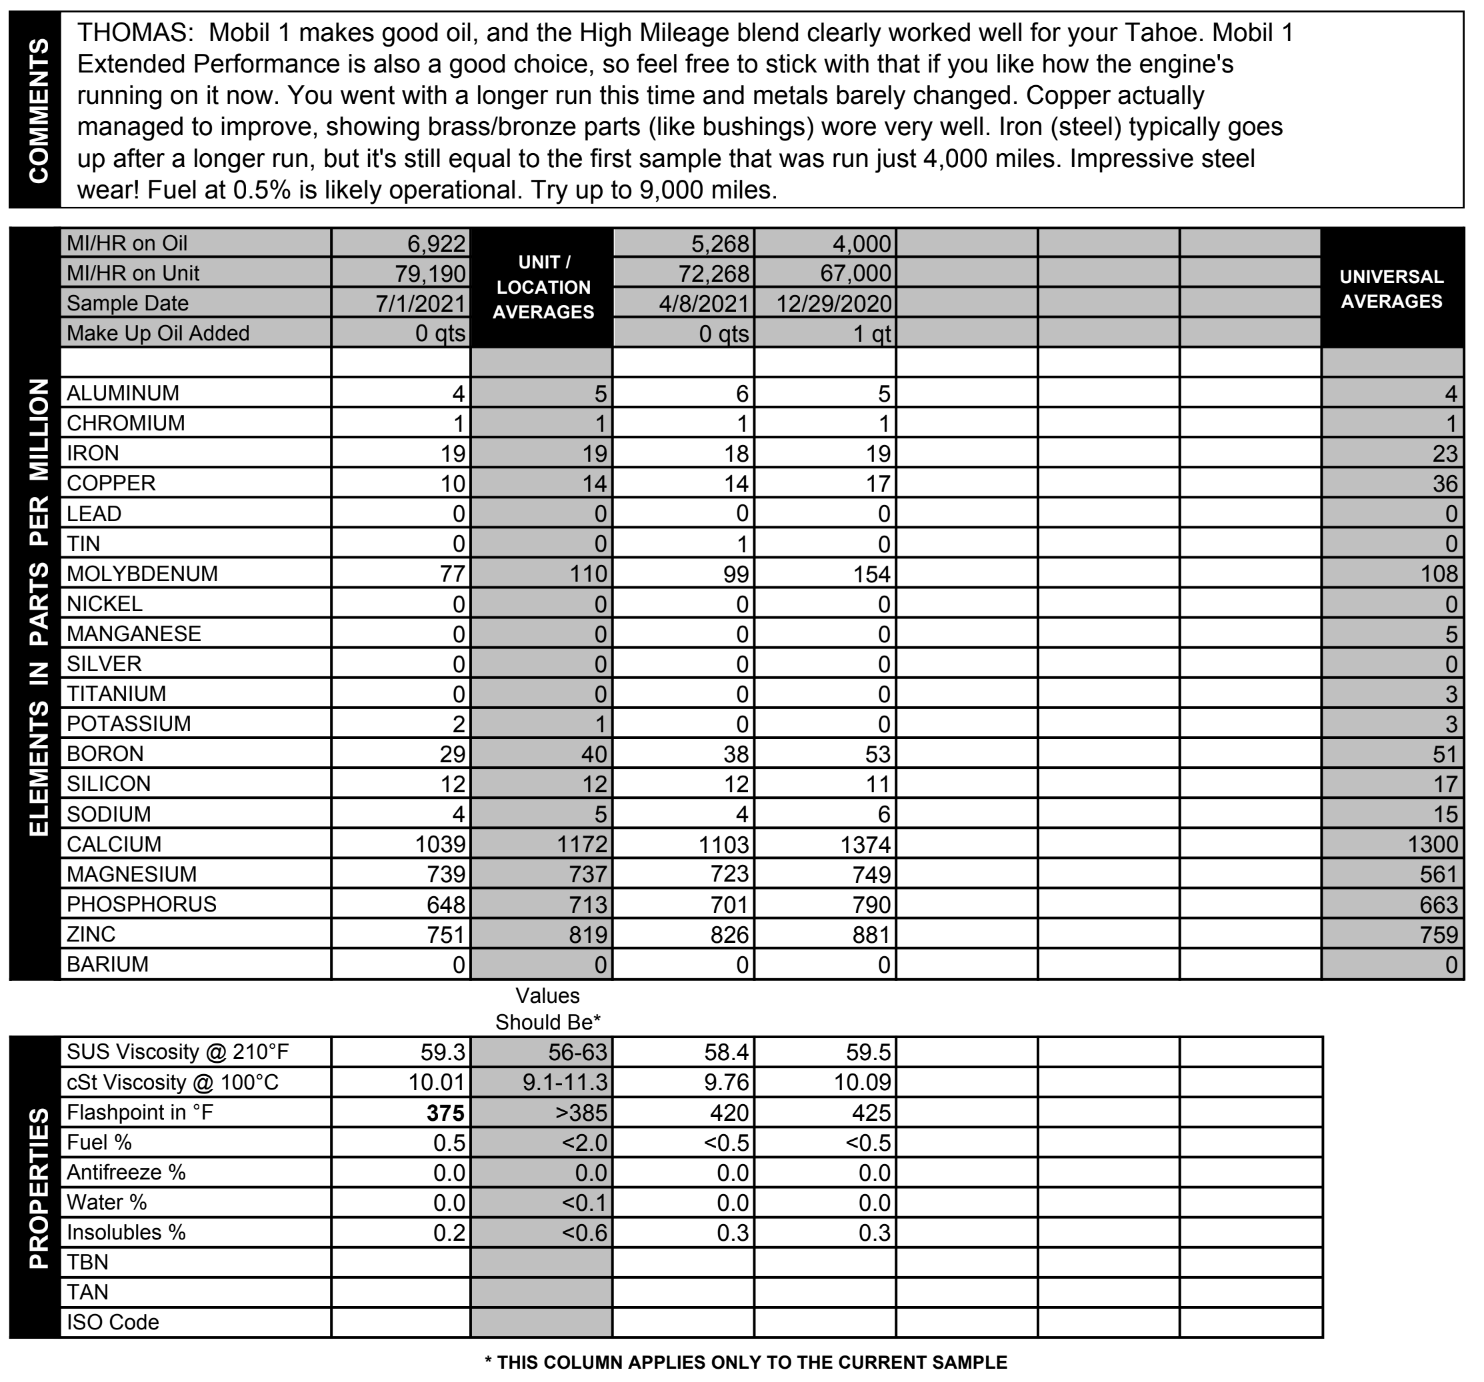
Wow! We had no problems for about 4k, then had the dreaded low oil error. We swapped the oil pressure sender, and filter, with no change. Figured we were in for a new engine, but decided to try an oil change first. I picked Mobil1 High Mileage and the low oil pressure problems have gone away. I've had the oil analyzed by Blackstone Labs and I'm very happy with how the Tahoe is performing. Here's a snap of the most recent oil analysis.
Screen Shot 2021-07-29 at 16.57.25.png


After the oil pressure fiasco, we moved forward with building out the SSV for our ham radio hobby. We do Parks on the Air. We bought the Tahoe to take us to places our previous vehicle wouldn't safely go.

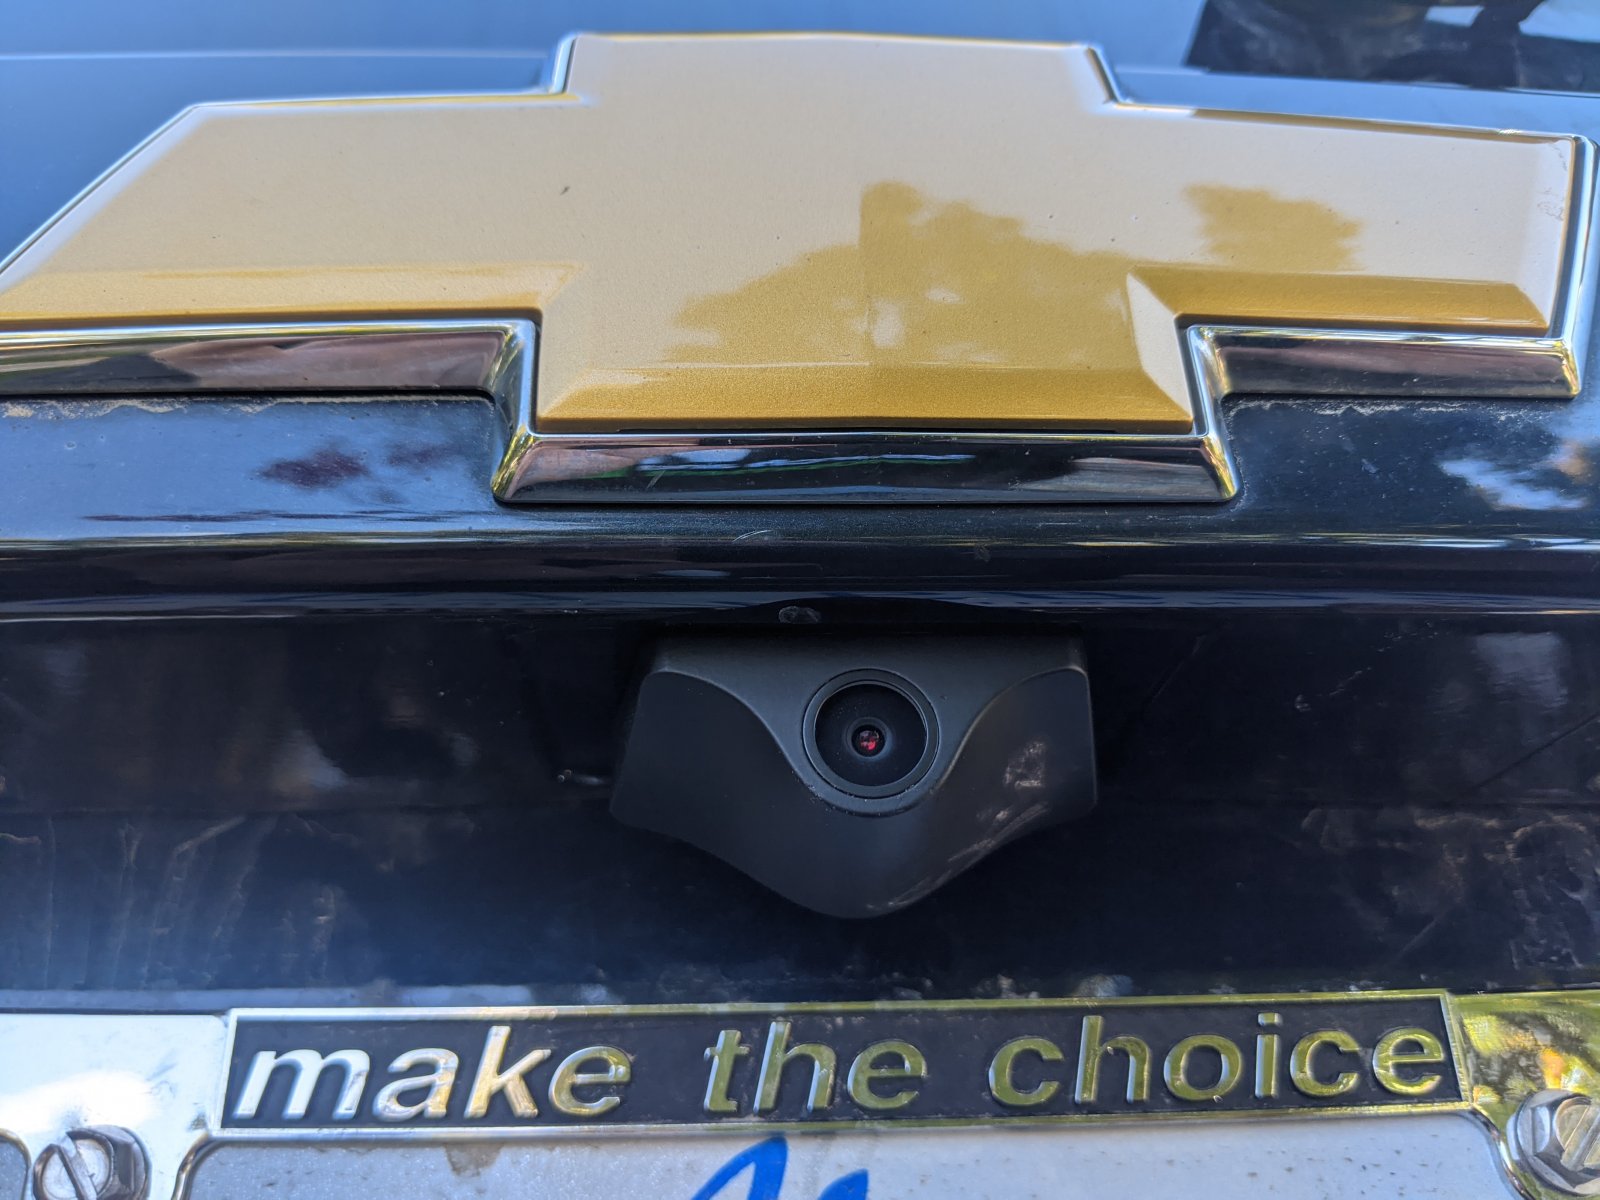
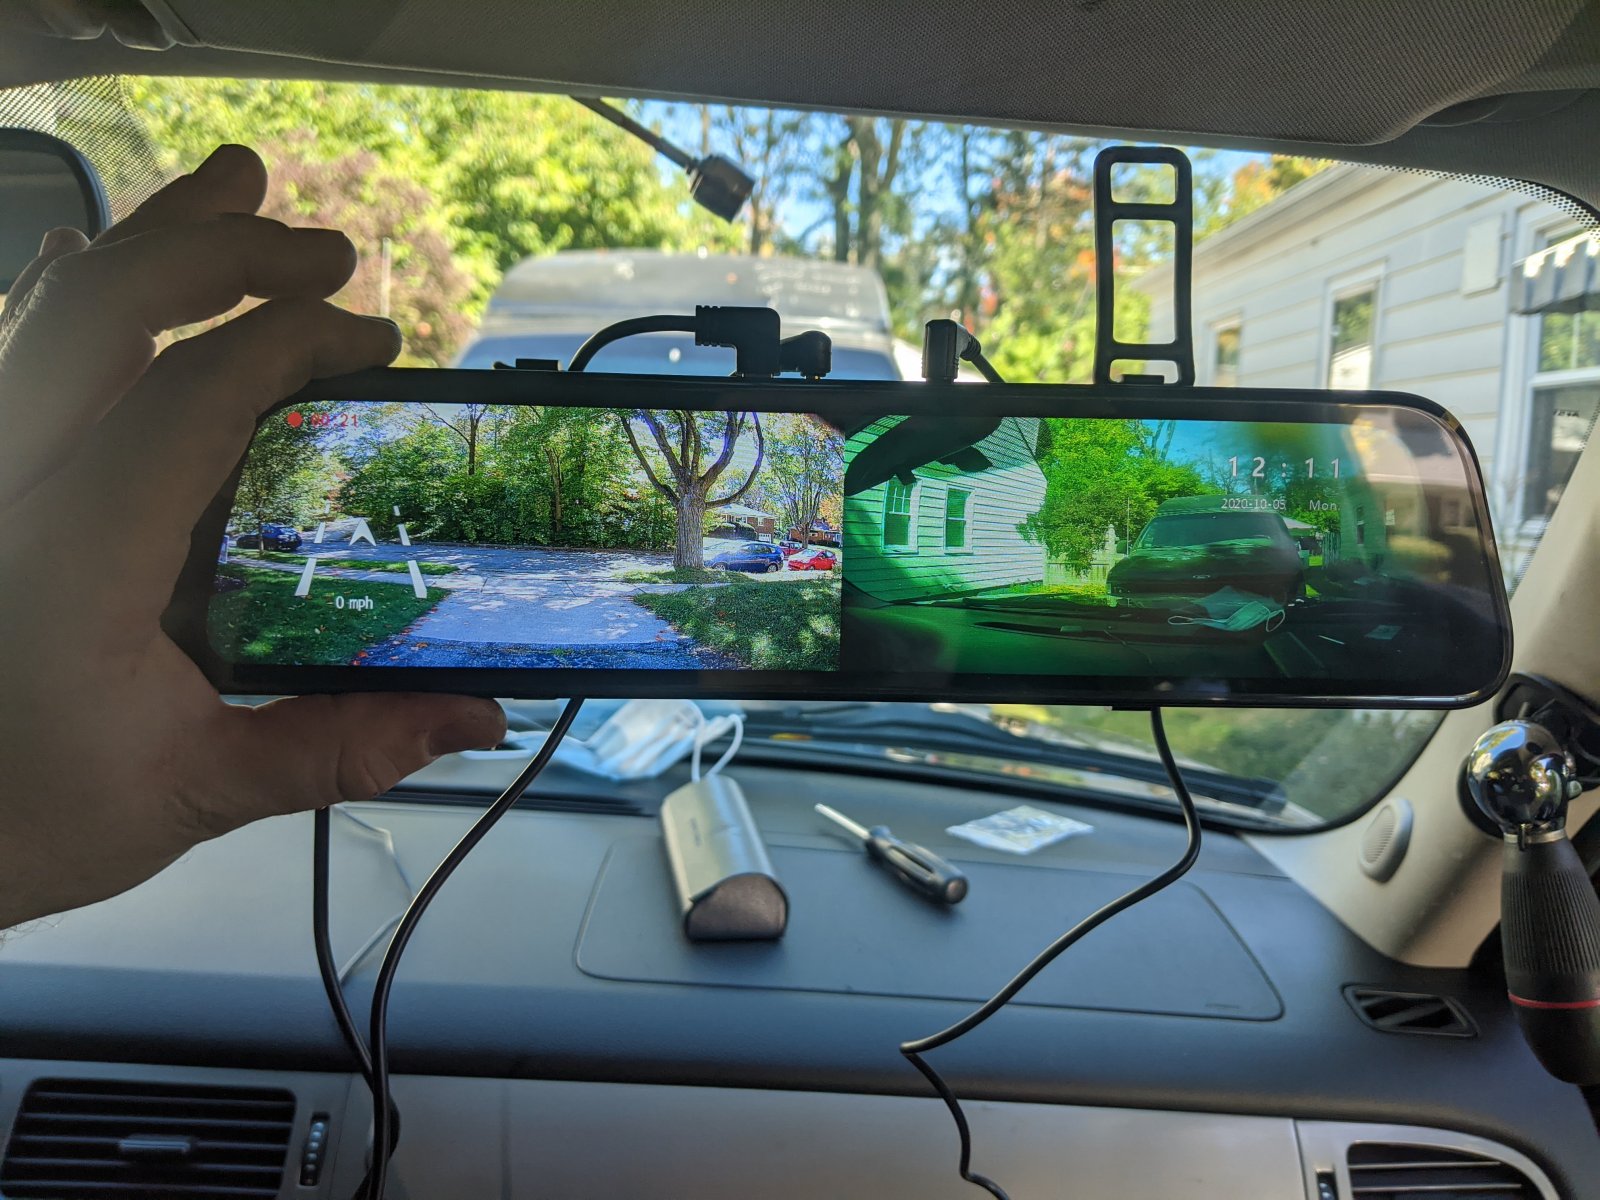
Installed a backup/dash cam.
PXL_20201005_161142478.jpeg


PXL_20201005_161309330.jpeg
 
OP
OP
tamitall

tamitall

TYF Newbie
Joined
Jul 27, 2021
Posts
26
Reaction score
44
Location
Ann Arbor, MI
We had the coolant tees break. Thankfully it happened while parked, not while driving. I've replaced them with billet tees, so I shouldn't have problems again.
PXL_20210411_154131792.jpeg


After getting some of the necessary maintenance out of the way, I started on the ham radio install.

PXL_20201103_191144313.jpeg


PXL_20201101_024046537.jpeg


After we got the basic radio install done, we started doing some camping and traveling in the Tahoe.

My first use of the 4x4. That mud pit was a little bit deeper than I thought!

PXL_20201106_215106473.jpeg


We did some camping, and exploring.

PXL_20201108_160738687.jpeg
 
OP
OP
tamitall

tamitall

TYF Newbie
Joined
Jul 27, 2021
Posts
26
Reaction score
44
Location
Ann Arbor, MI
More exploring.

PXL_20201121_173759819.jpeg


PXL_20201122_220441895.jpeg


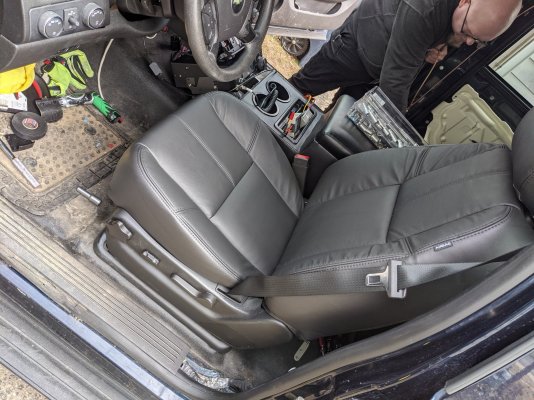
After a couple trips sitting on the smashed foam in the driver seat, we decided that an upgrade was necessary. We decided on The Seat Shops foam, which is sold as denser than stock foam. Some foam mods were necessary though.
PXL_20210312_174643887.jpeg


After the foam mods, just installing the leather seat upholstery and reinstalling the seats in the Tahoe. While we had the seats out, I replaced the seatbelts too.

PXL_20210313_191132635.jpeg


I'm real happy with how the seats feel now.


PXL_20210323_175531225.jpeg
 
OP
OP
tamitall

tamitall

TYF Newbie
Joined
Jul 27, 2021
Posts
26
Reaction score
44
Location
Ann Arbor, MI
More exploring!

PXL_20210401_001344468.jpeg


PXL_20210424_182920627.jpeg


During this trip, I found that the front receiver mounted antenna is the low point on approach. Thankfully no damage done.

PXL_20210424_155301114.jpeg


This trip convinced me we needed more aggressive tires. The street tires worked shockingly well, but I felt it was time for a change.

PXL_20210418_232855257.jpeg


Enter the BFG KO2 tires. These tires are great!!


PXL_20210504_210331263.MP.jpg
 
OP
OP
tamitall

tamitall

TYF Newbie
Joined
Jul 27, 2021
Posts
26
Reaction score
44
Location
Ann Arbor, MI
The stereo in our SSV had been modified by the factory for police use. I fixed it, and replaced the moisture damaged speakers with fresh speakers, with silicon baffles to protect them from water in the door. This job reminded me why most people who do stereo installs are young. Also threw some sound deadening material in the doors. Makes a nice difference in road noise. Please don't ask how much work it was to install those speakers. They didn't really fit, but... I got it to work.

PXL_20210527_212527309.jpeg


PPV/SSV wiring is.... Unique. The rear speakers were connected to the "front" wires, and the front wires were open. I fixed up the wiring, and got stereo working properly.

PXL_20210529_183000377.MP.jpg


Time for a new head unit! The IC shortage of 2021 made buying a head unit an adventure. I managed to find this one, for a decent price, and it ticked many of my desires. No CD/DVD player, bluetooth phone and music, SXM compatibility. The fact that it sounds pretty good is a nice benefit, and wasn't too expensive.

PXL_20210530_004826876.jpeg


Now with entertainment and AT tires, more exploring!


PXL_20210509_002413432.jpeg
PXL_20210519_205544480.jpeg
 
OP
OP
tamitall

tamitall

TYF Newbie
Joined
Jul 27, 2021
Posts
26
Reaction score
44
Location
Ann Arbor, MI
Next few mods:
Exterior SXM antenna with higher gain than the stock one.
LED headlights.
LED taillights.
Upgraded Alternator.
Front brush guard?
 
OP
OP
tamitall

tamitall

TYF Newbie
Joined
Jul 27, 2021
Posts
26
Reaction score
44
Location
Ann Arbor, MI
I got the Draw-Tite #65052. Since I wasn't planning on having a lot of weight on it, it's way overkill. Does a nice job of holding my antenna up though.

Also, had to remove the air dam, and coax the bumper to bend enough to let the receiver ride level. A heat gun helped move the bumper out of the way.
 
Last edited:

Sparksalot

Elite Member
Joined
Sep 20, 2020
Posts
6,775
Reaction score
20,587
Location
Bastrop County, Texas
I got the Draw-Tite #65052. Since I wasn't planning on having a lot of weight on it, it's way overkill. Does a nice job of holding my antenna up though.

Also, had to remove the air dam, and coax the bumper to bend enough to let the receiver ride level. A heat gun helped move the bumper out of the way.
I hear ya on the approach angle. This was before I added the pushbar.

EF2572DD-5004-4E16-BDD6-6413C98628E2.jpeg
 

LiLRedWagon

TYF Newbie
Joined
Oct 21, 2016
Posts
25
Reaction score
36
Just saw this post. Like how you mounted the rig. Interesting how you mounted that screwdriver out front vs the back. Do you operate HF mobile with the capacity hat on or do you remove it? Do you do any CW? Front mount could be challenging with this push bar on. Enjoyed the pix
 

Attachments

  • Right Front Go Rhino.jpg
    Right Front Go Rhino.jpg
    311.2 KB · Views: 46
OP
OP
tamitall

tamitall

TYF Newbie
Joined
Jul 27, 2021
Posts
26
Reaction score
44
Location
Ann Arbor, MI
Just saw this post. Like how you mounted the rig. Interesting how you mounted that screwdriver out front vs the back. Do you operate HF mobile with the capacity hat on or do you remove it? Do you do any CW? Front mount could be challenging with this push bar on. Enjoyed the pix
Thanks for the kind words! I have operated mobile with the capacity hat on, though I no longer leave it on most of the time. Most of my operating is stationary from parks. We participate in Parks on the Air. I am decent at CW, but rarely call CQ. Mostly return others CQ, or operate in contests. We run mostly digital out of the truck, though a couple weeks ago I operated sideband for the Wisconsin Parks on the Air event.

I'm thinking I'd weld a tab onto a push bar setup to mount the screwdriver on. I know it would either need to be re-powder coated, or watched carefully for corrosion. It would get the feedpoint a little higher, and thus reduce ground losses a bit. I'd also get some of my front approach angle back.

Current projects include a 500w mobile amp for the rig.

73 de w8tam


PXL_20210918_214156033.jpeg
 

stocksj

Member
Joined
Nov 29, 2021
Posts
66
Reaction score
72
Location
Brandon, FL
Thanks for the kind words! I have operated mobile with the capacity hat on, though I no longer leave it on most of the time. Most of my operating is stationary from parks. We participate in Parks on the Air. I am decent at CW, but rarely call CQ. Mostly return others CQ, or operate in contests. We run mostly digital out of the truck, though a couple weeks ago I operated sideband for the Wisconsin Parks on the Air event.

I'm thinking I'd weld a tab onto a push bar setup to mount the screwdriver on. I know it would either need to be re-powder coated, or watched carefully for corrosion. It would get the feedpoint a little higher, and thus reduce ground losses a bit. I'd also get some of my front approach angle back.

Current projects include a 500w mobile amp for the rig.

73 de w8tam


View attachment 351467
Very nice, one of my reasons for getting the 07 Suburban LS is to server as a mobile ham station and haul my astronomy gear. I'll need to replace the front jump seat a find a console to mount my Yaesu FT-857d and ATAS-120. any recommendations for a replacement console that would well for ham radios? also, are you pulling your power from the dual battery setup?
 

Sparksalot

Elite Member
Joined
Sep 20, 2020
Posts
6,775
Reaction score
20,587
Location
Bastrop County, Texas
Very nice, one of my reasons for getting the 07 Suburban LS is to server as a mobile ham station and haul my astronomy gear. I'll need to replace the front jump seat a find a console to mount my Yaesu FT-857d and ATAS-120. any recommendations for a replacement console that would well for ham radios? also, are you pulling your power from the dual battery setup?
I bought a Jotto floor plate, then built a console.

1616C3B5-0EAB-4E8A-B09D-C3A4E00636E6.jpeg
6D7FBD94-6127-44C5-B754-590D5D48B01D.jpeg
BAC5923C-B91E-4297-A2E3-4F03C4AB6DD1.jpeg
 
OP
OP
tamitall

tamitall

TYF Newbie
Joined
Jul 27, 2021
Posts
26
Reaction score
44
Location
Ann Arbor, MI
Very nice, one of my reasons for getting the 07 Suburban LS is to server as a mobile ham station and haul my astronomy gear. I'll need to replace the front jump seat a find a console to mount my Yaesu FT-857d and ATAS-120. any recommendations for a replacement console that would well for ham radios? also, are you pulling your power from the dual battery setup?


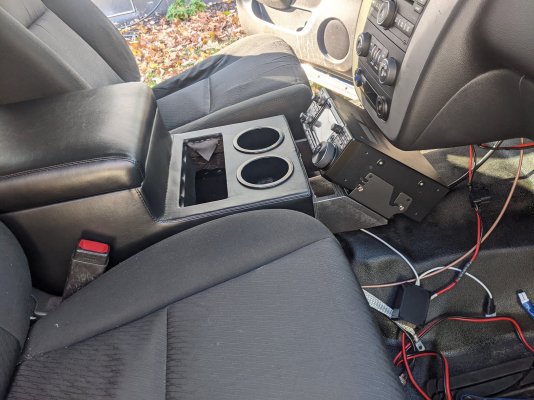
That's the center console I used. I built a little wood bracket that I bolted to the front of the console to hold the ic-7300 at a good angle.

Here's a photo while I was working on the seat install. Shows a decent profile of the Nenno console, and the bracket I built for the IC-7300.

I put in a battery isolator, and installed a second battery. My truck came with only 1 battery. After installing the isolator, I moved the 3 50amp circuits provided in the SSV onto the second battery. I call it the "house" battery, and try to run as much of the accessories off it as I can. That leaves the starting battery untouched by the radios.

I have a voltage booster with a PTT port on it hidden under the console. Boosts the battery voltage up to 14v for transmit, and doesn't cause any RF interference while receiving.

Currently running on the stock 160amp alternator, but I have a Mechman 370amp alternator to go in at some point.

73 de w8tam
 

Attachments

  • PXL_20210323_175537675.jpg
    PXL_20210323_175537675.jpg
    441.8 KB · Views: 35
  • PXL_20201103_191144313.jpg
    PXL_20201103_191144313.jpg
    400.2 KB · Views: 37

Amp653

Member
Joined
Dec 28, 2021
Posts
69
Reaction score
52
Did you buy the leather seat covers from seat shoppe as well when you updated them? They look amazing
 

Forum statistics

Threads
138,096
Posts
1,998,979
Members
103,022
Latest member
scottd

Latest posts

Back
Top