"While I'm in there" pickup tube hoobla

Disclaimer: Links on this page pointing to Amazon, eBay and other sites may include affiliate code. If you click them and make a purchase, we may earn a small commission.

iamdub

Full Access Member
Joined
Apr 23, 2016
Posts
20,750
Reaction score
44,585
Location
Li'l Weezyana
Sweet thanks


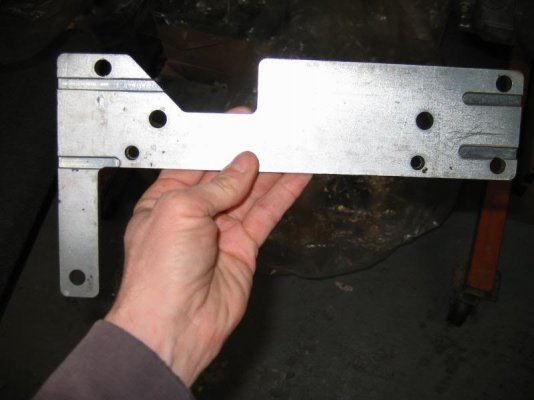
And what about the gasket alignment? Any alternatives to that tool? I tried to find if anyone was 3d printing them for one time use or something and didn't have any luck. It's to make sure the front cover is flush with the bottom of the pan and 'droop' the gasket by a measured amount.

Cheapest I could find the thing for is a buck 15


Looks like this
img-5332-1505227878-tbn.jpg

img-5351-1505227960-tbn.jpg


If I wanted to make sure two surfaces were flush with each other, I'd simply use a straightedge.

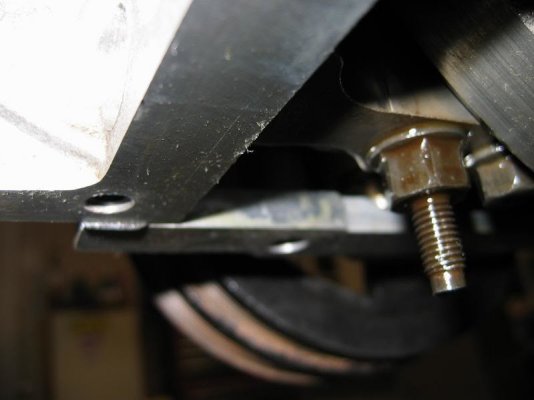
The idea is that the cover needs to be at an exact position so that the seal is centered on the crankshaft and so that the bottom of it is on the same plane as the oil pan. When the engine is being assembled at a factory, it's easy to use two separate purpose-built tools to achieve this, regardless of the high cost. Basically, one tool sets the vertical position (the "Y" axis) and the other sets the horizontal position (the "X" axis). What you will end up with, and this is the critical factor, is the seal will be centered around the crankshaft. So, if you used one tool that focused on this point, you'll get the hole in the cover in the correct location. The problem is that the cover can be rotated (clocked) slightly one way or the other as it can rotate around this centered position. This can widen the gap at the bottom where the cover meets the oil pan on one side and tighten it on the other. So, you want it even. The blessing is that this isn't nearly as critical as the crank seal alignment. The other point, as you mentioned, is the gasket. Part of it's sealing is at the very bottom, on a plane adjacent to the block and cover surfaces. Simply enough, you want only the rubber (nitrile, silicone, whatever it is) part of the gasket revealed at that point and none of the metal frame of the gasket protruding. Honestly, you can achieve this by sight and feel. What most do is to make everything flush- bottom of block, bottom of cover and bottom of gasket, then pack in a dab of RTV sealant to fill in the slight void so that it will be sealed when the oil pan is torqued into position. Basically, what you're doing is "extending" the rubber sealing part at the bottom of the gasket. Personally, I think this method is better since it's easier, doesn't require an expensive tool and the RTV can be squished to fill in any microscopic voids. Using RTV on an assembly line doesn't happen because there's no consistent control of the application throughout hundreds of thousands of engines, let alone the cure time required of the RTV. So they design a special gasket and special tools to ensure consistent assembly standards.


So, use the $40 tool to get the cover centered radially, use a straightedge to get the bottom surfaces flush, slip the gasket down so that the rubber part protrudes a little if you want, finger-tighten everything, dab in some RTV, torque everything down and get 'er back together.
 
Last edited:

Ilikemtb999

Full Access Member
Joined
Aug 27, 2018
Posts
825
Reaction score
795
Location
Denver
You can use the damper to center the front cover. Loosely install the cover and then install the damper.
 

bottomline2000

Full Access Member
Joined
Oct 21, 2009
Posts
1,722
Reaction score
987
Location
Dallas, TX
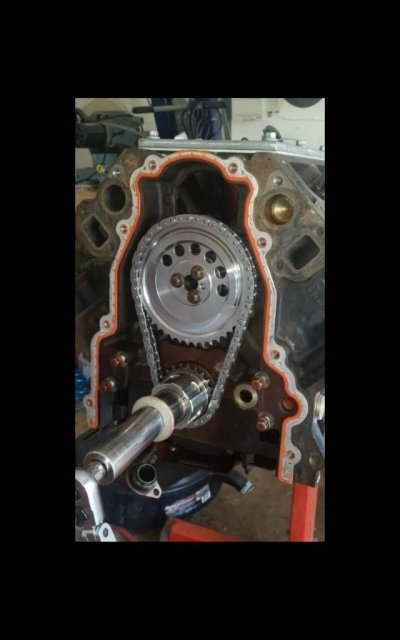
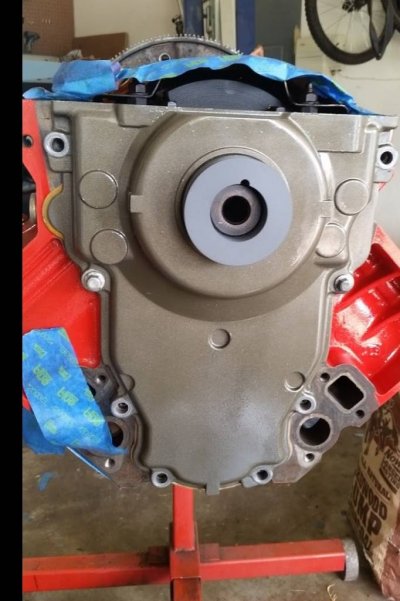
There are no plastic tensioners in the timing set. At least not in my engine. I run a billet timing gear, but I've not heard of anyone having problems with the stock chain. I did an aftermarket cam hence the timing set upgrade. I used the sac city alignment kit to center the front cover..they have 2 kinds for the front plate..I prefer the one that works with the bare front plate and u can use it to install the front seal properly. .a straight edge or the oil pan itself will keep the front plate level.

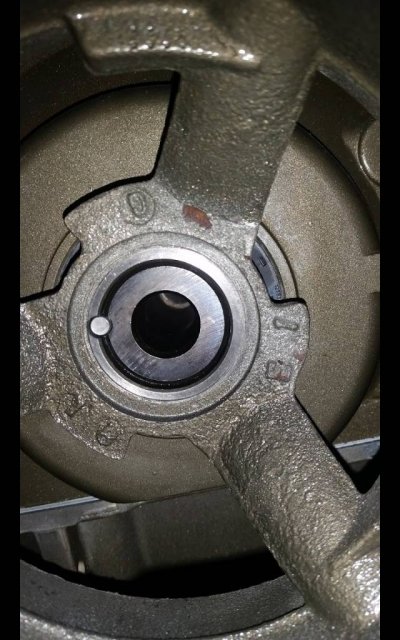
The crank bolt is one time use and I suggest you get a crank balance install kit. It's like a threaded rod that threads deep into the crank and them presses the pulley on...u don't want to strip the crank threads..the crank is not keyed, but I keyed mime for future plans. ARP makes a reusable crank bolt, but it's not cheap..and not needed for your purpose..

make sure u used the right color oring for the pick up.i believe it's orange..645cd4b494afeed006d2a7607eb0aeae.jpg9c67c32da4aa713a72b9aecec90731e4.jpg1e175f12d7df8597fa4853b750392c60.jpg

Sent from my SAMSUNG-SM-T377A using Tapatalk
 

iamdub

Full Access Member
Joined
Apr 23, 2016
Posts
20,750
Reaction score
44,585
Location
Li'l Weezyana
You can use the damper to center the front cover. Loosely install the cover and then install the damper.

Kinda. I've done this on engines outside of the vehicle when I could see the seal. The problem is that you're relying the seal, which is flexible, to center it. The weight of the cover will press the top of the seal harder against the crank and the bottom will have less pressure. It'll be such a small amount that you may not be able to see it, especially if the engine is in the vehicle. When I did it on the engine stand, I used a razor blade to trace the cover on the block at three or four points before I removed it. Then I'd use the crank pulley to center the cover with the new seal, tap it up that half a blonde hair's thickness to meet the scored lines, then tighten it. I never had a leak but after the third or fourth motor, I invested in a centering tool.
 

Ilikemtb999

Full Access Member
Joined
Aug 27, 2018
Posts
825
Reaction score
795
Location
Denver
Kinda. I've done this on engines outside of the vehicle when I could see the seal. The problem is that you're relying the seal, which is flexible, to center it. The weight of the cover will press the top of the seal harder against the crank and the bottom will have less pressure. It'll be such a small amount that you may not be able to see it, especially if the engine is in the vehicle. When I did it on the engine stand, I used a razor blade to trace the cover on the block at three or four points before I removed it. Then I'd use the crank pulley to center the cover with the new seal, tap it up that half a blonde hair's thickness to meet the scored lines, then tighten it. I never had a leak but after the third or fourth motor, I invested in a centering tool.
How is the tool any different than the end of the dampener? I’ve never actually held the tool in my hand but it can’t take up anymore room in the seal than the dampener end.
 

iamdub

Full Access Member
Joined
Apr 23, 2016
Posts
20,750
Reaction score
44,585
Location
Li'l Weezyana
I was curious and wanted to compare the Sac City tool to the CBM. Really, they all perform the same function. Bottomline's post led me to Sac City's site and I saw they had a video on there that'll give you a visual of what I was trying to explain:


iamdub

Full Access Member
Joined
Apr 23, 2016
Posts
20,750
Reaction score
44,585
Location
Li'l Weezyana
How is the tool any different than the end of the dampener? I’ve never actually held the tool in my hand but it can’t take up anymore room in the seal than the dampener end.

The tool is used with the seal NOT installed. It slips over the crank and the OD of the tool meets the ID of the hole in the cover that the seal would press in to. Metal-on-metal, so no room for error. It's kinda dumb for someone to buy the tool that just mimics the OD of the damper and still relies on the flap in the seal as part of the centering when they could just use the damper itself. The tool with a little bigger OD that is used before the seal is installed makes far more sense since it's the same price and requires the same steps.


Now you got me second-guessing myself: Chris, make sure you get the tool that does NOT use the seal. I'm not sure at this point if that one I linked you to does this.
 
Last edited:

Ilikemtb999

Full Access Member
Joined
Aug 27, 2018
Posts
825
Reaction score
795
Location
Denver
The tool is used with the seal NOT installed. It slips over the crank and the OD of the tool meets the ID of the hole in the cover that the seal would press in to. Metal-on-metal, so no room for error. It's kinda dumb for someone to buy the tool that just mimics the OD of the damper and still relies on the flap in the seal as part of the centering when they could just use the damper itself. The tool with a little bigger OD that is used before the seal is installed makes far more sense since it's the same price and requires the same steps.


Now you got me second-guessing myself: Chris, make sure you get the tool that does NOT use the seal. I'm not sure at this point if that one I linked you to does this.
Ah ok, nothing really denotes that in the listings for tools so I figured it just mimicked the dampener end. Good info for sure.
 

iamdub

Full Access Member
Joined
Apr 23, 2016
Posts
20,750
Reaction score
44,585
Location
Li'l Weezyana
Ah ok, nothing really denotes that in the listings for tools so I figured it just mimicked the dampener end. Good info for sure.

Right, which is why I was second-guessing what I linked Chris to cuz they do have both styles and that mimicking one is just stupid.
 

Forum statistics

Threads
129,111
Posts
1,810,501
Members
92,190
Latest member
zeronightwolf
Top