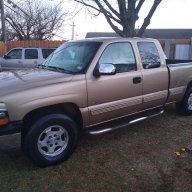
There are just some days I wish I didn't turn wrenches

Disclaimer: Links on this page pointing to Amazon, eBay and other sites may include affiliate code. If you click them and make a purchase, we may earn a small commission.
OP
OP
OR VietVet

OR VietVet

GMT800 2005 Tahoe Z71
Navy Supporting Member
Joined
Oct 8, 2014
Posts
23,939
Reaction score
44,672
Location
Willamette Valley
Update on progress on the F150:

Got the transmission installed and torque converter attached to the flexplate, all related harnesses routed and plugged in and tethered to their attaching points, catalytic converter heat shields installed and the catalytic converter/y-pipe assembly installed, transmission crossmember installed and after the mounts were all checked for binding-all mounts torqued to spec. Some people do not do this mounts step that way and can end up with a drivetrain vibration if not done correctly. Then the shoe dropped. Found that the oxygen sensors were incorrect. Getting correct sensors this morning. Want to install the front sensors before installing the transfer case and front driveshaft. Will install sensors, transfer case, driveshafts and fill all fluids and start the vehicle today. Just have the transmission install pics before the crossmember install. More pics tonight or tomorrow.

20240508_110028.jpg
20240508_110039.jpg
20240508_110101.jpg
20240508_110110.jpg
 
OP
OP
OR VietVet

OR VietVet

GMT800 2005 Tahoe Z71
Navy Supporting Member
Joined
Oct 8, 2014
Posts
23,939
Reaction score
44,672
Location
Willamette Valley
Went to roadtest the F150 and experienced a shudder and lack of power. Transmission Fault at dash and CEL. Codes recovered: PO731, PO750 and PO753. Traced to a failed Shift Solenoid A. Showed 20 megaohms instead of between 20-30 ohms. Shift Solenoid B was supposed to be same ohms and read at 27 ohms. Torque Converter Clutch solenoid spec is between 10-16 ohms and measured at 15 ohms. Talked to transmission rebuilder and explained that if going to reuse electrical component, should test it. They did not. Gonna go ahead and install all 3 solenoids on Monday and roadtest again. Everything else shows fine with no leaks. My neighbor/customer is all good.
 
OP
OP
OR VietVet

OR VietVet

GMT800 2005 Tahoe Z71
Navy Supporting Member
Joined
Oct 8, 2014
Posts
23,939
Reaction score
44,672
Location
Willamette Valley
Took my girl's K2500 dash apart and removed the old radio and tuner and equalizer. Installed new Retro Sound radio and hooked up existing speakers. Figuring out the new mounting location for the controller took the longest. Plus, the existing ribbon connector, that comes preinstalled inside the controller, will not reach to the back of radio head. Had to remove the cover on the controller and plug in the longer ribbon that came attached with the left and right speaker control harness. I could have missed that part but did not see in the instructions about that. I made a management decision. If the radio head mounts right on the controller, then I would have been ok. Reinstalled the equalizer body, back in the hole for now. If anyone has a cubby hole fix for that, please tell me. Anyway, she can drive now with no transistor radio.

20240511_181221.jpg
20240511_180744.jpg
20240511_180822.jpg
 
OP
OP
OR VietVet

OR VietVet

GMT800 2005 Tahoe Z71
Navy Supporting Member
Joined
Oct 8, 2014
Posts
23,939
Reaction score
44,672
Location
Willamette Valley
I just showed my girl a couple videos of what I will be doing when I replace her valve stems seals on her 5.7. She had heard me talking about keeping the valves up with either air or rope/silicone tubing. I showed her the two variations via you tube. She will be my official assistant the day I do the seals replacement. I told her I will be using the rope/tubing method because of no hose in the way and no air compressor running noise. She said, "You are going to do that on all 16 valves?" "Yes I am dear". She will fret and worry till we do a few starts and the "blue smoke out the exhaust" is gone.

Opinions from those that have done the job. Adjust valve lash? I tighten till there is no play in the push rod. No slop back and forth and no spin. Then I do a full tightening turn on the rocker arm nut. Different methods?

 

exp500

Full Access Member
Joined
May 14, 2017
Posts
2,026
Reaction score
1,985
I just showed my girl a couple videos of what I will be doing when I replace her valve stems seals on her 5.7. She had heard me talking about keeping the valves up with either air or rope/silicone tubing. I showed her the two variations via you tube. She will be my official assistant the day I do the seals replacement. I told her I will be using the rope/tubing method because of no hose in the way and no air compressor running noise. She said, "You are going to do that on all 16 valves?" "Yes I am dear". She will fret and worry till we do a few starts and the "blue smoke out the exhaust" is gone.

Opinions from those that have done the job. Adjust valve lash? I tighten till there is no play in the push rod. No slop back and forth and no spin. Then I do a full tightening turn on the rocker arm nut. Different methods?
Valve lash on all MY Cast iron smallblocks for many 40+ years has been Loosen till noisy, tighten till quiet, then 1/8 turn tighter. For customer vehicles- loosen till noisy, tighten till quiet , add 1 full turn. I've done every variation of tighten from 1/8- full turn. never more than one. Rocker arm clips or cut down valve covers keeps mess under control.(1/8 turn is close to solid lifter performance with less Valve train headaches and cam failures.)

For Air hold work I use a Compression gauge like fitting with a valve stem inside. A little safety in case of a kicked air hose disconnecting. I recommend Air hold over Tubing. No partially open valves to get springs or keepers back on and faster too ! If I remember correctly they were Foster brand air fittings.
 
Last edited:
OP
OP
OR VietVet

OR VietVet

GMT800 2005 Tahoe Z71
Navy Supporting Member
Joined
Oct 8, 2014
Posts
23,939
Reaction score
44,672
Location
Willamette Valley
Looks like my next job at the shop in JC, Oregon will be an engine replacement in a 2015 3500HD Duramax crew cab. Doing research now and looks like will be lifting the crew cab off the frame and exposing the engine for the engine swap. I have watched 6 videos of doing this and looks like I should be ready to separate crew cab body from frame during a one day shift. Then roll the frame and engine/transmission out from under it.

Any comments and/or suggestions are welcome. Of course, pics along the process.
 

TollKeeper

Full Access Member
Joined
Feb 21, 2010
Posts
3,600
Reaction score
7,571
Location
Brighton, CO
Your biggest thing, with it seems every GM Body on Frame, is if the body to frame bolts come loose. I think I remember that most of them are exposed, so that if they are frozen, its just a matter of cutting/torching them off. But I seem to remember that 2 of them are not fully exposed, and go to a internal position in the cab with caged nuts.

I could be misremembering thou.
 

89Suburban

Bull in the china shop
Space X Supporting Member
Joined
Jan 10, 2013
Posts
18,078
Reaction score
51,459
Location
SE PA
Does the front clip come off then the cab or the whole shebang at once?
 
OP
OP
OR VietVet

OR VietVet

GMT800 2005 Tahoe Z71
Navy Supporting Member
Joined
Oct 8, 2014
Posts
23,939
Reaction score
44,672
Location
Willamette Valley
Previous neighborhood customer's husband approached me yesterday and has a 2008 Pontiac Torrent and wanted me to do brake pads all around and no rotors and replace left rear ABS sensor. I did pull ABS codes and did see that there was a code for "erratic signal at left rear ABS sensor". Turns out another shop told him what he needed. I said I can do it but will replace the rotors. He said no rotors.

This is the husband of a recent neighborhood customer that has a Jeep Cherokee that had very intermittent dash notifications warning lights and CEL. This was also a "start/stop" vehicle. Traced down to having the wrong battery installed by husband because was cheaper. Needed an AGM battery and he did not install an AGM battery. She finally installed the AGM battery and her intermittent dash lights problems went away.

I told the husband that I will not do job without rotors and he accused me of just racking up the bill. Then I reminded him that I do not make any money on parts and there is no additional labor for rotor replacement. I also reminded him that I get their parts for them at my cost with a military discount. He also wanted it done in 2 days and I am already booked out. He threw a fit like a little girl. I walked away knowing I dodged a bullet and am so glad that I work on only "what I want and when I want".
 
Last edited:

Tahoe14

Full Access Member
Joined
Jun 10, 2014
Posts
2,089
Reaction score
1,371
Location
Central Fl
You did the right thing and you really shut him down telling him no extra money for rotor replacement and parts at cost. Not a whole lot he could say but sounds like he continued to run his mouth. He must be a real a**hole.
 
OP
OP
OR VietVet

OR VietVet

GMT800 2005 Tahoe Z71
Navy Supporting Member
Joined
Oct 8, 2014
Posts
23,939
Reaction score
44,672
Location
Willamette Valley
You did the right thing and you really shut him down telling him no extra money for rotor replacement and parts at cost. Not a whole lot he could say but sounds like he continued to run his mouth. He must be a real a**hole.
He is an ass for sure. His mother-in-law lives next door to us and he and wife live 1 block down.
 

Forum statistics

Threads
138,099
Posts
1,999,072
Members
103,025
Latest member
26AT4
Back
Top
