Rocket Man's 02 Denali Build Thread AKA "THE BEAST"

Disclaimer: Links on this page pointing to Amazon, eBay and other sites may include affiliate code. If you click them and make a purchase, we may earn a small commission.

pwtr02ss

Full Access Member
Joined
Apr 1, 2013
Posts
14,177
Reaction score
33,183
Location
Tennessee
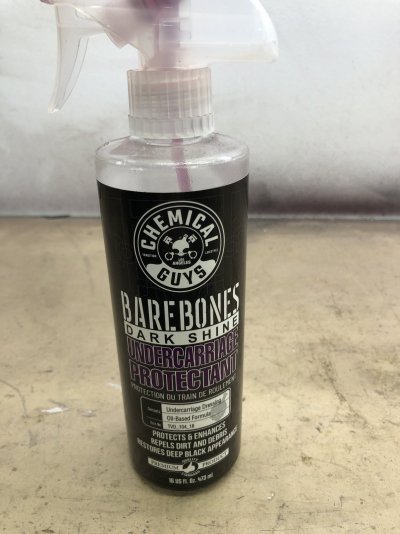
I wonder if that **** would bring the life back to the avalanche plastic? I used "wipe new" once and it did awesome. Last 2 years or better. I tried some stuff that appeared to be the same, it did nothing.

What was the cleaning process prior to the new application?

 
OP
OP
Rocket Man

Rocket Man

Mark
Supporting Member
Joined
Dec 25, 2014
Posts
26,679
Reaction score
52,954
Location
Oregon
Do you know if you apply heat to black plastic, it turns back to black.
I have tried it and that might be true if it's flat but it never worked for anything on my trucks. All it did was start to melt the raised areas on my running board and bumper plastic parts. Have you done it successfully yourself? Besides, I like the way water beads off this stuff and it looks better than anything I've tried including Krylon Fusion which looked pretty damn good.
 

Tonyrodz

Resident Resident
Joined
Feb 16, 2012
Posts
33,326
Reaction score
51,789
Location
Central Jersey
I have tried it and that might be true if it's flat but it never worked for anything on my trucks. All it did was start to melt the raised areas on my running board and bumper plastic parts. Have you done it successfully yourself? Besides, I like the way water beads off this stuff and it looks better than anything I've tried including Krylon Fusion which looked pretty damn good.
I actually have. I used a heat gun and it worked fine for me.
 
OP
OP
Rocket Man

Rocket Man

Mark
Supporting Member
Joined
Dec 25, 2014
Posts
26,679
Reaction score
52,954
Location
Oregon
I actually have. I used a heat gun and it worked fine for me.
Weird. Maybe it is the texture on the Denali trim, it has those oval circle things. It left the edges of those whiter than when I started, and I kept trying until I pretty much ruined one piece and had to replace it. i never tried that again lol.
 

Tonyrodz

Resident Resident
Joined
Feb 16, 2012
Posts
33,326
Reaction score
51,789
Location
Central Jersey
Weird. Maybe it is the texture on the Denali trim, it has those oval circle things. It left the edges of those whiter than when I started, and I kept trying until I pretty much ruined one piece and had to replace it. i never tried that again lol.
Hmm... maybe you held the heat on it too long. I've never had an issue while doing that. Heat is also good for those little plastic "hairs" that are sometimes in high wear areas.
 
OP
OP
Rocket Man

Rocket Man

Mark
Supporting Member
Joined
Dec 25, 2014
Posts
26,679
Reaction score
52,954
Location
Oregon
Hmm... maybe you held the heat on it too long. I've never had an issue while doing that. Heat is also good for those little plastic "hairs" that are sometimes in high wear areas.
I tried it for shorter periods. I experimented with the piece I destroyed, in areas I hadn’t touched yet. All different amounts of time, from a few seconds to a few more seconds. To longer when that didn’t work. The edges of the raised areas actually turned white after just a few seconds of lightly doing it. They weren’t even white before, the whole thing was king of light colored and not deep black. As soon as I applied any heat it messed up those raised areas and the edges were whitish. Got any pics of when you did it? And how long did it last? I have seen the videos, I did exactly what they did. It didn’t work.
 
OP
OP
Rocket Man

Rocket Man

Mark
Supporting Member
Joined
Dec 25, 2014
Posts
26,679
Reaction score
52,954
Location
Oregon
I wonder if that **** would bring the life back to the avalanche plastic? I used "wipe new" once and it did awesome. Last 2 years or better. I tried some stuff that appeared to be the same, it did nothing.

What was the cleaning process prior to the new application?

I just washed it with blue Dawn, let it dry completely, then wiped it down with denatured alcohol and then a dry rag.
 
OP
OP
Rocket Man

Rocket Man

Mark
Supporting Member
Joined
Dec 25, 2014
Posts
26,679
Reaction score
52,954
Location
Oregon
i went back in the thread to see if there were pics of using the heat gun but all I found was some mention way back on page 3, in 2016, that it didn't work. I think that was the only time I painted the parts so that means it lasted a good 4 years. This year was when it started looking faded again. I'm curious how long this Cerakote lasts.
 

Tonyrodz

Resident Resident
Joined
Feb 16, 2012
Posts
33,326
Reaction score
51,789
Location
Central Jersey
I tried it for shorter periods. I experimented with the piece I destroyed, in areas I hadn’t touched yet. All different amounts of time, from a few seconds to a few more seconds. To longer when that didn’t work. The edges of the raised areas actually turned white after just a few seconds of lightly doing it. They weren’t even white before, the whole thing was king of light colored and not deep black. As soon as I applied any heat it messed up those raised areas and the edges were whitish. Got any pics of when you did it? And how long did it last? I have seen the videos, I did exactly what they did. It didn’t work.
Sorry, no pics. I never did it to any of my cars, always messed with the dealer's cars. I had one dealer that actually used one of those handheld torches--those little blue tanks--used it on a faded black grill on a truck. It originally was black but had turned gray from uv, weather, etc. He just ran the torch all along the ribs of the grill and it turned black again. He'd run it along kind of slowly, not really slow, but slow enough that I thought he was gonna melt the plastic. I was amazed that it worked. I'm not recommending this method, just relaying what I saw with my own eyes.
 
OP
OP
Rocket Man

Rocket Man

Mark
Supporting Member
Joined
Dec 25, 2014
Posts
26,679
Reaction score
52,954
Location
Oregon
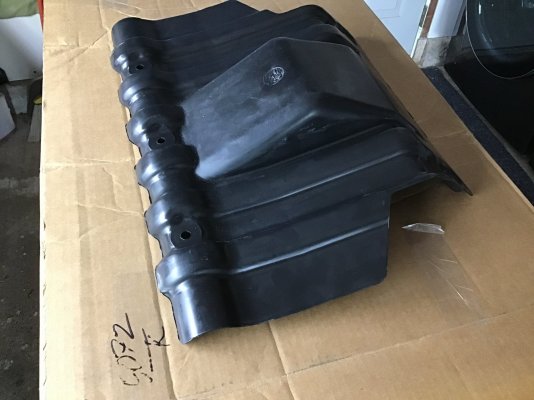
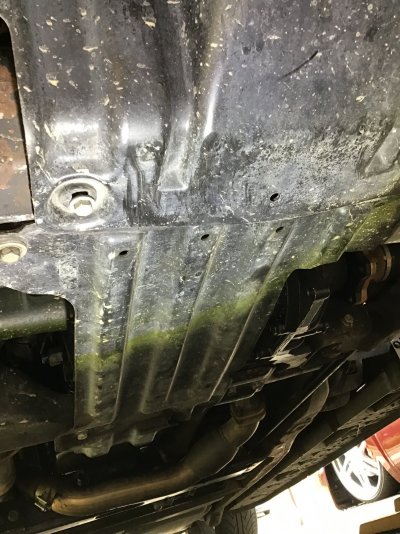
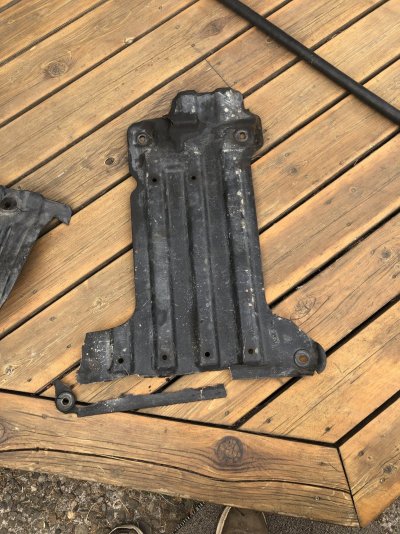
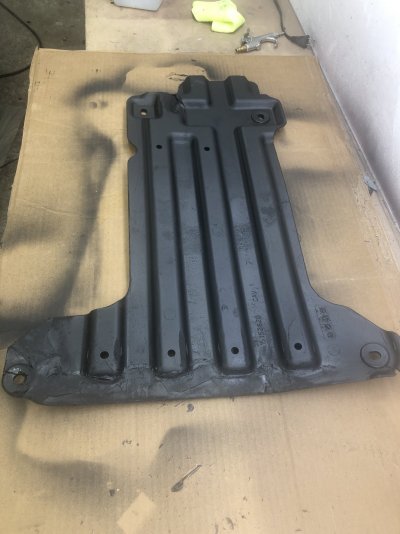
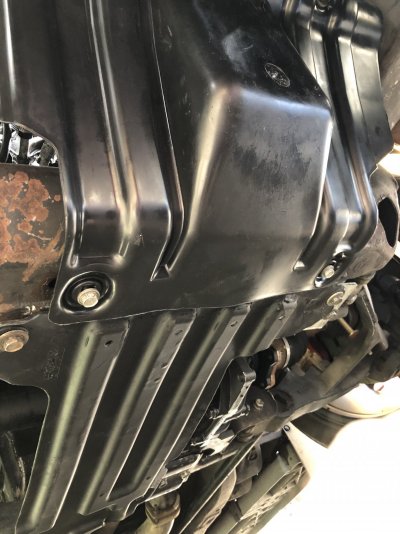
I ordered a new engine splash shield ( skid plate kinda) to replace my broken one but I bought the front snd I need the rear. I can’t find the p/n for the rear though. @915_Tahoe can you see if you can find it.? Here’s the new front one, and a pic of the rear one on the truck. Last 9 of the VIN is 12J105097.
 

Attachments

  • image.jpg
    image.jpg
    261.7 KB · Views: 23
  • image.jpg
    image.jpg
    386.1 KB · Views: 20
Last edited:

Tonyrodz

Resident Resident
Joined
Feb 16, 2012
Posts
33,326
Reaction score
51,789
Location
Central Jersey
I ordered a new engine splash shield ( skid plate kinda) to replace my broken one but I bought the front snd I need the rear. I can’t find the p/n for the rear though. @915_Tahoe can you see if you can find it.? Here’s the new front one, and a pic of the rear one on the truck. Last 9 of the VIN is 12J105097.
I never knew there was a rear shield. When the kid worked on mine he stripped 2 of those damn bolts holding the front shield in. Unreal. What did the front run you?
 

915_Tahoe

Your GM Parts Specialist
Joined
Jul 1, 2018
Posts
1,440
Reaction score
2,167
Location
HELL PASO, TX
I ordered a new engine splash shield ( skid plate kinda) to replace my broken one but I bought the front snd I need the rear. I can’t find the p/n for the rear though. @915_Tahoe can you see if you can find it.? Here’s the new front one, and a pic of the rear one on the truck. Last 9 of the VIN is 12J105097.
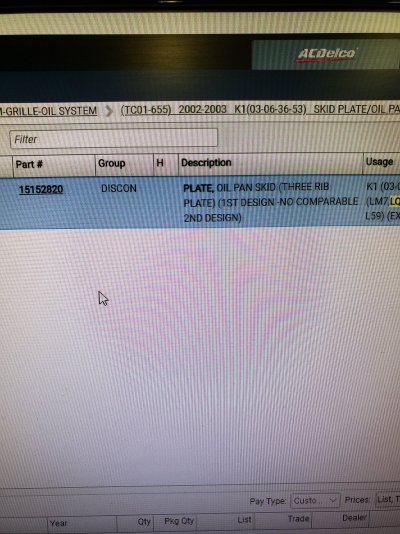
Discontinued
 

Attachments

  • 20210820_162534.jpg
    20210820_162534.jpg
    598.7 KB · Views: 20
OP
OP
Rocket Man

Rocket Man

Mark
Supporting Member
Joined
Dec 25, 2014
Posts
26,679
Reaction score
52,954
Location
Oregon
I never knew there was a rear shield. When the kid worked on mine he stripped 2 of those damn bolts holding the front shield in. Unreal. What did the front run you?
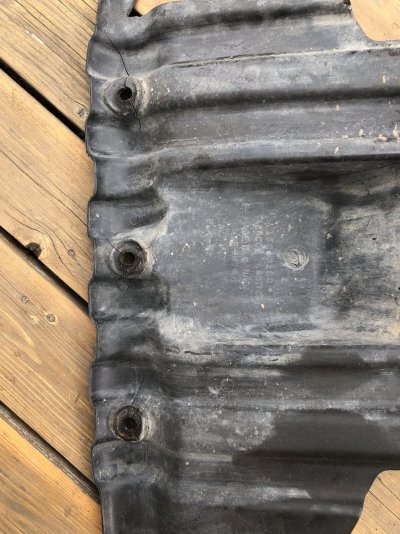
$35 shipped. I stripped two of those holes the bolts go into, probably from using my impact too hard. I just added two smaller ones right next to them, 13mm bolt heads instead of the 15mm. I had to drill and then tap the threads.
 
OP
OP
Rocket Man

Rocket Man

Mark
Supporting Member
Joined
Dec 25, 2014
Posts
26,679
Reaction score
52,954
Location
Oregon
I guess the front one needed to be replaced anyway. And here’s the rear one.
 

Attachments

  • image.jpg
    image.jpg
    465.8 KB · Views: 22
  • image.jpg
    image.jpg
    534.7 KB · Views: 24
OP
OP
Rocket Man

Rocket Man

Mark
Supporting Member
Joined
Dec 25, 2014
Posts
26,679
Reaction score
52,954
Location
Oregon
Meh. It’s fixed good enough for a splash shield. I don’t want to do a bunch of sanding and filling to make it look perfect. It’ll have to do.
 

Attachments

  • image.jpg
    image.jpg
    248.7 KB · Views: 23
OP
OP
Rocket Man

Rocket Man

Mark
Supporting Member
Joined
Dec 25, 2014
Posts
26,679
Reaction score
52,954
Location
Oregon
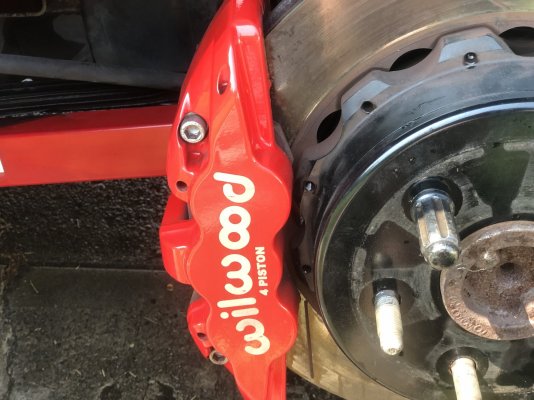
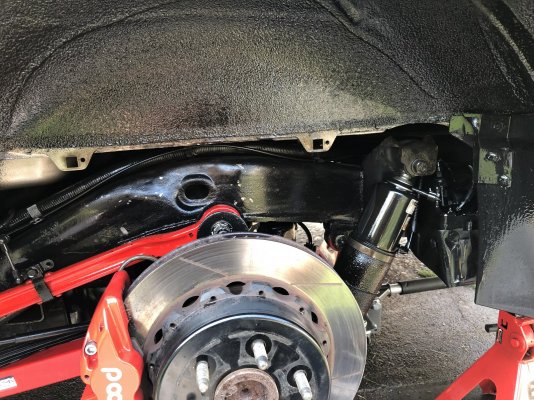
It’s a miracle- the parking brakes work for the first time since I’ve owned the truck, maybe since new. The adjusters were both ******* all the way in and one was stuck pretty good. I freed them up and used that measurement tool to adjust the shoes. It worked pretty good but I had to adjust them in a bit more in order to get the rotor on. It saved me a bit of time. No grinding and everything works. I also pressure washed the rear with Super Clean and followed up with CG Undercarriage Treatment that @Sam Harris turned me onto.
 

Attachments

  • 4DA738D5-25FB-4869-890B-422087AF420A.jpeg
    4DA738D5-25FB-4869-890B-422087AF420A.jpeg
    420.7 KB · Views: 35
  • 697CA6C2-2279-4499-89FC-3A3149F90983.jpeg
    697CA6C2-2279-4499-89FC-3A3149F90983.jpeg
    133.9 KB · Views: 40
  • 036EDAEF-412D-4147-BADF-473FED7BA8CD.jpeg
    036EDAEF-412D-4147-BADF-473FED7BA8CD.jpeg
    274.3 KB · Views: 31
  • 91F2B43E-B3DF-4725-9D2E-F714BB1F5D65.jpeg
    91F2B43E-B3DF-4725-9D2E-F714BB1F5D65.jpeg
    553.8 KB · Views: 41
  • B0EE0793-AF01-4EB4-AE08-78DEE48A494B.jpeg
    B0EE0793-AF01-4EB4-AE08-78DEE48A494B.jpeg
    217.2 KB · Views: 35

Forum statistics

Threads
138,042
Posts
1,997,737
Members
102,981
Latest member
Towmaster
Back
Top