Replacing My Seat Leather

Disclaimer: Links on this page pointing to Amazon, eBay and other sites may include affiliate code. If you click them and make a purchase, we may earn a small commission.

latvius

Full Access Member
Joined
Nov 17, 2014
Posts
581
Reaction score
986
Location
Ariton Alabama
Been wanting to do this for MANY years, wish I would have done it sooner.

When I bought the hoe in 2013 the drivers bottom was trash and the passengers not far behind. I made the mistake of letting a detail - jack of all trades guy "fix" them.
He was going to replace the drivers bottom and use a type of seat bondo (Dont remember what it is called) on the passenger.
What he didn't tell me is he created a custom color since he said you couldn't get the original color...so he sprayed ALL my seats a kinda bluish grey.

Anyways fast forward to now and I bought the whole front seat package minus the head rests from The Seat Shop. I almost bought from US Auto Seat cover as they were cheaper but I didn't want to risk regretting it.

I did the passenger and it's back in just have to paint the headrest and do the armrest. Took me about 5 hours or so but I am slow and I also had some extra work removing bluish grey paint overspray on plastic pieces and my seat belt...

I'll post the pictures from start to finish.

My passenger seat as it was.

20250207_114536.jpg20250207_114546.jpg20250207_114858.jpg20250207_114946.jpg20250207_115231.jpg
 
OP
OP
latvius

latvius

Full Access Member
Joined
Nov 17, 2014
Posts
581
Reaction score
986
Location
Ariton Alabama
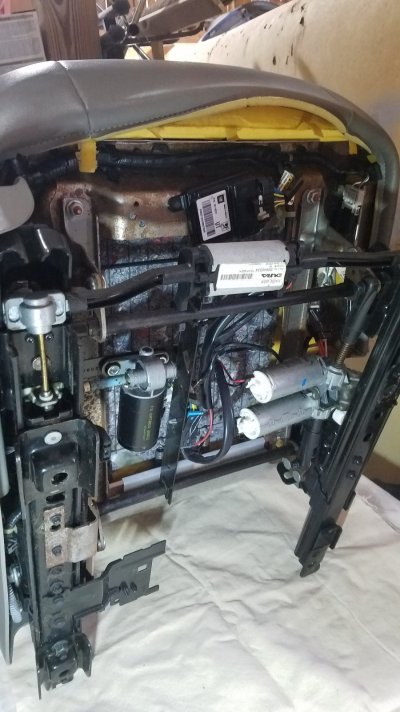
Pictures as I progressed along, as I was taking it apart it seemed like a lot of wires, when I put it all back together it felt like only a couple wires. It's like driving to a place you never been to, seems to take forever then on the way home it flies by.

20250207_115239.jpg20250207_115925.jpg20250207_120053.jpg
 

Attachments

  • 20250207_120057.jpg
    20250207_120057.jpg
    188.5 KB · Views: 28
  • 20250207_120403.jpg
    20250207_120403.jpg
    188.5 KB · Views: 30
OP
OP
latvius

latvius

Full Access Member
Joined
Nov 17, 2014
Posts
581
Reaction score
986
Location
Ariton Alabama
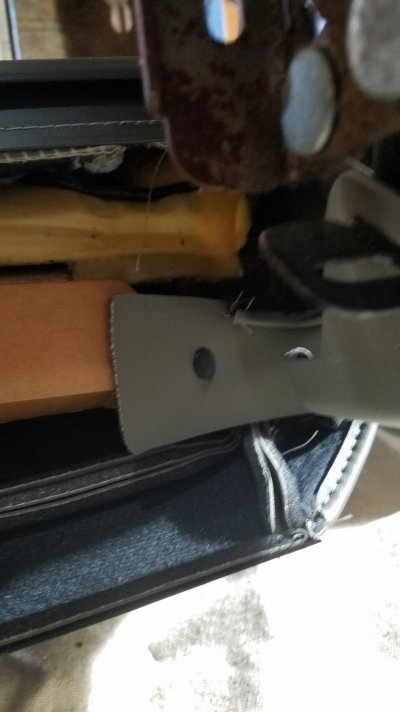
Just disconnect everything and take your time, also the seat front was pulled off not sure if someone had replaced that seat bottom in the past or not.

20250207_120408.jpg20250207_120732.jpg20250207_120736.jpg20250207_121123.jpg20250207_121132.jpg
 
OP
OP
latvius

latvius

Full Access Member
Joined
Nov 17, 2014
Posts
581
Reaction score
986
Location
Ariton Alabama
Also I watched the seat shop how to and I also watched lsxmatt matts was good but I followed the seatshop as they do this all the time.

Another big thing they are labeled passenger and driver, I wasn't paying attention and luckily I grabbed the passengers lol.

Also they stress separating the velcro carefully and stuff stick pretty good and you dont want to tear it off the foam.


20250207_121326.jpg20250207_121434.jpg20250207_121730.jpg20250207_121901.jpg20250207_122803.jpg
 
OP
OP
latvius

latvius

Full Access Member
Joined
Nov 17, 2014
Posts
581
Reaction score
986
Location
Ariton Alabama
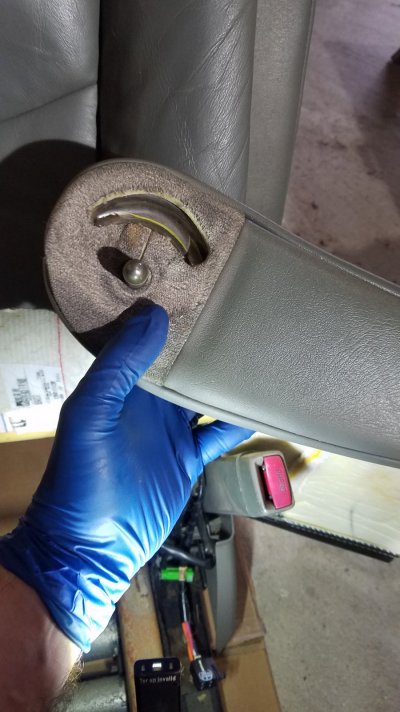
You can see the difference in the original color and mine. I didn't find removing the seat clips or installing them for that matter too difficult. The armrest clip was a PTA thought a headlight would have been helpful. Of course my drivers seat is goofed up because the dum dum removed it (I Had that leasther replaced by him now that I think of it) and it never stayed in. Now I know why he didn't put that clip in.
The seat shop video also has a good tip on if you loose that clip, use a medium sized binder clip and but off the end. Which is what I am going to do and I used the passenger rubber o ring as a example to grab one for the drivers side which I will need also.

I found using a red scotchbright pad removed a lot of the overspray on my plastic and even my leather like the headrest. I also found it removed the overspray on my seatbelt AND it removed the dirt as well. I was going to the hot water soak for the seatbelt but this worked just fine.

Also when you put that big fastner on the front of the seat do like they say and start in the middle you have to push down pretty hard and listen for the snap then go in the corners, the metal is lower so pay attention and make sure it actually connects and you hear the snap sound. Then continue all the way around. One of the clips at the back of the seat was pretty loose so put double sided tape on the metal the put the clip on. Not sure if after sitting in the seat if it will tighten up but I didn't want it to fall back off.
 

Attachments

  • 20250207_131418.jpg
    20250207_131418.jpg
    157.5 KB · Views: 36
  • 20250207_130836.jpg
    20250207_130836.jpg
    295.7 KB · Views: 37
  • 20250207_130711.jpg
    20250207_130711.jpg
    150.7 KB · Views: 33
  • 20250207_124038.jpg
    20250207_124038.jpg
    316.9 KB · Views: 37
  • 20250207_123304.jpg
    20250207_123304.jpg
    181 KB · Views: 32
Last edited:
OP
OP
latvius

latvius

Full Access Member
Joined
Nov 17, 2014
Posts
581
Reaction score
986
Location
Ariton Alabama
More of the armrest clip and how it goes in. Also a curved pair of needle nose worked for me on the install.

20250207_133156.jpg20250207_133255.jpg20250207_135002.jpg20250207_140045.jpg20250207_133544.jpg
 
OP
OP
latvius

latvius

Full Access Member
Joined
Nov 17, 2014
Posts
581
Reaction score
986
Location
Ariton Alabama
When you poke those holes for the pins that go in the cardboard instead of cutting it with a razor I just used a pick and shoved it ALL the way through so the ticker part of the pick spread the hole then pushed the pin through the leather then the cardboard.

The clip for the upper wasn't that bad to do I just used my hands. Maybe because I wasn't replacing any cushions is why I didn't have any issues with the clips.

Just reverse what you did to take it apart and take your time, also having pictures helped as the seat belt wire was giving me a hard time since the seatbelt was disconnected I didn't see it so was trying to figure out where this wire went.

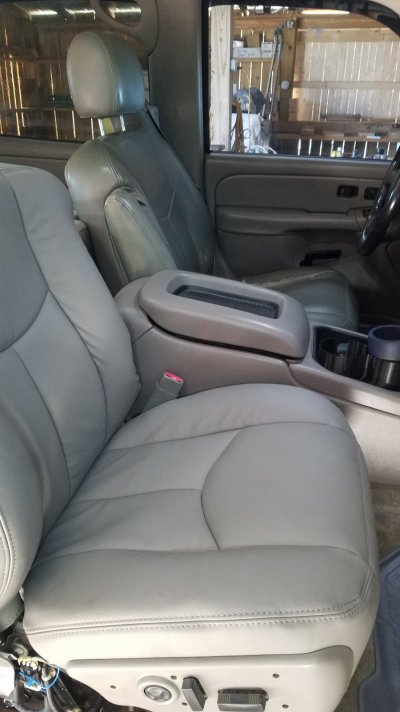
The seat back in the truck, I still have the armrest to change and the headrest and of course the drivers seat.

All in all it wasn't nowhere near as bad as I thought it would be and new leather smells like a new car!

Oh yeah I also forgot is in the videos they talk a lot about where you need to cut holes, well now they cut almost all of them for you so that made it a lot less nerve wracking.

1 more thing price, I bought the drivers seat cushion, both uppers and lowers and armrests was around $1200 and the us auto seat cover was around $800+, I think the ones in NC were close to seat shop prices and katzkins says I don't know how to install seat covers as I am not a professional.

20250207_140056.jpg20250207_141959.jpg20250207_142044.jpg20250207_142220.jpg20250207_152700.jpg
 
Last edited:

Bigburb3500

Full Access Member
Joined
Jun 7, 2024
Posts
854
Reaction score
1,340
Looks great! Amazing how new leather makes the truck feel new too. Do you see a quality difference from original to replacement?
 
OP
OP
latvius

latvius

Full Access Member
Joined
Nov 17, 2014
Posts
581
Reaction score
986
Location
Ariton Alabama
Looks great! Amazing how new leather makes the truck feel new too. Do you see a quality difference from original to replacement?
Thanks! Well when I got the truck it was 8yo so leather was already pretty worn but this new leather smells like a new car and I can find nothing but positives about it! Even though my wifes denali is in pretty good shape I think we are going to change the bottoms just to be new again and have that look and smell.
In one of the videos the seatshop guy says some people complain that the new leather is dull and theres is shiny, he said that's because the shiny leather is dirty!
 

Tonyrodz

Resident Resident
Joined
Feb 16, 2012
Posts
33,325
Reaction score
51,787
Location
Central Jersey
You did a pretty good job. If you flip your headrests upside down and unclip the plastic clip there's a tag inside that tells you the original color--or what GM calls it.
 
OP
OP
latvius

latvius

Full Access Member
Joined
Nov 17, 2014
Posts
581
Reaction score
986
Location
Ariton Alabama
Thanks! its really not that bad I was apprehensive about it for a long time and was going to take it to a shop. After doing the passenger seat I am glad I didn't.
 
OP
OP
latvius

latvius

Full Access Member
Joined
Nov 17, 2014
Posts
581
Reaction score
986
Location
Ariton Alabama
You did a pretty good job. If you glip your headrests upside down and unclipped the plastic clip there's a tag inside that tells you the original color--or what GM calls it.
Yeah I got the code off the glovebox and the seatshop will go off your vin so you get the right color because looking at the screen on the internet is totally different looking
 

Tonyrodz

Resident Resident
Joined
Feb 16, 2012
Posts
33,325
Reaction score
51,787
Location
Central Jersey
Katzkins leather is so nice and soft. They won't sell to the general public unfortunately.
 

Bigburb3500

Full Access Member
Joined
Jun 7, 2024
Posts
854
Reaction score
1,340
Thanks! Well when I got the truck it was 8yo so leather was already pretty worn but this new leather smells like a new car and I can find nothing but positives about it! Even though my wifes denali is in pretty good shape I think we are going to change the bottoms just to be new again and have that look and smell.
In one of the videos the seatshop guy says some people complain that the new leather is dull and theres is shiny, he said that's because the shiny leather is dirty!
This is true. Shiny is just the gloss spray they put on the seats to make you think it’s clean!

Did you do new foam or just new covers?
 

Joseph Garcia

Elite Member
Supporting Member
Joined
Aug 2, 2018
Posts
10,521
Reaction score
15,268
When you poke those holes for the pins that go in the cardboard instead of cutting it with a razor I just used a pick and shoved it ALL the way through so the ticker part of the pick spread the hole then pushed the pin through the leather then the cardboard.

The clip for the upper wasn't that bad to do I just used my hands. Maybe because I wasn't replacing any cushions is why I didn't have any issues with the clips.

Just reverse what you did to take it apart and take your time, also having pictures helped as the seat belt wire was giving me a hard time since the seatbelt was disconnected I didn't see it so was trying to figure out where this wire went.

The seat back in the truck, I still have the armrest to change and the headrest and of course the drivers seat.

All in all it wasn't nowhere near as bad as I thought it would be and new leather smells like a new car!

Oh yeah I also forgot is in the videos they talk a lot about where you need to cut holes, well now they cut almost all of them for you so that made it a lot less nerve wracking.

1 more thing price, I bought the drivers seat cushion, both uppers and lowers and armrests was around $1200 and the us auto seat cover was around $800+, I think the ones in NC were close to seat shop prices and katzkins says I don't know how to install seat covers as I am not a professional.

View attachment 449727View attachment 449728View attachment 449729View attachment 449730View attachment 449731
Outstanding step-by-step process description for this job. Our collective knowledge base has been increased.

I've had a driver's seat bottom cushion and leather top from the Seat Shop sitting around for about 5 months now, working up the courage to start/finish the job. Your post has shamed me into scheduling this work, and I thank you for that.
 
OP
OP
latvius

latvius

Full Access Member
Joined
Nov 17, 2014
Posts
581
Reaction score
986
Location
Ariton Alabama
Outstanding step-by-step process description for this job. Our collective knowledge base has been increased.

I've had a driver's seat bottom cushion and leather top from the Seat Shop sitting around for about 5 months now, working up the courage to start/finish the job. Your post has shamed me into scheduling this work, and I thank you for that.
Yeah it's been YEARS i've wanted to do this partly cost and partly seemed like a lot could go wrong with expensive parts. I just put the drivers seat back in took me about 3 hours. I still have both armrests to recover and repaint the head rest and touch up the overspray from previous nightmare to do.

I also found 2 wires in the drivers seat they didn't reconnect all those years ago and they lost one of the plastic pegs that holds the bottom down.
I have learned to trust very few to work on your stuff the hard way.
 
OP
OP
latvius

latvius

Full Access Member
Joined
Nov 17, 2014
Posts
581
Reaction score
986
Location
Ariton Alabama
Old seat cushion and I am glad I got the new one. The new one feels real firm. Got a new seat heater as mine has been broke since I owned it going on 12 years. So for 12 winters I kept wishing it worked while my wife in the passenger seat is nice an toasty.
So the seat heaters I got off car parts.com for about $60 for the set and the upper and lower came with some pretty decent pliers not that I needed them for the install but it was nice addition. The problem I ran into is the cords for the heaters are on the opposite side, I never noticed if there are different heaters for driver/passenger but I ended up running the wires on the opposite side of factory.
Also you can see where the heater burned out I expected it to be the bottom but it was the top heater. When you pull them off foam is gonna come with it I just was careful to pull off as little as possible.

Last pic is the seats installed minus the headrests and armrests.

20250208_110458.jpg20250208_110505.jpg20250208_111957.jpg20250208_113643.jpg20250208_135721.jpg
 

Forum statistics

Threads
138,041
Posts
1,997,693
Members
102,976
Latest member
Capybarbro
Back
Top