randeez
Full Access Member
been plucking away at it... didn't take many pics most of this is just tedious put it on, measure it, mark it, take it off, fix, repeat.
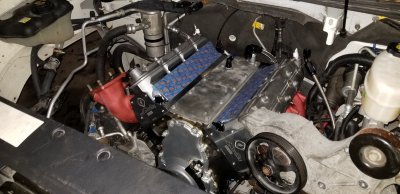
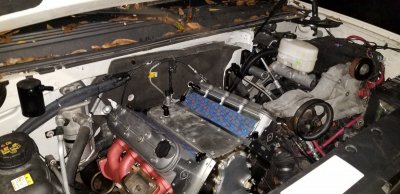
i "heard" there was some clearance issues with the passenger side motor mount and ac compressor bracket. started fitting up motor mount, wasnt to bad just needed to chop the front bottom corner down a little bit, i dont even see how a stock motor mount would have fit but no big deal took about 2 seconds with a grinder to get what i needed.
the ac compressor bracket on the other hand needs to have almost 1/4" of the ribbing in a few places taken off the back to get it to sit on the mounting bosses. and it isnt flat so you need to trim/grind it in an arc, pain in the ass. finally got it to sit flat. not sure if its just a truck spacing issue or what but it kinda sucked.
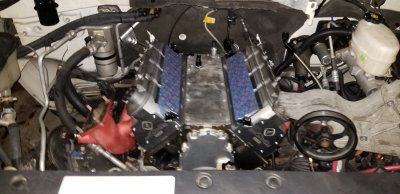
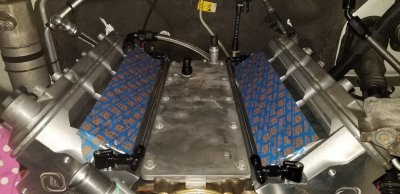
made a fuel pressure regulator return pipe that runs down the tunnel of the intake with a slight turn down that i will connect to ptfe hose back to tank. I am going to join the stock fuel feed and secondary pump feed into a y-block under the truck. With it that way i can get rid of stock fuel line connected at the regulator, the y-block has a 1/8" npt (for fuel pressure gauge) that im going to throw the fuel pressure sensor into so it will accurately measure pressure when 2nd pump comes on - before it was in the stock line (with a check valve) so whatever pressure was on the stock feed is what it saw. it does seem like a lot of unnecessary work but i am still trying to retain remote start and not have to hear big pump and worry about it overheating during longer cruises.
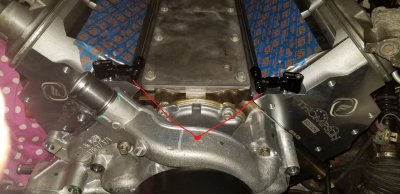
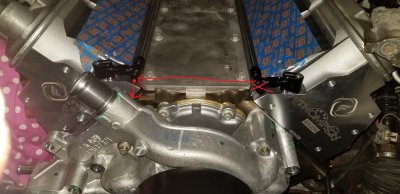
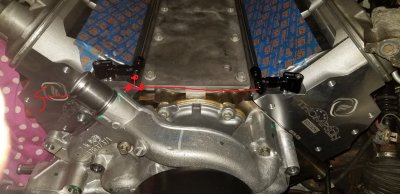
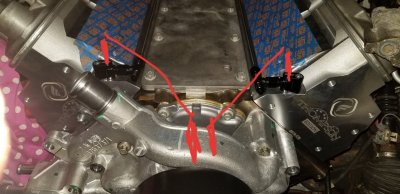
stuff to plumb in steam vents should be here next day or two, also going to see how it comes out with 1/4" hard tube. most of the kits seemed to use so many extra fittings and i dont really like any of them, afraid its probably going to look cluttered up anyway but will see how it goes. also going to plumb to top of waterpump to keep front of engine neat.
PCV system, i had -10an bungs welded on each valve cover, those are going to an open air catch can and will be the "supply" air most of the time. I will be pulling vacuum from the intake to the valley cover through a catch can ( and check valve) sucking under vac, when its in boost whatever crank case pressure builds up can escape out the valve covers/free air can. if i have problems it'll prob just be left free air and i'll cap the valley
i "heard" there was some clearance issues with the passenger side motor mount and ac compressor bracket. started fitting up motor mount, wasnt to bad just needed to chop the front bottom corner down a little bit, i dont even see how a stock motor mount would have fit but no big deal took about 2 seconds with a grinder to get what i needed.
the ac compressor bracket on the other hand
 needs to have almost 1/4" of the ribbing in a few places taken off the back to get it to sit on the mounting bosses. and it isnt flat so you need to trim/grind it in an arc, pain in the ass. finally got it to sit flat. not sure if its just a truck spacing issue or what but it kinda sucked.
 made a fuel pressure regulator return pipe that runs down the tunnel of the intake with a slight turn down that i will connect to ptfe hose back to tank. I am going to join the stock fuel feed and secondary pump feed into a y-block under the truck. With it that way i can get rid of stock fuel line connected at the regulator, the y-block has a 1/8" npt (for fuel pressure gauge) that im going to throw the fuel pressure sensor into so it will accurately measure pressure when 2nd pump comes on - before it was in the stock line (with a check valve) so whatever pressure was on the stock feed is what it saw. it does seem like a lot of unnecessary work but i am still trying to retain remote start and not have to hear big pump and worry about it overheating during longer cruises.
stuff to plumb in steam vents should be here next day or two, also going to see how it comes out with 1/4" hard tube. most of the kits seemed to use so many extra fittings and i dont really like any of them, afraid its probably going to look cluttered up anyway but will see how it goes. also going to plumb to top of waterpump to keep front of engine neat.
PCV system, i had -10an bungs welded on each valve cover, those are going to an open air catch can and will be the "supply" air most of the time. I will be pulling vacuum from the intake to the valley cover through a catch can ( and check valve) sucking under vac, when its in boost whatever crank case pressure builds up can escape out the valve covers/free air can. if i have problems it'll prob just be left free air and i'll cap the valley


