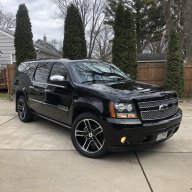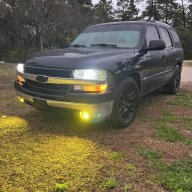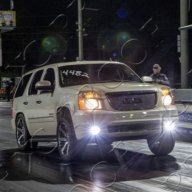
Randeez 2012 Budget Yukon Denali Build (stick on hood scoops galore)

Disclaimer: Links on this page pointing to Amazon, eBay and other sites may include affiliate code. If you click them and make a purchase, we may earn a small commission.

OP
OP
randeez

randeez

Full Access Member
Joined
Sep 29, 2017
Posts
8,197
Reaction score
25,967
Location
south florida
Hold the torch at a 45 degree angle instead of going straight in on it. A few of those welds like good but most of them aren't penetrating enough. When you get the smaller wire, I think you'll be good with some adjustments in your technique. Hold torch at angle, zap, move, zap, move. Maintaining a nice "dime on dime" pattern. If you have any thicker stock, practice on that with the thicker wire until you can lay a bead. Once you conquer that, you'll know what to look for on the thinner material. Rest your nozzle on the material and steady your hand. That helps with control.

You can get wild on the thicker stuff as long as it its thick enough to not burn through and you can lay a continuous weld. Some work the weld in a circle to get the roll of coins look, I prefer the half circle method. Use whatever method you're comfortable with. The main thing is getting the weld to be strong than the material. Get in a comfortable position. Waste some wire. You'll get there.

Its hard to explain this in text. I hope I'm helping and hindering. Hopefully some others will chime in who can add more technical info/critique/tweak what I've said
View attachment 274906


45* angle... in line with the joint or off to the side? as in push or pull along where i just welded?

also the good looking flat welds are just where most of the material is falling thru, id like them to be flat and not leave a huge nug inside the pipe
 
Last edited:
pwtr02ss

Full Access Member
Joined
Apr 1, 2013
Posts
14,239
Reaction score
33,403
Location
Tennessee
45* angle... in line with the joint or off to the side? as in push or pull along where i just welded?

also the good looking flat welds are just where most of the material is falling thru, id like them to be flat and not leave a huge nug inside the pipe

IDK how to explain this exactly.

With the wire going parallel with the seam you are welding, lay the torch at a 45˚ angle and pull the weld. Being as its on such thin material, you'll have to do tacks, letting it cool a bit between cycles. Let the wire "poke" (or start) on the previous weld each time, not starting on the material. The weld is much stronger than the metal and that with help with your burn/blow through.

I hope this makes sense.
 

pwtr02ss

Full Access Member
Joined
Apr 1, 2013
Posts
14,239
Reaction score
33,403
Location
Tennessee
Here is a pic I stole from the internet. You can achieve this same look doing individual tacks. I weld left to right, but you get the idea.

IMG_5357.jpg
 
OP
OP
randeez

randeez

Full Access Member
Joined
Sep 29, 2017
Posts
8,197
Reaction score
25,967
Location
south florida
IDK how to explain this exactly.

With the wire going parallel with the seam you are welding, lay the torch at a 45˚ angle and pull the weld. Being as its on such thin material, you'll have to do tacks, letting it cool a bit between cycles. Let the wire "poke" (or start) on the previous weld each time, not starting on the material. The weld is much stronger than the metal and that with help with your burn/blow through.

I hope this makes sense.


:angels2:

lol i gotcha... i was doing most of that; tack, start in the last tack, allow a sec or two to cool, i just wasnt doin the 45* mess - wasnt going straight at it for any reason it just felt natural

will wait on the thinner wire to try again prob ive got plenty of scrap pipe cuts to practice welding together.
 

pwtr02ss

Full Access Member
Joined
Apr 1, 2013
Posts
14,239
Reaction score
33,403
Location
Tennessee
:angels2:

lol i gotcha... i was doing most of that; tack, start in the last tack, allow a sec or two to cool, i just wasnt doin the 45* mess - wasnt going straight at it for any reason it just felt natural

will wait on the thinner wire to try again prob ive got plenty of scrap pipe cuts to practice welding together.

Hope it helps. Also, don't be afraid to rest the nozzle on the material.
 

pwtr02ss

Full Access Member
Joined
Apr 1, 2013
Posts
14,239
Reaction score
33,403
Location
Tennessee
Tomorrow I'll have some questions for you and Dan. Now that I got the avalanche back together, it's time to make it run properly. I believe I have the trans part sorted out, just need a little reassurance. I'll get to the engine plan after that. I'm having a hard time grasping the basics. I'll try to keep my ******** questions to a minimum. I won't clog up your thread with it either
 
OP
OP
randeez

randeez

Full Access Member
Joined
Sep 29, 2017
Posts
8,197
Reaction score
25,967
Location
south florida
spent another hour or so messing around working on the tip angle, abandoned the dabs and just started running some welds - produced some halfway acceptable looking welds. i am still trying with the .030 wire and 16g tubing so not really making it easy on myself. puddle is laying out pretty good, and its not dropping inside the pipe but i still feel its just to much filler so i will try same way with the .023 when it gets here
 
OP
OP
randeez

randeez

Full Access Member
Joined
Sep 29, 2017
Posts
8,197
Reaction score
25,967
Location
south florida
Hows the welding coming along?

better,
i was ashamed by version 1.0 so i reordered a few parts to re-do it. also adding another flex section to the passenger side pipe. cause i planned on solidly mounting the turbo so i need some flex between the engine and it.
still no heads so im waiting on them and to install them before i tack anything more together incase fit is a little different. havent messed with it much past week or so
 

Forum statistics

Threads
138,115
Posts
1,999,556
Members
103,039
Latest member
Yizzo88
Back
Top