Nadthomas 2007 Yukon Denali 200k Mile Re-build

Disclaimer: Links on this page pointing to Amazon, eBay and other sites may include affiliate code. If you click them and make a purchase, we may earn a small commission.

PG01

Supporting Member
Joined
Nov 6, 2016
Posts
14,758
Reaction score
17,877
Location
Up here to the right
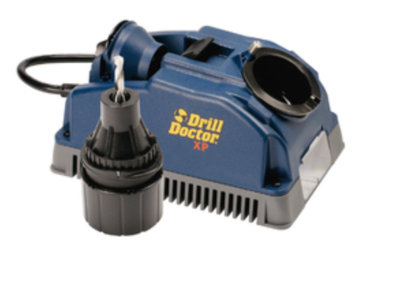
Someone bought this for me years ago and believe it or not the thing aint half bad, any drill bit ive broken or that doesn’t seem to be up to ***** i yank this out , sharpen up the bit and always center punch and oil the bit while im a drillin.... gotta keep it lubed.....;). Seriously tho, it works... slow and steady and 3in1 oil. 510DBC1E-04A6-42B6-8BEE-6988D8302BAF.jpeg
 
OP
OP
nadthomas

nadthomas

Full Access Member
Joined
Dec 1, 2017
Posts
158
Reaction score
177
Dan you've been holding out on me! Never knew about drilling slow when trying to get those bolts/studs out! I broke three very expensive bits on my swaybar bolt and it is still stuck in the frame. Now that I've seen this I might just tackle it again and go SLOW! Thanks for posting!

Glad to hear this info helped someone. I'm guessing your swaybar bolts broke from trying to remove them, and they were probably seized and rusted. If that is the case after you get your hole cut, use lots of heat before going after it with the bolt extractor. I strongly recommend a MAPP gass torch over propane as it burns much hotter. You can pick them up at your local hardware store right next to the propane torch. Its probably going to be a fine balance for you to heat things enough to break up the rust, while also not making the stud too soft for the extractor to be able to do its job. Good luck.
 

UplevelDave

TYF Newbie
Joined
Jul 30, 2018
Posts
15
Reaction score
24
Location
Sturgeon Bay, WI
Nadthomas, great build thread, thanks for all the information. It's nice to see someone had the sense to just remove the front end parts, I always see videos (EricTheCarGuy, etc) where people just try to leave every last component in place and pull the engine at some bizarre angle, cussing the whole way about what a nightmare it was.. It's a body on frame truck! The whole front end comes off easy if you're so inclined! LOL! In any event, don't worry about releasing the A/C refrigerant, it's R-134a and doesn't have ozone depleting CFCs. In fact, that's the one environmental success story we even have, the hole in the ozone layer has repaired itself gradually due to the CFC restrictions.
 

Rocket Man

Mark
Supporting Member
Joined
Dec 25, 2014
Posts
25,966
Reaction score
50,661
Location
Oregon
Someone bought this for me years ago and believe it or not the thing aint half bad, any drill bit ive broken or that doesn’t seem to be up to ***** i yank this out , sharpen up the bit and always center punch and oil the bit while im a drillin.... gotta keep it lubed.....;). Seriously tho, it works... slow and steady and 3in1 oil. View attachment 205162
I want one but they aren’t cheap.
 
OP
OP
nadthomas

nadthomas

Full Access Member
Joined
Dec 1, 2017
Posts
158
Reaction score
177
Finally ordered all the parts I needed last week. I was going to order through RockAuto, but shipping was going to be $130 for everything. So I went through Amazon, saved about $100, and got it in two days. Amazon was missing a couple of things so I grabbed those from RockAuto, and the oil pump from Summit Racing. Speaking of the oil pump, make sure you don't have a brain fart and mis-read in your torque wrench. Thought I had it set to 106 in/lbs, for the pickup tube to pump bolt. Nope, had it set to 206 in/lbs, and just as I was about to stop and double check everything I felt the threads in the pump strip out. Total amateur hour. :emotions122:

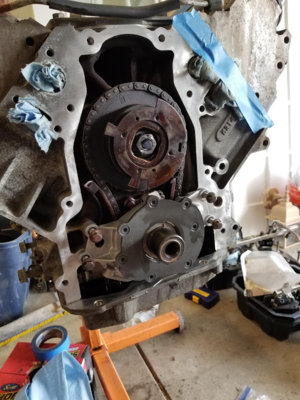
Pulled the pump back out, drilled and tapped the hole for an M8x1.25 bolt, and ordered a small set of ARP M8x125 20mm bolts from my local Jegs store. The ARP bolt I'm sure was overkill, but I wasn't comfortable using just any hardware that will sit inside the engine. A day and $12 later we were back in business. Replaced the Oil control valve (bolt thingy for VVT). Replaced the Cam position sensor for the heck of it, and the Cam Magnet Actuator (thingy on the front cover that controls VVT). Although I found that I needed a new gasket for it, and couldn't find it on RockAuto. Eventually found it by search a partial number stamped into the original gasket. Fortunately I can proceed without the gasket for now.
20180818_153943.jpg

Moved onto installing the new Oil Pan Pressure Relief Valve into the oil pain, and a new oil pan gasket. Installed the new gasket for the front cover, and used a SakCity alignment tool to properly align it with the block/pan. Put the 4 dabs of RTV at the block seams and torqued the pan and front cover down to spec. Then used the SakCity tool to help install the new seal into the front cover.

Along the way I was also cleaning up the gasket surface with a red pad on my small air grinder. So, I finished cleaning up the remaining gasket surfaces like the intake and exhaust port mating surfaces. Gave everything another spray with brake cleaner and taped up the surfaces.

Finally last night, I gave the block a fresh coat of paint. The valve covers weren't painted yet as they are going to get a coat of VHT wrinkle red. Feels good to finally be at this point.
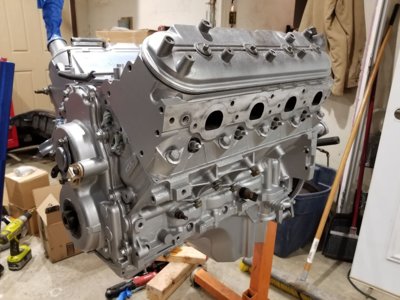
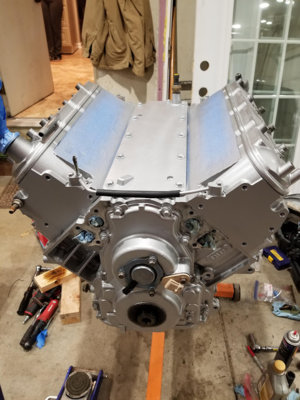
20180822_221123.jpg 20180822_221148.jpg

Note: The rear cover gasket and and rear main seal will get replaced as well, but I need to pull it off the stand to do that, so that will happen just before I drop it back in.
 
Last edited:
OP
OP
nadthomas

nadthomas

Full Access Member
Joined
Dec 1, 2017
Posts
158
Reaction score
177
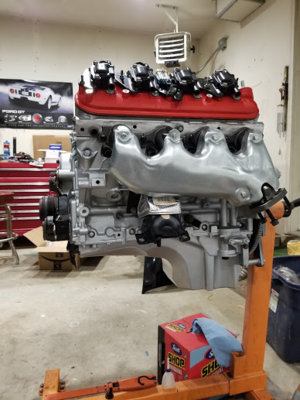
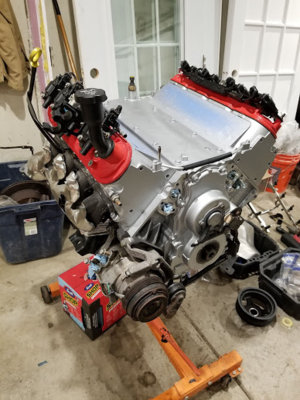
Painted the valve covers with VHT wrinkle red, and installed new gaskets. The paint wrinkled a little more then I wanted, but it will have to do. Bolted on pretty much everything that needed to go back on before dropping it in. Including new exhaust manifolds with FelPro gaskets and ARP bolts, and new "Hummer" motor mounts. Need to do the crank pulley, and remove it from the stand so I can do the rear cover and main seal.

20180826_213457.jpg 20180826_213426.jpg
 

Rocket Man

Mark
Supporting Member
Joined
Dec 25, 2014
Posts
25,966
Reaction score
50,661
Location
Oregon
Painted the valve covers with VHT wrinkle red, and installed new gaskets. The paint wrinkled a little more then I wanted, but it will have to do. Bolted on pretty much everything that needed to go back on before dropping it in. Including new exhaust manifolds with FelPro gaskets and ARP bolts, and new "Hummer" motor mounts. Need to do the crank pulley, and remove it from the stand so I can do the rear cover and main seal.

View attachment 206092 View attachment 206091
Looking good. I would suggest painting the aluminum brackets and water pump before installing them. That’s the first thing that starts to look like crap after putting everything back together, and you can’t really keep that aluminum clean once it’s reinstalled.
 

Forum statistics

Threads
129,220
Posts
1,812,329
Members
92,321
Latest member
rick3645
Top