2007 Burb radiator change. Tips, tricks, timesavers welcomed....

Disclaimer: Links on this page pointing to Amazon, eBay and other sites may include affiliate code. If you click them and make a purchase, we may earn a small commission.

Kapitein

Full Access Member
Joined
Aug 11, 2021
Posts
120
Reaction score
233
Location
The Netherlands, Europe
Hi folks

In 4 days time I'm due to leave on a 3000mile roadtrip towing a 5000lb camper.... Of course the radiator has chosen this moment to retire itself from active service.

It's an 07 Burb 4WD with the 4L60 and the GT4 RPO code.

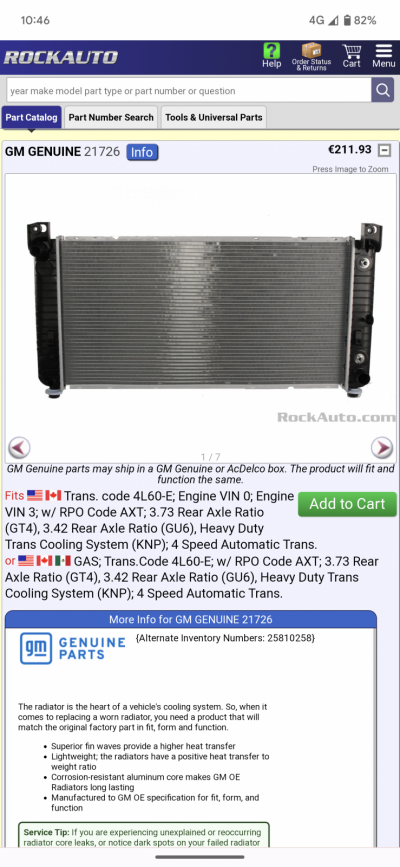
I've immediately ordered this from Rockauto:

GM 21726
Screenshot_20230730-104640.png


I'm based in Europe, so as long as DHL are on time, the part should come in on Wednesday.... I can't get any shop time with this short notice, so I need to change it out myself... Probably Thursday morning before we leave Thursday afternoon .

I've watched a few YT videos and it looks straightforward enough, but are there any gotchas, or time saving tricks etc you can offer from experience.

I need this to go right 1st time, otherwise the family summer vacation is screwed.

Thanks in advance :)
 

j91z28d1

Full Access Member
Joined
Feb 28, 2022
Posts
1,999
Reaction score
2,302
I've not changed mine on this truck, but in general I'd say check that you have the right size tools to get to and loosen the transmission cooler lines. may go ahead and make sure you can loosen them now while you have the time to run to the store. they just snug back till the day of.

good luck. hopefully shipping goes well.
 

mikez71

Full Access Member
Joined
Mar 9, 2023
Posts
799
Reaction score
933
A pick can pry off the transmission line clips. There should be new ones with your new radiator in case they fly away.
The radiator hose clamps have a little tab that limits how far you can open the clamp. Makes installing the hose/clamp over the bump a little tougher.
You can bend the tab for more clearance if you're unable to use the tab to latch the clamp open.
Otherwise very straightforward. You will succeed!
 

Geotrash

Dave
Supporting Member
Joined
Feb 16, 2018
Posts
5,621
Reaction score
13,376
Location
Richmond, VA
Hi folks

In 4 days time I'm due to leave on a 3000mile roadtrip towing a 5000lb camper.... Of course the radiator has chosen this moment to retire itself from active service.

It's an 07 Burb 4WD with the 4L60 and the GT4 RPO code.

I've immediately ordered this from Rockauto:

GM 21726

View attachment 405026


I'm based in Europe, so as long as DHL are on time, the part should come in on Wednesday.... I can't get any shop time with this short notice, so I need to change it out myself... Probably Thursday morning before we leave Thursday afternoon .

I've watched a few YT videos and it looks straightforward enough, but are there any gotchas, or time saving tricks etc you can offer from experience.

I need this to go right 1st time, otherwise the family summer vacation is screwed.

Thanks in advance :)
Super easy job - should take you no more than an hour. Remove the top cover over the cowl. Remove both radiator hoses and cooler lines along with any other lines attached to the radiator. Remove the fans (unbolt the top 2 bolts, release the wiring connectors, and pull the whole fan assembly straight up and out. Plus the radiator up and out, and reverse for install. Make sure the new radiator comes with grommets for the pegs on the bottom and if not, make sure to keep and reuse your originals. While you have everything apart and the system drained, replace your radiator hoses, heater hoses and connectors at the firewall. Might as well replace the thermostat too.
 

petethepug

Michael
Joined
May 4, 2016
Posts
2,457
Reaction score
2,472
Location
SoCal
You’ll improve the coolant flow and this leads the plastic fittings at the heater core lines to crack and burst.

Order the Gruven repair kit or new OEM lines next chance you get if you haven’t already done so. To cover yourself until then purchase a couple of bolts that will fit the inside diameter of the heater hoses and a couple of hose clamps. Put them in a bag with a pair of side snips and screwdriver in the jack storage area.

Those pesky heater hose line will drain the coolant in less than 45 seconds forcing engine shutdown while in motion. If you’re on a grade or mountain it’ll turn your hair white. No engine power at speed loses power steering and power brakes. These beasts DO NOT stop or steer worth a damn without the motor on.
 

Foggy

Full Access Member
Joined
Jul 25, 2019
Posts
990
Reaction score
1,209
Location
KS
Install is straight forward.. But make sure when you are done that you properly
bleed/burp the cooling system.
It may seem "OK" but you don't want to get on the road and find out you
have air in the system.. you will overheat in matter of a few minutes and your temp
gauge won't help/be accurate
 

me88

Member
Joined
Nov 10, 2021
Posts
98
Reaction score
92
Location
Germany
I have read about a spacer or restrictor in the line going to the overflow tank, if it's missing you are likely to get coolant warnings so make sure you transfer it to the new one: https://www.tahoeyukonforum.com/threads/what-is-the-best-radiator-available.125918/#post-1560401

Bleeding the cooling system on these is not too difficult. Fill the system slowly through the tank up to the mark, install the cap, start it on level ground and run it at a little more than idle speed until the coolant has been at 90°C / 194°F for at least three minutes and then turn it off. Let it cool down and check the surge tank level and add if necessary, I had to add about a 1/4 liter if I remember correctly. I also like to check the heater output, if the system is bled correctly you should get good heat coming from the air vents in the interior.

You can either buy the expensive orange Opel/GM Dexcool or any other coolant that is compatible with GM 6277M.
 
Last edited:

Charlie207

Full Access Member
Joined
Apr 13, 2021
Posts
1,203
Reaction score
2,201
Location
LFOD, New Hampshire
I have read about a spacer or restrictor in the line going to the overflow tank, if it's missing you are likely to get coolant warnings so make sure you transfer it to the new one: https://www.tahoeyukonforum.com/threads/what-is-the-best-radiator-available.125918/#post-1560401

Bleeding the cooling system on these is not too difficult. Fill the system slowly through the tank up to the mark, install the cap, start it on level ground and run it at a little more than idle speed until the coolant has been at 90°C / 194°F for at least three minutes and then turn it off. Let it cool down and check the surge tank level and add if necessary, I had to add about a 1/4 liter if I remember correctly. I also like to check the heater output, if the system is bled correctly you should get good heat coming from the air vents in the interior.

You can either buy the expensive orange Opel/GM Dexcool or any other coolant that is compatible with GM 6277M.

You can take a spent .45ACP case, and drill a 1/8" hole through the primer pocket, to use as the flow restrictor. The diameter of the spent case is about a thick blonde one oversized from the ID of the return hose, and fits perfectly inside. Use narrow flathead screwdriver to push the case a couple inches into the hose.

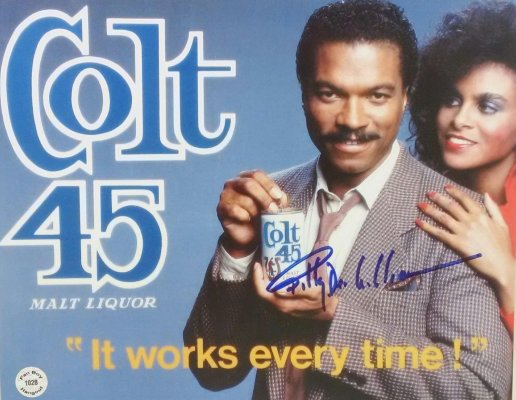
I know this works because my Champion radiator didn't come with a restrictor, and I couldn't get the old one out of the leaky radiator. My coolant temps weren't rising at all prior to the Billy Dee Willams mod. (See post HERE)

2a8f5838ac6178bc3cfa32d3652dd7fc.jpg
 

Foggy

Full Access Member
Joined
Jul 25, 2019
Posts
990
Reaction score
1,209
Location
KS
You only need to do that restricter when you use an aftermarket upgrade performance
radiator like the all aluminum cold case radiators... NOT a stock replacement radiator
Just install it !!!
 

Forum statistics

Threads
129,265
Posts
1,813,018
Members
92,367
Latest member
agmanw8n
Top